Last Updated on May 24, 2024 by Team Ideas24
These paper cactus crafts are great substitutes for real ones.
More and more people are collecting cacti and succulents at home. They’re easy to care for and they’re great as indoor plants. As much as we want to grow our own collection, we sadly cannot. We have small kids at home and they’re always playing. We don’t want to risk having them hurt because of the plants.

So as not to feel cactus-deprived – if there’s such a thing – my husband resorted to giving me anything cactus-related. Now I have mugs, coasters, and paintings of cacti. My daughters made me some paper cactus last Mother’s Day. I loved them so much I’m sharing the project with you.

The best thing is, that you have complete freedom over the final design!
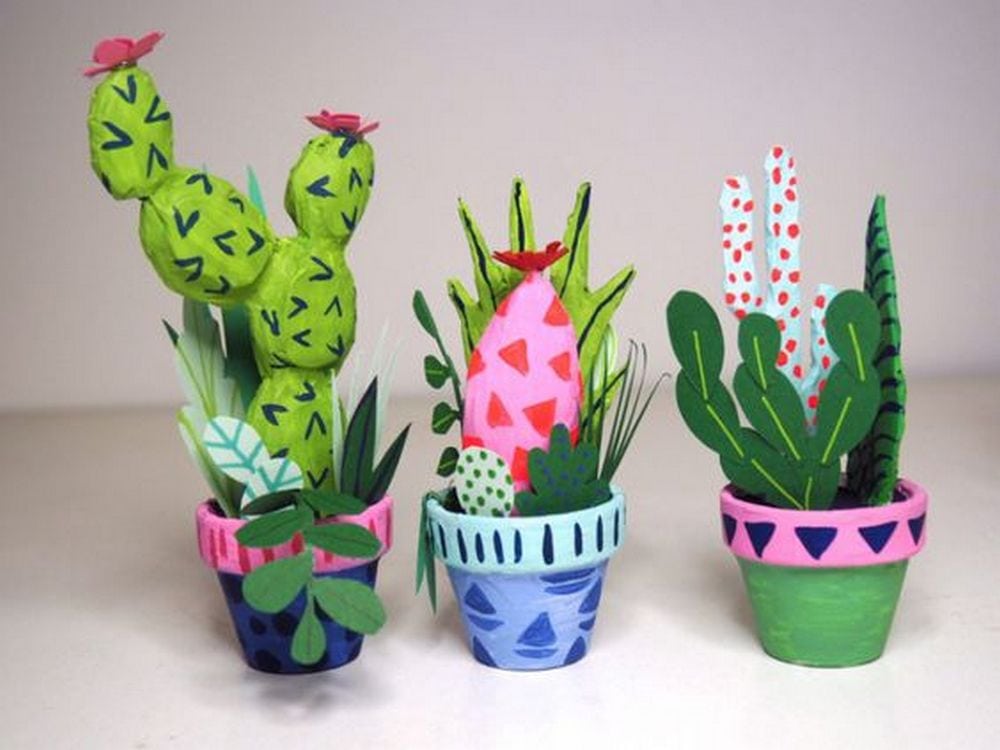
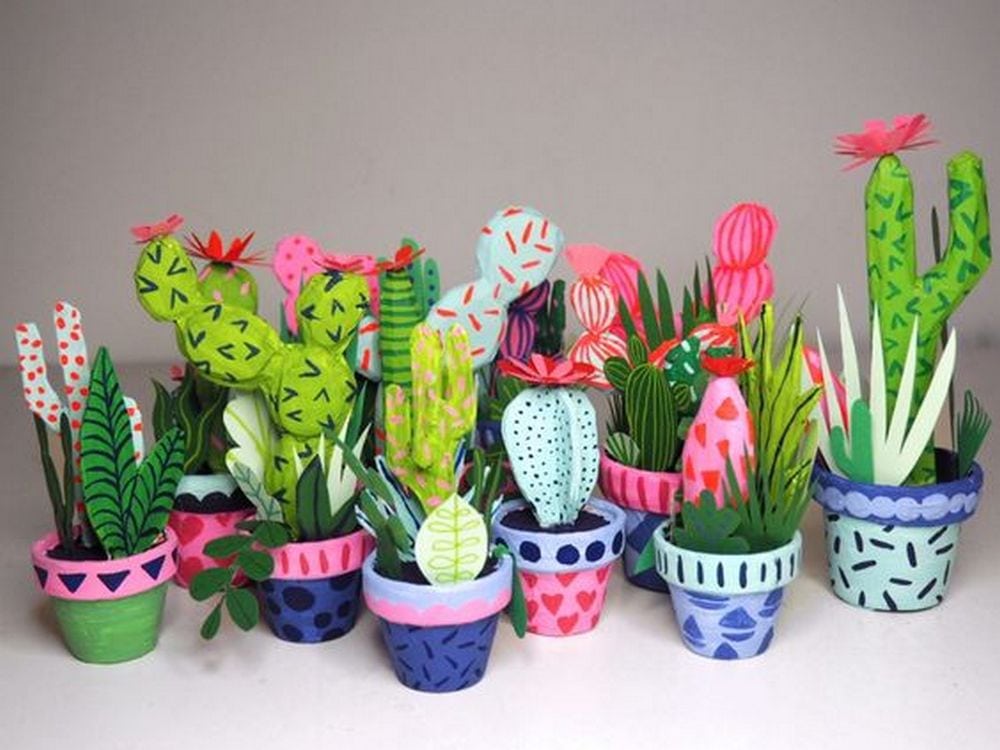
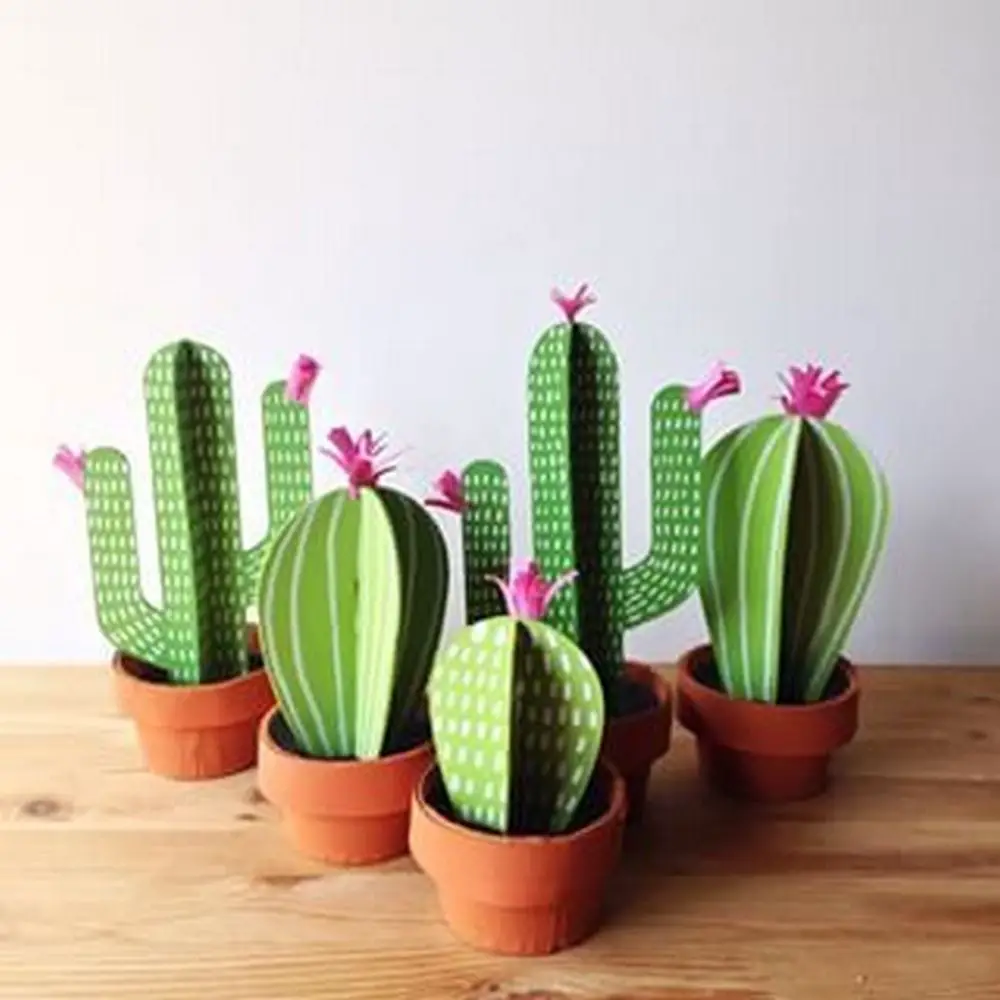
Not sure where to start? Check out some of these inspiring paper cactus designs. From simple and chic to colourful and fun, there’s sure to be a project here that’s perfect for you. So get crafting, and enjoy your new paper cactus!
Inspiring paper cactus design ideas
Click on any image to start the lightbox display. Use your Esc key to close the lightbox.
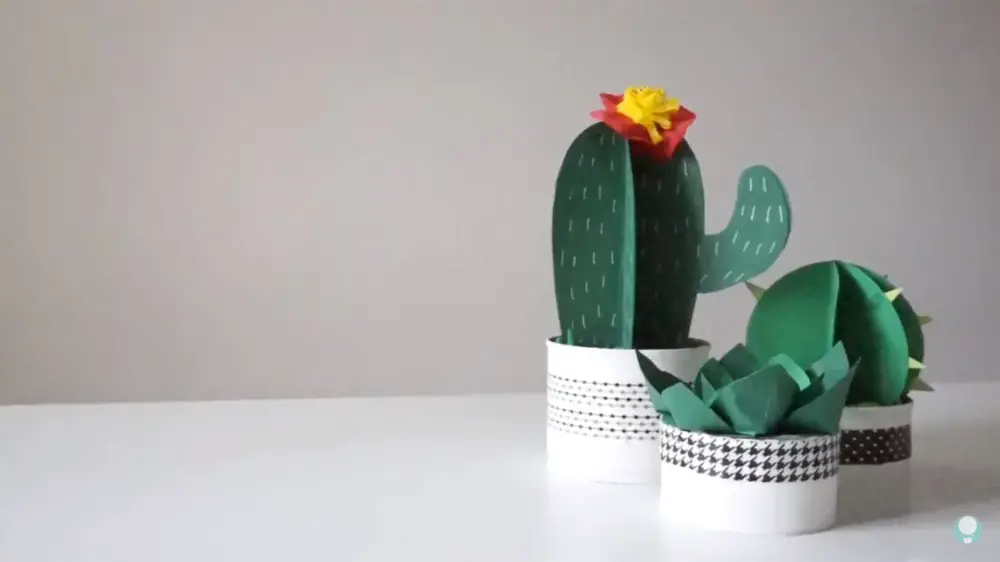
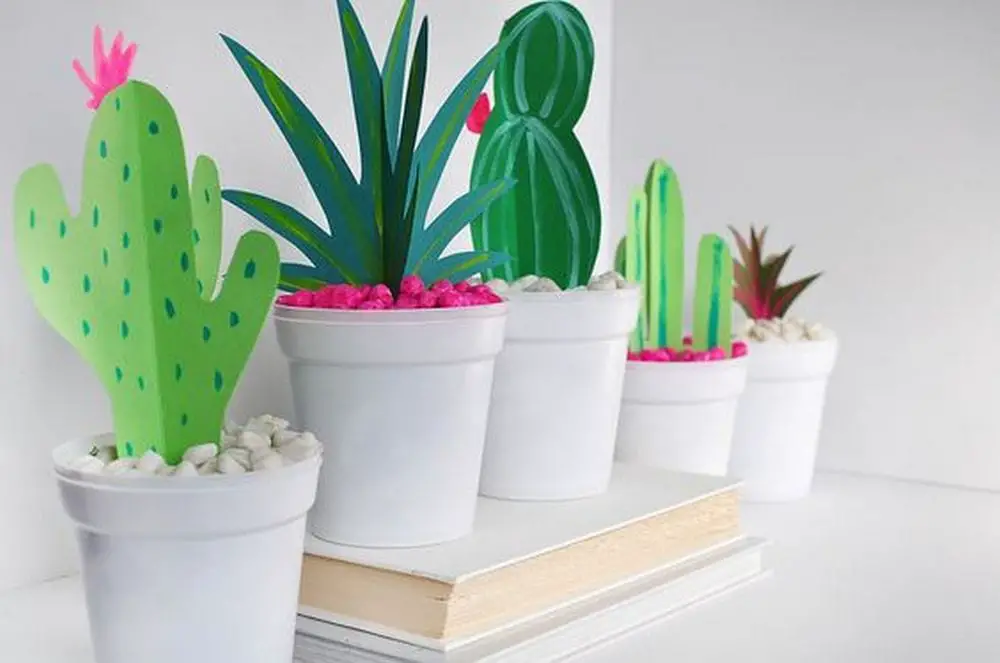
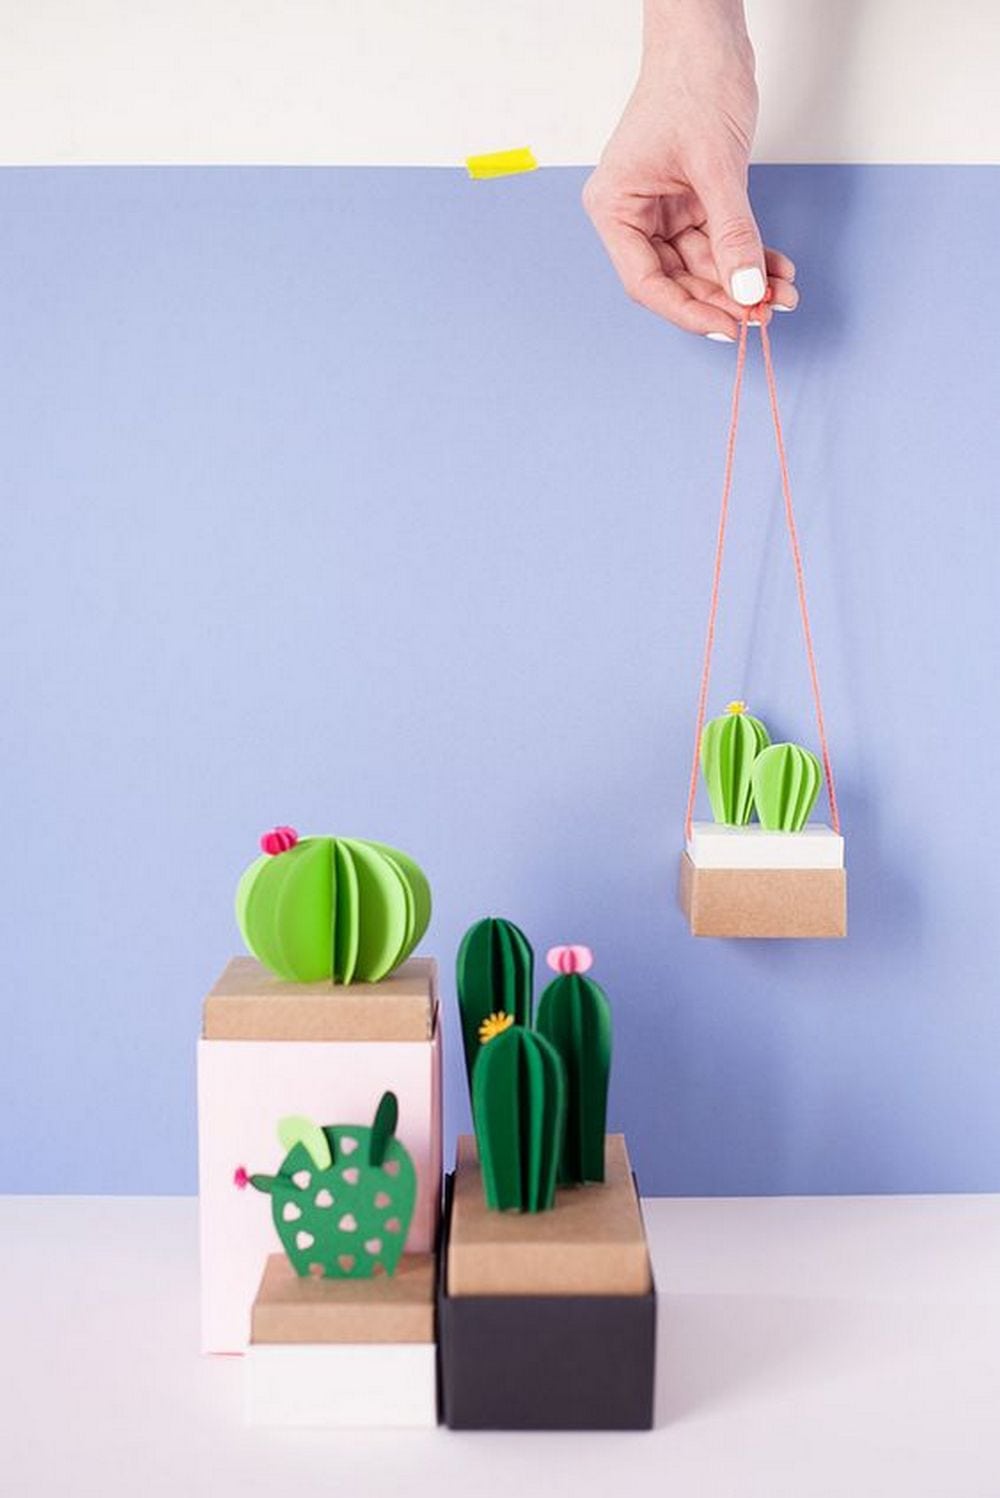
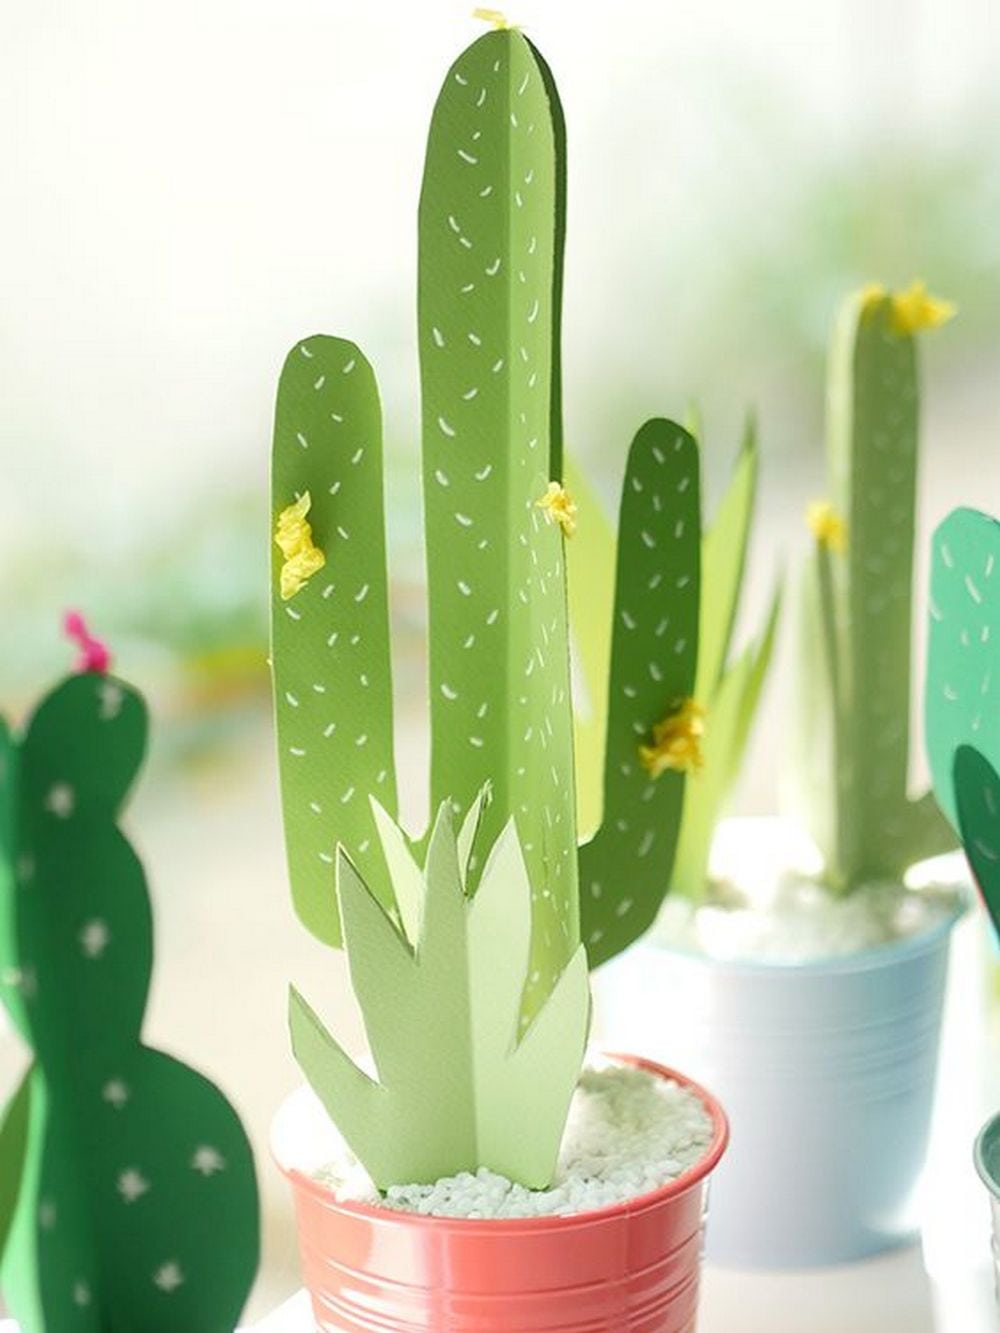
Whether you’re looking for a fun project to keep the kids entertained, or you’re wanting to add a bit of green to your home décor, these DIY paper cactus designs are perfect. And the best part is, they’re super easy to make! So, what are you waiting for? Get creative and start making your own paper cactus today!
Making a paper cactus is a fun and easy project that kids and adults alike will enjoy. With just a few simple supplies, you can create a cute and unique cactus that will brighten up any room. Here’s what you’ll need:
Materials:
- Coloured paper
- Small tin can/pot
- Glue
- Paint/sharpie
- Small rocks (optional)
Tools:
- Scissors
- Pencil
- Paintbrush
- Hot glue gun
Contents
Making a Paper Cactus
These cute cacti are perfect for adding a touch of greenery to any room, and they’re really easy to make.
So, what are you waiting for? Get creative and start making your own paper cactus today!
Now that you have the materials gathered, let’s get started!
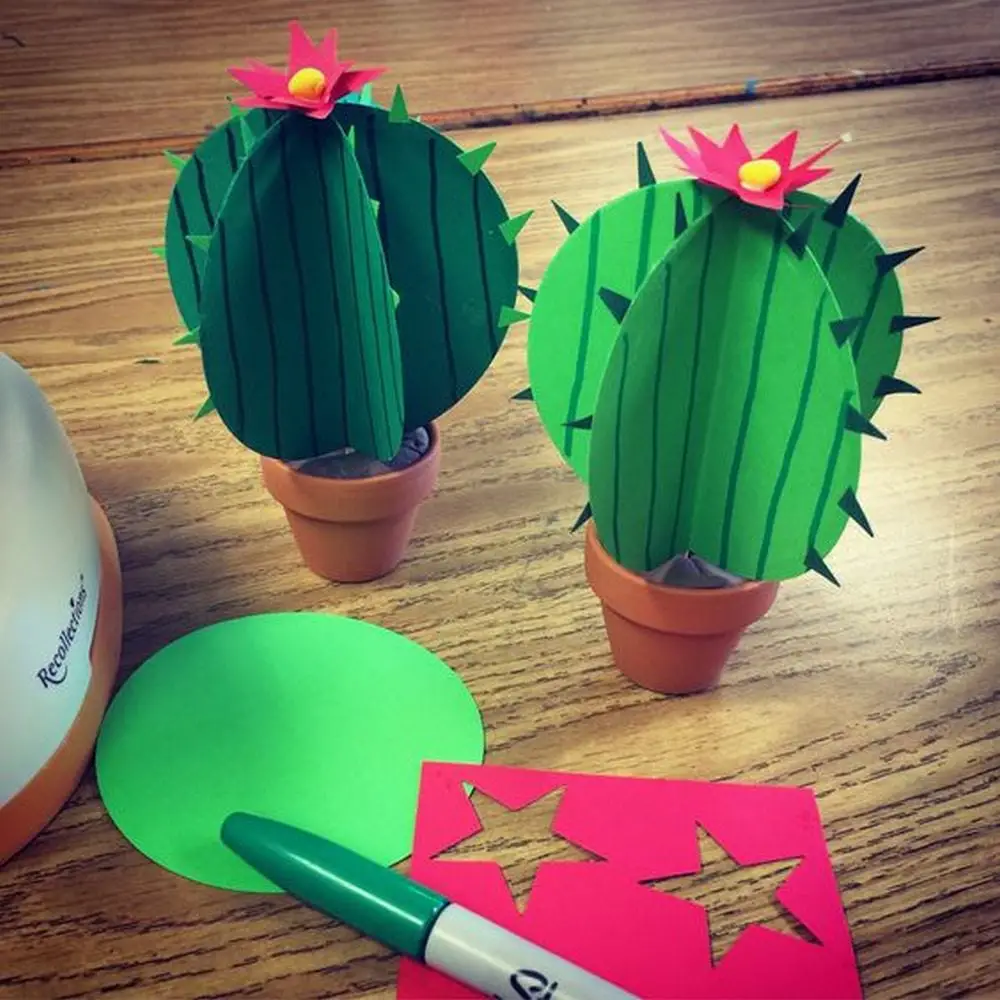
1. Prepare the small tin can
First, prepare the tin can by washing it thoroughly.
Paint the tin can white or your favourite colour. Then, let it dry.
Once it’s dry, you can add some designs or patterns if you like.
You can paint some floral designs on your tin can. You can also attach a tape around the can with a choice of your design. Just have fun and be creative!
2. Make your cactus
Using your green coloured paper, draw some cactus shapes. Trace the first cactus shape to make more.
Once you have a few cactus shapes traced, you can start cutting them out.
Once you have a nice little pile of cut-out cacti, it’s time to start gluing them together. Simply apply some glue to the back of each cactus, and start attaching them to each other, building up a fun little cactus sculpture. Let your creation dry.
3. Add some accessories to your cactus
Using your red and yellow coloured papers, draw some flower and leaf shapes. Glue together. Let it dry.
4. Attach the cactus
Finally, use a small amount of glue to attach your papercactus with its accessories on the tin can. Let it dry.
Great job! Now that your paper cactus ornaments are all finished, you can display them with pride. They make wonderful decorations for your dining table or any other special spot in your home.
You can watch the full video tutorial here…
Varieties of Paper Cacti
Exploring the diverse world of cacti through paper crafting offers a unique opportunity to bring these fascinating plants into your home without the care requirements of real cacti.
Below, you’ll find several popular types of cacti reimagined in paper form, each with its distinctive shape and charm. Whether you’re a seasoned crafter or a beginner, these projects can add a touch of desert flair to any room.
Saguaro
The iconic saguaro is a classic symbol of the American Southwest. To create a paper saguaro, use long, vertical cuts of green paper, and add ribs with a darker shade of green for a more realistic effect. Don’t forget to top it with white paper flowers to mimic the saguaro’s natural blooming state.
Prickly Pear
This type is known for its broad, flat pads and vibrant fruit. Start with green paper pads and use small red or purple papers to represent the pear-shaped fruits. Adding tiny yellow dots can mimic the small but dense spines, giving it a colorful yet approachable look.
Barrel Cactus
Short and stout, the barrel cactus is perfect for circular or oval-shaped crafting. Use layers of concentric circles in varying shades of green to replicate its bulging body, and line the edges with tiny paper spines for a touch of authenticity.
Fishhook Cactus
Named for its curved, hook-like spines, this cactus is ideal for those who appreciate intricate details. Use fine, curly paper cuts to create the distinctive spines, and assemble a cylindrical base from tightly rolled green paper to form the body.
Star Cactus
Also known as the starfish cactus, this type spreads out low to the ground in a star-like shape. To emulate this look, cut your paper into elongated arms that radiate from a central point and use a light green color to highlight its unusual form.
Each of these paper cacti offers a different set of challenges and aesthetic rewards, making them wonderful projects for crafters looking to create a paper desert garden.
Decorating with Paper Cacti
Paper cacti provide a versatile and creative way to enhance your living space without the maintenance of real plants. Their unique shapes and vibrant colors can liven up any area, offering endless possibilities for indoor decoration. Here are some innovative ideas to incorporate paper cacti into your home décor.
Minimalist Charm
For a clean and simple look, arrange a series of small, identical paper cacti in uniform pots along windowsills or shelves. Choose a monochromatic color scheme—like varying shades of green—to maintain a minimalist aesthetic while adding a touch of nature.
Desert-Inspired Centerpieces
Create a centerpiece for your dining table or coffee table by grouping various types of paper cacti. Mix different shapes and sizes to mimic a natural desert scene. Place them in rustic pots or on a bed of faux sand and pebbles to enhance the desert vibe.
Wall Art
Transform paper cacti into dynamic wall art. Mount individual cacti on canvases or arrange them in a large shadow box. This can be an artistic focal point in a room and a great conversation starter.
Children’s Room Decor
Bright, colorful paper cacti are perfect for children’s rooms. They add a playful element without the risk of sharp spines. Use vibrant colors and fun patterns to make the cacti appealing to kids, and perhaps involve them in the crafting process for a personalized touch.
Seasonal Displays
Adapt your paper cacti for seasonal decorations. Add small flowers or fruits for spring, bright lights for the holidays, or spooky faces for Halloween. This versatility makes paper cacti a fun and reusable décor option throughout the year.
Bohemian Accents
Incorporate paper cacti into a bohemian-style decor by hanging them in macramé plant holders or arranging them on driftwood shelves. Pair them with other paper succulents and plants for a lush, eclectic look that brings texture and a natural feel to any room without the upkeep.
Office and Study Enhancements
Add a touch of green to your office or study area with small paper cacti. Place them in tiny pots on your desk or along a bookshelf to create a more relaxing and inviting work environment. Opt for more geometric, abstract designs to keep the look sharp and professional.
Bathroom Greenery
Turn your bathroom into a serene spa-like space with waterproof paper cacti. Use laminated paper or treated surfaces to protect against moisture. Cluster them on windowsills or beside the sink to add a fresh pop of color that thrives even in low light.
Event Decorations
Use paper cacti as part of your event decor for parties, weddings, or gatherings. They can serve as unique place card holders or centerpieces. Customize them to match the theme or color scheme of your event for a personal touch that guests will remember.
DIY Lamp Bases
Transform a simple lamp into a themed accent piece by attaching paper cacti around the base. This is a great way to add character and theme to room lighting without permanent alterations. Choose colors that complement the lampshade for a cohesive look.
By incorporating paper cactus into your home decoration, you can enjoy the beauty and geometric intrigue of these desert plants in a creative, personal way. Whether used as subtle accents or bold statement pieces, paper cacti can refresh and revitalize any interior space.
Conclusion
Crafting a paper cactus is an enjoyable and imaginative activity that allows you to bring the beauty of the desert into your home without any maintenance. These versatile creations can be customized to fit any decor style, making them perfect for gifts, home embellishments, or fun projects with kids. Embrace the art of paper cacti crafting to add a unique and vibrant touch to your living spaces.