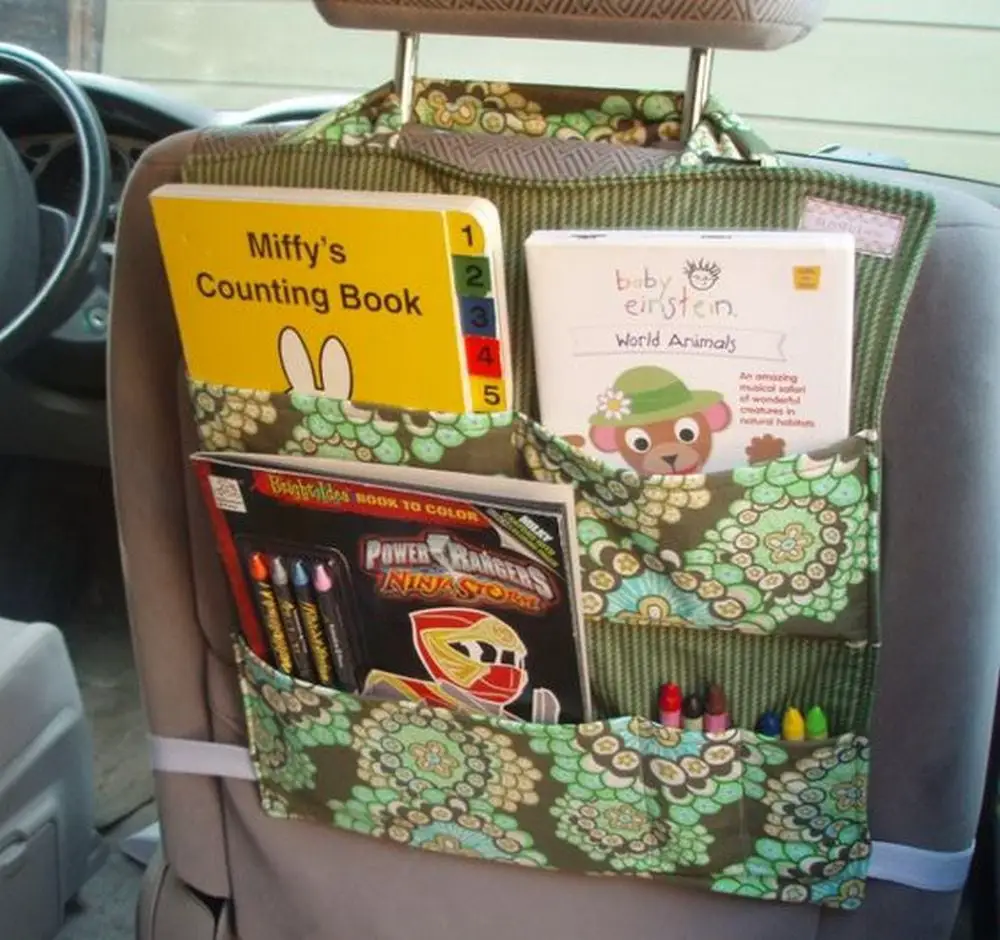
This DIY back seat car organizer is very useful and practical.
One of the things that annoy most car owners – my husband, specifically – is when the car’s a mess. Most of us are guilty of having a lot of clutter. We have receipts, coins, kids’ stuff, and a lot of other things in there. We just toss them anywhere in the car once we get in.
I was tempted to buy a car organizer to somehow lessen the mess inside the car. However, being the thrifty person that I am, I opted to do it myself.

I found this backseat organizer which I really liked.
It did not only enable me to save money but also saved me from my husband’s endless scolding.

Say hello to a clutter-free, organized car!
Contents
Awesome DIY back seat car organizer design ideas
Click on any image to start the lightbox display. Use your Esc key to close the lightbox.

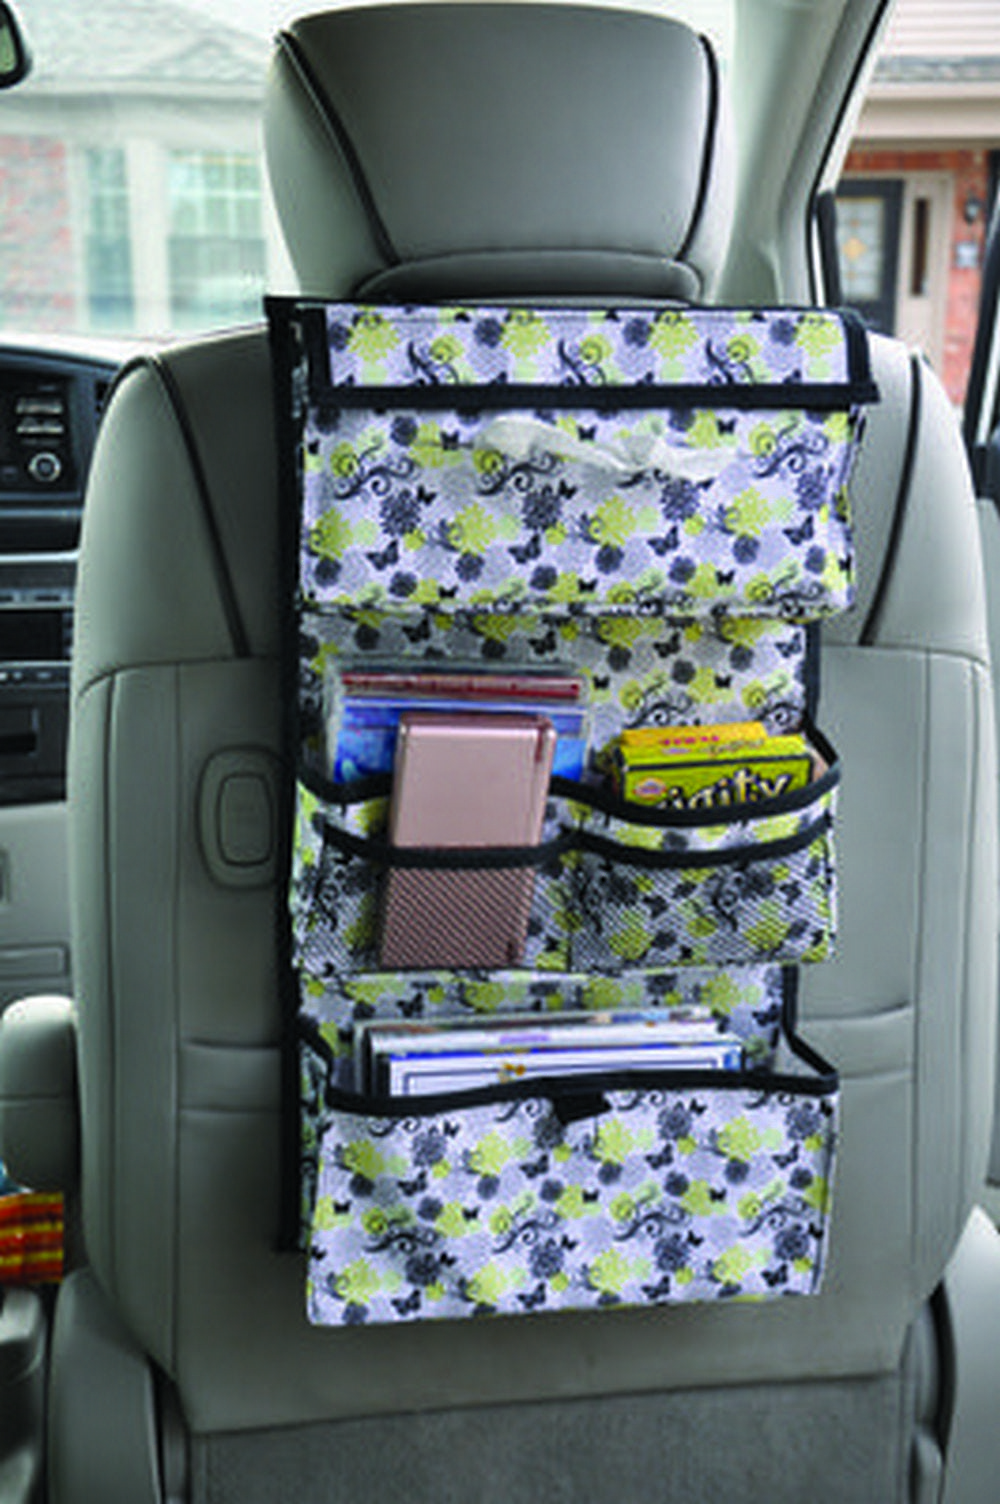
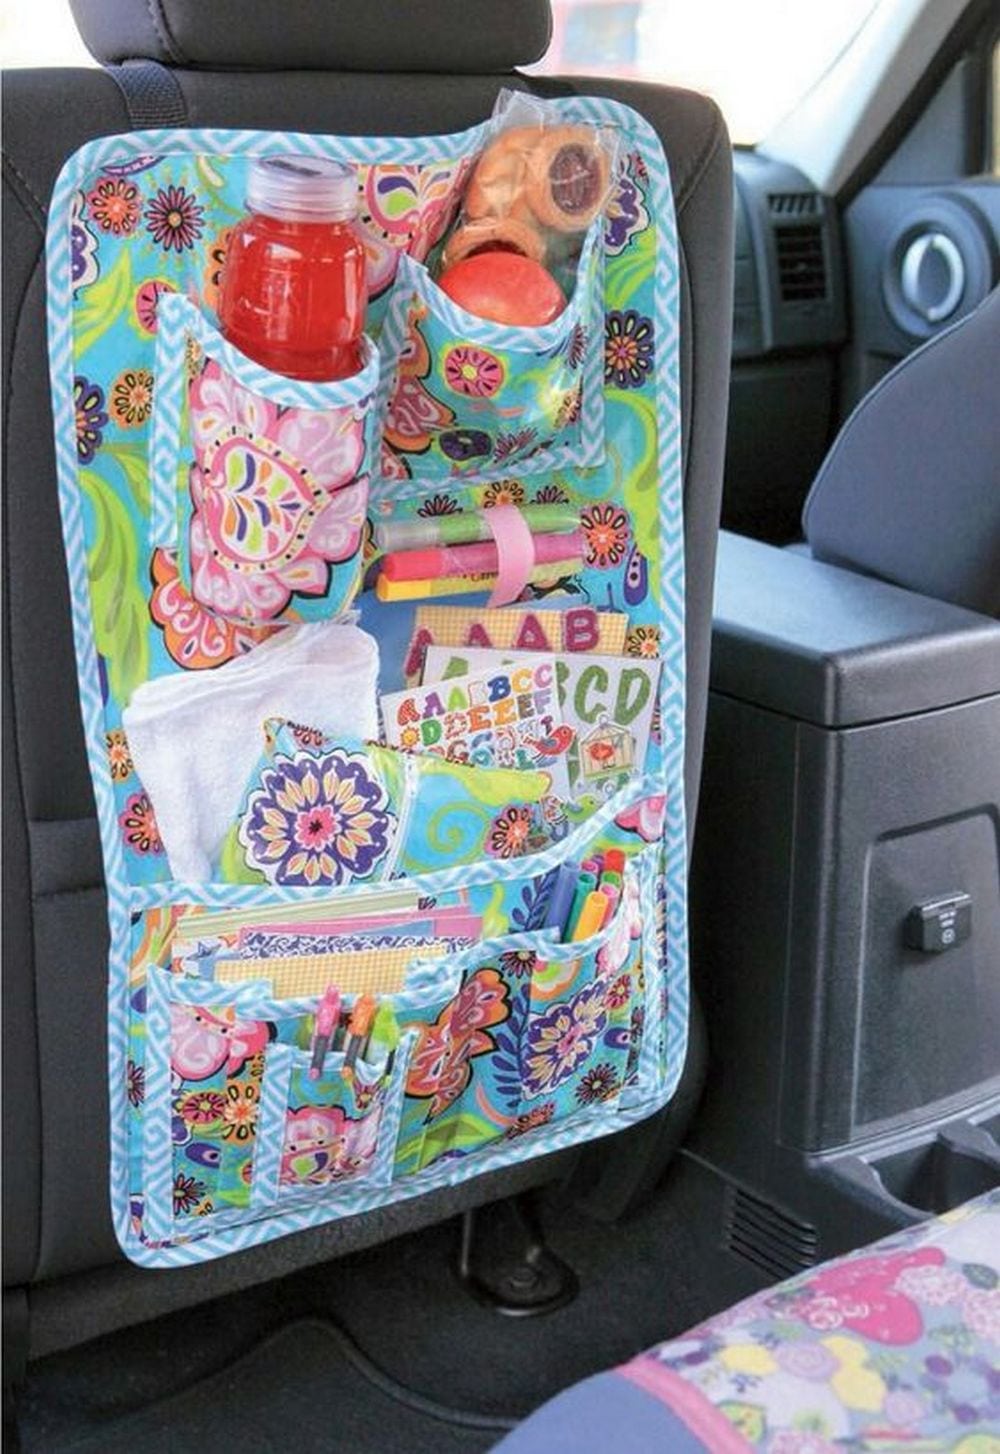
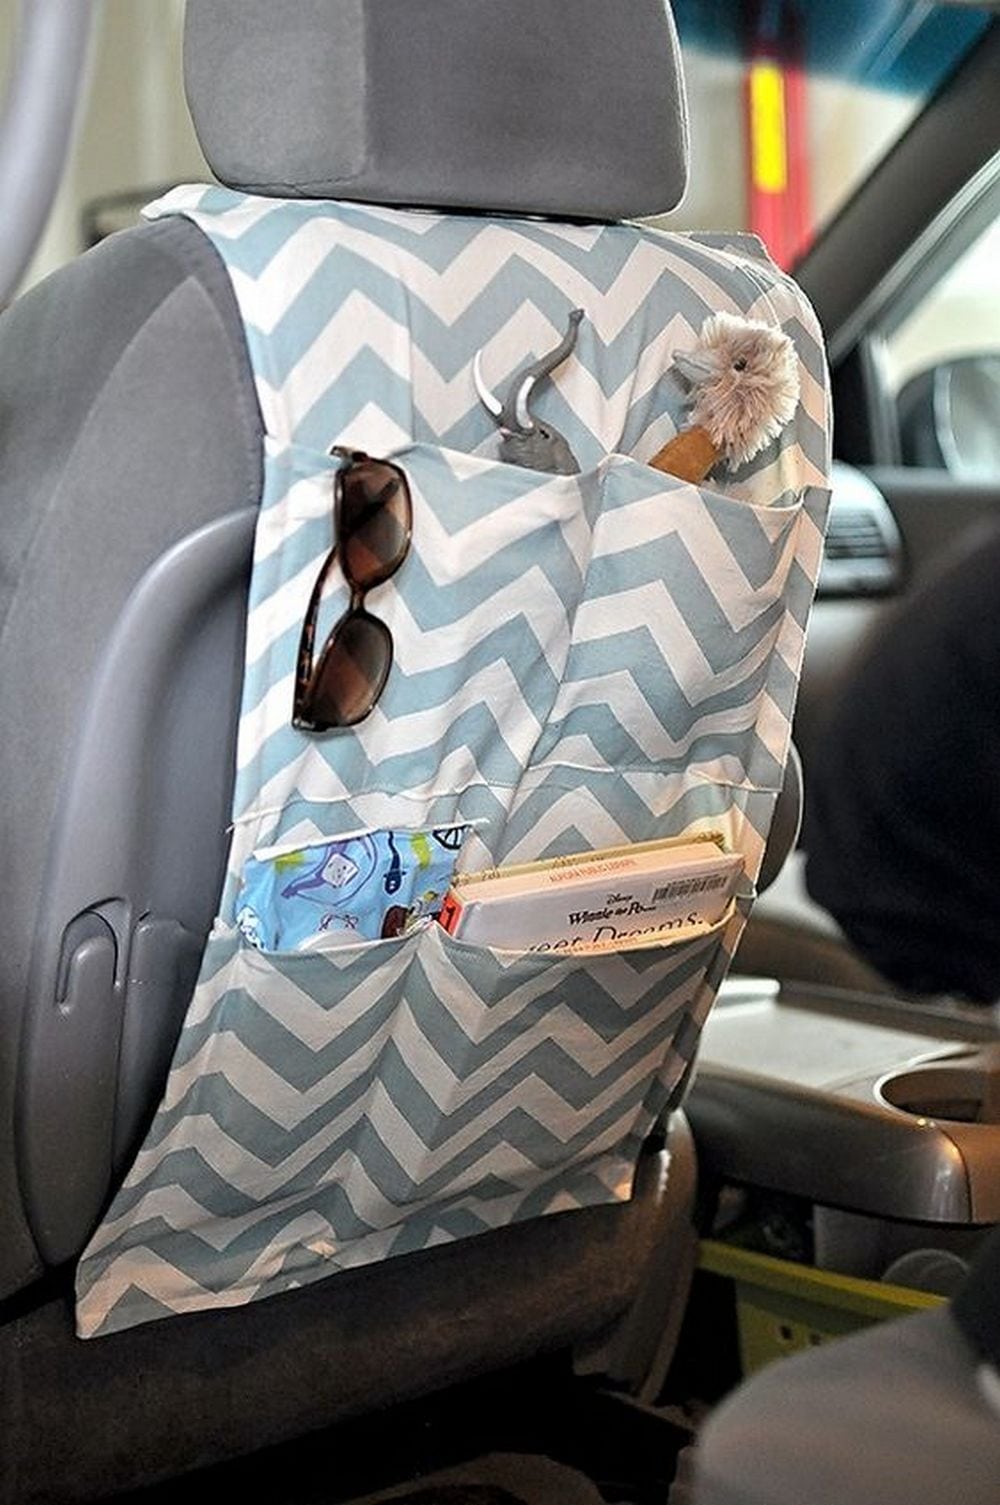
This is a very practical and useful project. If there’s some DIY project that you must do in your spare time, this is definitely it.
Making a Back Seat Car Organizer
Materials
- 1-yard vinyl
- 1-yard mesh
- 5 yards wide Fold Over Elastic
- velcro
Tools
- Scissors
- Pins
- Sewing machine
Instructions
1. Determine the measurement
Using a tape measure, determine the measurement you need for your car organizer.
2. Cut and sew the backseat organizer
Based on the measurement, make the markings on your vinyl and FOE. Cut them using your scissors. Sew the vinyl together with the FOE to secure the sidings.
3. Add the pockets
Use the mesh fabric for the pockets. Simply determine the measurement you need for your pockets. Then, cut and sew to your car organizer.
4. Add the straps
Use your remaining vinyl to make the straps. Measure the length you need for the straps. Then cut the vinyl. Straps should be sewn at the top and bottom of your organizer.
5. Attach to the car’s backseat
Finally, you can now attach it to your car’s backseat using the straps.
You can now add your stuff to bring with you without having a mess in the car.
Enjoy the ride!
Thanks to Life Sew Savory for the step-by-step instructions.
Matching Front Seat Organizer for a Unified Look
Creating a matching front seat organizer is an excellent way to extend the functionality and aesthetic appeal of your back seat car organizer. A cohesive look between the front and back of your car enhances its interior and promotes an organized and clutter-free environment.
Here’s how you design a front seat organizer that complements your back seat car organizer perfectly.
Design Considerations
When planning your front seat organizer, consider the design elements of your back seat car organizer. Aim for consistency in materials, color schemes, and patterns. This unity in design will not only make your DIY project more satisfying but also give your car a interiorcar’sofessional, well-thought-out appearance.
Material Selection
It is crucial to choose the same materials as your back seat car organizer. If your back seat organizer is made from vinyl and mesh, use these materials for the front seat organizer. This ensures durability and style continuity throughout the vehicle. The use of fold-over elastic (FOE) for edges can be replicated here to maintain a unified look.
Storage Needs
While the back seat car organizer caters to passengers’ nepassengers’ont seat organizer should focus on the driver’s and cdriver’driver’s’siver’sorate spaces for essential items such as sunglasses, pens, notepads, and mobile devices. This attention to the specific needs of front-seat users will enhance the practicality of your car organizers.
Safety and Accessibility
Ensure that the design of your front seat organizer does not interfere with the car’s operatiocar’sontrols or compromise safety. It should be easily accessible without distracting the driver. For example, pockets designed to hold items securely in the back seat car organizer can be adapted to ensure that items in the front seat organizer are secure and don’t pose a danger.
Easy to Attach and Remove
Like the back seat car organizer, the front seat version should be easy to attach and remove. This facilitates cleaning and allows you to switch it out if needed. Attaching your back seat organizer, such as straps or Velcro, can be employed to maintain consistency for the front seat organizer.
Complementing Your Back Seat Car Organizer
To truly compliment your back seat car organizer, consider adding unique features to the front seat organizer that enhance functionality and appearance. For example, a dedicated compartment for charging cables or a particular clip for parking tickets can be handy. These thoughtful additions serve practical purposes and highlight the cohesive design between the front and back seat organizers.
By creating a matching front seat organizer, you enhance the utility and aesthetic appeal of your back seat car organizer. This approach maximizes organization within the car and elevates the overall driving experience. With both organizers in place, your car becomes a pinnacle of efficiency, style, and comfort.
Innovative Storage Solutions for Specific Items
When organizing your car, the back seat car organizer plays a crucial role in keeping everything neat. However, specific items often require tailored storage solutions to ensure they are secure, easily accessible, and well-organized.
Let’s explore some innovative storage ideas designed for particular items that can enhance the functionality of your backseat car organizer.
Tablet and Device Holders
- Secure Sleeves: Create padded sleeves within your back seat car organizer for tablets and electronic devices. These sleeves protect the devices from bumps and scratches while the car is in motion. For added convenience, incorporate a transparent, touch-sensitive front panel, allowing passengers to use the devices without removing them from the organizer.
- Charging Pockets: Equip your back seat car organizer with special pockets that include openings for charging cables. This design allows devices to charge while stored, ensuring they’re ready to use upon arrival.
Snack Compartments
- Insulated Sections: Add insulated compartments to your back seat car organizer for snacks and drinks. These sections help maintain the temperature of both hot and cold items, making them perfect for long trips. The compartments can be lined with a wipe-clean material to deal with spills efficiently.
- Adjustable Dividers: For snack storage, consider incorporating adjustable dividers. These allow you to customize the storage space based on the size of the snacks or the number of items you need to carry. This flexibility ensures everything stays in place and is organized according to your needs.
Toy Loops and Pockets
- Elastic Loops: Elastic loops can be a game-changer for children’s toys. These loops can hold small toys, crayons, or stuffed animals, keeping them within reach of young passengers. This solution helps prevent toys from falling under seats or getting lost.
- Mesh Pockets: Use mesh fabric to create see-through pockets in your backseat car organizer. These are ideal for storing toys and books, providing easy visibility and access. The mesh material also allows for flexibility, accommodating items of various sizes.
Document Sleeves
- Protected Envelopes: Include protected envelopes in your back seat car organizer for important documents like maps, travel guides, or car manuals. These sleeves should be water-resistant to prevent spills and durable enough to withstand frequent handling.
- Quick-Access Slots: Designate a particular slot for parking passes, toll tickets, or other documents that require quick access. This feature prevents these items from getting lost among other belongings and can be a stress reliever during travel.
By integrating these innovative storage solutions into your backseat car organizer, you can cater to the specific needs of all passengers and items. These specialized compartments keep your car organized and enhance the overall travel experience, ensuring that everything has its place and is easily accessible.
Safety Tips for Car Organizers
While back seat car organizers are invaluable for keeping your vehicle tidy and items within reach, safety should always be a priority. The right practices can prevent your organizer from becoming a hazard during travel.
Here are essential safety tips when using a back seat car organizer.
Secure Attachment
- Sturdy Fastening: Ensure your back seat car organizer is securely fastened to the seat. Loose organizers can shift or fall during abrupt stops, creating distractions or even injuring passengers. Use adjustable straps that can be tightly secured around the seat.
- Check Regularly: Periodically check the attachments of your back seat car organizer. Over time, vibrations from the car can loosen fastenings. A quick check and tightening can prevent any issues.
Weight Distribution
- Avoid Overloading: Be mindful of how much weight you place in your back seat car organizer. Heavy items should be stored in lower pockets to keep the organizer balanced and prevent it from becoming too heavy, which could cause it to detach.
- Distribute Evenly: Ensure weight is distributed evenly across the organizer. Uneven weight can cause the organizer to sag or pull to one side, potentially affecting its security and the balance of items within.
Item Placement
- Soft Items in Upper Pockets: Store softer, lighter items in the higher pockets of your back seat car organizer. In case of a quick stop or an accident, these items are less likely to cause injury if dislodged.
- Secure Loose Items: Any small, hard items such as toys or bottles should be securely stored in zipped compartments or pockets with closures. This prevents them from becoming projectiles during sudden stops.
Visibility and Accessibility
- Do Not Obstruct Views: Your back seat car organizer should not obstruct the driver’s view out of any windows. Ensure that it is of an appropriate size and positioned in a way that keeps all windows clear.
- Maintain Access to Safety Features: Make sure your back seat car organizer does not block access to any safety features, including seat belts and car seat anchors. It’s crucial that all safety devices are easily accessible at all times.
Regular Inspection and Maintenance
- Inspect for Wear and Tear: Regularly inspect your back seat car organizer for any signs of wear and tear. Damages like tears or loose seams can affect its integrity and safety. Replace or repair the organizer as necessary.
- Clean Regularly: A clean organizer is not only more pleasant but safer. Spills can create sticky surfaces that attract dirt and potentially obscure important items. Regular cleaning maintains the organizer’s condition and functionality.
By following these safety tips, you can enjoy the benefits of your back seat car organizer without compromising the safety of passengers. It’s all about using the organizer wisely and maintaining it properly to ensure it serves its purpose without becoming a risk.
Conclusion
Crafting a back seat car organizer is a rewarding project that enhances vehicle organization and maximizes space. With careful planning and customization, you can create a solution that meets your specific needs, ensuring everything has its place. Ultimately, this DIY endeavor not only keeps your car clutter-free but also makes every journey more enjoyable and efficient.
If you liked this project, you might also like to view the Hammock for your car…


