Do you want something that will really bring out the Halloween spirit this season? Then this head in a jar prank is the project you’re looking for!
OK — before doing this Halloween project you have to make sure that all your friends and family can take a good scare prank. Make sure no one who has a heart problem will see it! :)

Ready to make this for some real fun this Halloween? Don’t forget to share with us how it goes!
Click on any image to start the lightbox display. Use your Esc key to close the lightbox. ?

Contents
Crafting a Head in a Jar Prank
Materials
- Bond Paper
- Large Jar
- Food Colouring
Tools
- Digital Camera
- Photo Editing Software
- Computer Printer
- Paper Lamination
Steps
To make the head printout you’ll need 2 pictures of a head, a profile, and a portrait. With the camera at eye level, take a picture straight on and one from the side. Ensure your subject is well-lit. Also, ask them to make a face. That impression will make your head in a jar prank funnier.

Next, we’ll import these images into a photo editing suite for your head in a jar prank. Since the final output will be on a standard A4 / 8.5″ x 11″ printer paper, start by opening your photo editing software and opening a new document set to your printer paper size.
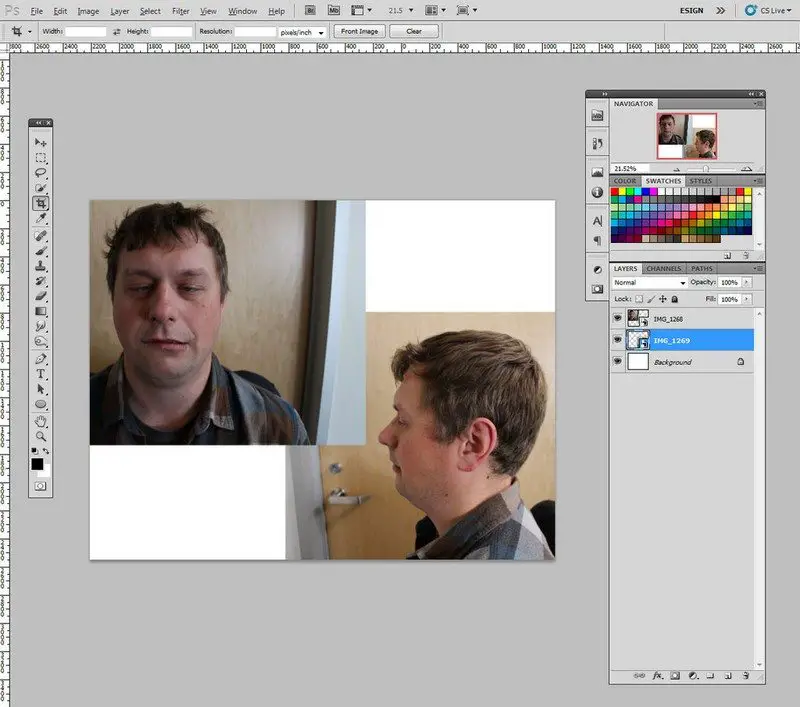
Then, import the profile and portrait pictures of your subject onto new layers and resize them to fit your head in a jar prank. We’ll resize them again after merging the faces together.
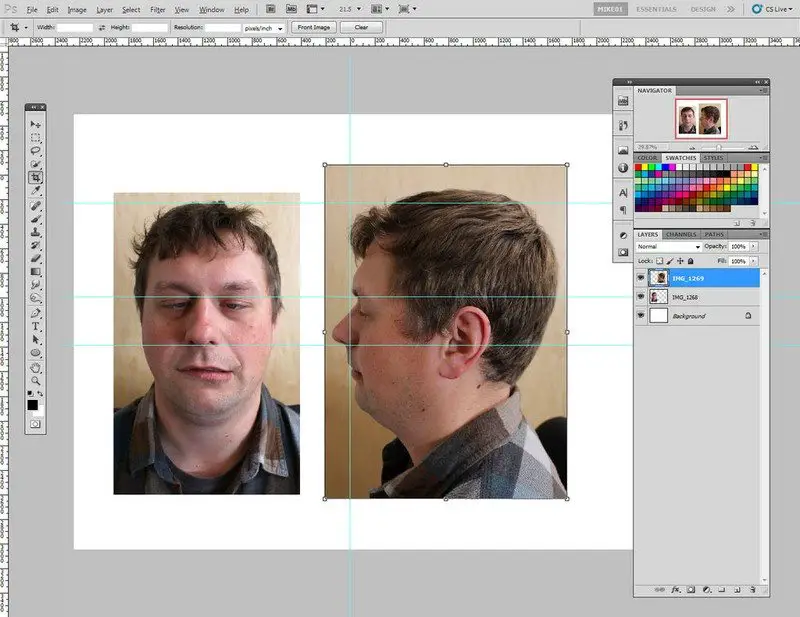
Using your photo editor trim away any background so that you are left with just the face.
After trimming, if your two pictures have different lighting adjust the lighting levels (ctrl+L in most applications). Using the eye as a level, align the two images so the features match up from the profile to the portrait (eyes, mouth, and nose all aligned). Almost all photo editors have a ruler function, these help keep things true.
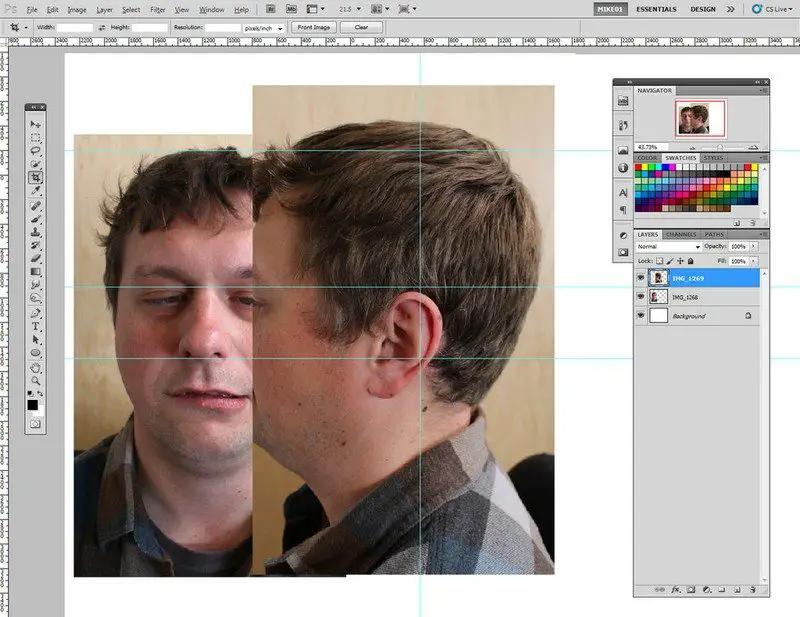
To merge the two faces together you’ll need to remove the face portion of the profile image. Make a selection to eye on the profile and delete the face. Then, move the profile picture to one side of the portrait to match the location of the eyes.
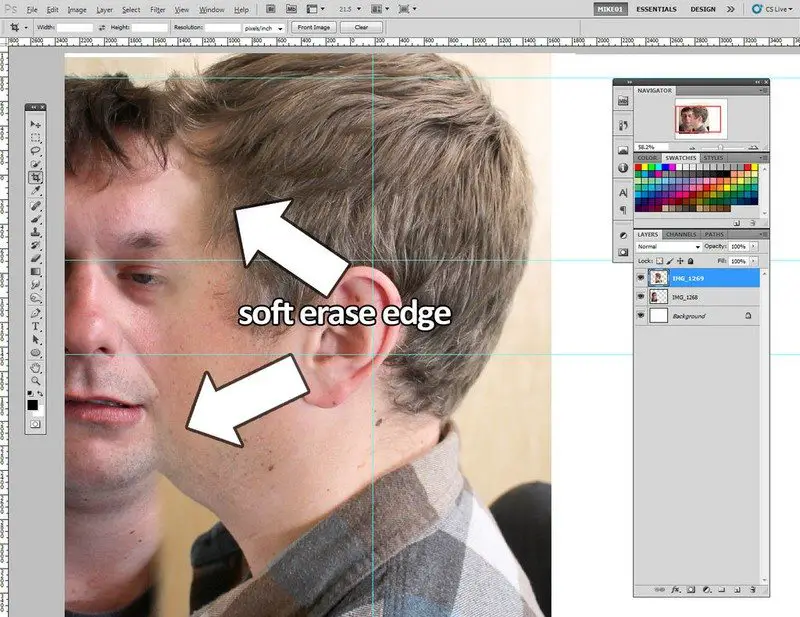
Select the erase tool and set it to a soft brush. Erase the edge of the profile picture where the two faces meet. Changing the opacity of the eraser you can work the brush to feather away some of the details and blend the two images.
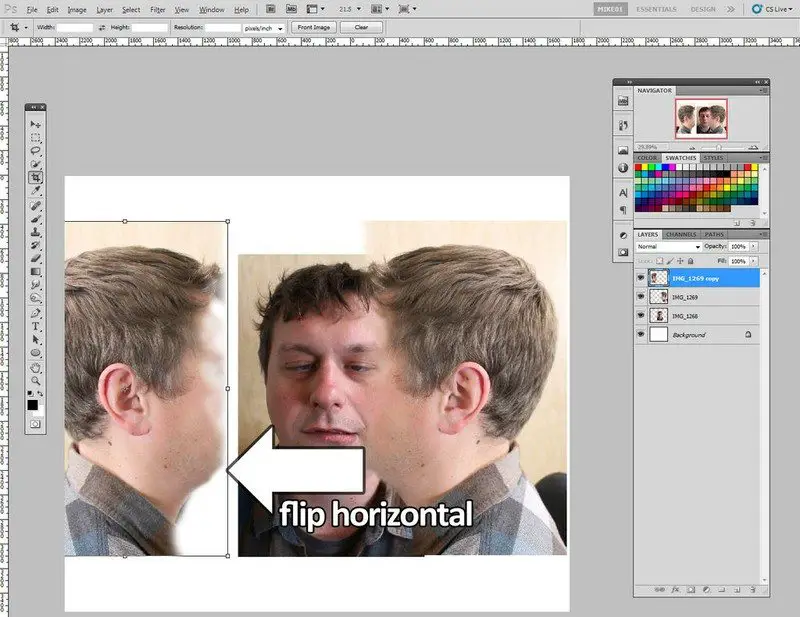
With one side completed, make a copy/duplicate of the profile and paste it to a new layer. Flip the copy horizontally and move over to the other side of the portrait picture.
You may need to adjust the levels of the duplicate layer to match the portrait and use the eraser tool again to feather away portions of the duplicate profile to blend into the portrait.
Don’t worry too much about the chin and neck, these will be cropped out of the picture when we’re ready to print. You should have a reasonable version of a flattened head for your head in a jar prank.
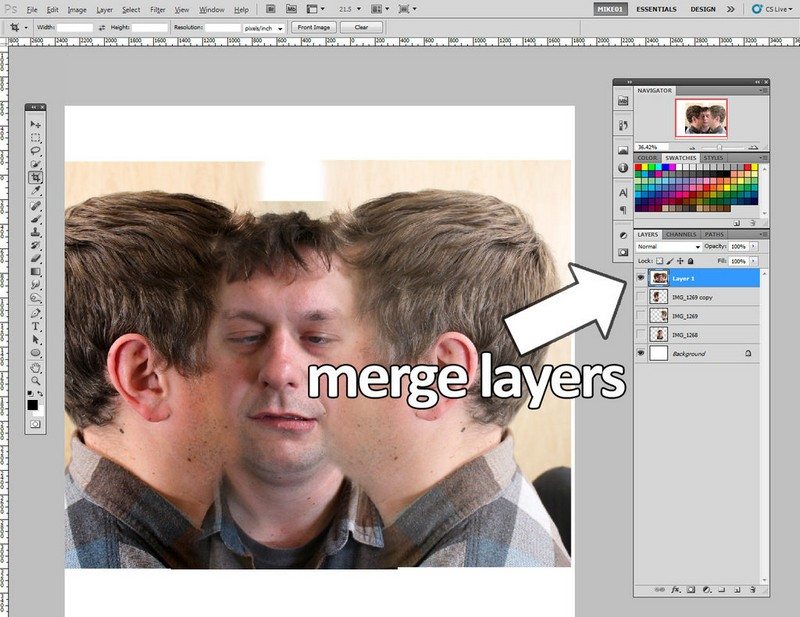
When you are satisfied with the layer placement, blending, and lighting levels, merge your layers together. Next, resize the image to fit your paper space. You can enlarge your image to crop out the neck and top of the head, or you can work more brush magic in these areas; such as with the clone stamp tool, or prediction tool (depending on your photo editor).

After saving my image I printed it out. There should be an option in your print dialogue box that enables you to fill the page with your image, this will be “fit to media” or something to that effect.
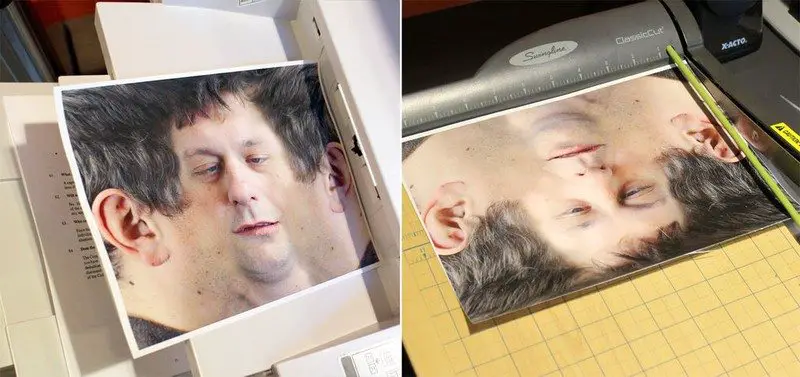
When I printed mine it printed with a small white margin. Since I wanted just the image I used a paper cutter to trim off the white border.

Since this image will be submerged for your head in a jar prank, it needed to be laminated so it wouldn’t disintegrate. Most people don’t have a lamination machine at home, but your local school, office supply store, library, or copy center likely has one that you can use. Lamination costs about $1 a sheet.
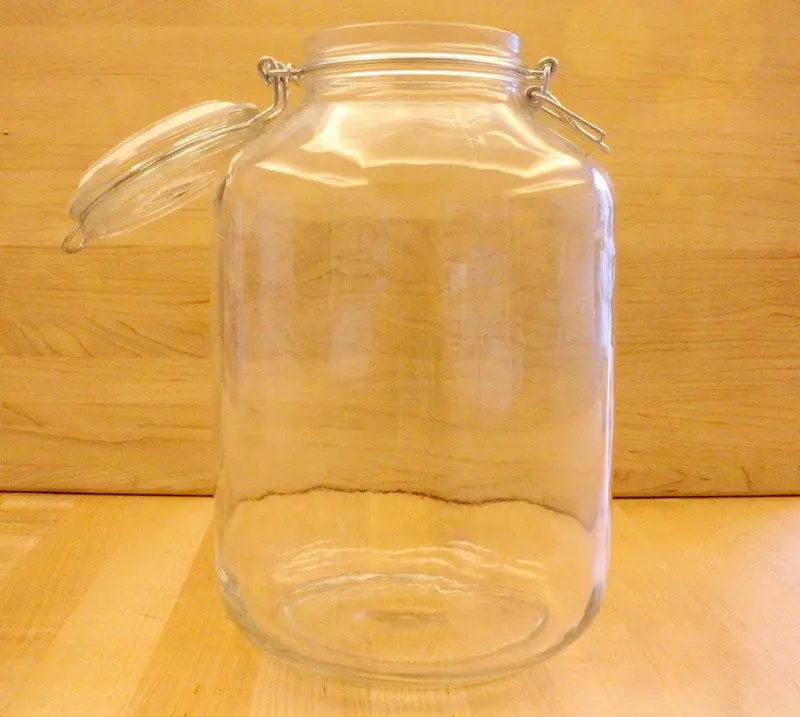
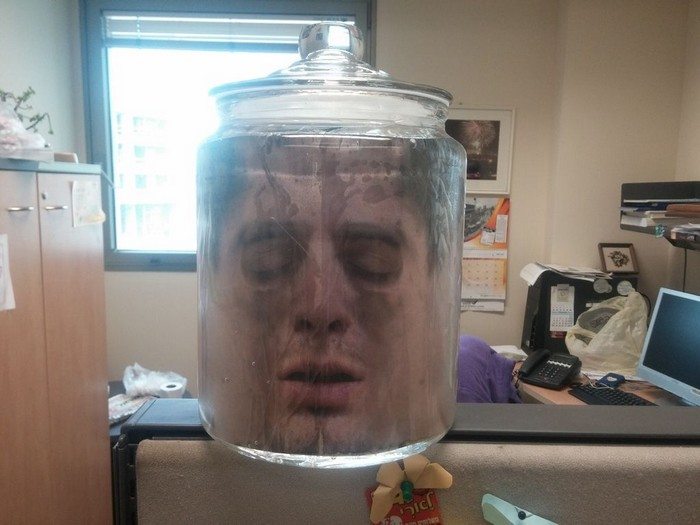
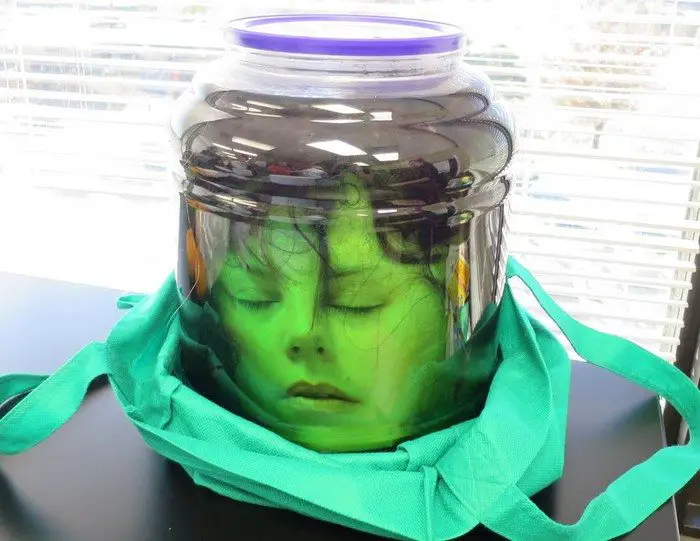
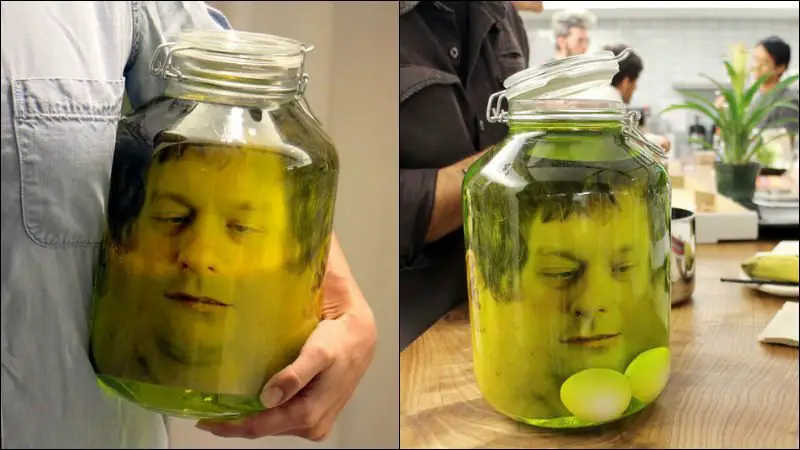
You’ll need a jar large enough to hold your picture. I got this 5-liter glass jar at my local hardware store for $15.
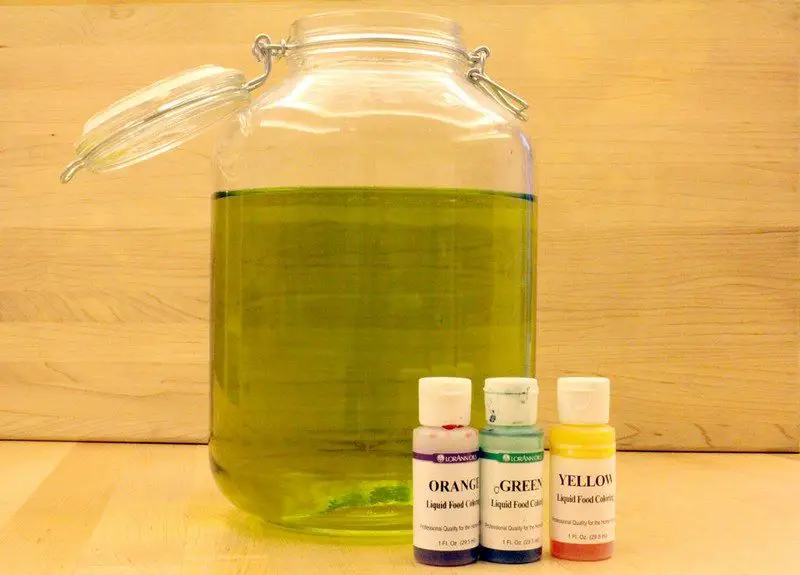
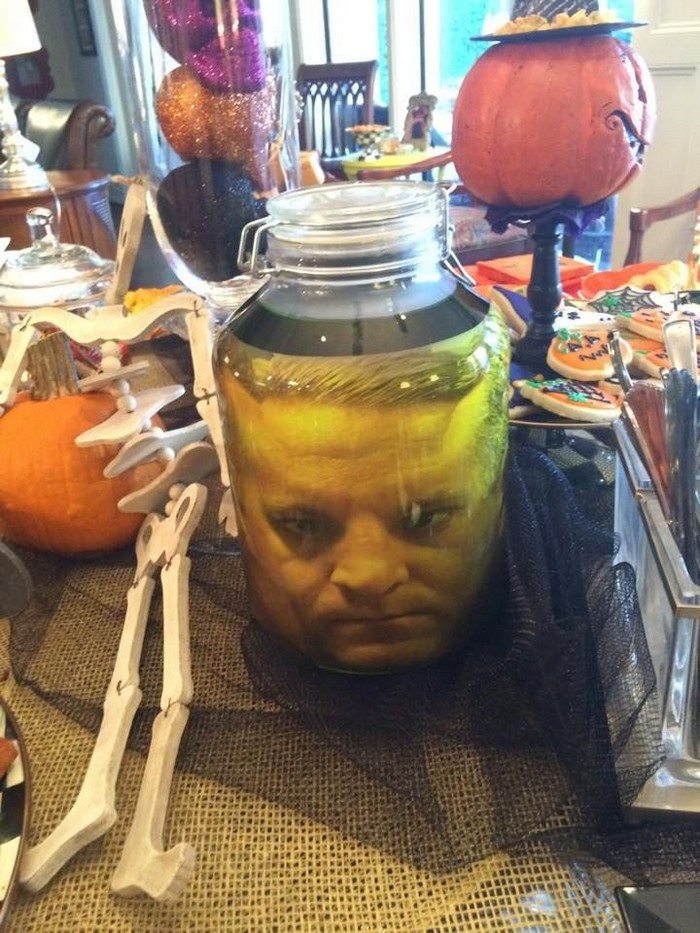
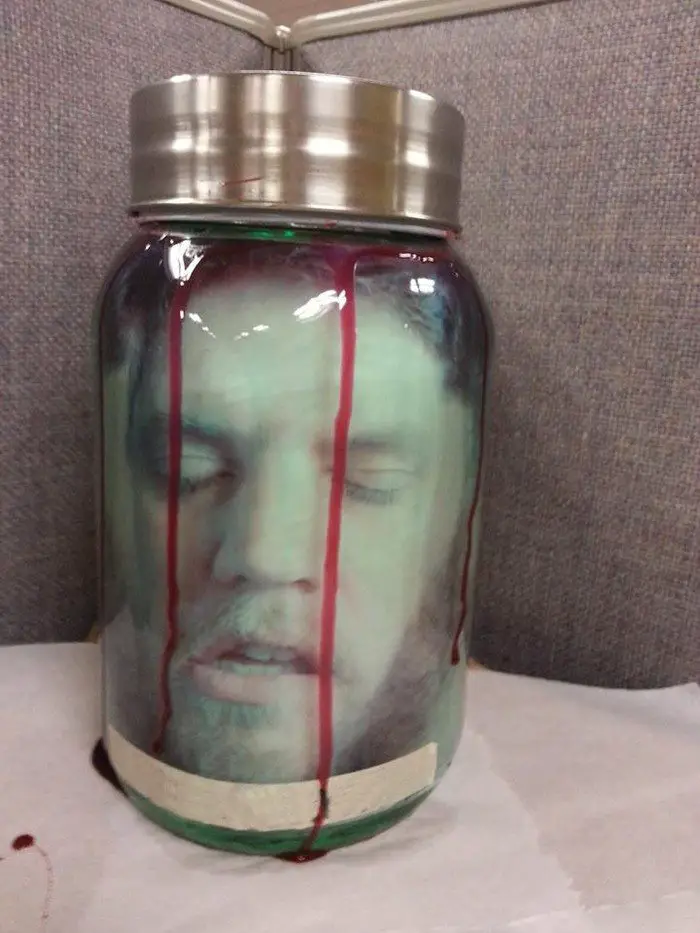
Filling the jar about halfway with water, I used a mix of yellow, orange, and green liquid food dye I tinted the water to resemble a preserving solution for my head in a jar prank. Just like in the vintage science fiction movies.
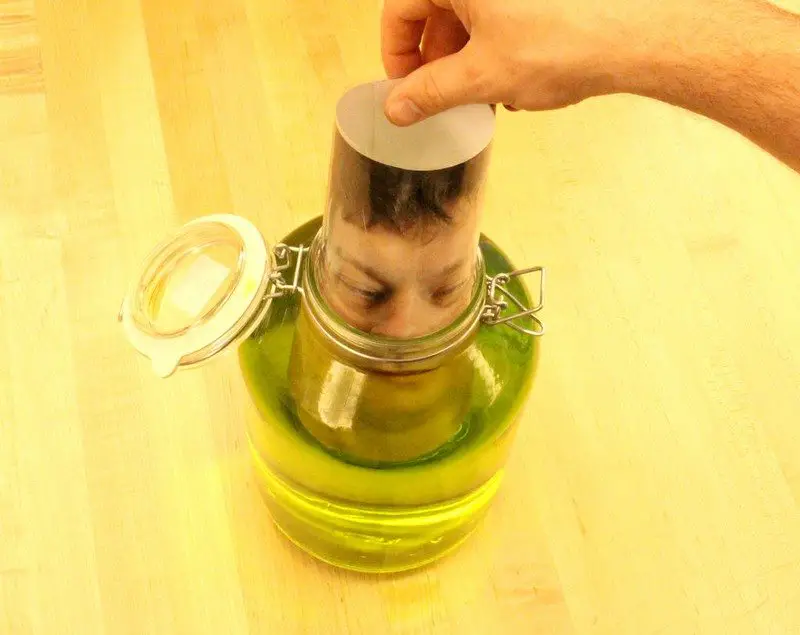
Curling the laminated printout to fit through the jar neck the sheet was inserted, and the jar was then topped off with water until full.
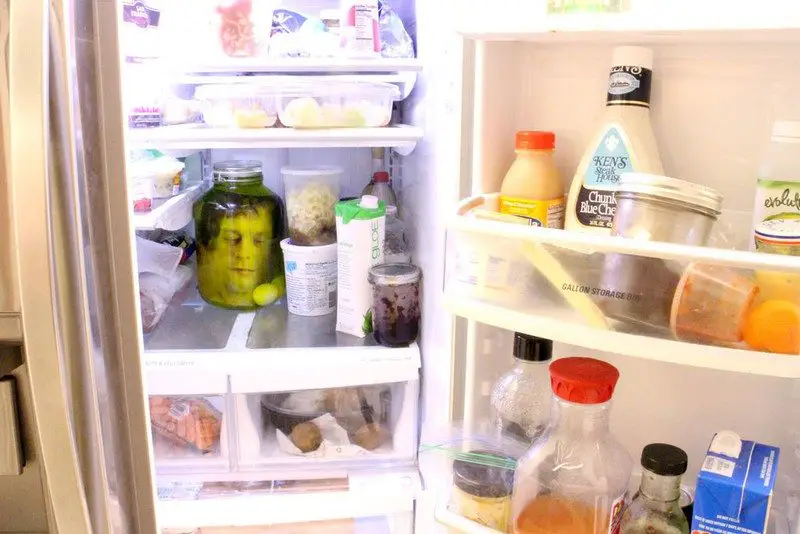
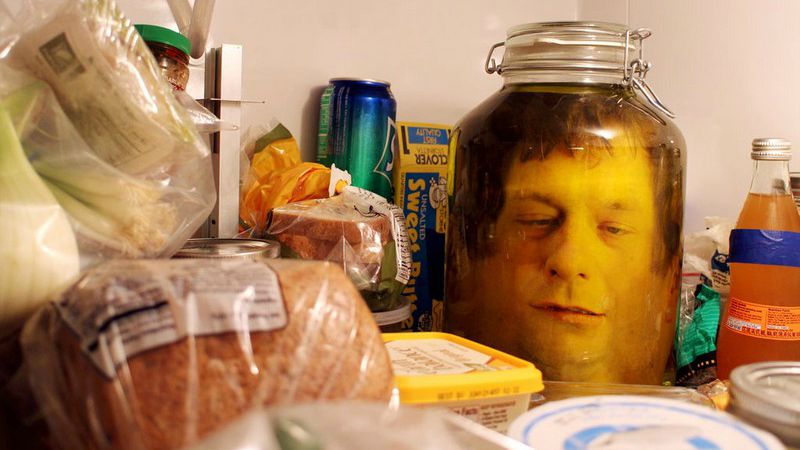
The jar was then sealed. The head in a jar was now ready to be placed inside the fridge to prank hungry foragers.
Place the jar into the fridge. Maybe you hide it behind a few items so that a person has to be digging to find it, or maybe you leave it right up top to scare people as they initially open the fridge.
Have fun scaring your friends with a head in a jar!
Thanks to mikeasaurus for this great project!
Safety Tips for Pranking
Safety is paramount when it comes to executing pranks, especially ones as visually startling as the “head in a jar prank.” While the aim is to create a memorable and fun experience, ensuring the well-being of everyone involved is crucial.
Here are some safety tips to consider when planning your head in a jar prank or any other scare prank.
Know Your Audience
Before setting up the head in a jar prank, take a moment to consider the people who will be exposed to it. It’s essential to ensure that everyone in the prank’s vicinity is in good health and not prone to severe anxiety or heart conditions. Understanding your audience’s tolerance levels and health conditions can help prevent any unintended consequences.
Choose the Right Setting
The location where you decide to place the head in a jar is key to both the prank’s effectiveness and safety. Opt for a setting where the prank can be controlled and where you can quickly diffuse the situation if it becomes necessary. Avoid public spaces where the prank could cause unnecessary panic or distress to unsuspecting individuals.
Timing is Everything
Timing your prank appropriately can significantly reduce the risk of causing undue stress. Avoid executing the head in a jar prank during times of high stress or significant life events. Instead, choose a moment when the prank can be taken in the lighthearted spirit it was intended.
Provide Immediate Reassurance
After someone has been pranked with the head in a jar, it’s important to provide immediate reassurance. Quickly reveal that it’s just a prank and ensure the individual is okay. Keeping the time between the initial shock and the reveal short can help mitigate any negative reactions.
Be Mindful of the Prank’s Intensity
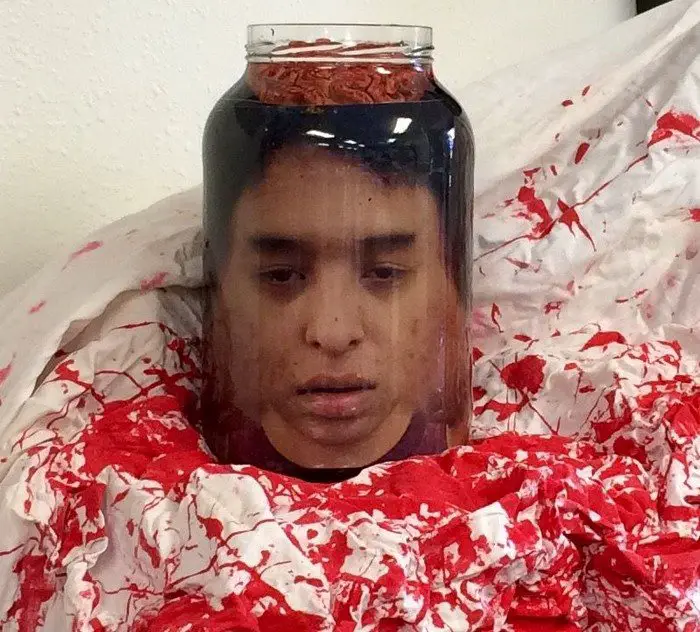
While the head in a jar prank is designed to be a harmless joke, consider the visual impact it may have. Some individuals may have a more intense reaction to graphic images, even if they are fake. Gauge the potential impact of your prank on those you plan to scare and be prepared to apologize and explain if it doesn’t go over well.
Consent and Boundaries
If possible, obtain implicit or explicit consent from those exposed to more intense pranks like the head in a jar. This doesn’t mean ruining the surprise but having a general agreement among friends or family about accepting pranks. Respect people’s boundaries and avoid pranking individuals expressing their discomfort with such activities.
Following these safety tips ensures that your head in a jar prank brings more laughs than harm. Always prioritize the well-being of your friends and family, and remember that the best pranks are those where everyone can enjoy the humor and no one gets hurt.
Psychological Effects of a Good Scare
The allure of a well-crafted scare is a fascinating phenomenon that has intrigued humans for generations. From haunted houses to suspenseful movies and pranks like the head in a jar, the thrill of being scared in a controlled environment offers a unique blend of fear and fun.
This section delves into the psychological effects of a good scare, focusing on how pranks leverage our innate responses for entertainment, specifically the head in a jar.
The Thrill of Fear
The head in a jar prank is a perfect example of how a controlled scare can elicit a complex psychological response. When someone first encounters the head in a jar, their immediate reaction is often one of shock or fear. This is due to the amygdala, a part of the brain that processes emotional responses, triggering a fight-or-flight response.
However, once the initial fear subsides and the person realizes it’s just a prank, the sensation can quickly turn into amusement and laughter. This switch is often accompanied by a release of adrenaline and endorphins, creating a euphoric feeling known as a “thrill.”
Anticipation and Relief
A significant part of the head in a jar prank’s appeal lies in the anticipation of the viewer’s reaction and the subsequent relief when the prank is revealed to be harmless. The buildup to the moment of discovery heightens the emotional impact, making the eventual release of tension more satisfying. This cycle of anticipation and relief is a core component of the psychological appeal of pranks and scary experiences, providing a safe way to explore the sensations of fear and relief without real danger.
Social Bonding
Engaging in pranks like the head in a jar can also foster social bonding. Shared experiences of fear and laughter create common ground and memories that can bring people closer together. The shared experience of setting up the prank, witnessing the reactions, and later laughing about it can strengthen friendships and create a sense of camaraderie among participants. This social aspect is crucial in the enduring popularity of pranks and scares.
The Safe Scare
The head in a jar prank epitomizes the concept of a “safe scare.” People enjoy being scared in a controlled environment because it allows them to experience fear and adrenaline without the risks associated with real danger. Understanding that the scare is not a genuine threat enables individuals to enjoy the physiological and emotional rollercoaster in a safe setting. This controlled environment is key to transforming a terrifying experience into an enjoyable one.
The head in a jar prank leverages our psychological wiring to provide entertainment, social bonding, and a harmless outlet for experiencing fear. By tapping into the thrill of anticipation, the relief of safety, and the joy of shared experiences, this prank becomes more than just a Halloween decoration—it becomes a fascinating study in the human enjoyment of fear.
DIY Guide to Waterproofing Without Lamination
For those eager to execute the perfect head in a jar prank, finding a durable, waterproof solution is key. While lamination is a common go-to for protecting paper from water damage, several DIY methods can be just as effective.
This guide will explore alternative techniques to safeguard your prank, ensuring that the shock value lasts without needing professional lamination services.
Using Clear Packing Tape
Clear packing tape offers a simple and effective method for waterproofing your head in a jar prank. This method involves carefully covering both sides of your printed head with strips of tape, making sure to overlap each strip slightly to avoid any gaps. The key is to smooth out any air bubbles to prevent water from seeping in.
- Lay your printed head on a flat surface.
- Apply clear packing tape across the front side, overlapping each strip.
- Flip the printout over and repeat on the backside.
- Trim the excess tape around the edges, sealing the head within.
Applying Clear Acrylic Spray
For a more seamless finish, consider using a clear acrylic spray. This spray provides a waterproof coating without the bulkiness of tape. It’s perfect for preserving the head in a jar prank’s realistic appearance while protecting it from water damage.
- Place your printed head on a protected surface outdoors or in a well-ventilated area.
- Spray an even coat of clear acrylic sealer over the front of the printout, holding the can approximately 6-12 inches away.
- Allow to dry according to the product’s instructions before applying a second coat.
- Once the front is dry, repeat the process on the back of the printout.
Utilizing Plastic Sleeves
Plastic sleeves are another excellent option for waterproofing your prank. They offer the advantage of being resealable and adjustable. Slide your head printout into a plastic sleeve, and seal the open end with clear tape or a heat sealer for a watertight closure.
- Insert the printed head into a plastic sleeve of appropriate size.
- Use clear tape to securely seal the open end of the sleeve.
- For extra protection, consider sealing the edges with a heat sealer or an iron (with a cloth barrier).
By employing these DIY waterproofing methods, you can ensure your head in a jar prank remains a chilling spectacle for all who dare to glimpse it. Each technique offers a different approach to achieving the same goal: maintaining your prank’s integrity and fright factor without needing professional lamination. Experiment with these methods to find the one that best suits your head in a jar project, and prepare to deliver unforgettable scares.
FAQ About Making a Head in a Jar Prank
What do I need to make a head in a jar prank?
To create a head in a jar prank, you’ll need a few key materials and tools: bond paper, a large jar, food coloring, a digital camera, photo editing software, a computer printer, and access to paper lamination or waterproofing solutions. The process involves taking photos, editing them to fit inside the jar, and ensuring the final product is waterproof before submerging it in a tinted liquid.
How do I choose the right photo for the prank?
Selecting the right photo is crucial for the head in a jar prank. Take a front-facing (portrait) and a side (profile) picture of your subject with good lighting. Ensure the expressions are appropriately eerie or funny, depending on the effect you desire. The realism of the prank largely depends on the quality and editing of these photos.
Can I make the head in a jar prank without a lamination machine?
Yes, you can still create a head in a jar prank without access to a lamination machine. Waterproofing alternatives include using clear packing tape to seal the image or applying a waterproof spray coating. These methods can protect your printout from water damage effectively.
How do I get the head image to fit in the jar properly?
Adjusting the size of your head image is key. After editing the photos to create a seamless frontal image, resize it to fit the interior of your chosen jar. This might involve some trial and error. Curl the laminated or waterproofed photo slightly to slide it into the jar, ensuring it unfolds to fill the space convincingly.
Is the head in a jar prank suitable for all audiences?
While the head in a jar prank is a fantastic Halloween or party trick, it’s not suitable for everyone. Consider the sensibilities and health of your audience before proceeding. It’s essential to avoid presenting the prank to individuals who may have a severe adverse reaction, such as those with heart conditions or a low threshold for shock.
Conclusion
Crafting a head in a jar prank requires creativity, attention to detail, and consideration for the intended audience. This unique project not only adds an eerie touch to any Halloween decoration but also provides a memorable experience for friends and family who encounter it. With the right preparation and execution, the head in a jar prank is guaranteed to be a standout scare.


