Embroidery, an ancient craft, has become a popular hobby and art form. This guide introduces beginners to this hobby, covering basic techniques and tips. With a professional and human touch, we’ll explore the essential steps to start your embroidery journey.
Contents
- 1 Brief Background on Embroidery
- 2 Gathering Your Embroidery Supplies
- 3 Basic Embroidery Stitches
- 4 Transferring Your Design to Fabric
- 5 Starting Your First Embroidery Project
- 6 Caring for Your Embroidery Work
- 7 FAQ on Embroidery Basics
- 7.1 What is the best fabric for beginner embroiderers?
- 7.2 Which needle should I use when starting?
- 7.3 Can I use any thread for embroidery?
- 7.4 How do I transfer my design onto the fabric?
- 7.5 What are the basic stitches I should learn first?
- 7.6 How do I care for my finished embroidery work?
- 7.7 Can I still fix my embroidery if It gets damaged?
- 7.8 Is embroidery an expensive hobby?
- 7.9 Does it take a day to complete any embroidery projects?
- 7.10 Can embroidery be done by machine?
- 8 Conclusion
Brief Background on Embroidery
Embroidery, a form of art that decorates fabric with needle and thread, boasts a rich history. This section delves into the origins and evolution of embroidery, highlighting its significance through the ages and its role in contemporary craft.
Throughout history, embroidery has been a symbol of wealth and status. In medieval and Renaissance Europe, it adorned royal garments and church vestments. The Industrial Revolution brought significant changes. Machines for mass production emerged, making embroidery accessible to more people.
Today, embroidery is experiencing a resurgence. It’s a popular hobby and a medium for artistic expression. Modern embroidery blends traditional techniques with contemporary designs. This fusion has attracted a new generation of enthusiasts eager to explore the craft’s creative potential.
Embroidery’s journey from ancient craft to modern art form is a testament to its enduring appeal. It offers a unique way to express creativity and preserve cultural heritage.
Gathering Your Embroidery Supplies
Embroidery requires specific tools and materials. This section provides a comprehensive guide for beginners on what to gather before starting their embroidery journey.
Embroidery Needles
Needles are the backbone of embroidery. They come in various sizes and types, each suited for different fabrics and threads. For instance, sharp needles are ideal for tightly woven fabrics, while blunt needles work best with loosely woven materials.
The thickness of the thread also dictates needle choice; finer threads require smaller needles. Beginners should consider a variety pack to experiment with different sizes.
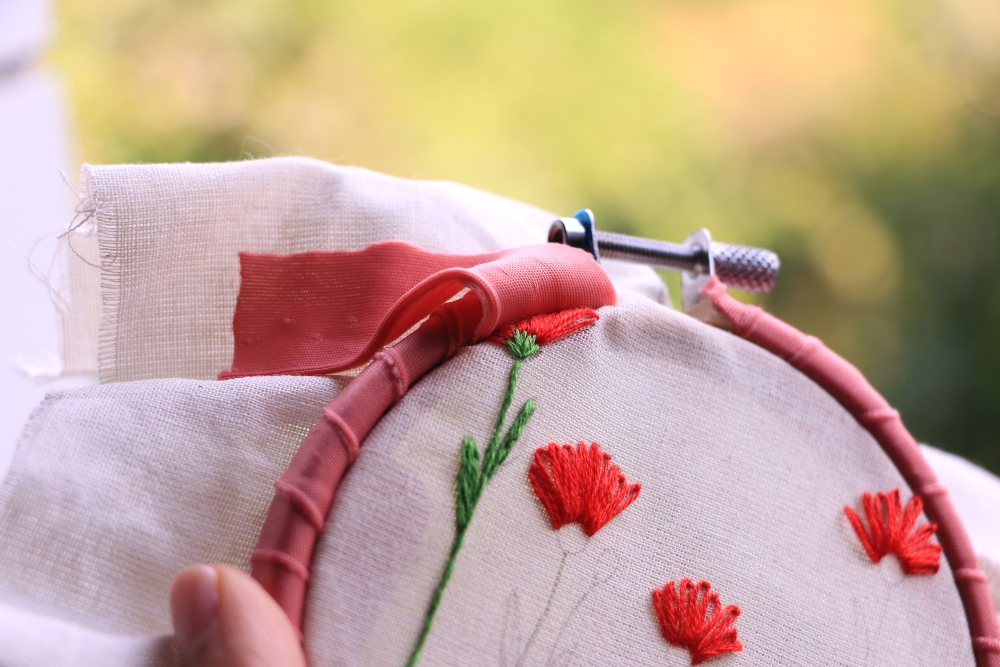
Embroidery Hoops
Hoops are critical for maintaining fabric tension. They come in two parts: an inner ring and an outer ring with a tightening mechanism. Fabrics are placed between these rings, keeping the surface taut and smooth for stitching.
Hoops are available in different materials like wood, plastic, or metal and in various diameters. Larger hoops are useful for big projects, while smaller ones offer more control for detailed work. Beginners should try a few sizes to find what feels most comfortable.
Scissors
A good pair of scissors ensures clean cuts of thread and fabric. Embroidery scissors are smaller and sharper than regular scissors, with fine points for precision cutting. It’s important to have a dedicated pair for embroidery to maintain sharpness.
Some scissors also have curved tips, ideal for snipping threads close to the fabric without damaging it. Quality scissors make a noticeable difference in the ease and neatness of embroidery work.
Fabric Selection
Fabric is the canvas for embroidery. For beginners, even-weave fabrics like cotton or linen are recommended. These fabrics have an even distribution of threads, making it easier to create uniform stitches.
Aida cloth, commonly used in cross-stitching, is also an excellent option for its easy-to-count square grid pattern. It’s essential to choose a fabric that’s not too loose or tight, as this can impact the ease of stitching and the final appearance of the work.
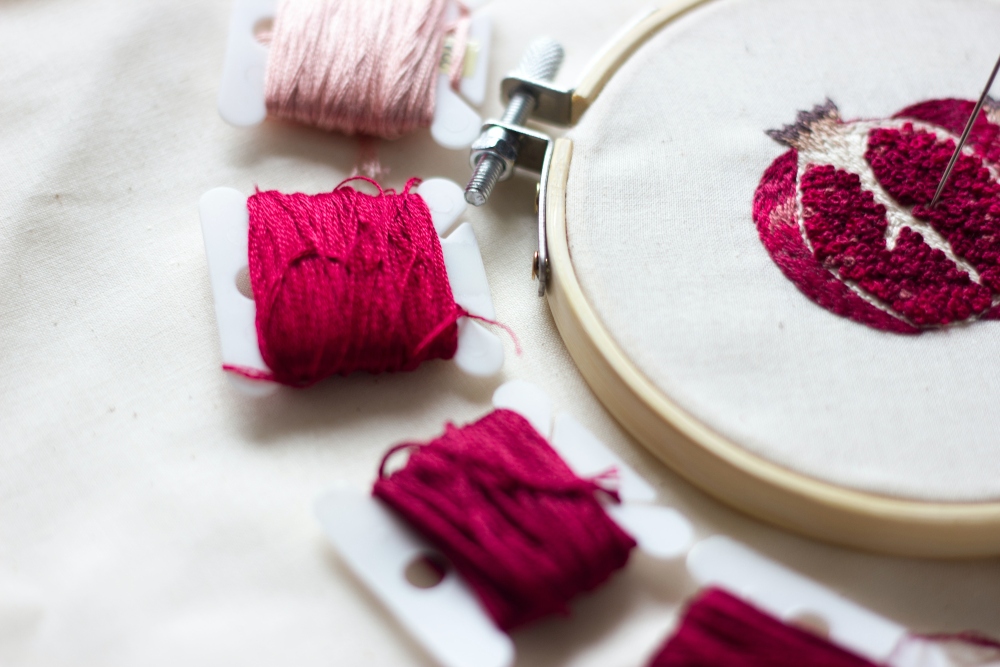
Thread Choices
Embroidery floss, the thread used in embroidery, comes in various colors and textures. Cotton floss, known for its smooth texture and vibrant colors, is a favorite among beginners.
It’s typically composed of six strands, which can be separated to adjust the thickness of the stitches. Silk and rayon floss are also available, offering different textures and sheens. Experimenting with different types of threads can add depth and character to your embroidery.
Additional Supplies
Beyond fabric and thread, a few additional tools can enhance your embroidery experience:
- Thimble: A thimble protects your finger from getting pricked by the needle. It’s especially useful when working with tough fabrics.
- Storage Box: Keeping your supplies organized is key. A storage box or organizer can help you keep track of your needles, threads, and other tools.
- Embroidery Stabilizer: This is placed behind the fabric to provide additional support, especially for stretchy or delicate fabrics.
- Marking Tools: Pencils or water-soluble markers transfer or draw designs onto the fabric before stitching.
Basic Embroidery Stitches
Embroidery stitches are the building blocks of any embroidery project. Each stitch offers a unique texture and appearance, allowing for endless creativity. Beginners should start by mastering a few basic stitches, which form the foundation for more complex designs.
This section introduces ten fundamental embroidery stitches, perfect for those just starting their journey in this craft.
Running Stitch
The Running Stitch is one of the most basic and versatile embroidered stitches. It’s characterized by a simple, in-and-out motion, creating a dashed line effect. This stitch often outlines designs, creates straight or curved lines, and adds fine details.
To execute the Running Stitch, push the needle up through the fabric, move forward a small distance, and then push the needle back down. Continue this process, keeping the stitches and gaps uniform for a neat appearance. The Running Stitch is also a great way to practice maintaining consistent tension and stitch length.
Backstitch
The Backstitch is a strong, continuous stitch perfect for outlining and adding definition to designs. Unlike the Running Stitch, the Backstitch creates a solid line with no gaps.
To begin, bring the needle up through the fabric. Move a stitch length forward and push the needle down. Then, bring the needle up a stitch length ahead of the last stitch and return to the end of the previous stitch. This ‘backtracking’ creates a continuous line.
The Backstitch is ideal for clean, crisp lines and is often used for text and outlines in embroidery designs.
Split Stitch
The Split Stitch creates a textured, braided look, ideal for outlining and filling designs. It involves splitting the thread of the previous stitch to create a continuous line.
Bring the needle up through the fabric and make a small stitch forward. Then, bring the needle up again halfway through the previous stitch, literally splitting the thread, and continue forward. This technique creates a chain-like effect, adding depth and dimension to the embroidery.
The Split Stitch is particularly effective for curved lines and detailed work, allowing smooth curves and fine lines.
Stem Stitch
The Stem Stitch, named for its common use in embroidering plant stems, offers a twisted, rope-like appearance. It’s excellent for curvy lines, like plant stems and flower outlines.
Start by bringing the needle up through the fabric. Make a small stitch forward, but leave a small loop instead of pulling the thread through. Bring the needle up again a short distance from where the thread emerges, catching the loop. Continue this process, keeping the stitches even and the tension consistent.
The Stem Stitch creates an elegant, slightly raised line that adds texture and interest to any embroidery design.
French Knot
The French Knot is a decorative stitch that creates a small, raised dot, perfect for adding texture or filling small areas. This stitch can be tricky for beginners but adds a beautiful dimension once mastered.
To make a French Knot, bring the needle up through the fabric. Hold the thread taut and wrap it around the needle two or three times. While holding the wraps, insert the needle back into the fabric close to where it came up, but not through the same hole. Gently pull the needle through while holding the wraps, creating a tight knot on the surface.
French Knots are great for flower centers, animal eyes, or adding texture to your design.
Satin Stitch
The Satin Stitch fills areas with smooth, lustrous thread coverage. It’s composed of straight stitches laid next to each other, covering an entire area.
To perform a Satin Stitch, start by outlining your shape with a split or backstitch. Bring the needle up on one side of the shape and down on the opposite side, creating a straight stitch across the area. Continue making parallel stitches to fill the shape and keep them close together without overlapping. The key to a beautiful Satin Stitch is maintaining even tension and stitch length, resulting in a smooth, satin-like finish.
This stitch is ideal for filling hearts, leaves, petals, or any design that requires a solid block of color.
Chain Stitch
The Chain Stitch creates a series of looped stitches that resemble a chain, ideal for outlining and decorative lines.
To begin, bring the needle up through the fabric. Then, insert the needle back into the same hole, bringing it up a short distance away while keeping the thread under the needle tip. Pull the needle and thread through, forming a loop. Continue this process, inserting the needle back into the end of the previous loop.
The Chain Stitch is versatile and used for both straight and curved lines. It adds a lovely textured effect and is popular in traditional and contemporary embroidery designs.
Lazy Daisy
The Lazy Daisy Stitch, a variation of the Chain Stitch, is used to create individual looped petals, often resembling a daisy. It’s perfect for floral designs and adding small, delicate details.
Start by bringing the needle up through the fabric at the center of where a petal will be. Make a small loop by inserting the needle back into the same hole and bringing it up at the petal’s tip, keeping the thread under the needle. Pull the needle through to create a loop, then anchor the petal with a small stitch at the tip. Repeat this process to create multiple petals, forming a flower.
The Lazy Daisy Stitch adds a charming and whimsical touch to any embroidery project.
Blanket Stitch
The Blanket Stitch is a sturdy, decorative stitch commonly used for edging. It’s perfect for finishing the edges of fabric, creating borders, or as a decorative element in embroidery.
Bring the needle up from the back of the fabric at the edge. Move a short distance along the edge, insert the needle, and bring it up a small distance away, keeping the thread under the needle. This creates a loop along the edge. Continue this process, maintaining equal spacing and stitch length for a uniform look.
The Blanket Stitch adds a decorative touch and reinforces the fabric edges, preventing fraying.
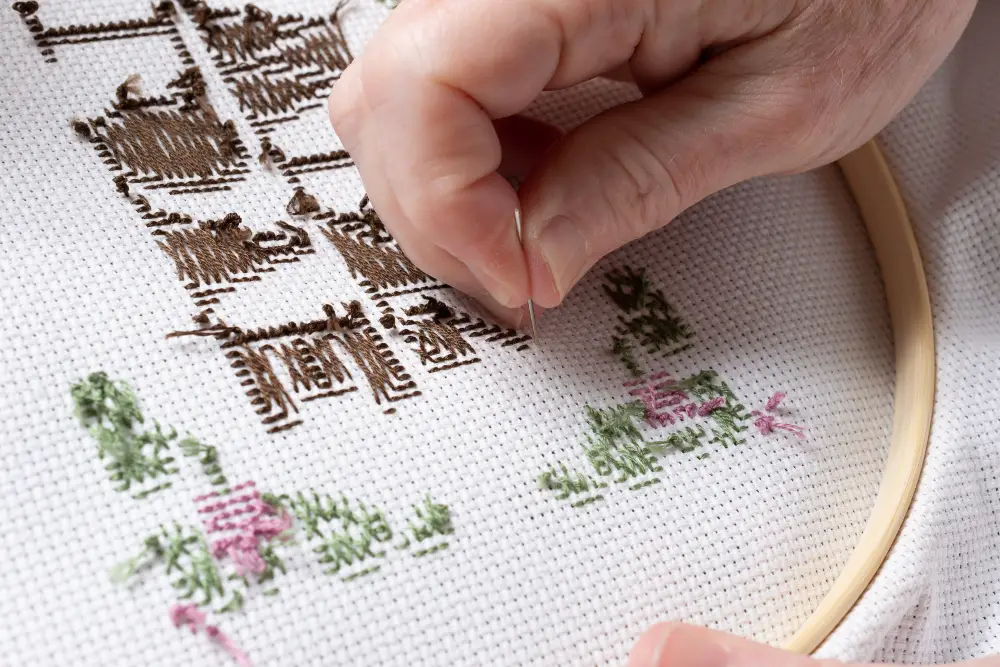
Cross Stitch
Cross Stitch is a popular form of counted-thread embroidery known for its X-shaped stitches. It’s often used to create detailed designs and patterns, especially in pixel art style.
To do a Cross Stitch, create a diagonal stitch over a block of fabric threads. Then, cross over it with another diagonal stitch in the opposite direction, forming an ‘X.’ The key is to keep all top stitches crossing in the same direction for a uniform appearance. Cross stitching is typically done on even-weave fabric like Aida cloth, which makes counting threads and maintaining uniformity easier.
This stitch is great for creating intricate designs and is a favorite among beginners and advanced embroiderers.
Transferring Your Design to Fabric
Transferring your design onto the fabric is a crucial step in embroidery. This process ensures that your stitching follows the intended pattern accurately. There are various methods to transfer designs, each suited to different types of projects and fabrics. Here’s a guide to the most common techniques:
Tracing Method
If your fabric is semi-transparent, you can use the tracing method. Place the fabric over your design, which should be on a well-lit surface or a lightbox. Use a water-soluble pen or pencil to trace the design onto the fabric carefully. This method is best for simple designs and light-colored fabrics.
Transfer Paper Method
For darker fabrics, transfer paper is ideal. Place the transfer paper between the design and the fabric, then trace the design with a stylus or empty ballpoint pen. The pressure transfers the design onto the fabric. Be sure to use transfer paper suitable for fabrics, available in various colors for fabric shades.
Iron-On Transfer Method
Iron-on transfers are convenient for complex designs. Print or purchase a design on iron-on transfer paper, then place it design-side down on your fabric. Iron over the paper following the manufacturer’s instructions, transferring the ink onto the fabric. This method works well for detailed designs but is permanent, so precision is key.
Stabilizer Transfer Method
You can print or draw your design directly onto a stabilizer. Then, adhere the stabilizer to your fabric. This method is great for stretchy or delicate fabrics, providing extra stitching support.
Freehand Drawing
For artistically inclined people, freehand drawing directly onto the fabric with a fabric marker or pencil is an option. This allows for maximum creativity and customization.
Regardless of the chosen method, ensuring the design is centered and properly aligned on your fabric is important. Always test your transfer method on a scrap piece of fabric first to ensure it works as expected. With the design accurately transferred, you can proceed confidently to the embroidery itself.
Starting Your First Embroidery Project
Starting your first embroidery project is an exciting step in your creative journey. Here’s a guide to help you begin with confidence and ease.
Selecting a Design
Choose a simple design for your first project. Look for patterns with basic shapes and a limited number of stitches. Simple floral designs, geometric shapes, or alphabets are great starting points. You can find patterns online, in embroidery books, or design your own.
Preparing Your Fabric
Choose an even-weave fabric like cotton or linen. Cut the fabric to size, ensuring it’s large enough for your hoop and design with some extra margin. If the fabric is wrinkled, iron it for a smooth surface.
Transferring the Design
Transfer your chosen design onto the fabric using a method that suits your design type and complexity. Ensure the design is centered and visible.
Setting Up Your Embroidery Hoop
Place your fabric in the embroidery hoop. The fabric should be taut but not overly stretched. The hoop keeps the fabric steady and makes stitching easier.
Threading the Needle and Starting to Stitch
Choose an embroidery thread color that complements your design. Cut a thread length (not too long to avoid tangling) and thread your needle. Start with one of the basic stitches you’ve learned. Remember to make your stitches even and not too tight.
Finishing and Displaying Your Work
Once your design is complete, remove it from the hoop and iron it gently on the reverse side to remove any wrinkles. You can frame your embroidery, sew it onto an item like a bag, or keep it as a memento for your first project.
Starting with a manageable project helps build confidence and skills. Remember, the goal is to learn and enjoy the process. Each stitch brings you closer to mastering the art of embroidery.
Caring for Your Embroidery Work
Caring for your embroidery work is essential to preserve its beauty and longevity. Proper maintenance ensures that your creations remain vibrant and intact for years. Here’s a guide on how to care for your embroidered pieces:
Cleaning Embroidery
Embroidery requires gentle handling during cleaning to maintain its integrity. Start by filling a basin with cool water and adding a small amount of mild, non-bleaching detergent. Submerge the embroidery, gently swishing it around to loosen any dirt.
Avoid aggressive rubbing or agitation, as this can cause the stitches to loosen or the fabric to stretch. For heavily soiled areas, use a soft-bristled brush to lightly scrub. Spot cleaning is recommended if your embroidery uses delicate threads like silk or metallic or if it’s an antique piece.
Dab the dirty areas with a damp cloth dipped in soapy water, then with a cloth dipped in clean water. Avoid soaking these delicate pieces entirely, as water can damage them.
Drying and Ironing
After washing, avoid wringing out the craft, as this can distort the fabric and stitches. Instead, gently press the piece between your hands to remove excess water. Spread a clean, dry towel on a flat surface and lay the embroidery on it.
Roll the towel and embroidery together, pressing lightly to absorb water. Unroll and remove the embroidery, then lay it flat on a dry towel to air dry completely. Avoid hanging it up to dry, as gravity can pull the stitches and fabric out of shape. When ironing, place the embroidery face down on a padded surface, like an ironing board, and cover it with a pressing cloth or lightweight cotton fabric. This protects the stitches from the direct heat of the iron.
Use a low to medium heat setting, gently press the iron over the cloth without dragging. This helps smooth out any wrinkles without damaging the embroidery. Proper drying and ironing techniques help preserve the shape and appearance of your embroidered piece.
Storing Embroidery
Proper storage is key to preserving the quality of embroidery. First, ensure that the item is clean and completely dry. Exposure to moisture can lead to mold or mildew.
Choose a storage location that’s cool and dry, avoiding areas with high humidity or temperature fluctuations, like attics or basements. Direct sunlight can cause the colors in the thread to fade over time, so it’s best to store embroidery in a dark place.
If you need to fold the embroidery, do so in a way that avoids creasing the embroidered areas. Placing acid-free tissue paper between the folds can help prevent creasing and protect the stitches.
Alternatively, roll the embroidery around a cardboard tube wrapped in acid-free paper. For extra protection, especially for heirloom or delicate pieces, wrap the embroidery in a soft, breathable fabric like cotton or muslin. Avoid using plastic bags for long-term storage, as they can trap moisture and cause damage.
Displaying Embroidery
Displaying embroidery can add a personal touch to your space, but it’s important to do so in a way that protects the piece. Framing is a popular choice. When framing, use acid-free mats and UV-protective glass to safeguard against fading and environmental damage.
Ensure the fabric is properly stretched and mounted to prevent sagging or distortion. It’s best to avoid placing the embroidery in direct sunlight or areas with high humidity, like bathrooms or kitchens, as these conditions can cause fading and fabric deterioration.
Regular maintenance of the display is also important. Dust the frame and glass periodically to keep it clean and clear. If the frame is opened or the embroidery is handled, ensure clean, dry hands or use cotton gloves to avoid transferring oils or dirt to the fabric. Properly displaying your embroidery showcases your work and helps preserve it for future enjoyment.
Taking good care of your embroidery work will keep it looking as beautiful as the day it was finished. Regular maintenance and careful handling are key to preserving these delicate art pieces.
FAQ on Embroidery Basics
What is the best fabric for beginner embroiderers?
Beginners should start with even-weave fabrics like cotton or linen. These fabrics are easier to work with and show stitches clearly.
Which needle should I use when starting?
The needle size depends on your fabric and thread thickness. A size 7 or 8 embroidery needle is a good start for most beginners.
Can I use any thread for embroidery?
It’s best to use threads specifically made for embroidery, like cotton floss, as they are designed to be durable and colorfast.
How do I transfer my design onto the fabric?
Popular methods include tracing, using transfer paper, iron-on transfers, or drawing directly on the fabric with a water-soluble pen.
What are the basic stitches I should learn first?
Start with simple stitches like the running stitch, backstitch, and satin stitch. These form the foundation for more complex designs.
How do I care for my finished embroidery work?
Hand wash gently with mild detergent, air dry, and iron on the reverse side. Avoid drying the fabric under the sun to prevent color washing.
Can I still fix my embroidery if It gets damaged?
For minor damage like loose threads, try fixing it at home. For major damage, consider consulting a professional.
Is embroidery an expensive hobby?
Embroidery can be quite affordable. Start with basic supplies and expand as you gain more experience.
Does it take a day to complete any embroidery projects?
Expect to take a considerable time learning about the basics when starting. Eventually, working on simple designs will only take a couple of hours to complete.
Can embroidery be done by machine?
While embroidery is done with unique sewing machines, it is only used for complicated projects. Doing embroidery by hand is still the best method for beginners.
Conclusion
Embroidery is an art that offers endless possibilities for creativity and personal expression. This guide for beginners lays the foundation for a fulfilling journey into embroidery. You just need knowledge of the basic stitches and the right materials to start working on incredible crafts.


