
Here’s a fun project idea for parents. If you’re one of the many parents who are constantly looking for educational and functional toys for their kids, this DIY articulated grabber is for you. It’s a great way to teach your kids about linkage, among other things.

This project combines Science, Technology, Engineering, Math, and Art. Not only is the end-product useful, but it’s also learning-based. This is an inexpensive project and it will be fun making this over the weekend.
Furthermore, this also works well for adults who need to pick something up from the floor without having to bend down. The grabber can extend your reach to almost 30 inches. This means you don’t have to stand on a chair to get something way beyond your reach!
Contents
Crafting an Articulated Grabber
Materials
- Cardboard (unbent and clean)
- Masking tape
- 5” Metal fasteners
- 1/8” x 3.5” Rubber band
- String
- craft sticks, foam, paperclips, or other materials for improving the grabber’s grip
- assorted objects to pick up
Tools
- Ruler
- Scissors
- Sharpened pencil
Instructions
Step 1: Cut the Cardboard
- Using the ruler and pencil, draw two identical pieces of cardboard, each about 12 inches long and 1 inch wide.
- Cut out the pieces with scissors. These will serve as the arms of your grabber.
Step 2: Create the Gripping Mechanism
- At one end of each cardboard strip, attach additional materials such as foam or craft sticks to create a gripping surface. This can be done with masking tape. Ensure the materials are securely attached to prevent slipping.
Step 3: Attach the Metal Fasteners
- About 1 inch from the opposite end of where you attached the gripping materials, make a hole in the center of each cardboard strip using the sharpened pencil.
- Insert a metal fastener through both holes, joining the two strips together. This creates a pivot point for the grabber.
Step 4: Adding the Rubber Band
- Attach the rubber band to both ends of the cardboard strips, just above the gripping mechanism. This creates tension that will help the grabber to open and close.
Step 5: String Mechanism
- Tie a piece of string around the pivot point where the metal fastener connects the two pieces.
- Ensure the string is long enough to reach the end of the grabber and back to the user’s hand.
Step 6: Final Assembly
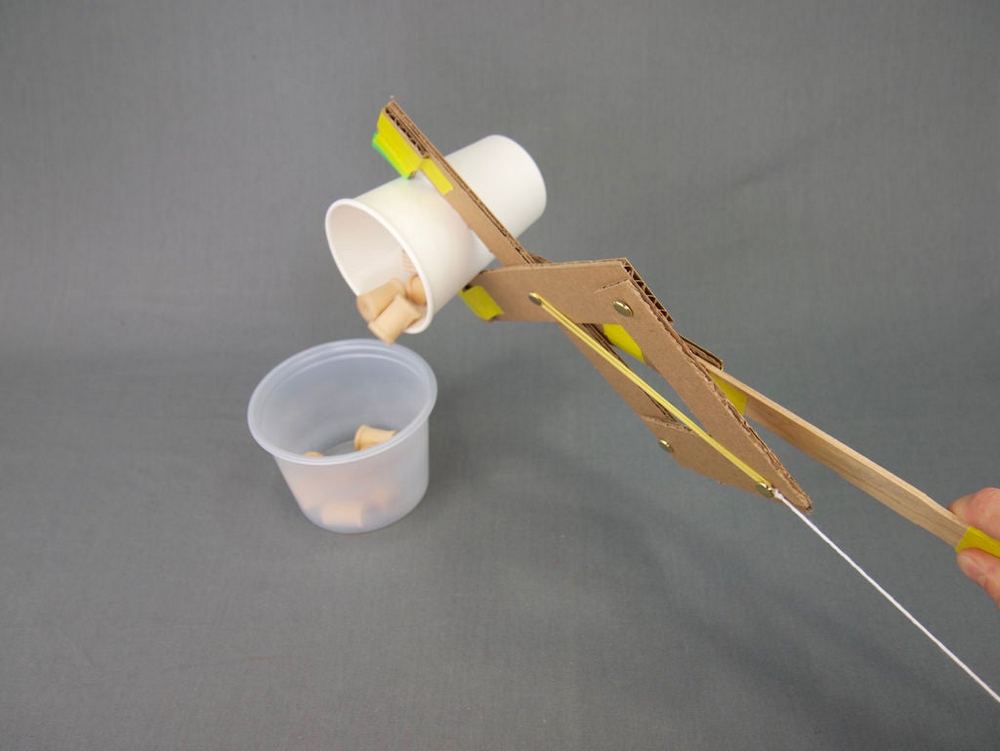
- To operate the grabber, hold the end without the gripping mechanism. By pulling the string, the arms should come together, allowing the grip materials to pick up objects.
- Secure the string to the back of the grabber with a small piece of masking tape when not in use.
Step 7: Test Your Grabber
- Test the grabber with assorted objects to pick up. Experiment with different objects to see how well your grabber performs.
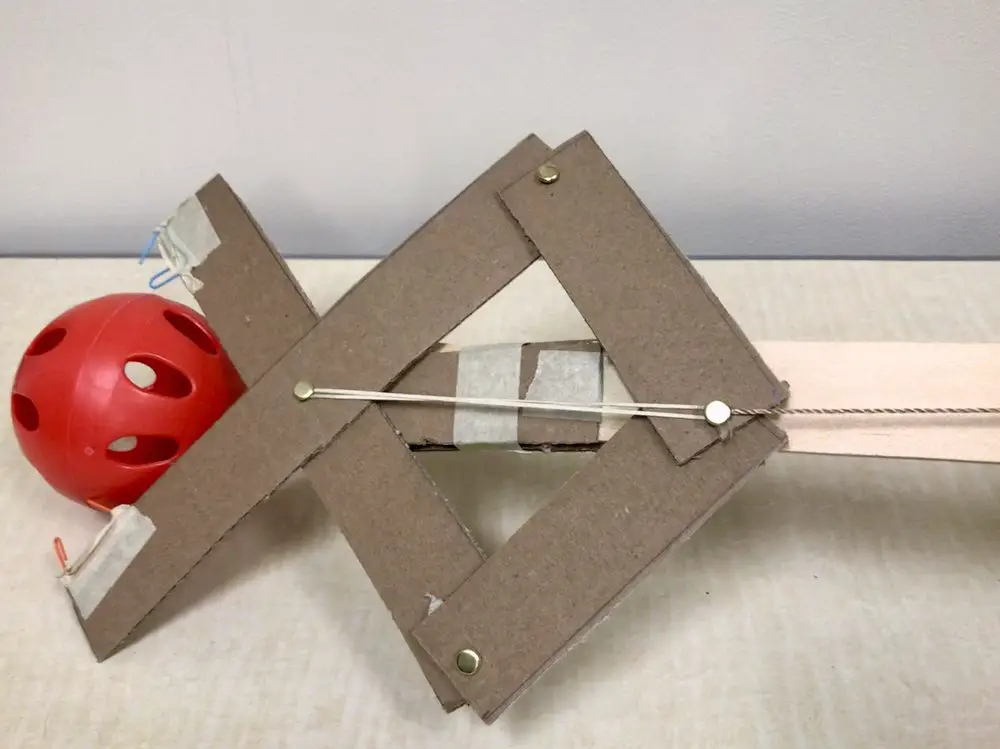
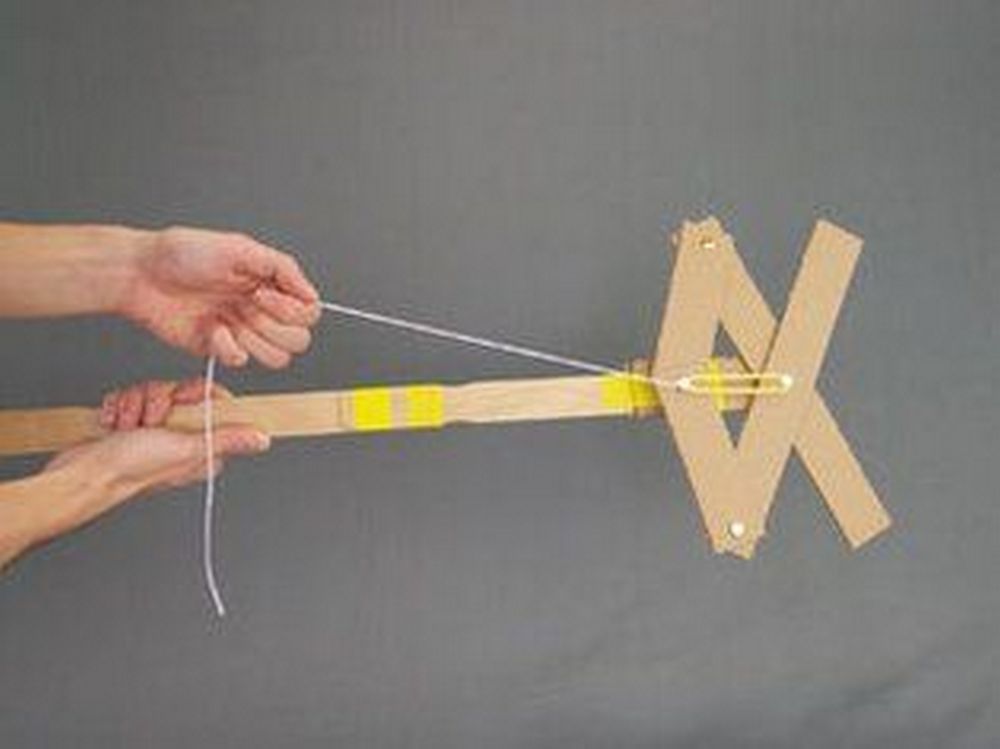
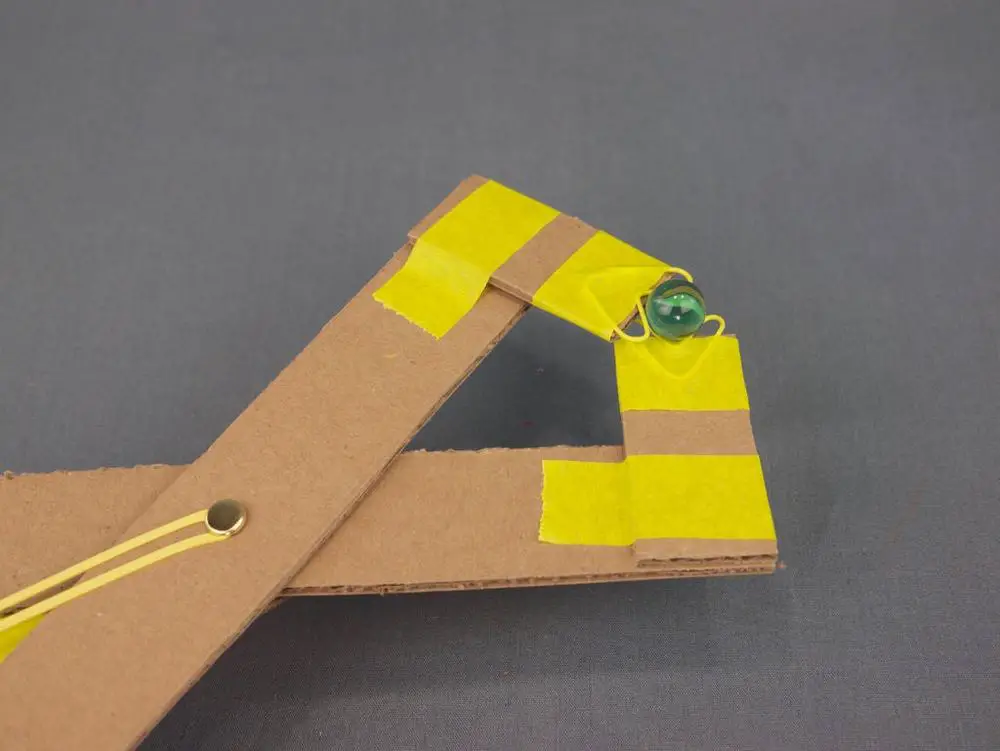
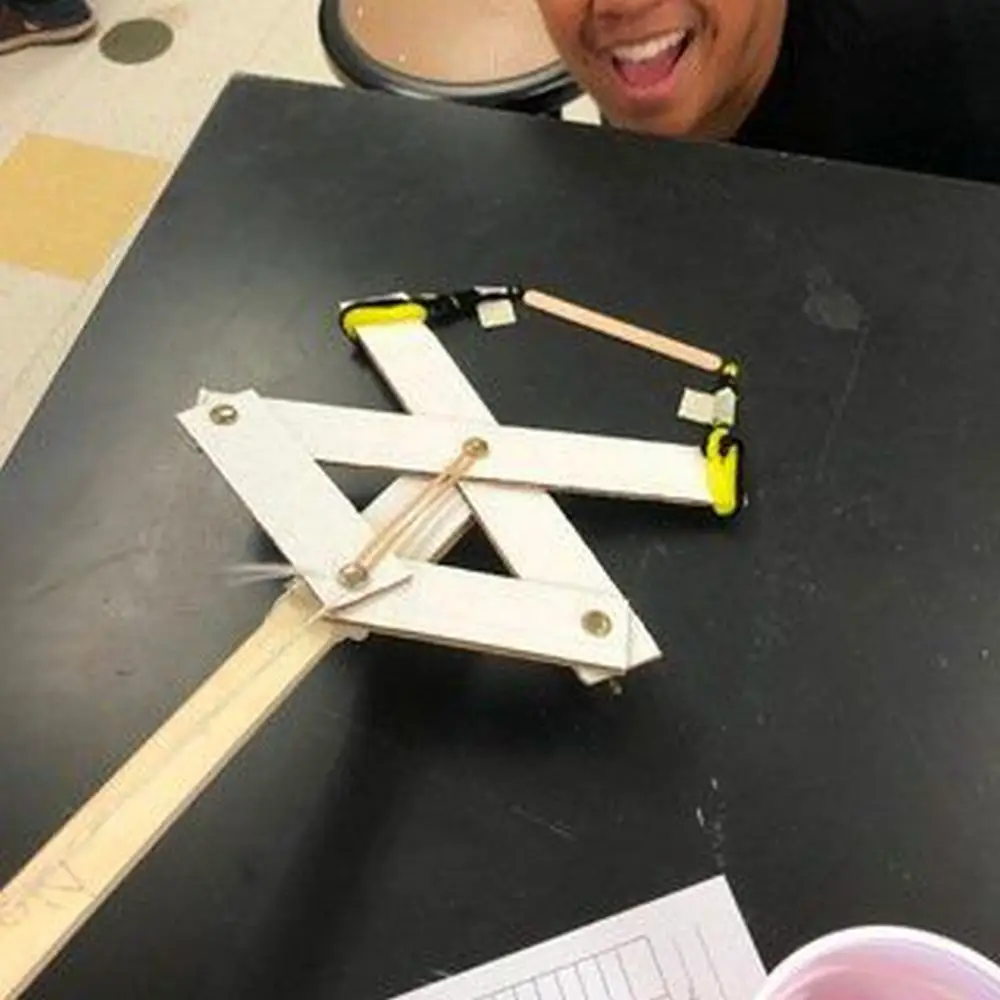
DIY articulated grabber design ideas
Click on any image to start the lightbox display. Use your Esc key to close the lightbox.

Below is a video guide if you need visual instructions on making your articulated grabber.
Articulated Grabber Challenges and Games
Engaging in challenges and games with an articulated grabber can transform a simple DIY project into hours of entertainment and learning. These activities not only test the effectiveness of your homemade tool but also develop fine motor skills, problem-solving abilities, and creativity. Below are some fun and interactive ways to use your articulated grabber, perfect for individuals or groups of all ages.
Grabber Relay Race
Objective: Complete a relay race where participants must use the grabber to carry objects from one point to another.
How to Play:
- Set up a course with a start and finish line.
- Place objects at the starting point that must be transported to the finish line using the articulated grabber.
- Participants take turns, or compete in teams, to move all objects as quickly as possible.
- The fastest individual or team wins.
Precision Pickup Challenge
Objective: Test your precision by picking up small or delicate objects.
How to Play:
- Arrange a variety of small objects on a table or the floor. These can range from marbles to paper clips.
- Each participant uses the articulated grabber to pick up the objects.
- The challenge can be timed, or you can compete to see who picks up the most items in a set period.
Creative Construction
Objective: Use the grabber to build a structure with blocks or other construction materials.
How to Play:
- Provide building materials such as blocks, Legos, or cups.
- Participants use the articulated grabber to stack and arrange these items into a structure.
- This can be a free-form activity or a competition to see who can build the tallest or most creative structure within a time limit.
Articulated Grabber Tag
Objective: A twist on the classic game of tag, using the grabber to “tag” other players.
How to Play:
- Designate one player as “it” who must use the grabber to tag others.
- If a player is tagged by the grabber, they become “it.”
- This version adds a fun challenge and encourages players to be creative with their movements.
Object Sorting Race
Objective: Sort assorted items into designated categories as fast as possible.
How to Play:
- Prepare a mixed collection of objects that can be sorted into categories (e.g., by color, size, or type).
- Participants use the articulated grabber to sort the items into separate containers.
- The first to accurately complete the sorting wins.
Incorporating games and challenges with the articulated grabber not only provides endless entertainment but also enhances the educational value of the project. These activities foster a deeper understanding of mechanical principles, improve dexterity, and promote teamwork. So, grab your DIY articulated grabber and start the fun!
Customization and Personalization Tips for Your Articulated Grabber
Creating an articulated grabber is just the beginning. The real fun begins when you start to customize and personalize it to make it uniquely yours. Customization not only adds a personal touch but also can improve the functionality and feel of your grabber.
Here are some creative ideas to make your articulated grabber stand out.
Color It Up
- Make It Pop with Paint: Transform your articulated grabber with a splash of color. Use acrylic paints or spray paint to add designs, patterns, or even your favorite colors. For a more durable finish, apply a clear sealant over the paint.
- Decorative Tape: Decorative masking tape or washi tape is an easy and removable way to add patterns and color. Wrap the handles or the entire grabber for a custom look.
Add Some Texture
- Grip Enhancements: Enhancing the grip not only personalizes your grabber but also makes it more functional. Wrap the handles with rubber grips, foam, or even plaited yarn for a comfortable and secure hold.
- Gripper Customization: Modify the gripping end with different materials to pick up objects more effectively. Depending on the objects you’re targeting, materials like soft rubber, foam, or even hook-and-loop strips can add versatility.
Functional Add-ons
- Magnetic Tips: Adding small magnets to the tips of your articulated grabber can turn it into a tool perfect for picking up metallic objects like screws, nails, or paperclips.
- Extendable Cord: Attach a retractable cord to your grabber, so it’s always within reach when you need it. This is especially handy if you use the grabber to pick things up frequently.
Personal Flair
- Stickers and Decals: Personalize your grabber with stickers, decals, or even temporary tattoos. This is a great way to showcase your interests, from favorite bands to beloved cartoon characters.
- Name It: Give your articulated grabber its own identity by naming it. Use paint or permanent markers to add the name creatively to your tool.
Making It Educational
- Learning Labels: If the articulated grabber is part of a learning activity, add labels to its parts to teach about mechanics and engineering principles. It’s a great way to combine fun with education.
Lighting It Up
- LED Accents: Adding LED lights can illuminate your path or the object you’re trying to grab, especially in dimly lit areas. Small, battery-operated LED strips can be attached along the arms or near the grippers for that cool, futuristic look.
- Glow-in-the-Dark: Paint or tape with glow-in-the-dark features can make your grabber easy to find at night. This is particularly useful for camping trips or nighttime adventures in the backyard.
Sound Effects
- Add Some Sound: Integrating a small sound module from a greeting card or toy can make your grabber more interactive. Imagine your grabber making a robotic sound every time you grab something!
Eco-Friendly Touches
- Sustainable Materials: For those conscious about the environment, replacing parts of the grabber with recycled or sustainable materials is a step towards eco-friendliness. Bamboo, recycled plastics, or biodegradable filaments for 3D-printed parts can be great choices.
Smart Grabber
- Incorporate Technology: For the tech-savvy, adding sensors like pressure sensors on the grip can help indicate when you’ve successfully grabbed an object. A small Arduino or Raspberry Pi could turn your grabber into a smart device with endless programming possibilities.
Thematic Designs
- Theme It: Design your grabber around a theme you love, such as your favourite movie, book, or video game. This could involve specific colour schemes, decals, and even modifications that mimic gadgets from your chosen theme.
Interchangeable Grips
- Swap It Out Creating interchangeable grips for different tasks can vastly increase the versatility of your grabber. Magnetic attachments can allow for easy swapping between foam, rubber, or even claw-like grips for various uses.
Enhanced Durability
- Reinforce the Structure: Strengthen your grabber by reinforcing it with metal strips or carbon fibre along its length. This can increase its weight-bearing capacity and overall lifespan.
Creative Carrying Solutions
- Carry in Style: Design a custom carrying case or strap for your articulated grabber. This not only makes it easy to transport but also protects it from damage when not in use.
Educational Customization
- Interactive Learning: Attach educational tags that explain the physics behind the grabber’s mechanism, such as leverage and fulcrum points, to make it a more effective learning tool.
Your DIY articulated grabber doesn’t have to be just another tool; it can be a reflection of your personality and creativity. Through customization and personalization, you can transform it into something uniquely yours while enhancing its functionality.
Conclusion
Crafting an articulated grabber from scratch is a rewarding experience that blends creativity with practical learning. Through customization, this simple tool transforms into a personalized extension of one’s own ingenuity, catering to both fun and functional needs. It stands as a testament to the joy of DIY projects, where the process of creation is just as valuable as the finished product.
We have many fun project for kids. Check out our play foam guide next!


