Planning on going somewhere far on your bike? Pack the essentials in your own bicycle frame bag!
Cycling boosts energy, improves aerobic and cardio-vascular fitness, builds muscle, lowers blood pressure, and improves coordination. Sneaking the health benefits of biking into your daily commute is so easy it feels like cheating on your exercise routine! In fact, riding a bike to any destination makes things a lot more fun.
That’s why bike-packing is a fairly common activity for those who want to get away from the hustle and bustle of fast-paced living. It’s what long car drives are to bike rides – one simply hops on his bike and pedals away to go camping. It’s therapeutic and relaxing, with a strong breeze and warm sunshine.
However, there’s a twist. Because one is on a bike and not a car, it’s important to travel light. A small “camping” bag is attached to the bike’s frame, holding the essentials. And because not all bikes are created equal, bike owners opt to customize their own bike frame bags.
These bags can be made in such a way that they fit the exact dimensions of the bike’s frame. Additionally, making your own bag would mean you get to maximize storage space. If you think this is awesome, go ahead and try it. Your biker friends would surely love one, as well.
Because the bike bag is fully customizable, you get to choose the dimensions that you want to maximize storage space.
There are so many great DIY bicycle frame bag designs out there that it can be tough to know where to start. But never fear! We’ve rounded up some of the coolest and most inspiring designs we could find, to get your creative juices flowing.
Whether you’re looking for a simple and sleek bag to keep your essentials close at hand, or something a little more flashy to show off your personality, there’s bound to be a design here that speaks to you. So get ready to get crafting, and enjoy the satisfaction of having made your very own bicycle frame bag!
Contents
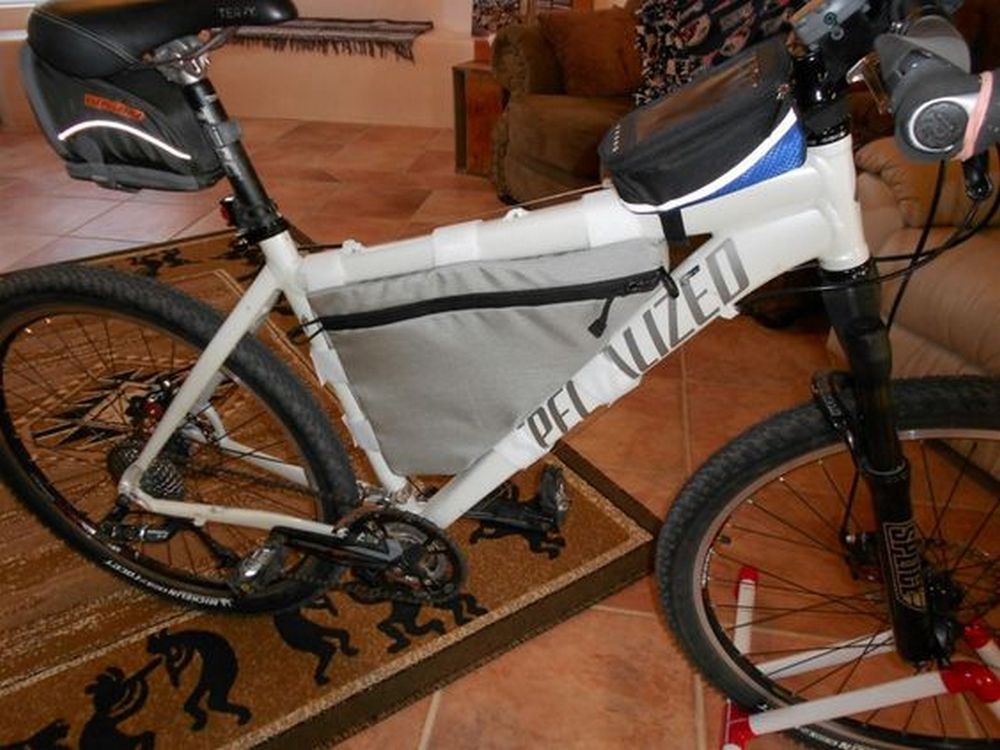
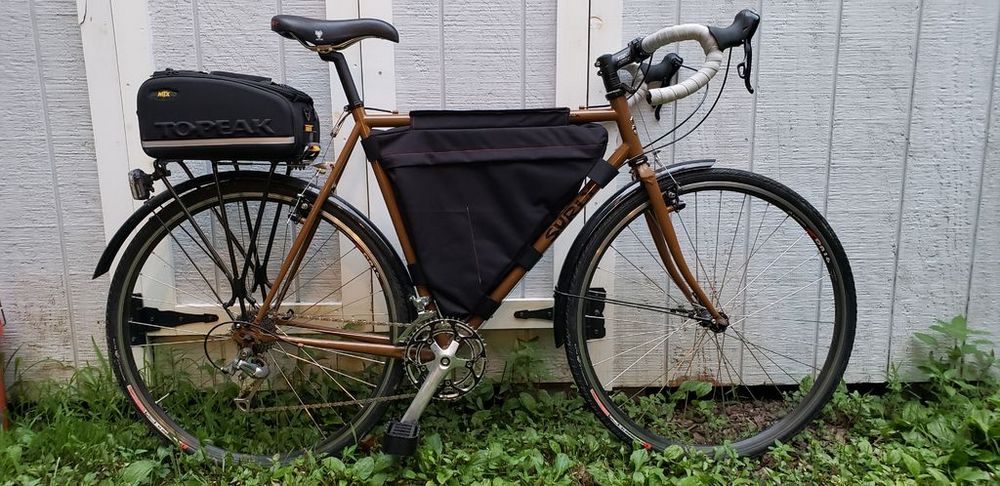
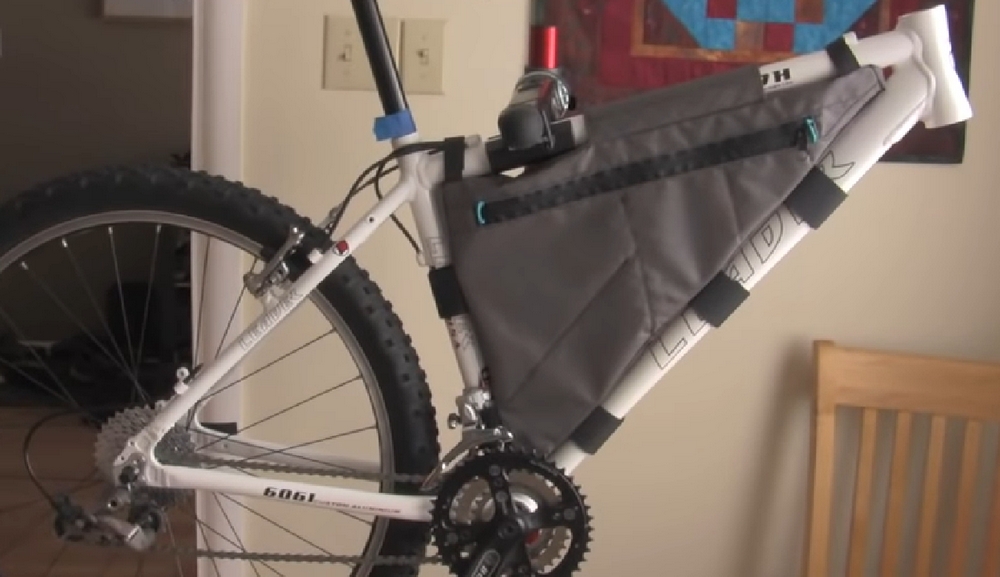
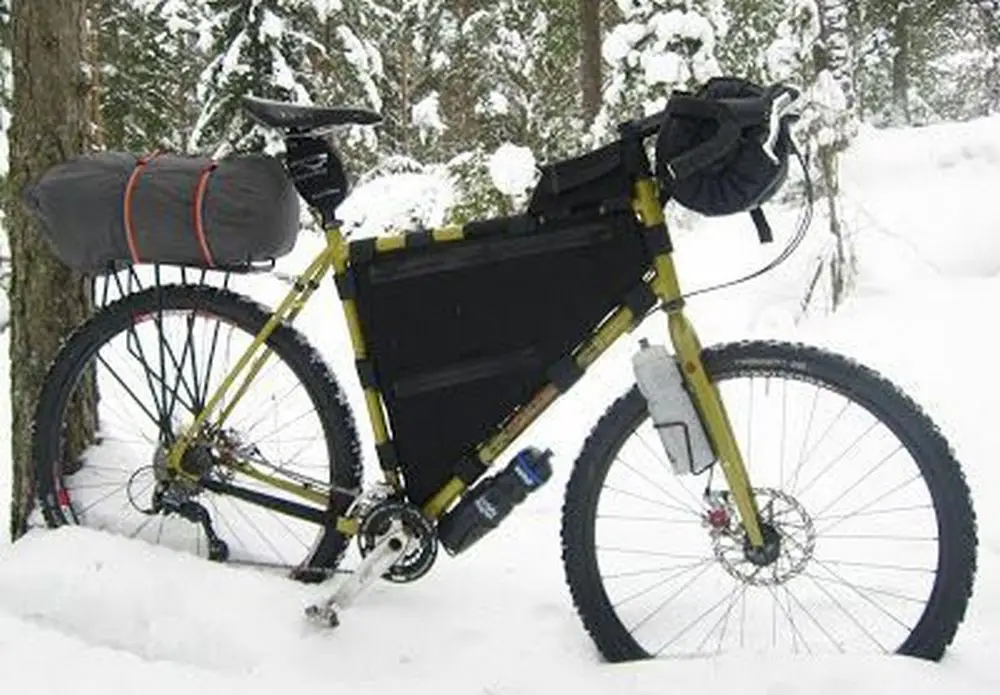
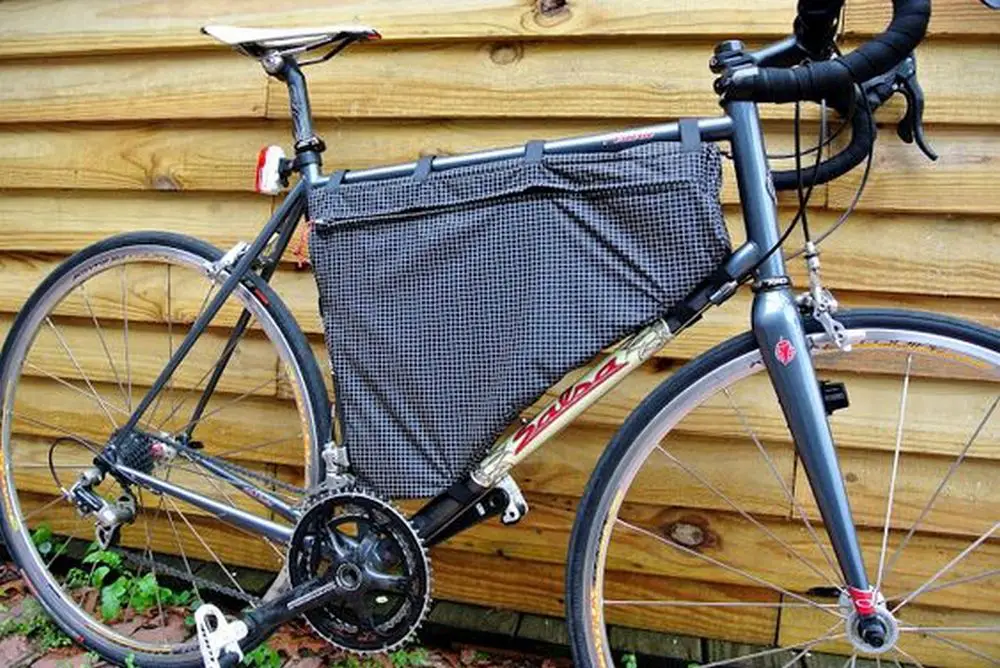
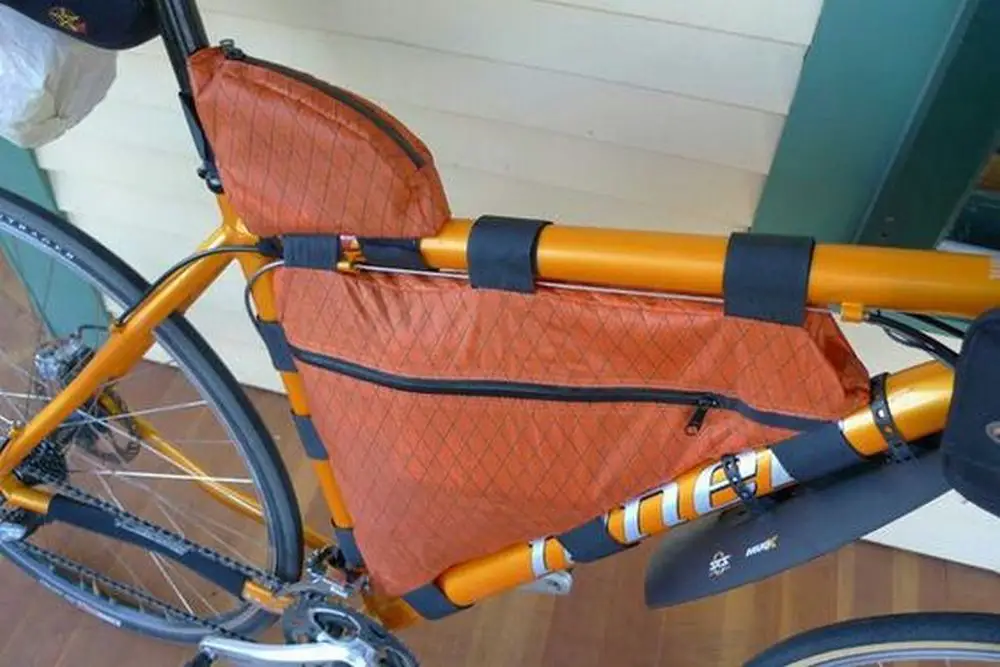
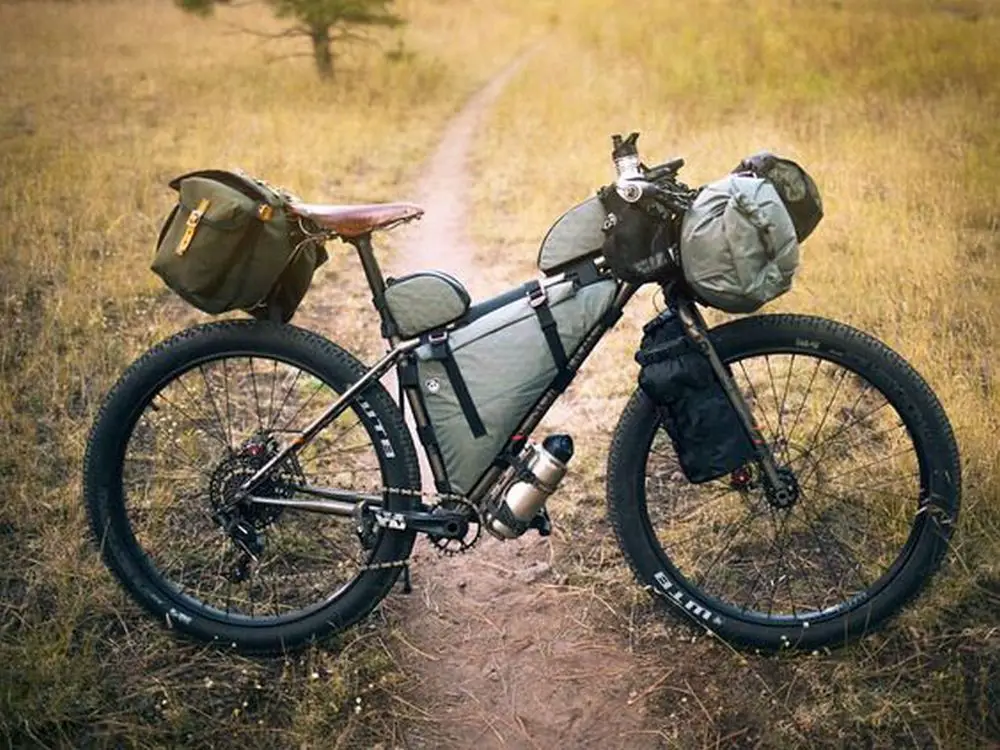
Cool DIY bicycle frame bag designs
Click on any image to start the lightbox display. Use your Esc key to close the lightbox.


A bicycle frame bag is a great way to store your essentials while you’re on the go. You can easily make your own frame bag with a few simple materials. Here’s what you’ll need:
Making a Bicycle Frame Bag
Materials
- mesh
- x-pac ripstop nylon
- 1-inch and 2-inches Velcro
- Waterproof zippers
- 100% nylon thread
Tools
- Rotary cutter
- Straight edge
- 1-inch grosgrain
- Sewing machine
- Scissors
Instructions
Whether you’re a seasoned cyclist or just getting started, the bike bag is a great way to keep your belongings safe and organized while you’re on the go. So whether you’re looking for a small bag to hold your essentials, or a larger bag to pack for a long ride, the bike bag is a great option.
With just a few supplies and a little bit of time, you can easily make a frame bag that’s custom-fit to your bike. Just follow these steps:
1. Make a template
To make a template for your bicycle’s bag, measure your bicycle’s frame. You can use a carton board to template your frame. Put a mark on the spot where the straps will be attached.
Make sure to measure the length and width of the frame, as well as the distance from the top of the frame to the ground. With these measurements, you’ll be able to create a bag that fits your bicycle perfectly!
2. Cut out your fabric
Once the template is done, trace it onto your fabric. Make sure to mark any necessary details with a pen or pencil. We recommend using a Velcro fabric, as it will be easier to work with.
Next, carefully cut the fabric along the lines you traced, using a rotary cutter or scissors. Take your time with this step, as you want the final product to look clean and professional.
3. Add zippers
To make a zipper with the velcro fabric, start by sewing the two pieces of fabric together with a straight stitch. Then, using a zigzag stitch, sew along the edge of the fabric. Finally, trim the excess fabric from the zipper.
4. Dividers
Adding internal dividers to your bike bag is a great way to keep your gear organized and easy to access. Plus, it’s a quick and easy project you can do yourself! Here’s how:
- Measure the inside of your bag to determine how big you want your dividers to be. Cut out pieces of mesh fabric to those dimensions.
- Sew the dividers into place inside your bag. Make sure to leave enough room at the top so that you can still close the bag. And that’s it! Now you have handy internal pockets that will keep everything in its place.
5. Let’s pin & sew
Finally, you can now start sewing your bike bag. Make sure to fold and pin the fabric before sewing it together – this will help ensure that your final product looks great! Don’t forget to add the zipper before you start sewing the fabric together. Lastly, trim the unnecessary threads.
Great job! You can now bring your stuff while riding your bike without bringing your pouch or backpack! Enjoy riding!
Now that you have installed a bike bag, you can enjoy riding your bike while bringing your belongings with you! This is a great way to get around without having to carry a backpack or pouch, and it will make your rides more enjoyable. Thanks for installing the bike bag and enjoy your rides!
Here’s a quick video…
Thanks to Greenwater for this project. You can also watch their video tutorial…
Choosing the Right Materials for Different Weather Conditions
Choosing the correct materials is one of the most crucial choices one makes when starting a do-it-yourself project to design a bicycle frame bag. Particularly in different weather, the fabric and other materials used in the bag can significantly impact its durability, comfort, and use. Whether you are riding in the blazing sun or a sudden downpour, this article will help you negotiate the choices to guarantee your bicycle frame bag resists the elements.
Weatherproofing Your Bicycle Frame Bag
A waterproof bicycle frame bag is absolutely essential for riders who regularly find damp or humid surroundings. Excellent water resistance and durability abound from materials including TPU-coated nylon, PVC cloth, or premium polyester. These products guarantee that, even in severe rain, your items remain dry. Use sealed seams and waterproof zippers to stop water from leaking into the bag for optimal results.
Choosing Breathable Fabrics for Hot Climates
In warmer locations, you should pick materials that will not only resist heat but also stop moisture accumulation within your bicycle frame bag. Enough air circulation can be supplied using breathable materials such lightweight nylon or mesh portions. This lowers the possibility that moisture-sensitive objects might get wet or harmed. Another good approach to boost ventilation and stop the bag’s contents from overheating is including tiny vent panels.
UV Resistance and Material Stability
Many materials can be broken down by prolonged sunlight, therefore influencing their color and structural integrity. Choose UV-resistant fabrics, including acrylic-coated polyester, when building a bicycle frame bag for use in sunny climates. These materials are meant to withstand sun damage and preserve color and strength across time. For riders who spend a lot of time on the road, especially, this guarantees the lifetime and appearance of the frame bag.
Combining Materials for Versatility
If you want a really flexible bicycle frame bag, think about combining several materials to maximize their special qualities. For the bottom and sides of the bag, for example, use tough, waterproof materials to guard against splashes and ground moisture; choose lighter, breathable fabrics for the top sections to cut weight and improve airflow. The bag’s adaptability and usefulness to various weather situations can be much improved by this deliberate material placement.
To sum up, choosing the correct materials for your homemade bicycle frame bag means thinking through the particular environmental difficulties you could run across. Selecting suitable fabrics and features that provide defense against the elements—rain, heat, or UV rays—you guarantee that your frame bag not only looks fantastic but also functions under any conditions. This careful planning lets you savor your riding experiences knowing that, whatever of the conditions, your basics are safe.
Conclusion
Crafting your own bicycle frame bag allows you to tailor its design and features to perfectly meet your cycling needs. Using the right materials ensures it stands up to various weather conditions, keeping your essentials safe and dry. This DIY project not only adds a personal touch to your bike but also enhances your overall riding experience. Enjoy the satisfaction of creating something functional and unique that accompanies you on every ride.
If you liked this project, you might also like to view Design Your Own Tote Bags with Stencils!


