I honestly could not remember what I was doing during our art classes way back when I was still in school. First, I am not creative – at all. Second, I couldn’t even make a straight line, even with a ruler. Third, it’s just not my thing.
Everything turned 180 degrees when I had kids. I’m really hands-on when it comes to their parties. In fact, I DIY most of the decorations. Tassel banners? I’ve done that. Letter standees? Easy-peasy.
The planning and conceptualization really take most of my time. Obviously, each birthday has a theme. We see to it, though, that most of our decors may be reused.

Contents
How to Make a Great Paper Wisteria?
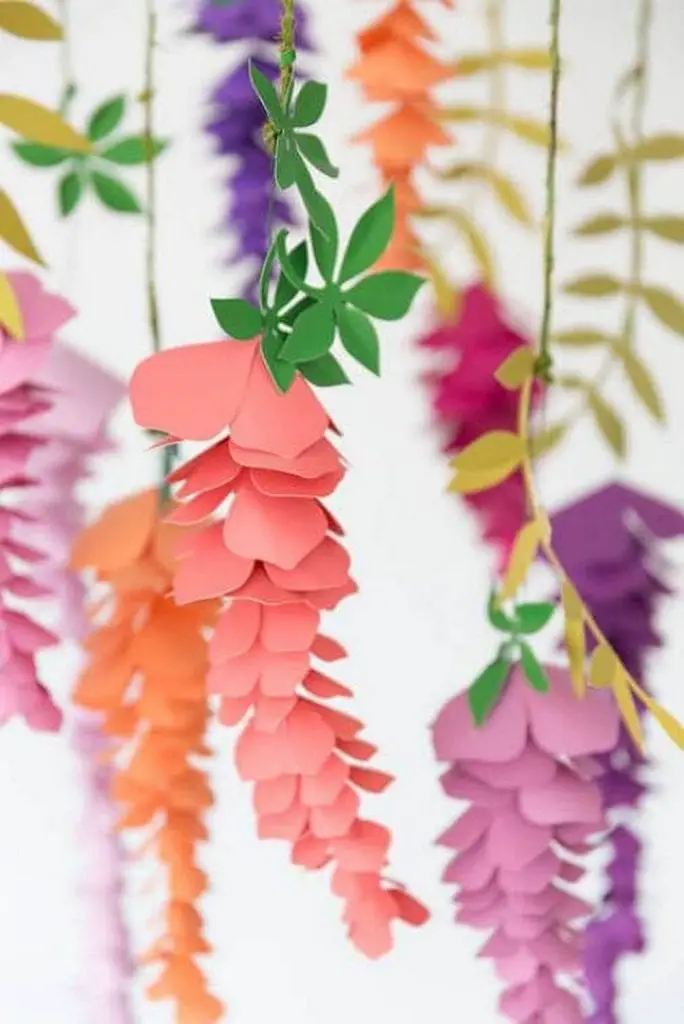
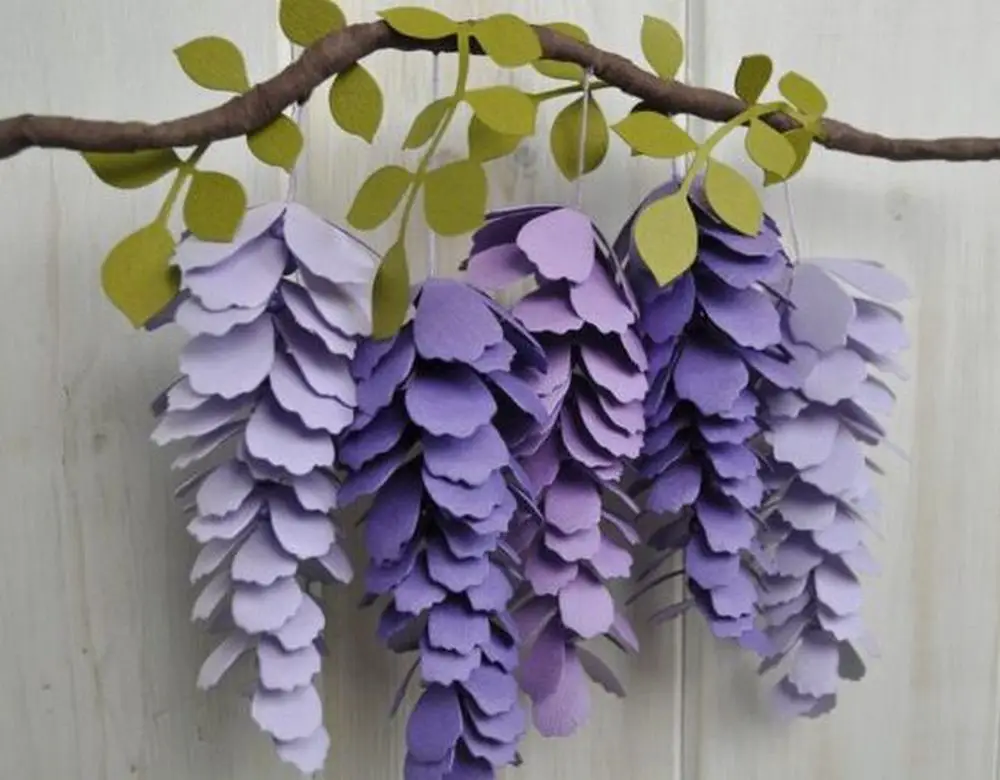
One of my favourite DIYs is the paper wisteria. It’s not hard to make, even grade schoolers can do it themselves. It can really blend in different party themes and may actually be used as a house decoration. My daughter’s teacher even had them put up in her classroom.
This is one of the most basic – but really useful – crafts.
Materials
Collecting the required materials prior to starting a project is important. Allocating time to plan and collect the materials in advance guarantees a smooth and productive workflow. Having the required items on hand prevents the inconvenience of pausing to get more supplies, saving both time and frustration.
Gathering the necessary materials and equipment for a project guarantees that you have all the required items to finish it. This enables you to get any additional needed materials ahead of time.
- Coloured paper
- You can use tissue paper or crepe paper in different shades of purple, pink, and white to create the flowers. You can also use green paper for the leaves.
- Small beads/pearls
- These will be used to create the stamen of the flower. You can use beads or pearls in a contrasting colour to the flower petals.
- 22 gauge wire
- This type of wire is sturdy enough to hold the weight of the paper flowers and allows you to create a realistic-looking stem for your wisteria.
Tools
In addition to collecting materials, it’s crucial to ready the necessary tools for your DIY paper wisteria project. Possessing appropriate tools can simplify and speed up the process, enabling you to effortlessly craft a stunning and lifelike paper wisteria.
Some of the tools you might need for this project include:
- Glue gun
- For this project, a hot glue gun is essential for swiftly and effortlessly attaching the paper flowers and beads to the wire stem. It is crucial to have an ample supply of glue sticks on hand, given the quantity of gluing required.
- Scissors/cutting machine
- To cut the paper into the desired shapes and sizes, you will require a pair of sharp scissors. Alternatively, a Cricut or Silhouette cutting machine can be utilised to speed up the process.
- Rolling tool and mat
- These tools are helpful for creating the 3D effect of the flowers. You can use a rolling tool and mat to curl the petals of the flower to make them look more realistic.
- Pliers
- Depending on the type of wire you use, you may need pliers to help bend and shape the wire stem.
- Ruler
- A ruler can come in handy for measuring and cutting the wire and petals to the correct length.
Step-by-Step Instructions
Creating your own paper wisteria is a fun and easy project that anyone can do. Follow these simple instructions to get started:
Cutting the Petals
To create a paper wisteria, begin by cutting numerous petals from your preferred coloured paper. It is crucial to have enough supply of petals to create a rich and lively wisteria appearance. Employing a cutting machine would speed up the process significantly.
To add variety and depth to your wisteria, cut petals in different sizes. You may use a template or draw the shapes by hand, but ensure they are roughly uniform. Though time-consuming, cutting petals is essential for a realistic and stunning wisteria. Take your time and make enough petals to create a full, lush look.
Rolling the Edges
After cutting out the petals for your paper wisteria, the next step is to give them a more natural look by curling the edges. You can use a rolling tool and mat for this step.
Start by laying the petal on the mat, coloured side down. Secure the petal with one hand and use the rolling tool with your other hand to curve the edges towards the centre. Apply gentle pressure as you roll the tool back and forth along the petal’s edge. You can curl the edges slightly or more dramatically, depending on the look you are going for.
Curling the edges of the petals gives the wisteria a more realistic and natural appearance. It also adds dimension and depth to the overall design. So take your time and carefully curl the edges of each petal until you are satisfied with the result.
The Stem of Your Paper Wisteria
After attaching beads or pearls to the centre of each petal, it’s time to prepare the wire for your paper wisteria. This will serve as the stem of your paper flowers.
Start by taking a 22 gauge wire and affixing a tiny bead or pearl to its end. You can use a hot glue gun or twist the wire to secure the bead. The bead will function as a stopper for your petals.
Add another bead to the wire approximately an inch from the first one. Use the glue gun to affix the bead. Continue this process until the wire is embellished with a series of beads.
Adding the Petals to the Stem
Attach the petals to the beaded wire by applying a small amount of glue to the bottom of each petal. Carefully attach them to the wire, just above the first bead. Press firmly and hold for a few seconds until the glue sets.
Repeat this step for the rest of the petals, spacing them out evenly along the wire. The beads on the wire will serve as stoppers for the petals, keeping them in place.
As you attach more and more petals, your paper wisteria will start to take shape. Be sure to arrange the petals in a way that looks natural and organic. You can bend and shape the wire to create a more realistic stem for your paper flowers.
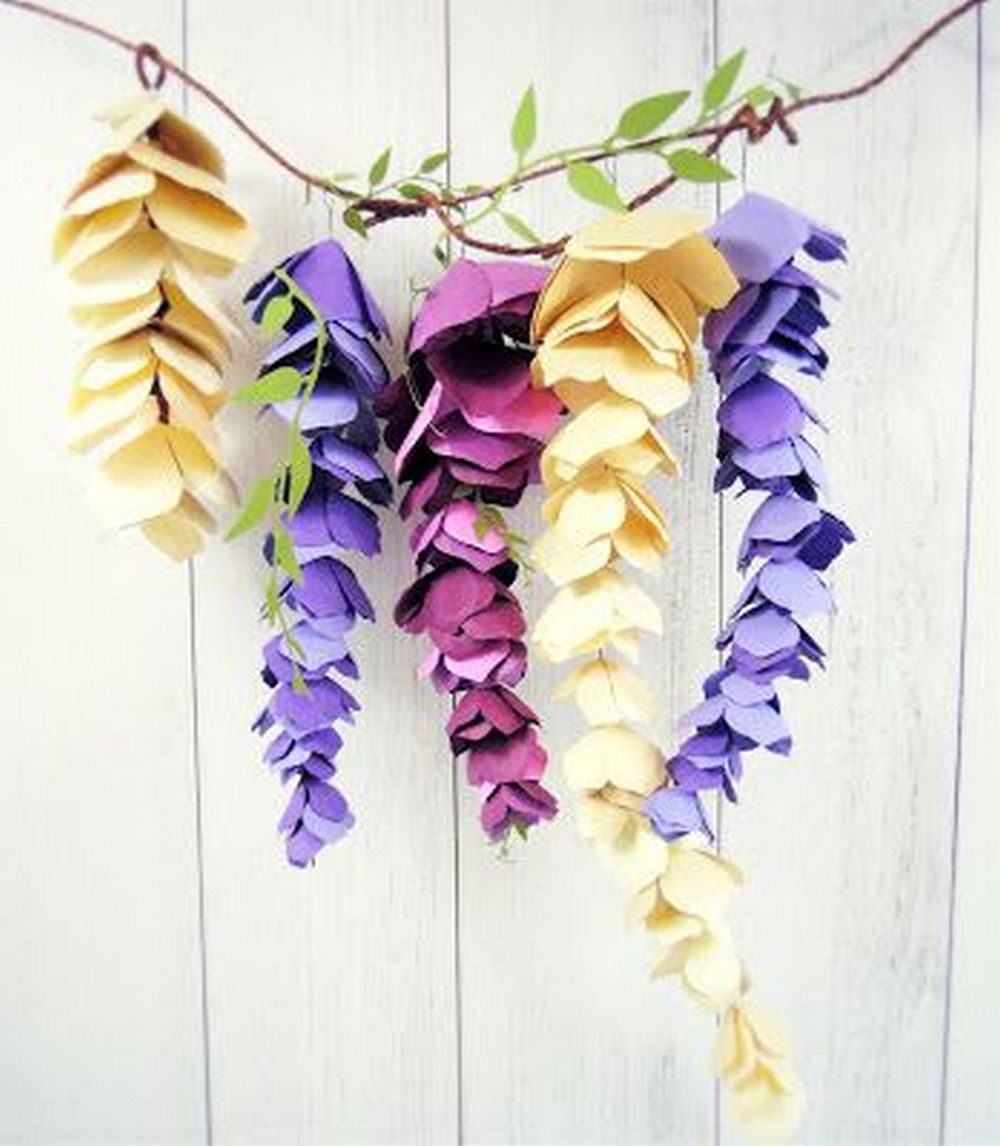
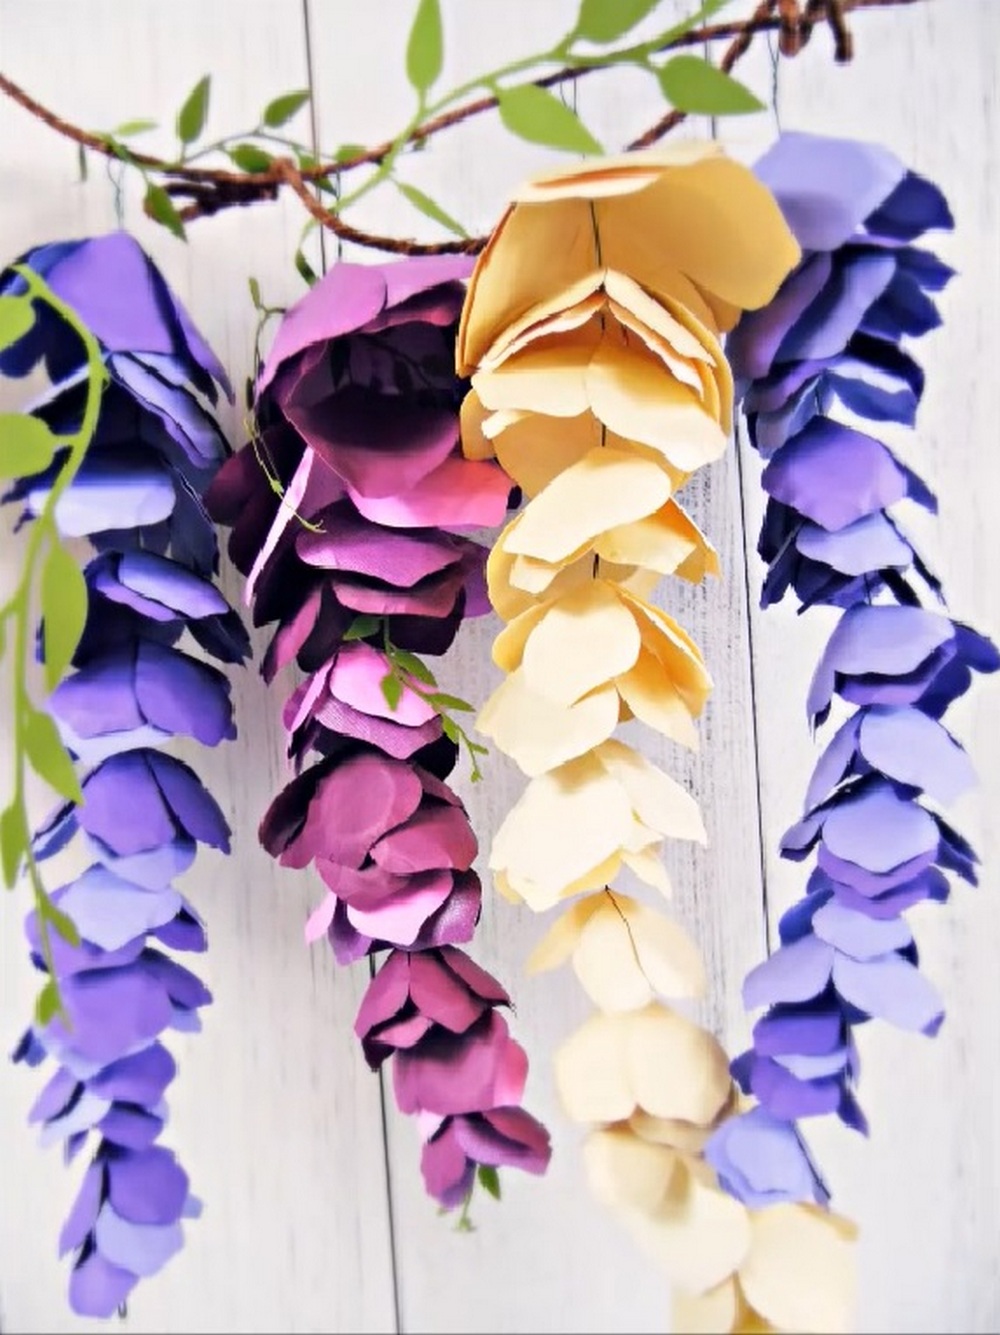
Continue adding petals until you achieve the desired length of your paper wisteria. To add more variety and interest, combine various colours and sizes of petals. When satisfied with the length, twist the wire ends together to form a loop for hanging your paper wisteria.
Click on any image to start the lightbox display. Use your Esc key to close the lightbox.


Design Ideas
One of the best things about paper wisteria is its versatility. Here are a few design ideas to get you started:
- Choose a color scheme that matches your party’s theme.
- The appropriate color scheme is crucial for establishing a cohesive and aesthetically pleasing décor. Consider your event’s overall theme when deciding on color choices. For example, mellow and understated pastel hues such as pink, blue, yellow, and green may be suitable for a baby shower. Conversely, lively and daring hues like red, pink, purple, and black for a bachelorette party can produce an entertaining and thrilling ambiance.
- Create a beautiful ombre effect by using different shades of the same color.
- Create a distinctive and visually appealing paper wisteria by exploring diverse color combinations. Opt for an ombre effect by using varying hues of a single color or blending complementary colors for a dramatic contrast.
- Mix and match different paper textures for added interest.
- Consider using metallic or glitter paper for a touch of glamour.
- In addition, you can also consider incorporating metallic or glitter accents to add some sparkle and glam to your paper wisteria. Just be sure to use them sparingly to avoid overwhelming your decor with too much shine.
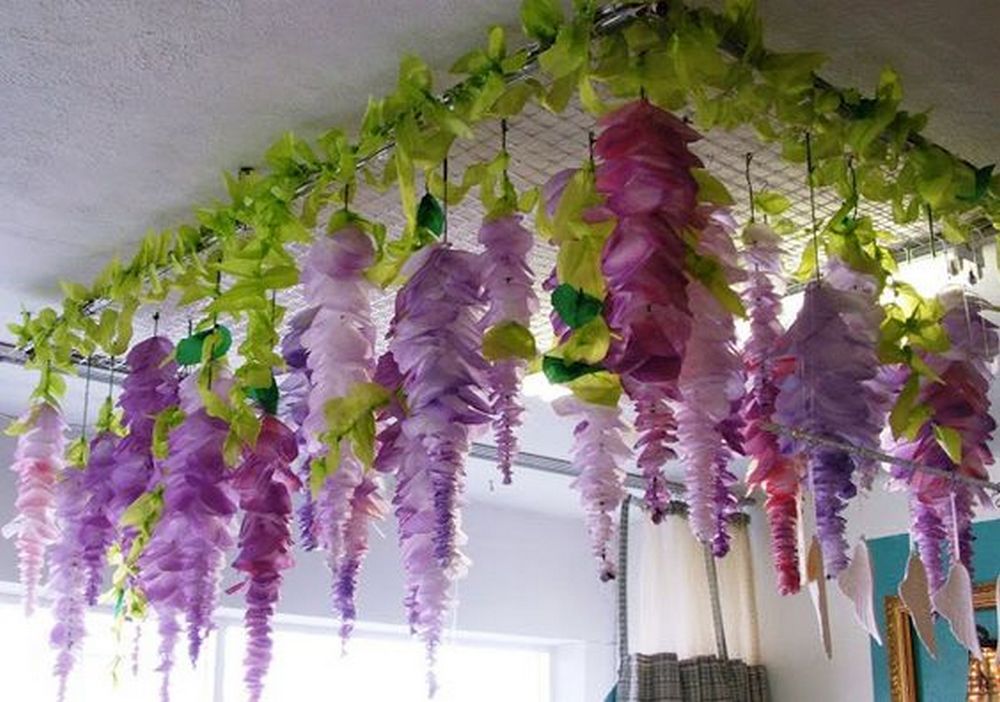
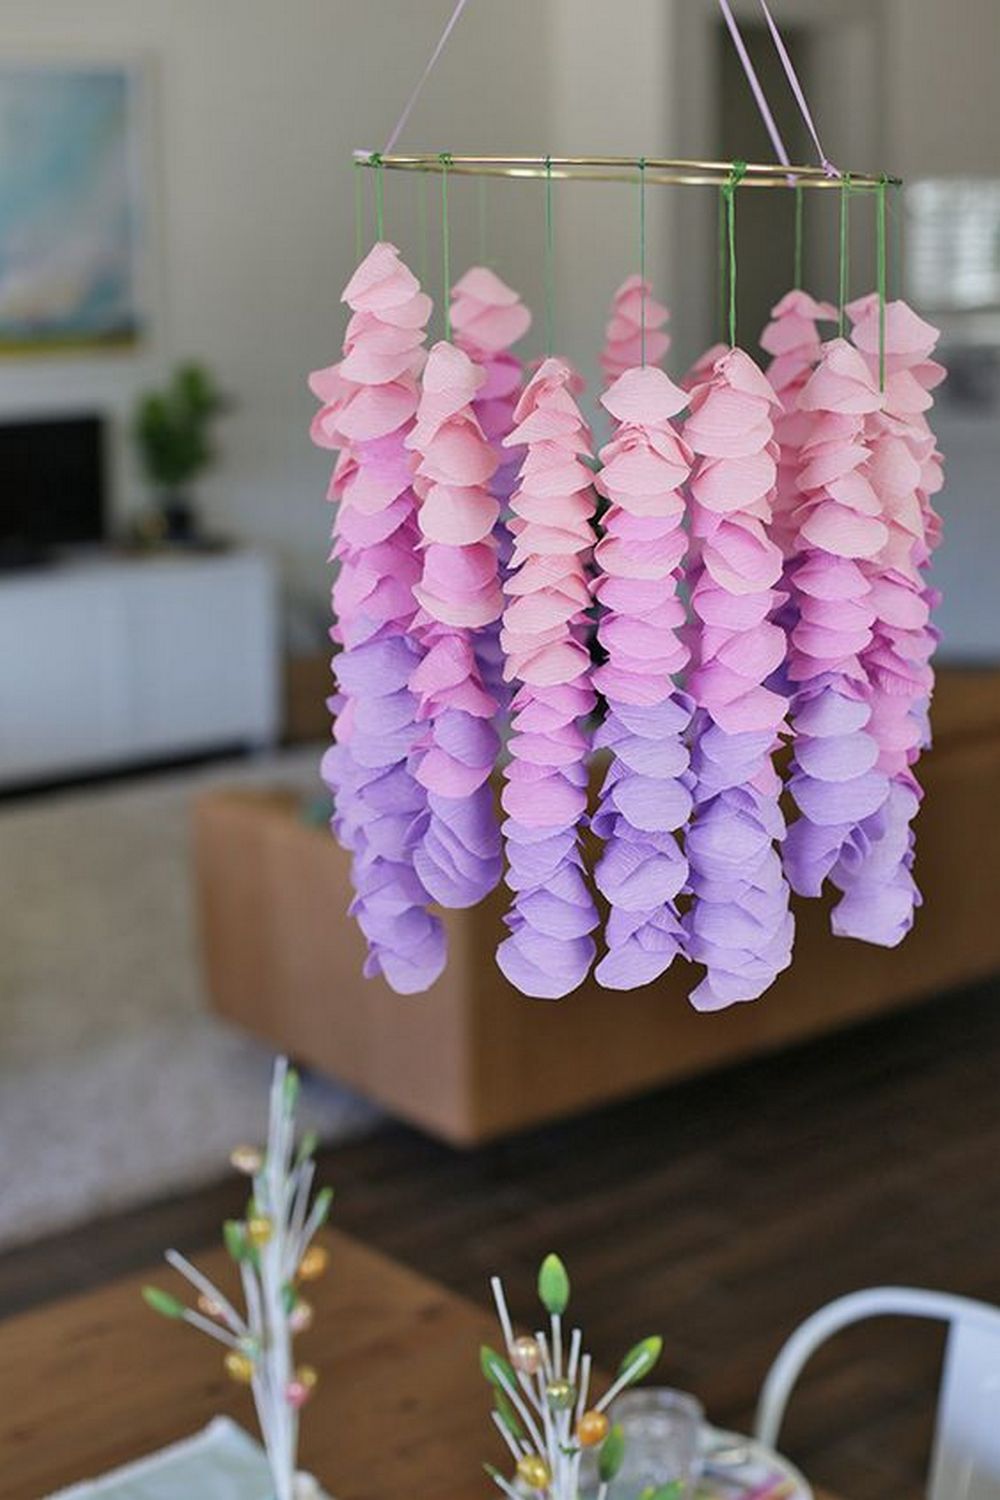
- Hang your wisteria from a chandelier or canopy for a dreamy effect.
- To showcase your creativity, hang it from a chandelier or canopy for a stunning and enchanting display that is sure to impress your guests.
- Hang wisteria using a fishing line or clear thread for a floating effect or ribbon or twine for a rustic feel.
- Create a wisteria photo booth backdrop by attaching several strands of paper wisteria to a wall or frame.
Thematic Decoration Ideas
Thematic decoration ideas offer a wonderful opportunity to personalize your DIY projects and events, making them unforgettable and unique. The versatility of paper wisteria allows it to be adapted to various themes, adding a touch of elegance and creativity to any setting. Here, we explore how to tailor your paper wisteria creations to fit different seasonal and cultural themes, ensuring that these beautiful decorations perfectly complement your event’s atmosphere.
Seasonal Variations
Spring Celebrations
Create paper wisteria in soft pastels such as baby pink, lavender, and pale yellow for a spring-themed event. These colors reflect the gentle rebirth of nature, making them ideal for Easter gatherings or spring weddings. Incorporating the focus keyword, paper wisteria, into your spring decor adds a fresh and lively touch to your celebration.
Summer Vibrance
Embrace the vibrant colors of summer by crafting paper wisteria in bold and bright hues. Think of sunny yellows, deep blues, and lush greens that mirror the season’s energy. Hanging these lively decorations at summer barbecues or pool parties will enhance the festive mood, making your paper wisteria the highlight of your decor.
Autumnal Hues
Capture the essence of autumn by choosing paper wisteria in warm tones of orange, red, and gold. These colors reflect the changing leaves and cozy atmosphere of the season, making them perfect for Thanksgiving decorations or fall festivals. The rustic charm of paper wisteria in these hues will add a sophisticated yet homey feel to any autumn event.
Winter Wonderland
For winter celebrations, opt for paper wisteria in white, silver, and icy blues to mimic the frosty beauty of the season. These colors are ideal for creating a winter wonderland theme for Christmas parties or New Year’s Eve celebrations. The focus keyword, paper wisteria, can transform any space into a magical snowy landscape, bringing the wonder of winter indoors.
Cultural and Festive Adaptations
Weddings and Celebrations
Paper wisteria can be customized to fit the specific cultural elements of a wedding, such as using red and gold for Chinese weddings or vibrant colors for traditional Indian ceremonies. Incorporating paper wisteria into these events adds a personalized and cultural touch, making the celebration even more memorable.
Festivals and Traditional Holidays
From the lantern festivals of Asia to the spring festivals of Europe, paper wisteria can be adapted to suit various cultural festivals. Crafting paper wisteria to match the specific colors and themes of these holidays enhances the festive atmosphere and pays homage to cultural traditions.
By incorporating these thematic decoration ideas, your paper wisteria projects will enhance the beauty of your events and create a deeper connection to the seasons and cultures they celebrate. Whether you’re crafting for a specific season or a cultural festival, paper wisteria offers endless possibilities to add a personal and thematic touch to your decorations.
Complementary Decor Ideas
Complementary decor ideas can elevate the aesthetic appeal of your event or space, creating a cohesive and visually stunning environment. Paper wisteria, with its delicate appearance and versatile design, serves as an excellent foundation for a variety of decor themes. By pairing paper wisteria with other decorative elements, you can enhance its beauty and create a more immersive experience. Below, we explore several ideas that complement paper wisteria, adding depth and richness to your decor.
Pairing with Other Paper Flowers
Creating a Floral Tapestry
Combine paper wisteria with other paper flowers like roses, peonies, and daisies to craft a breathtaking floral tapestry. This mix of flowers can be used to adorn walls, create centerpieces, or enhance the backdrop of a photo booth. The variety of shapes and colors will add complexity to your decor while maintaining a harmonious look.
Themed Floral Arrangements
Select paper flowers that match the theme of your event and use them alongside paper wisteria to create themed floral arrangements. For instance, pair paper wisteria with paper hibiscus and frangipani for a beach-themed party. This approach allows you to tailor your decor to the event’s theme, making the paper wisteria even more impactful.
Creating a Full Paper Garden
Enchanted Forest Theme
Transform your venue into an enchanted forest by combining paper wisteria with paper greenery, such as ferns and ivy. Add paper butterflies and fairy lights to complete the magical feel. This setup is perfect for fantasy-themed parties or whimsical weddings, with paper wisteria as the centerpiece of your enchanted forest.
Rustic Countryside Garden
For a rustic or countryside theme, mix wisteria with paper wildflowers and arrange them in wooden crates or mason jars. Incorporating elements like burlap ribbons and lace can enhance the rustic charm. This decor idea is ideal for outdoor events, barn weddings, or any occasion that calls for a touch of rustic elegance.
Incorporating Textures and Materials
Adding Metallic or Glitter Accents
Introduce metallic or glitter paper into your paper wisteria arrangements for a touch of glamour. These shiny elements can elevate the elegance of your decor, making it suitable for sophisticated events, gala nights, or holiday parties. Use these accents sparingly to ensure they enhance rather than overwhelm the natural beauty of the paper wisteria.
Combining with Fabric and Lace
Combine paper wisteria with delicate fabrics like tulle or lace for a softer, more romantic look. This combination is perfect for creating dreamy, ethereal wedding decor or adding a soft touch to baby and bridal showers. The contrast between the paper’s texture and the softness of the fabric adds an intriguing visual element.
Unique Display Ideas
Suspended Installations
Create a stunning visual impact by suspending paper wisteria from the ceiling or over a dining area. This creates the illusion of floating flowers and adds a dramatic touch to your decor. You can enhance this effect by interspersing hanging lanterns or fairy lights among the paper wisteria.
Wisteria-Lined Pathways
Line walkways or entrance paths with paper wisteria, guiding guests through a floral tunnel that sets the tone for the event. This immersive experience can be further enriched by adding ground-level floral arrangements or lanterns, creating a beautiful and inviting pathway.
Nature-Inspired Accents
Botanical Shadow Boxes
Create three-dimensional botanical shadow boxes featuring paper wisteria as the main focus, complemented by other paper foliage and floral elements. These shadow boxes can serve as captivating wall art or unique table centerpieces, adding a touch of nature-inspired elegance to your space.
Eco-Friendly Table Runners
Craft eco-friendly table runners by intertwining paper wisteria with real or paper leaves and branches. This approach brings a natural and organic feel to your dining settings and promotes sustainability. Perfect for eco-conscious events, these table runners can beautifully bridge the gap between nature and craftsmanship.
Interactive Decor
DIY Wisteria Kits for Guests
Engage your guests with DIY paper wisteria kits during the event’s activities. These kits can be a creative icebreaker for parties or a memorable take-home favor from weddings or showers. Allowing guests to create their paper wisteria adds a personal touch to the event and allows them to contribute to the decor.
Paper Wisteria Photo Frames
Encourage guests to capture memories by setting up photo frames with paper wisteria. These decorative frames can be placed around your event space or at a designated photo booth. The frames serve as beautiful props and lovely keepsakes that guests can use to display their favorite moments from the event.
Conclusion
Create stunning paper wisteria for any occasion with this fun and rewarding DIY project. With minimal materials and time, impress guests with your beautiful handmade decorations. Don’t hesitate to try it out and witness the breathtaking end result.


