Fairy gardens are magical. Some may argue that these are figments of the imagination. While it may be true, there’s something enchanting about them that is very hard to resist. A lot of people are very fond of them. Is it possible to have a tiny world that we don’t see? Whatever the reason is, fairy gardens have become extremely popular.
There are a lot of cute and quaint ideas available on the Internet. Adorable miniature DIY projects have sprouted out like mushrooms after the rain. From acorn chairs to Adirondacks, arbors to gazing balls, there’s a lot you can actually do.
This DIY project is simple and inexpensive but it sure has lots of charm.

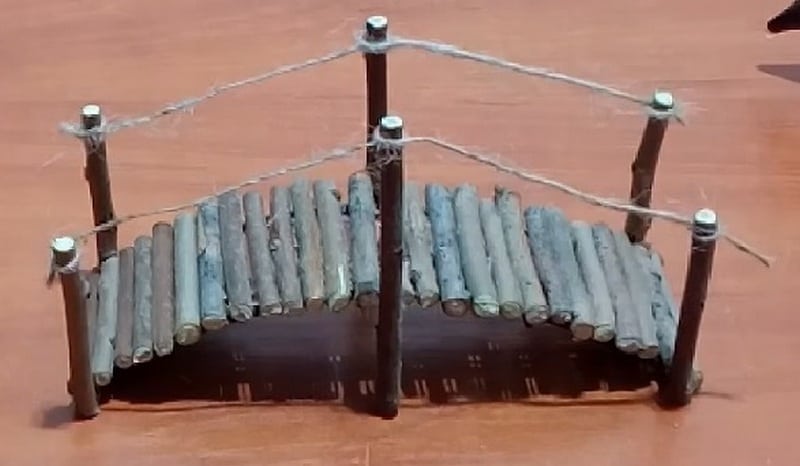
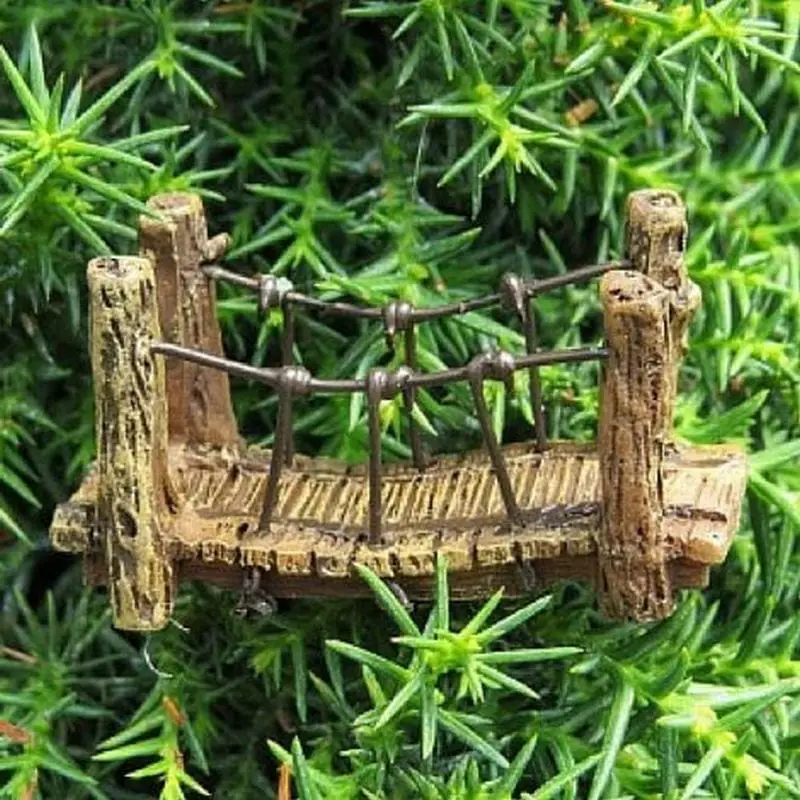
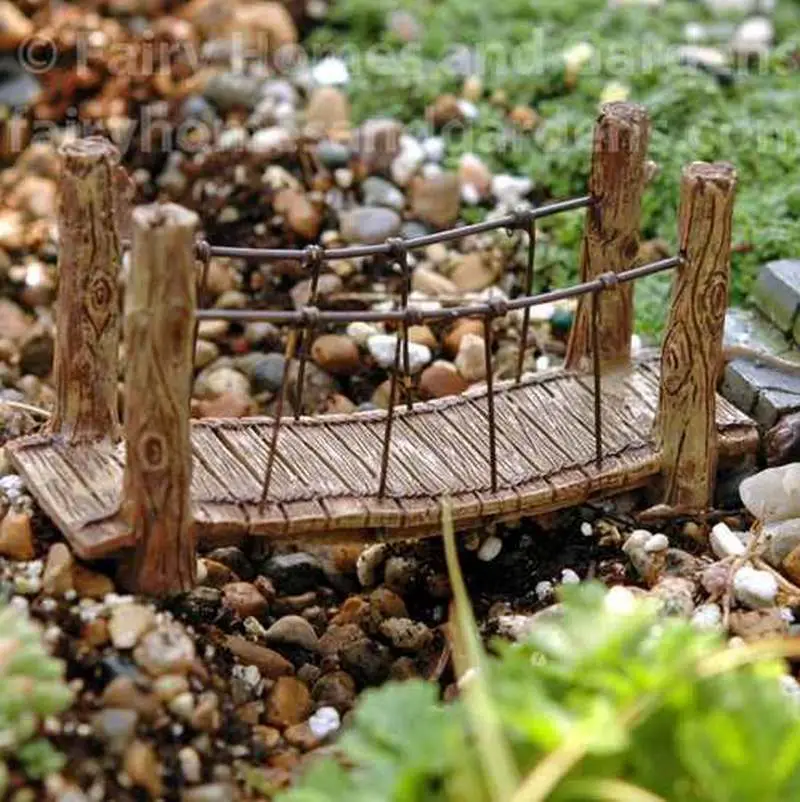
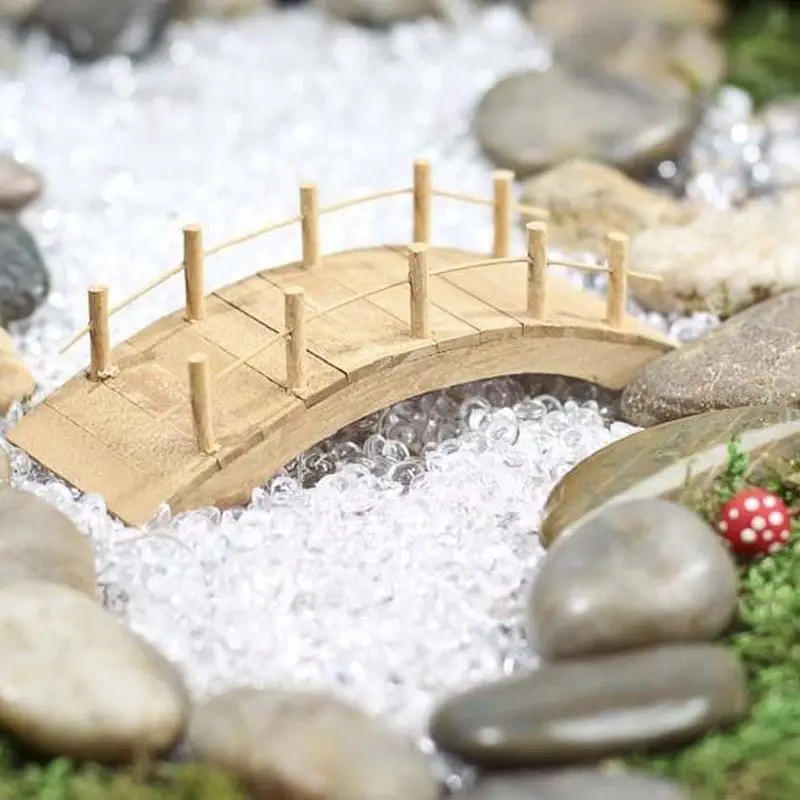
Not sure where to start? Check out these cute fairy garden bridge designs!
These bridges are typically small and delicate, making them the perfect accent for a miniature garden. Best of all, there are tons of different design options to choose from, so you can find the perfect one to fit your style.

No matter what style you choose, remember to add some special touches to make your fairy garden bridge extra special. Perhaps some climbing vines or sparkling fairy lights would do the trick!
Contents
Cute fairy garden bridge designs
Click on any image to start the lightbox display. Use your Esc key to close the lightbox.

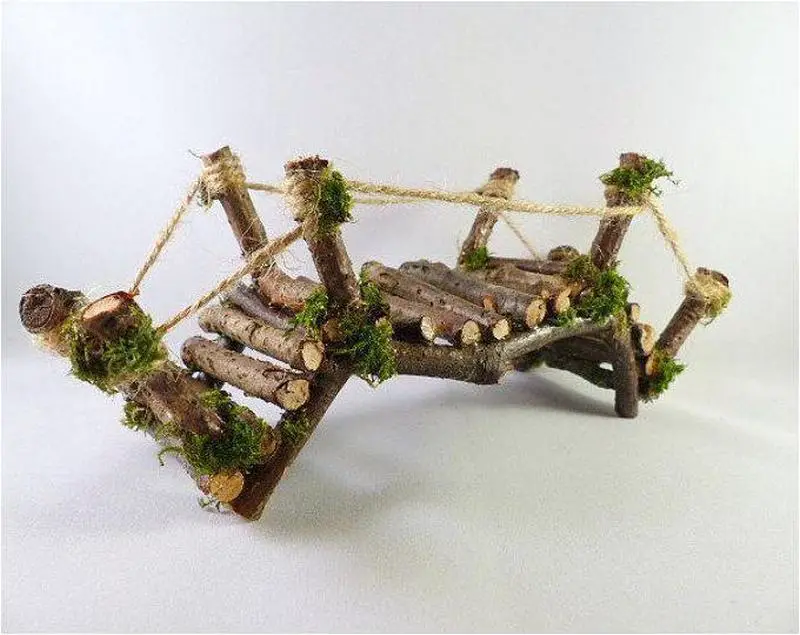
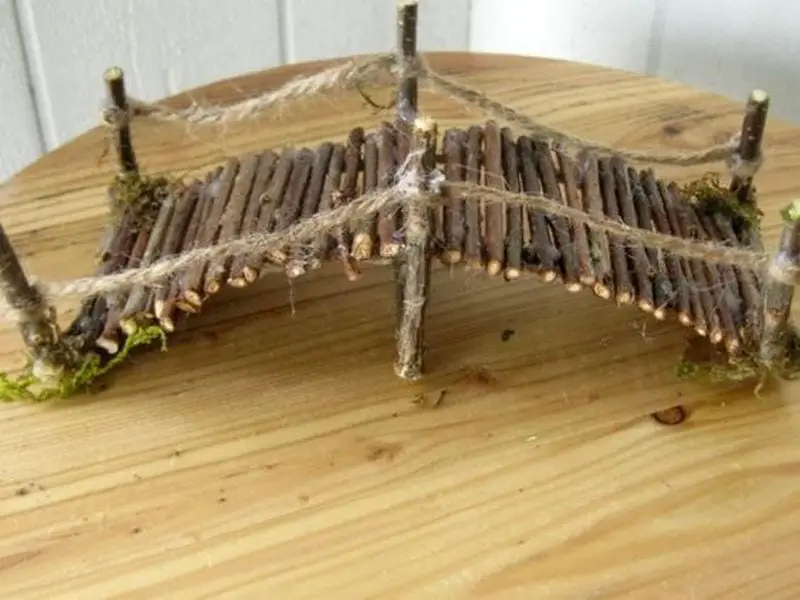
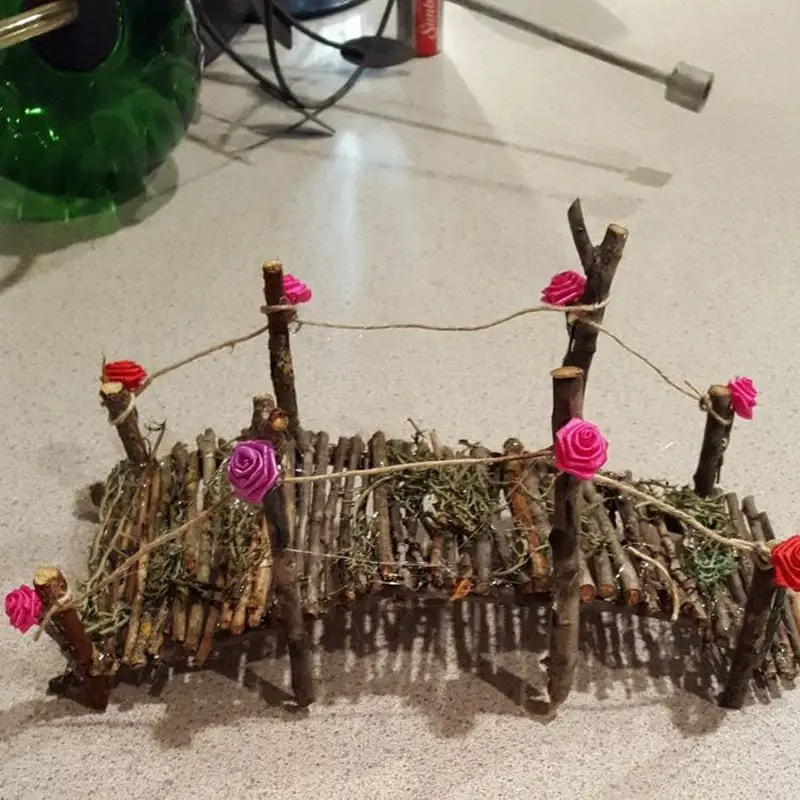
Design your fairy garden bridge any way you want it!
Well, here’s something to add to that growing list – a fairy garden bridge. It would make a great addition to your entertaining fairy world. It’s so economical you won’t have to spend money except on glue.
Building a Fairy Garden Bridge
Here’s what you’ll need:
Materials
- Twigs
- Twine
- Hot glue
- String
Tools
- Twig cutter
- Glue gun
Instructions
You can add a magical touch to your garden by making your own fairy garden bridge! It’s a fun project that’s perfect for both kids and adults. Here’s how to do it:
1. Prepare the twine and twigs
Make sure to clean them before using them. Measure your desired bridge and check if your twine and twigs will be enough. To measure your desired bridge, simply check to see if your twine and twigs will be long enough to span the entire distance. If not, you may need to find longer pieces of twine or add more twigs to your pile.
2. Cut the twine and twigs
After measuring, cut the twine and twigs. First, cut one and this will serve as the pattern. After cutting, arrange them like in a row a bridge. If needed, use more twine to secure the twigs in place.
3. Apply hot glue
Once arranged, you may now secure them with a glue gun. Hold them there for a few seconds until the glue sets, and then let the arrangement dry for a few minutes before moving it.
4. Add a string
Add a string to tie up the twine and twigs. Tie a string around the twine and twigs to secure them together. This will serve as the bridge’s handle for our tiny travelers. to hold onto as they cross the bridge. 😉
And that’s it! You can now enjoy your very own fairy garden bridge! This enchanting little addition is sure to bring a touch of magic to your garden.
Now that our bridge is complete, all that’s left to do is test it out! Gather up some of your favorite toys and see if they can safely make it across. If they can, then congratulations – you’ve just built your very own miniature bridge!
You can watch the video tutorial here…
Get more step-by-step-instructions here….
Decorating Your Fairy Garden Bridge
Decorating your fairy garden bridge can transform it from a simple structure into a captivating centerpiece of your miniature landscape. With a touch of creativity and some decorative enhancements, you can make your fairy garden bridge not only a functional element but also a striking visual attraction.
Choose a Theme
Start by deciding on a theme for your fairy garden bridge. This could align with the overall theme of your garden, whether it’s enchanted woodland, mystical creatures, or a whimsical fairy village. A consistent theme helps in selecting decorations that complement each other and the garden’s aesthetic.
Colorful Paints and Finishes
Give your fairy garden bridge a colorful makeover with paints that stand up to the outdoors. You could paint the bridge in bright colors that pop against the greenery, or choose more subdued, earthy tones that blend seamlessly with the natural environment. Consider using finishes that resist weathering, ensuring your bridge remains vibrant through different seasons.
Adding Miniature Details
Enhance the charm of your fairy garden bridge by adding miniature details. This could include tiny handrails, a cobblestone path across the bridge, or delicate lanterns that light up at night. These small additions can make a significant impact, bringing your fairy tale scene to life.
Natural Embellishments
Incorporating natural elements into your fairy garden bridge decoration can enhance its enchantment. Adorn the bridge with small moss patches, miniature ivy, or even tiny blooming flowers. These elements can be glued on or placed around the bridge to create a more organic, grown-in look.
Incorporate Lighting Effects
Adding lighting to your fairy garden bridge can create a magical atmosphere, especially at dusk and during the night. Consider small LED fairy lights or solar-powered lanterns that mimic the glow of fireflies. These lights not only illuminate the bridge charmingly but also add a whimsical touch, making the garden come alive in the evening.
Use Hanging Elements
Dangle small charms or crystals from the sides of the fairy garden bridge to catch the sunlight and create reflections. Wind chimes made from tiny bells or pieces of glass can also add a delightful auditory element whenever the breeze flows through your garden.
Install Miniature Signage
Craft miniature signs to place on or near your fairy garden bridge. These could be whimsical directional signs pointing to imaginary places or tiny welcome signs that invite viewers into the fairy world. This not only adds charm but also encourages engagement and storytelling.
Textural Contrasts
Experiment with different textures to give your fairy garden bridge more depth. For instance, using smooth river stones as pavers on the bridge’s pathway contrasts nicely with the rustic texture of twigs or the smoothness of painted surfaces. Adding textured materials like sand, pebbles, or bark around the bridge can also enhance its visual appeal.
Seasonal Decorations
Change up the decorations with the seasons to keep your fairy garden bridge looking fresh and timely. For spring, you might add miniature flower pots or tulip fields; for autumn, scatter tiny pumpkins and colored leaves; during winter, decorate with miniature snowmen or white cotton to mimic snow. This keeps your fairy garden engaging all year round.
Decorating your fairy garden bridge is an opportunity to express creativity and enhance the magical appeal of your fairy garden. By carefully choosing themes, colors, details, and natural enhancements, your fairy garden bridge will become more than just a structure—it will be a portal into an enchanted world.
Placement and Integration into Your Fairy Garden
Integrating a miniature bridge into your fairy garden can significantly enhance its aesthetic appeal and narrative. The placement of the bridge is crucial as it not only serves as a charming structure but also as a functional piece that connects various elements within the garden.
Here’s how to strategically place and integrate this enchanting feature.
Consider the Flow of Your Garden
Assess the layout of your garden to determine the best spot for the bridge. It should naturally fit into the flow of the landscape, connecting two distinct areas or serving as a focal point. Think about how it can lead from one scene to another, such as from a fairy house to a secluded grove, creating a sense of adventure and exploration.
Create a Focal Point
Use the bridge to draw attention to a specific part of your garden. Placing it over a small stream of water or a dry riverbed made with blue glass shards can make it stand out. Surrounding the bridge with eye-catching plants or brightly colored flowers also helps to spotlight this charming feature.
Balance with Other Elements
Ensure that the bridge does not overpower other elements in the garden. Its size and style should harmonize with the surrounding features like miniature houses, paths, and plantings. Consider the scale and theme of your garden to maintain a balanced and cohesive look.
Enhance with Natural Landscaping
Incorporating natural landscaping around the bridge can help it blend seamlessly into the garden. Use small stones to create a rugged path leading up to the bridge, or plant low-growing ground cover to mimic grassy banks along a river. This integration helps the bridge appear as a natural part of the landscape rather than a standalone feature.
Utilize Vertical Space
If your garden includes vertical elements like raised beds or tiered plantings, the bridge can connect different levels, adding depth and dimension to your fairy garden. This not only makes practical use of the space but also adds an intriguing layer to the garden’s layout.
Your fairy garden can be more useful and magically appealing if the bridge is placed and integrated with care, especially if its with other fairy structures. This calculated move guarantees that the bridge enhances the narrative element and fits the theme of the garden.
Conclusion
Creating a fairy garden bridge is a delightful project that adds a touch of magic and whimsy to any garden. With careful consideration of materials, design, and placement, this charming feature can transform a simple garden into an enchanting escape. Enjoy the process of crafting and decorating your bridge, and watch as it becomes a beloved centerpiece in your fairy garden narrative.


