Marble Run

DIY Marble Run from Recycled Cardboard in 3 Fun Steps!

Last Updated on July 8, 2024 by Team Ideas24

Kids always want something new to do! The early years of a child’s life are extremely important. The child is growing and developing, learning new things every day. You can help your child grow and develop to the fullest by keeping him or her busy!

DIY Marble Run From Recycled Cardboard

If you’ve got a little one that seems to be bored with his or her “old” toys, then this cardboard project might interest you…

A marble run is a simple yet, fun game that even adults can find entertaining.

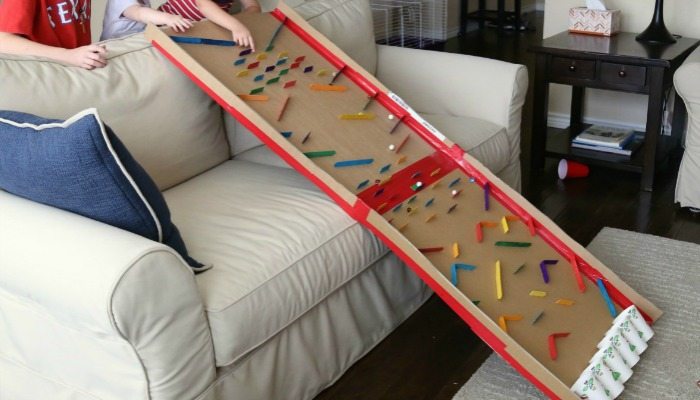
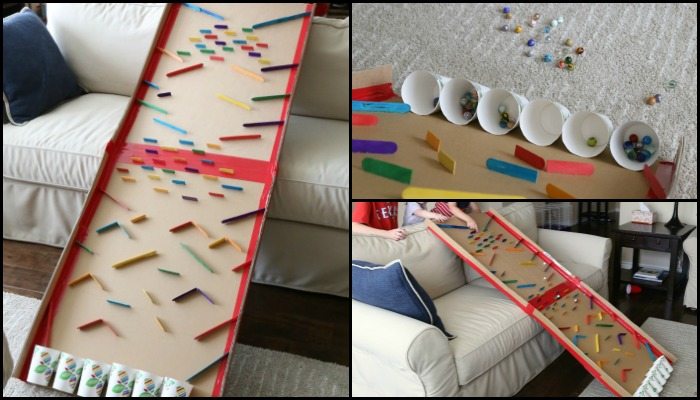
It’s simply a long cardboard sheet, with strips of the same material attached to the sides that prevent the marbles from rolling off. Craft sticks were positioned on the cardboard using hot glue. Now to keep the marbles from scattering all over the place, paper cups were glued at the end of the marble run. The rims were cut off first so that the marbles can easily roll into the cups.

DIY Marble Run From Recycled Cardboard

You can let the kids build one themselves, with help/supervision by using the hot glue gun. It’s a great project to involve them in since it can serve as an engineering challenge for them – how they can position the sticks so that it takes the path they want the marbles to go!

Now to make this game even more interesting, add the competition factor! Use solid-coloured marbles so that all participants have the same number of marbles, but with each having his or her own colour designation. Then assign point values to every cup. Participants can then send their marbles down the track. At the end of the game, points will be added depending on where their marbles end up, and the person who gets the highest total wins!

4 Unique Marble Run Projects

Check out these other versions of a marble run…

Click on any image to start the lightbox display. Use your Esc key to close the lightbox.8-)

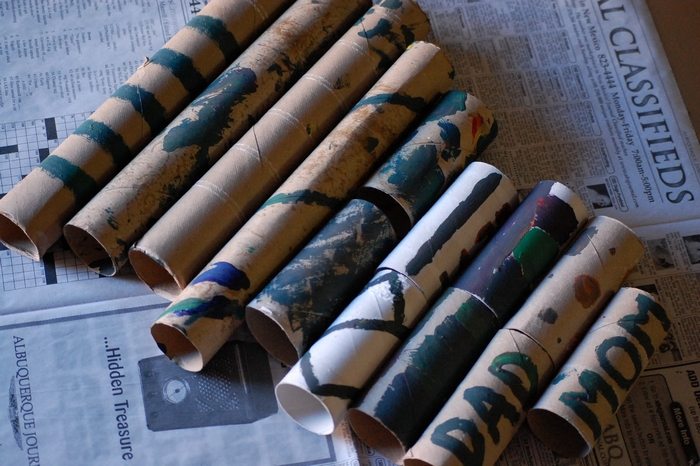
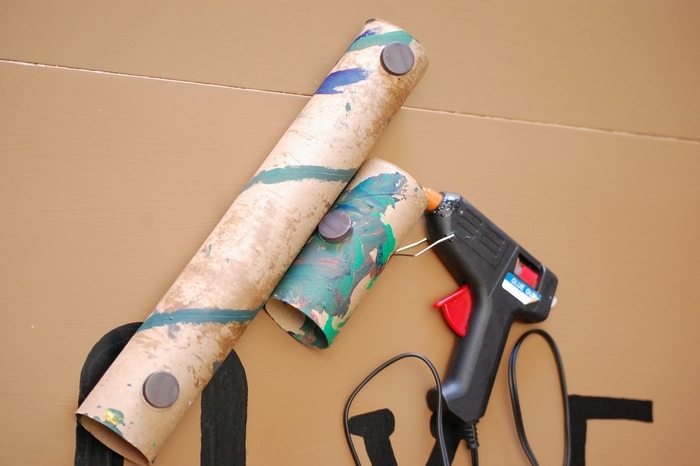
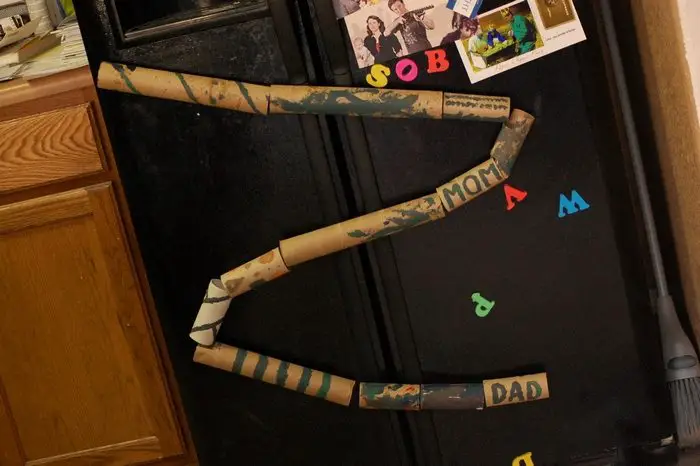
1. Cardboard Tubes with Magnets on Refrigerator

This innovative marble run utilizes the vertical space of your refrigerator door, creating a fun and interactive game that doubles as a quirky kitchen decoration. Start by collecting various lengths of cardboard tubes, like those from paper towels or toilet paper rolls. Attach small magnets to these tubes using tape or glue.

Arrange the tubes on the refrigerator in a cascading pattern, allowing marbles to travel from the topmost tube downward through a series of twists and turns. The magnetic setup not only makes it easy to adjust and move the pieces for endless configuration possibilities but also adds a unique twist to the classic marble run by integrating it into a part of the home where family members frequently gather.

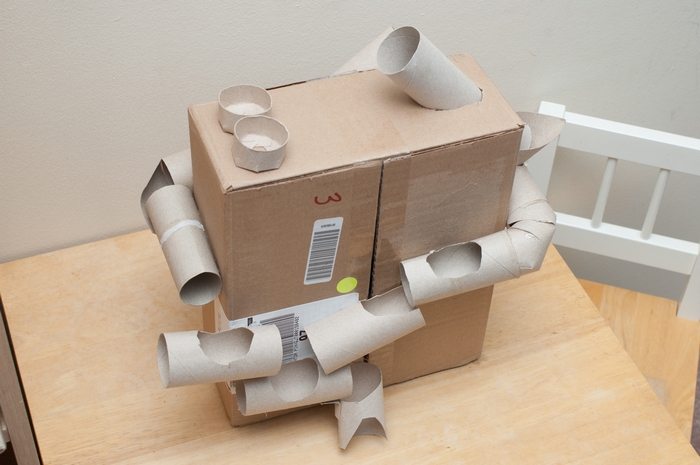
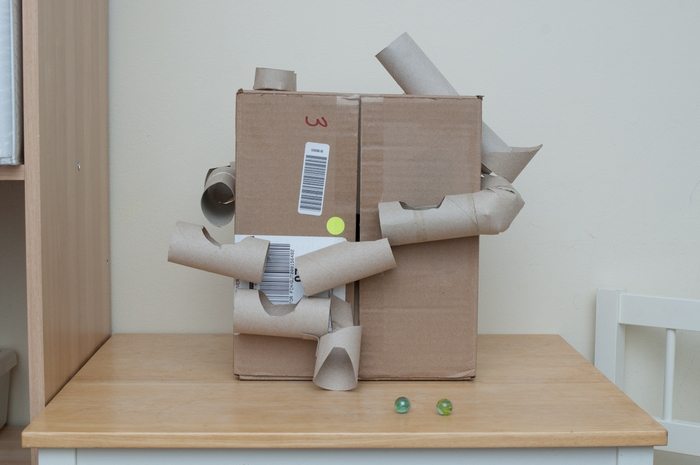
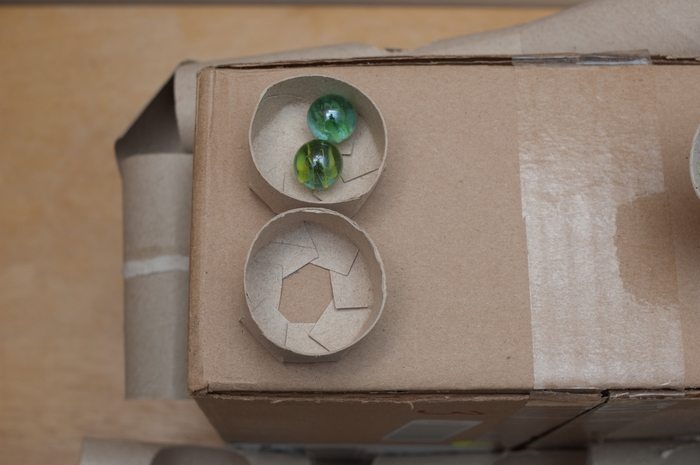
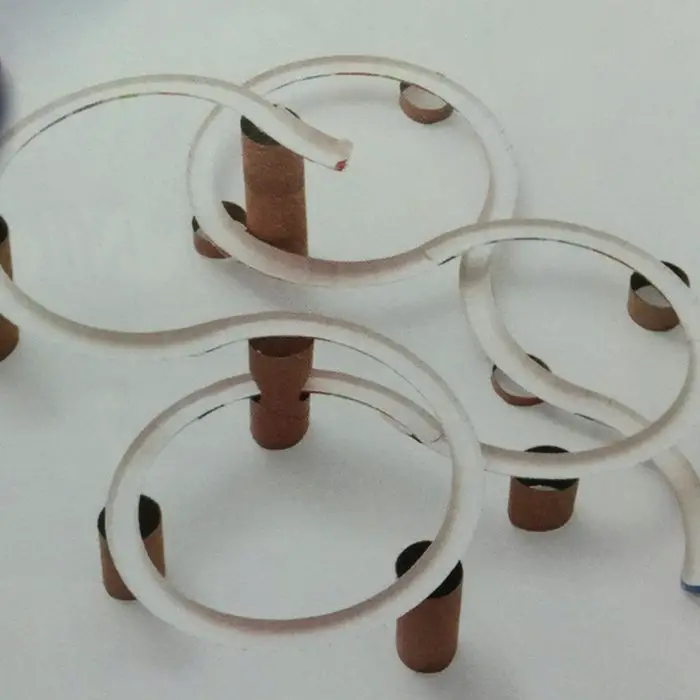
2. Cardboard Tubes and a Box

This marble run is perfect for beginners and offers a fantastic way to repurpose cardboard scraps. Use a large box as the base, positioning it either horizontally or vertically, depending on the desired complexity. Cut and arrange various lengths of cardboard tubes inside the box, securing them with tape or hot glue.

Design pathways that allow marbles to zigzag or spiral down into the box, adding smaller boxes or cutouts as additional obstacles or collection points for the marbles. The confined space of the box challenges designers to think creatively about space management, making it an excellent project for stimulating young minds and developing spatial awareness.

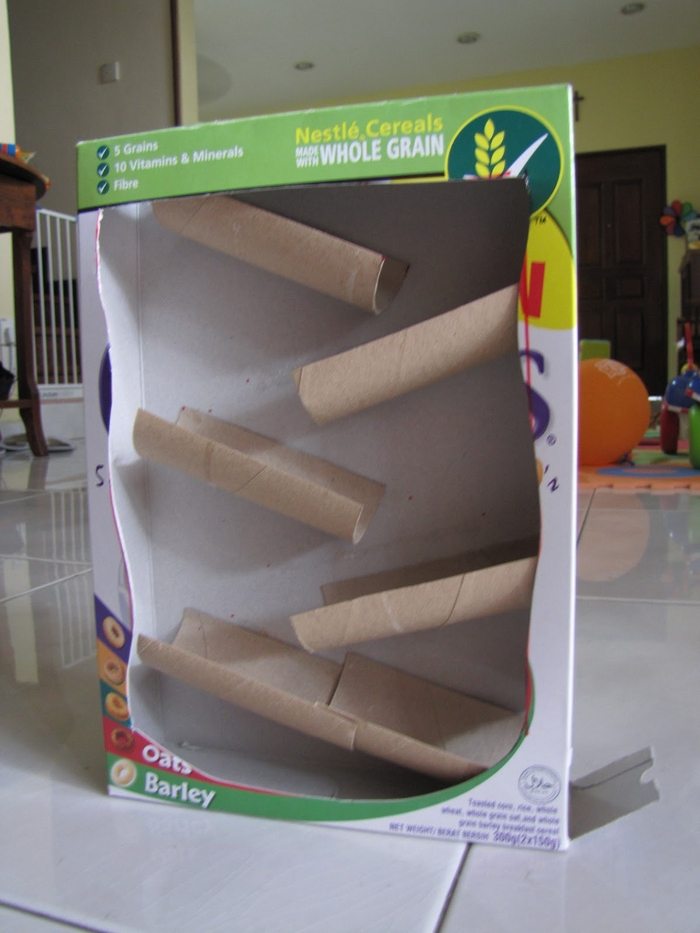
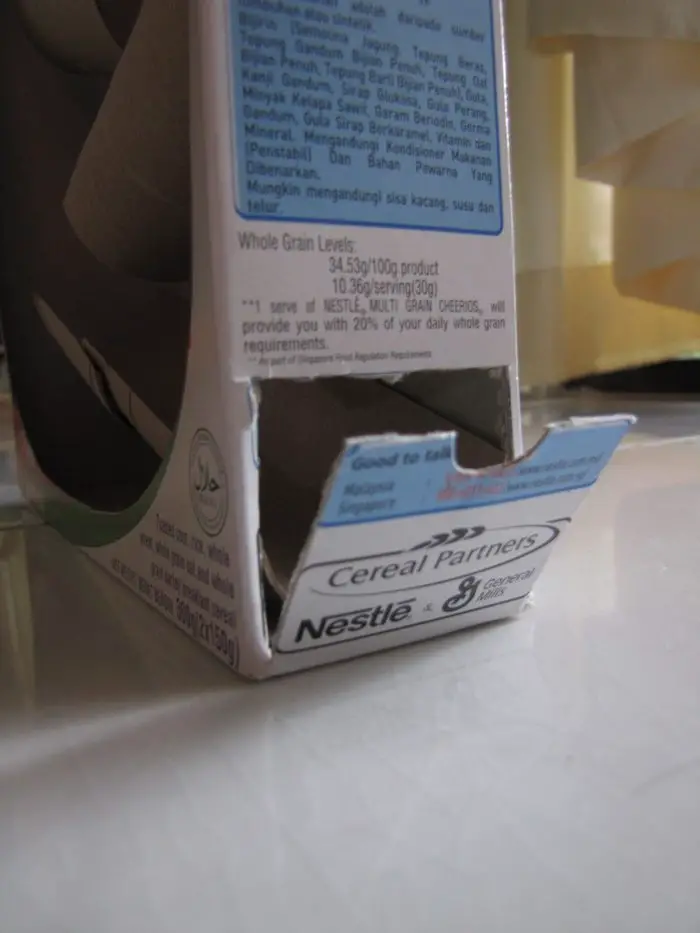
3. Cereal Box Marble Run

This creative take on a marble run turns an ordinary cereal box into an exciting playground for marbles. Begin by cutting the front panel of the cereal box to create a transparent viewing window. Use the remaining cardboard to craft ramps and barriers within the box. Secure these pieces with glue or tape to form a multi-tiered path that zigzags from the top of the box to the bottom.

Small cutouts can be made along the sides to serve as additional entry or exit points for the marbles, adding layers of complexity. Decorate the box with bright colors or patterns to enhance the visual appeal. This setup not only recycles a common household item but also provides a compact and visually engaging marble run that’s perfect for tabletop play.

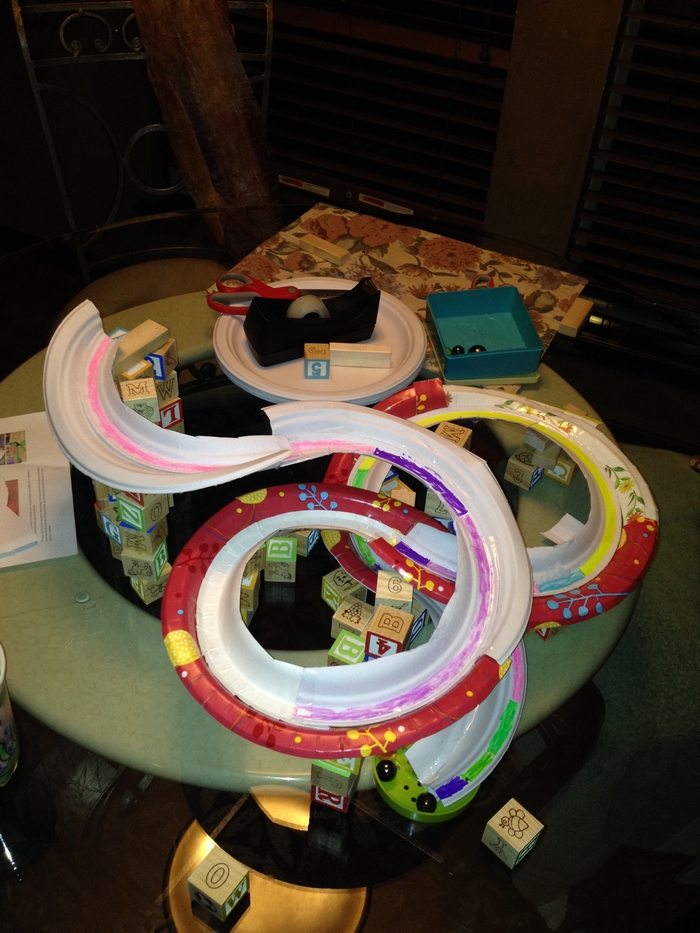
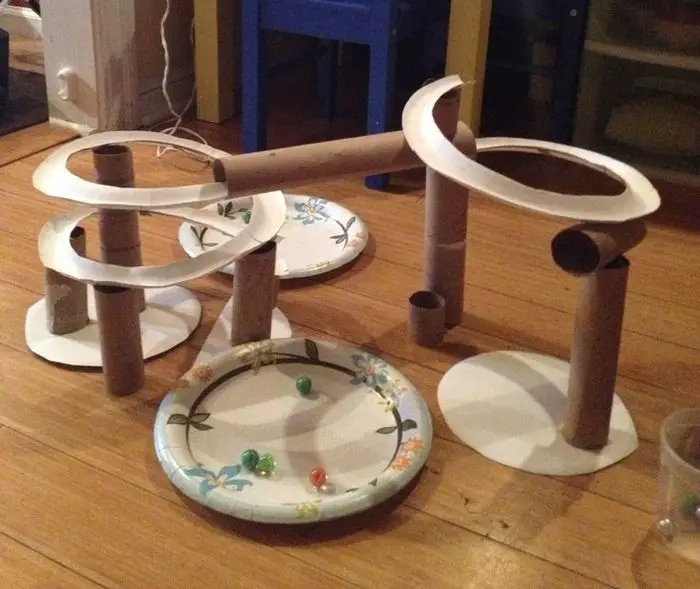
4. Paper Plate Marble Run

For a unique and versatile marble run, utilize paper plates by cutting and folding them into spirals and funnels. Connect several plates using tape or staples, ensuring that each plate’s path smoothly leads to the next. Incorporate sections where marbles have to jump gaps or navigate through small obstacles like straws or popsicle sticks glued across the path.

This design can be hung on a wall or from a ceiling, where the lightweight nature of the paper plates makes them easy to adjust and move around. The Paper Plate Marble Run is not only an inventive project but also a visually delightful one that can be customized with paints or markers, making each marble’s journey a vibrant spectacle.

Who says we need to spend on expensive toys to keep the kids entertained? ;)

This is a great activity to do with kids, as it’s both fun and eco-friendly. Plus, it’s a great way to repurpose those old cardboard boxes taking up space in your home. Here’s what you’ll need to get started:

Materials

  • Cardboard
  • Craft Sticks
  • Paper Cups
  • Duct Tape
  • Hot Glue
  • Marbles

Tools

  • Scissors

Making a Marble Run

First, you’ll need to gather up some cardboard boxes. You can use any size or shape of a box, just make sure that they are sturdy enough to stand up on their own.

Now that you have all the materials you need, let’s get started! This project is easy and fun. Just follow the steps below and you’ll be finished in no time!

1. Prepare the cardboard

To keep the marbles from rolling off, we taped strips of cardboard to the sides. For the marbles to roll smoothly into the cups, I cut off the rims of the cups before gluing them to the cardboard.

2. Glue the craft sticks

After that, we glued craft sticks to the cardboard with hot glue. To make it like Plink-O, we used two sections of short sticks. It worked perfectly! Although we weren’t sure how much incline we wanted for our marble run, leaning it against the couch worked perfectly.

3. Find the perfect location to play

Look around your house where you can lean your marble run. You can use your sofa or table to have this leaned and there you go! Your kids can now start playing!

Your kids will have hours of fun playing with it. Plus, it’s a great way to encourage their creativity and problem-solving skills. Either way, your kids are sure to have a blast playing with their new toy!

You can get step-by-step instructions from Sarah over at Frugal Fun For Boys and Girls!

Advanced Design Tips for a More Complex Marble Run

Creating a marble run can be an exciting challenge that scales up as your design aspirations grow. Whether you’re a beginner looking to step up your game or an experienced creator aiming for complexity, these advanced design tips will help you build a marble run that stands out with its intricacy and interactive features.

Utilize Multiple Levels

Creating a multi-level marble run adds complexity and visual appeal. Start by constructing platforms at different heights and connect them with ramps or spiral slides. Use sturdy supports like thick cardboard or small boxes to maintain stability. Experiment with vertical drops for added excitement.

Incorporate Curves and Slopes

Curves and slopes make the marble’s journey unpredictable and thrilling. Instead of using straight tracks, bend flexible cardboard tubes to create winding paths. Adjusting the angle of slopes changes the speed of the marble, adding a dynamic element to the game.

Design with Obstacles

Introduce obstacles within the track to challenge the route of the marble. Items such as popsicle sticks, small boxes, or even sections of egg cartons can create barriers or gates that the marble must navigate around or through. Positioning these obstacles in key areas increases the difficulty and fun of your marble run.

Experiment with Intersections

Intersections where tracks cross or merge introduce an element of surprise and can result in marbles colliding or changing paths. Design intersections carefully to ensure they’re functional and add to the excitement without causing frequent blockages.

Add Action Features

Incorporate elements that require player interaction, such as push levers or blow tubes that can alter the path of the marbles during their run. These features engage players more actively and can be used to increase the difficulty of reaching certain areas of the track.

Fine-Tune with Testing

The most critical step in advancing your marble run design is continuous testing and tweaking. Run marbles through the course as you build, noting where they get stuck or where the flow could be smoother. Adjust angles, remove or add obstacles, and ensure that every element works as intended for maximum enjoyment.

By integrating these advanced design tips, you’ll not only enhance the complexity of your marble run but also boost its entertainment value, making it a hit with builders and players alike.

Conclusion

Building a marble run is an engaging way to combine creativity and problem-solving skills. Each design can be tailored to utilize everyday materials, transforming them into intricate and entertaining pathways for marbles. This DIY project not only provides hours of fun but also encourages young minds to explore the fundamentals of physics and engineering.

If you liked this project, you might also like to view 11 Brilliant Crafts You Can Make With Recycled Cardboard

YOU MIGHT ALSO LIKE

|

Global Site Search

Your details will never be shared with any third party. Unsubscribe at any time with a single click.

The posts on this site sometimes contain an affiliate link or links to Amazon or other marketplaces. An affiliate link means that this business may earn advertising or referral fees if you make a purchase through those links.