OK – this project takes some time to finish, but it only makes this activity a good way to spend time with your kids! Decorate their rooms or the patio together with this paper art project :) Read below for an example, and let your imaginations work to create unique designs!
Check out these adorable DIY-dyed paper decor designs! From pretty paper flowers to colorful garlands, these projects are sure to inspire you to get creative with your own paper crafting. Whether you’re looking for a quick and easy project or something a little more involved, there’s sure to be something here that catches your eye.
Contents
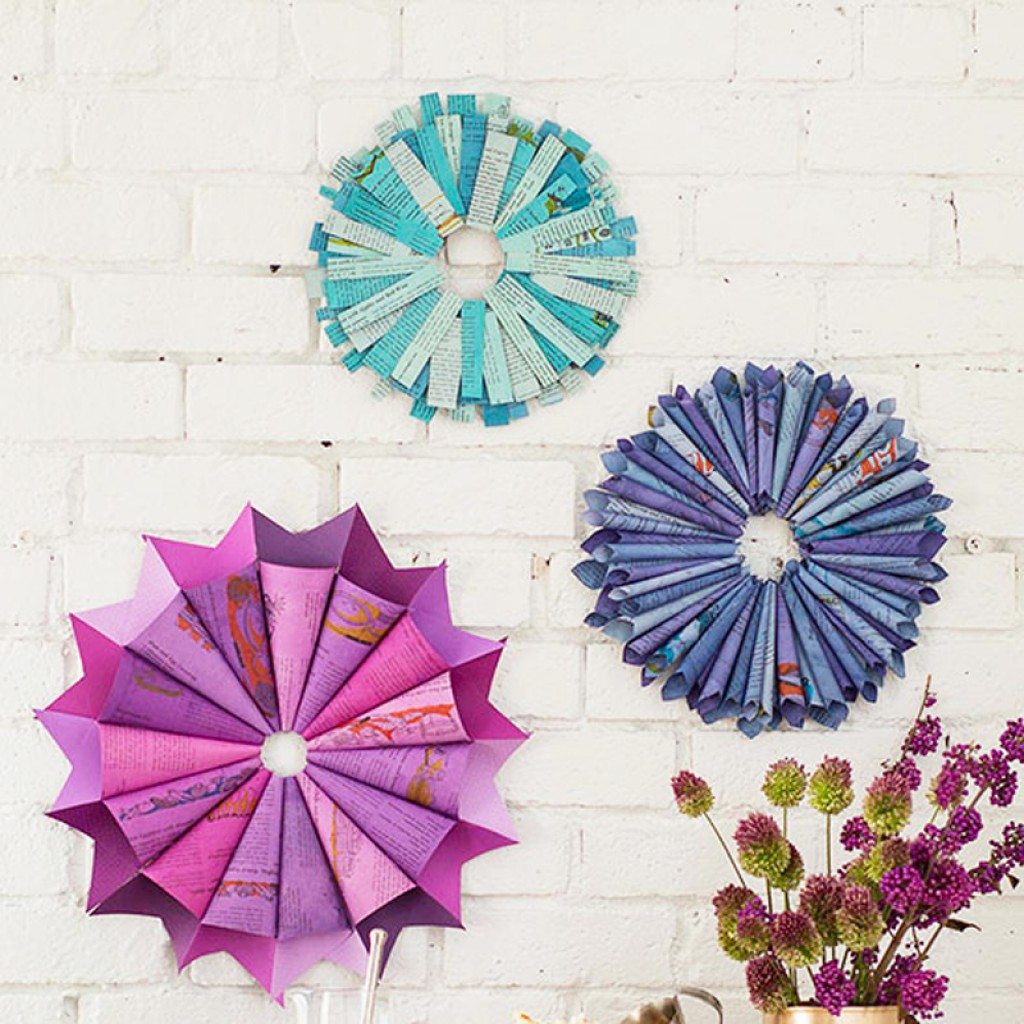
DIY-dyed paper decor designs
Click on any image to start the lightbox display. Use your Esc key to close the lightbox.![]()


This DIY project is easy to do and only requires a few supplies. Plus, it’s a great way to add a personal touch to your décor. So gather up some paper and some dye, and let’s get started!
Materials needed to make a DIY dyed paper decor
- Newspaper
- Crafts knife
- Old book pages (for best results, use thick paper)
- Powdered Rit dye in desired colors (see color combinations below)
- 2 glass jars
- 2 shallow pans
- Hot water
- Ironing clothes
- Iron
- Cardboard
- Glue gun
- Hot-glue sticks
- Adhesive dots or foam spacers
- Adhesive hanger or ribbon
How to make a DIY dyed paper decor
This project is easy to do, and you can customize the colors to match your home’s style. And the best part is that you can use whatever colors you like to customize the look to match your own personal style. Here’s how:
1. Cover your work area with newspaper
Covering your work area with newspaper is a great way to protect your surfaces from paint and other messes. Plus, it’s an easy way to clean up when you’re done!
2. Remove the book pages
Using the crafts knife take out the pages of the book
3. Prepare the mixture
Then prepare the two color mixtures mentioned below in glass jars.
To prepare the two color mixtures, you’ll need to gather a few supplies. First, you’ll need two glass jars. Next, you’ll need to prepare the two color mixtures. The first mixture should be light in color, and the second mixture should be dark in color. Here are the two color mixtures:
Formula = TEAL
Light Shade: 4 tsp. teals powdered Rit dye + 2 cups hot water
Dark Shade: 2 tsp. teal powdered Rit dye + 2 tsp. denim powdered Rit dye + 2 cups hot water
4. Transfer the mixture
Put these mixtures into shallow pans. You can add 2-3 cups of water if you want a little deeper “pool.”
5. Submerge the pages
Completely submerge book pages, a few ones at a time. Soak the pages at different durations to achieve different shades. Remove from the mixture when you get your desired shade.
6. Rinse the dyed pages
Rinse the dyed pages using cool water. Put them on paper towels and pat them to remove excess liquid. Hang or lay pages out to dry.
7. Smoothen the pages
To ensure your pages are nice and smooth, you can put them between some clothes and iron them. This will help to get rid of any wrinkles or creases.
To proceed with the paper decor follow these steps:
1. Make the circular forms
Make the circular forms of your project by cutting 9-inch diameter circles with 3-inch holes in the middle.
2. Make the strips
To create the strips, cut the book pages into different sizes lengthwise.
3. Apply glue
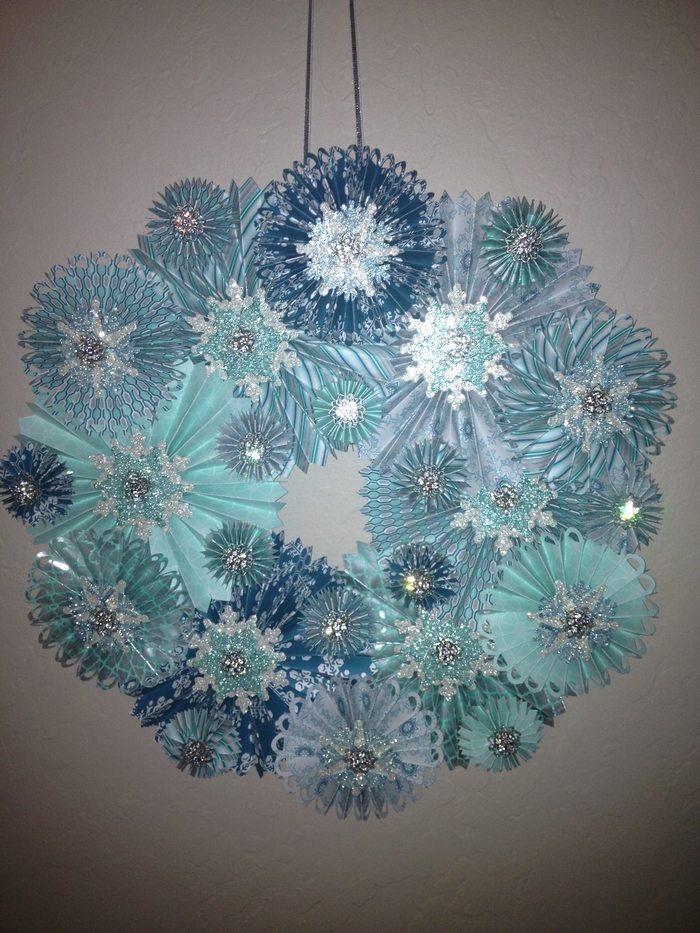
Starting on the outer edge of one of the cardboard forms, unevenly hot-glue random strips with 1–2 inches of overhang around the edge. Continue around the outside of the wreath, leaving space between the strips.
4. Cover the cardboard with the strips
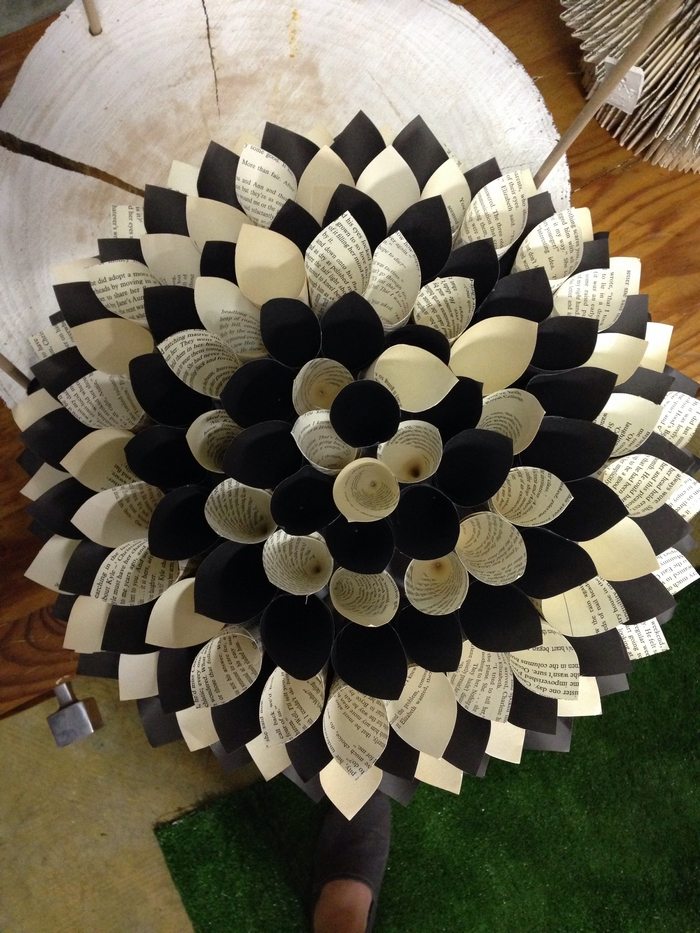
Stick adhesive dots on top of the cardboard with paper strips. Place the second wreath form on top and press to adhere. Stick random paper strips around the second cardboard, this time placing them on the spaces between strips on the first cardboard. For the final layer, add paper strips to the wreath form using adhesive dots to lift, giving some dimension. Continue until the cardboard is covered.
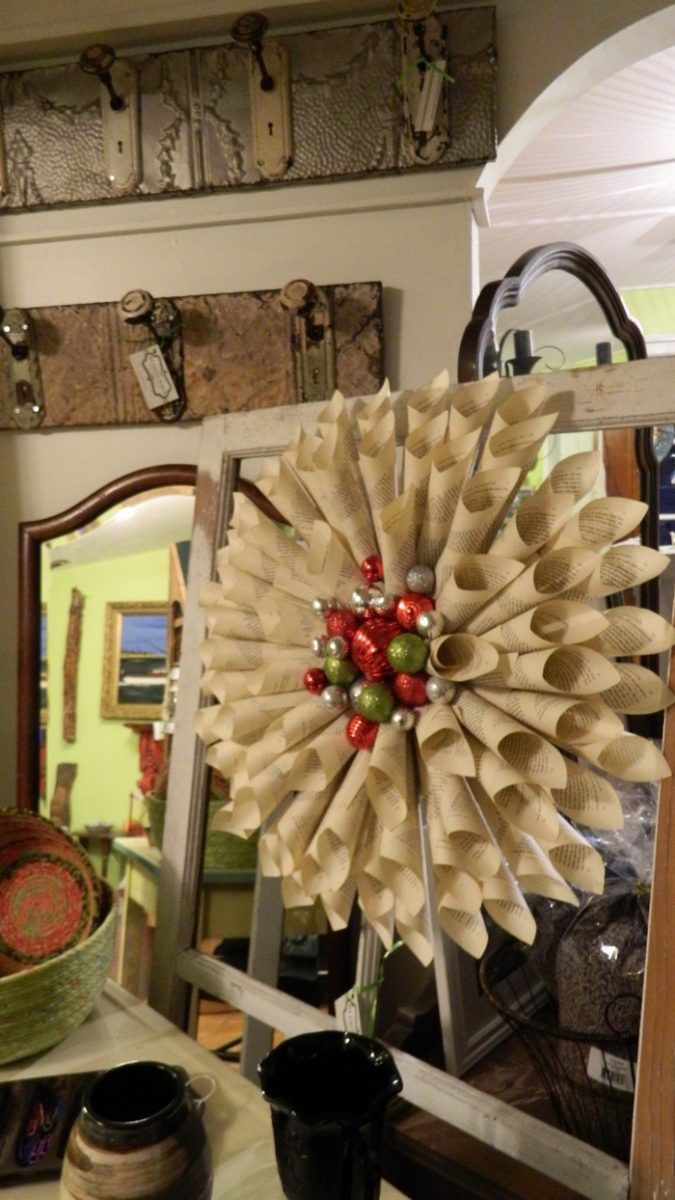
5. Hang it
You can hang your wreath with an adhesive hanger or a loop of ribbon. We recommend using ribbon if you plan on hanging your wreath outdoors, as the adhesive may not hold up in inclement weather.
Then you’re done! If you want to highlight the center of your paper decoration, you can add some beads or other embellishments. When you are having a meal, taking a break, or taking a family picture, make it the focal point of your dining area or living room. Adding this paper decoration to your dining or living area will surely make it more inviting and beautiful. 😊

Where to use DIY dyed paper decors?
Making your own dyed paper decorations is a great way to add a personal touch to any event or space. DIY-dyed paper decorations can be used for wall displays, hanging displays, or even as a background for taking pictures. With so many colors to choose from, you can really get creative with your decorating. Paper is an inexpensive way to add a splash of color to any event.
Plus, it’s a great way to recycle old newspapers or magazines that you would otherwise throw away.
Once your paper is dyed, you can use it to decorate your walls, windows, or even furniture. Get creative and have fun!
This project is a lot of fun and easy to do. It’s perfect for anyone who wants to try something new and creative. Plus, it’s a great way to add some personal style to your home.
There are endless possibilities for using DIY-dyed paper decor around your home. Get creative and see what you can come up with!
Here are other creations you can make with DIY-dyed paper:
- Frame some colorful paper to create unique wall art.
- Make pretty coasters or placemats.
- Cut out shapes and use them to decorate picture frames, mirrors, or lamps.
- Make a paper garland to hang up for a party or holiday.
- Fold or curl strips of dyed paper to create unique gift tags or labels.
The sky’s the limit – have fun and see what beautiful creations you can make!
Source: Better Homes and Gardens
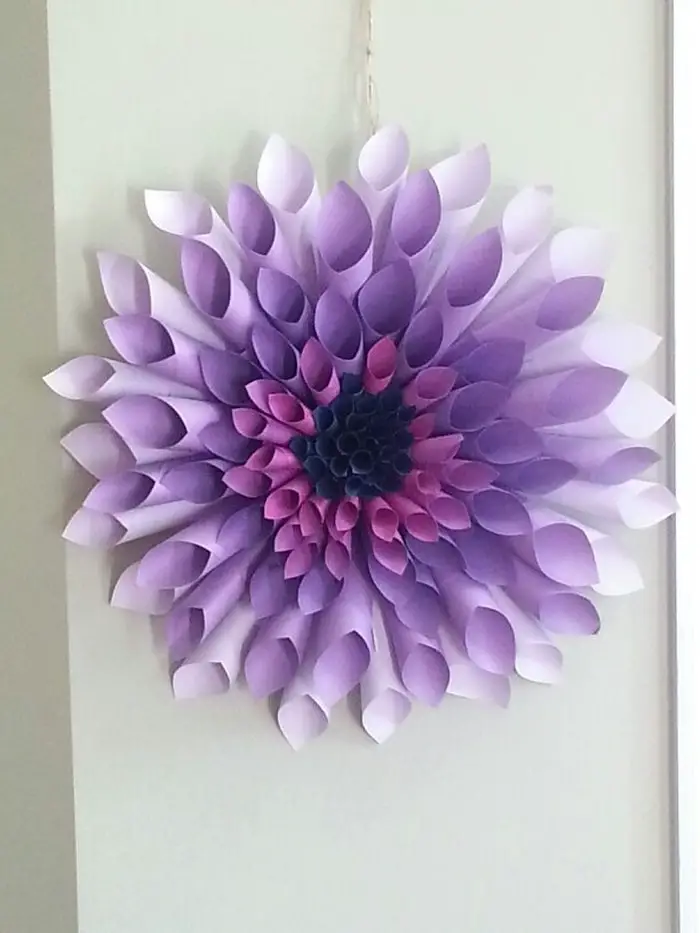
If you liked this project, you might also like to view the Adorable DIY Paper Flowers


