Buttons – they just appear out of nowhere. Do you have a jar or perhaps a box full of buttons that you’ve amassed over the years? If so, you have likely wondered from time to time how you can put them to good use. Chances are, you cannot use them all to mend your shirts – why not make a DIY button bowl?
Buttons are fun to collect and come in a variety of shapes, styles, and colours. That makes them perfect for craft projects. They have many fun and creative uses, after all. You can fashion everything from home decor to jewellery with buttons.
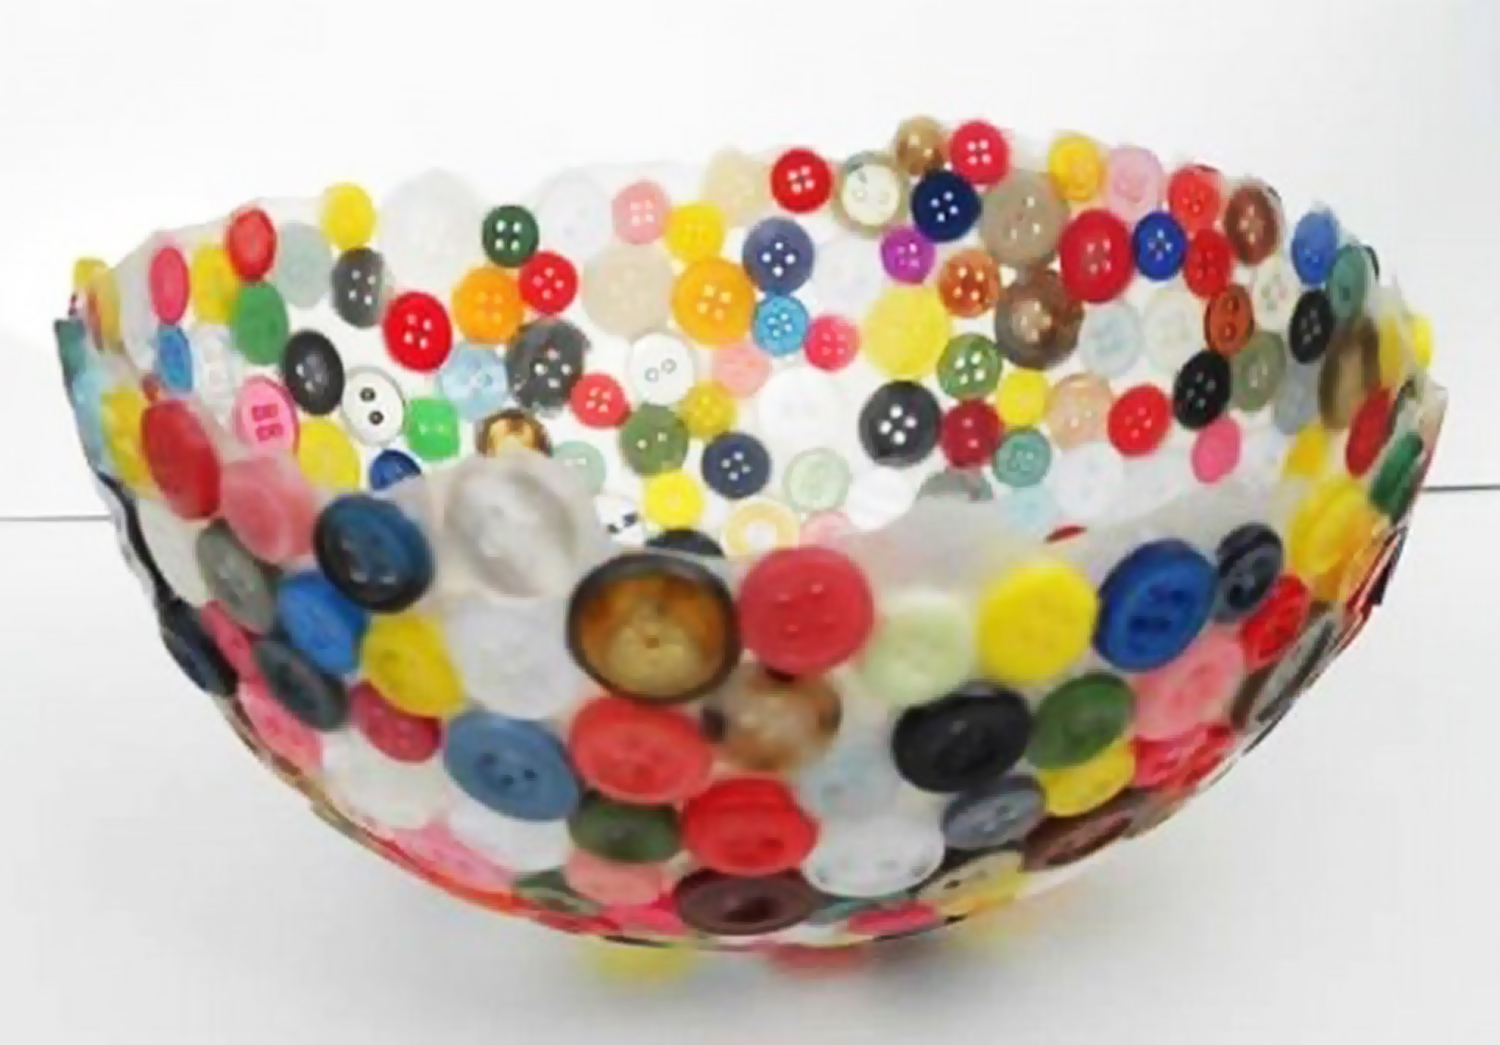
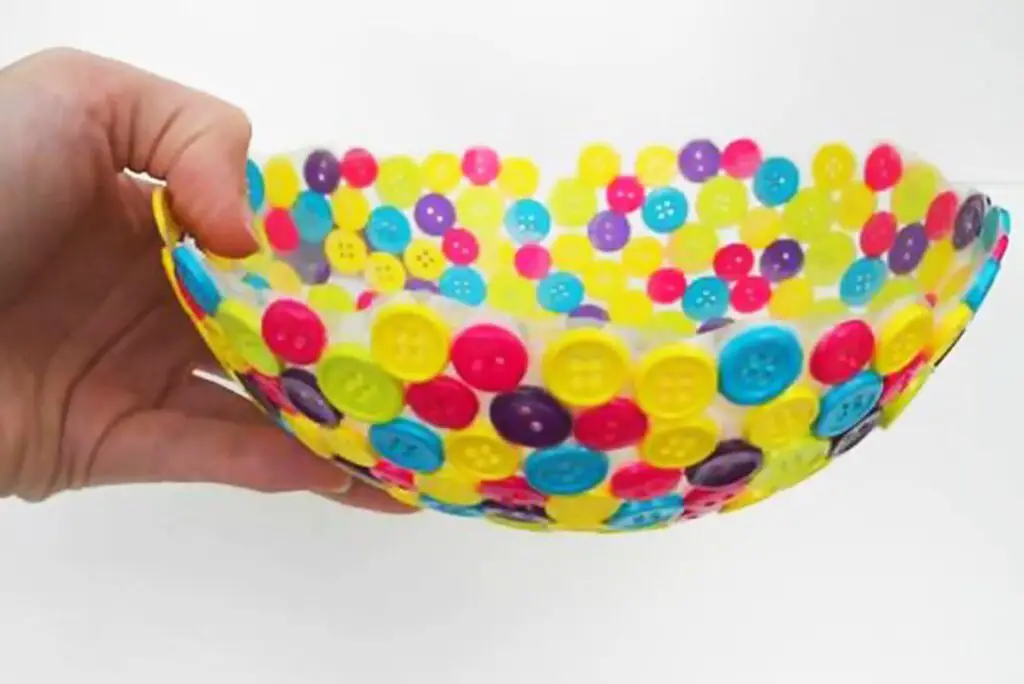
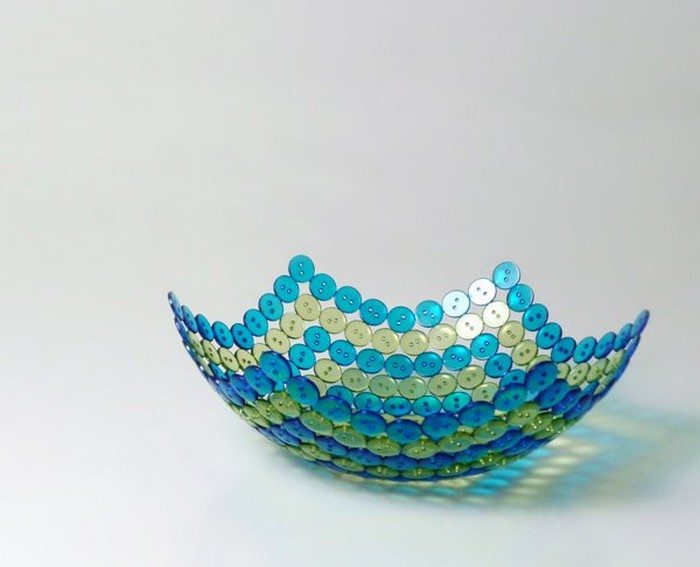
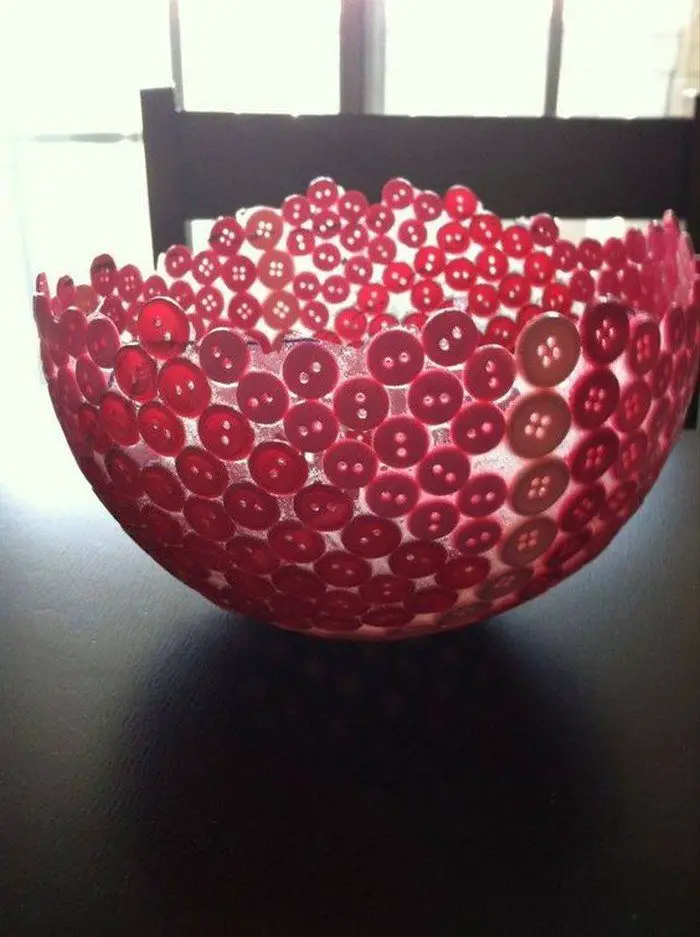
If you’ve run out of art ideas with that heap of buttons, try making a bowl with it! A button bowl can be used to store your kid’s accessories, as a candy bowl, or as a coffee table centrepiece.

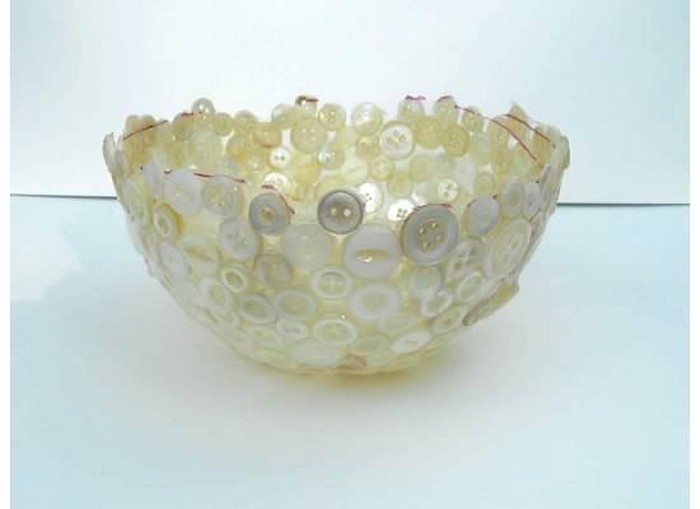
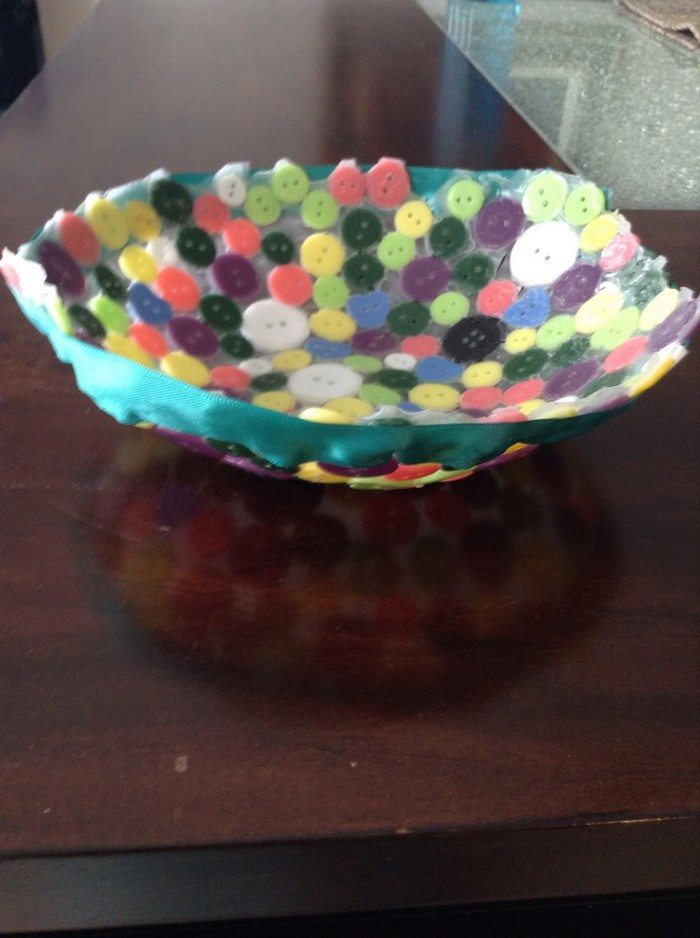
You can make yours even more different from the button bowls shown below by using other shaping models instead of a balloon!
Do you have a collection of buttons waiting for a project? :)
Click on any image to start the lightbox display. Use your Esc key to close the lightbox.![]()
Contents
How to Make Your DIY Button Bowl
Below are the materials you can use to create this cute and fun-to-make button bowl project.
Materials:
- Lots of buttons
- You’ll need a lot of buttons in various sizes, shapes, and colours to cover the surface of the balloon and create a unique design for your bowl.
- Balloon
- You’ll need a balloon to act as the mould for the bowl. Select the balloon size based on the desired bowl size.
- Vase or container
- Prepare a container or vase to secure the balloon for easy application of glue and buttons.
- White glue
- You’ll need white glue to stick the buttons onto the surface of the balloon. Elmer’s glue is a good choice for this project.
- Paintbrush
- Use a paintbrush of small to medium size to apply glue onto the balloon and buttons.
Step-by-Step Instructions
Collect your buttons, acquire some glue, and commence crafting a unique button bowl that you can exhibit with pride for many years to come.
Inflate the balloon
To start creating your DIY button bowl, start by inflating the balloon to your desired size. The balloon’s size will dictate the final dimensions of your button bowl, thus select a size that suits your intended purpose.
To hold small accessories such as hairpins or beads, opt for a small balloon. Conversely, choose a larger balloon if the purpose is to use the bowl for decorative purposes. Ensure not to over-inflate it, as this could result in bursting and jeopardize your project.
After achieving the desired size, secure the air inside the balloon by tying a knot. With the balloon prepared, it is now possible to progress to the subsequent stage of the project.
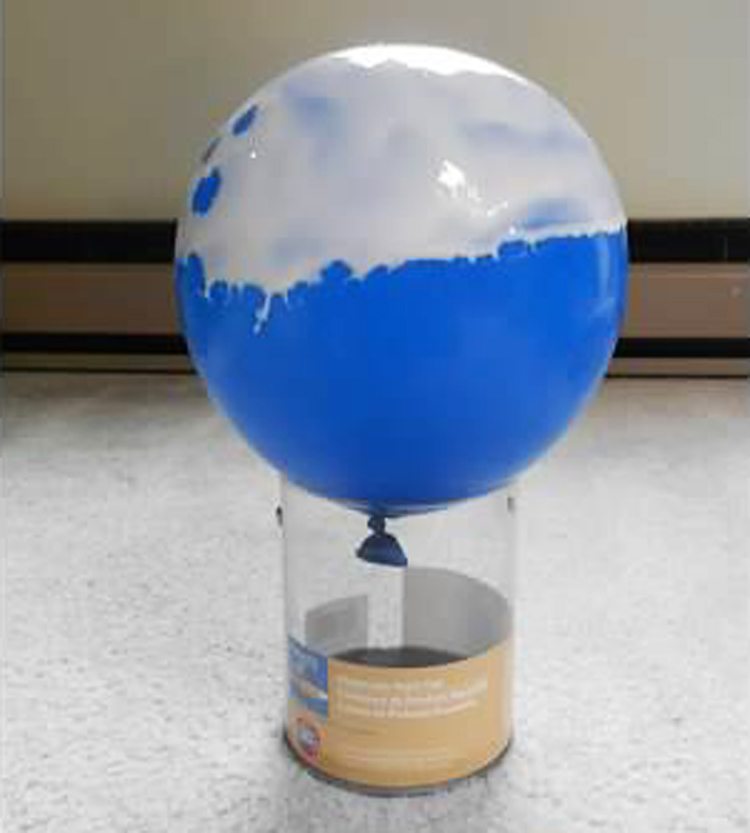
Add Glue: Protective Layer
To create a DIY button bowl, first, find a vase or container capable of supporting the balloon during the crafting process. Next, position the balloon on top of the container and secure it in place to avoid any incidents.
Using a paintbrush, generously coat one side of the balloon with white glue (such as Elmer’s glue), ensuring complete coverage. Leave it to dry completely.
Applying this coating is important to protect the bowl and ensure proper adhesion of the buttons.
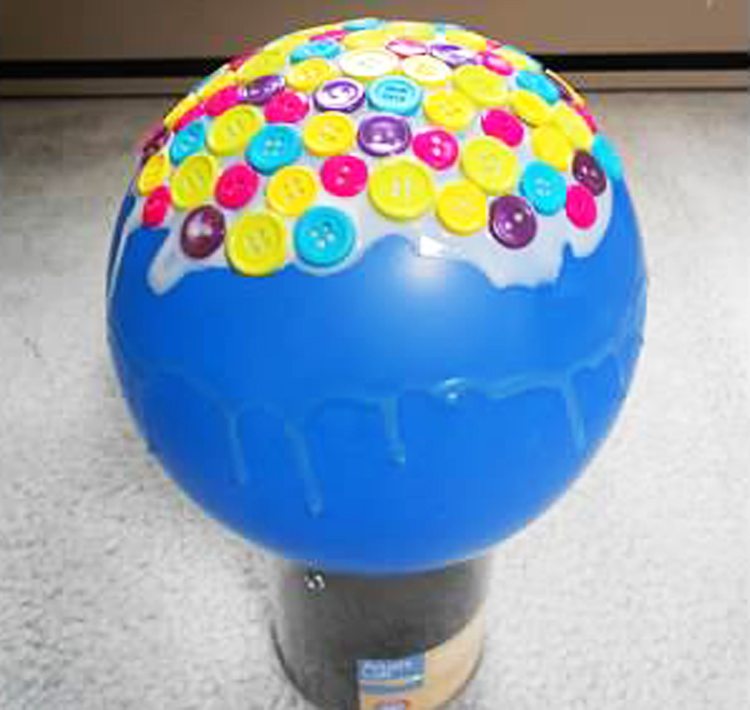
Adding Glue and Buttons
After the initial layer of glue has dried, proceed to apply a second coat using a paintbrush. Ensure the entire half of the balloon previously coated is covered with a thick layer of white glue.
Take the buttons and stick them to the glue, one by one and as closely as possible. Firmly press each button onto the glue to ensure it sticks well. Cover the entire half of the balloon with buttons, avoiding any empty spaces.
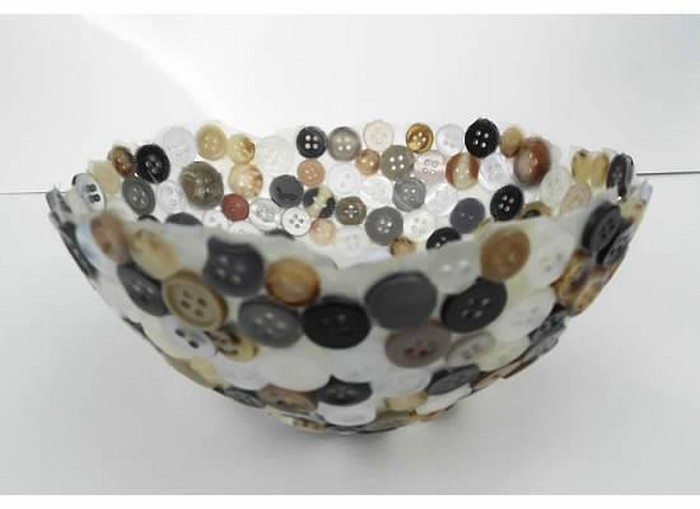
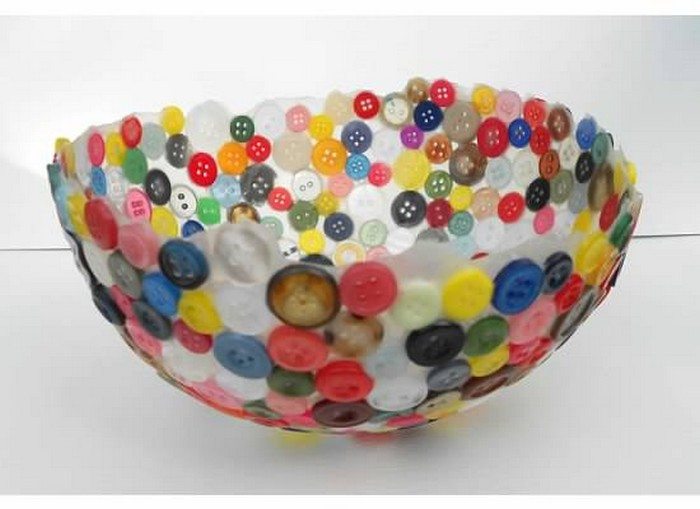
You can use buttons of different sizes, shapes, and colours to create a unique and eye-catching design.

Let it Dry
Once you have attached all the buttons, allow the balloon to dry on the vase for approximately 5 hours to ensure that the buttons are firmly secured and do not detach when the balloon is removed.
To prevent unintentionally dislodging any buttons, refrain from handling or relocating the balloon.
To speed up the drying process, place it in a well-aerated area. Upon full solidification of the adhesive, the buttons will be securely affixed to the balloon, and the bowl will have formed.
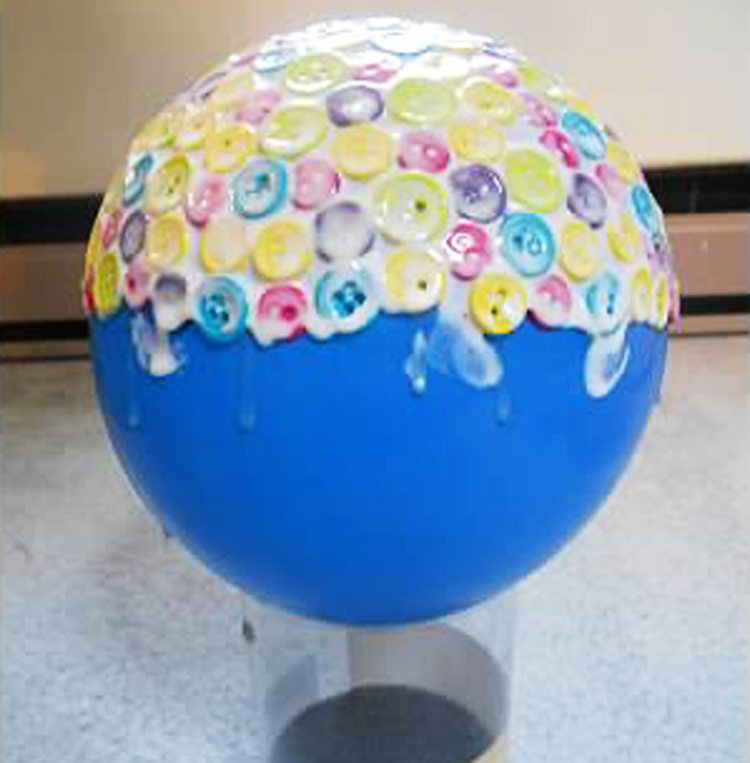
Add 1 or 2 More Coats of Glue
After the second coat dries, apply a third layer of glue uniformly across the button bowl’s entire surface. It’s advisable to use a thin layer of adhesive to speed up drying.
Let the third layer dry overnight. To strengthen the button bowl, apply a fourth layer of glue. However, ensure that each layer dries completely before adding the next.
After ensuring the bowl’s durability, allow enough time for it to dry completely before deflating the balloon. This will guarantee that the button bowl maintains its structure and does not collapse.
Avoid bursting the balloon! Instead, use the scissors to create a tiny incision and gradually release the air.

And there you have it! Your fun DIY balloon bowl is ready to display! :)
Utilizing Different Types of Glue for Varying Effects
Creating a button bowl involves not just creativity in design but also in the choice of materials, especially the type of glue used. The adhesive not only affects the durability of your bowl but also its aesthetic appeal and functionality.
Here, we explore various types of glue you can use in your button bowl project, each offering unique benefits and considerations.
White Glue
- Pros: White glue, like Elmer’s, is perfect for crafts due to its ease of use and clean-up. It dries clear, ensuring that the colorful buttons remain the focal point of your bowl.
- Cons: It may not be as durable as other adhesives and can soften in humid conditions.
Hot Glue
- Pros: Hot glue sets quickly, which is ideal when you need to hold buttons in place promptly. It’s also stronger than white glue, making it suitable for a sturdier button bowl.
- Cons: Hot glue can be messy and might show through transparent or small buttons, potentially detracting from the overall look.
Epoxy Resin
- Pros: Epoxy provides a robust bond and dries to a hard, clear finish, adding durability and a glossy sheen to your bowl, which can enhance its appearance.
- Cons: It requires careful mixing of resin and hardener and can be more expensive and difficult to work with than other types of glue.
Silicone Adhesive
- Pros: Silicone adhesives are flexible and waterproof, making them excellent for button bowls that might handle weight or moisture (like a fruit bowl).
- Cons: They can take longer to dry and might require clamping to hold the buttons in place during the drying process.
Spray Adhesive
- Pros: Spray adhesives provide an even coat and are excellent for covering large areas quickly, which is beneficial when working on a bigger bowl.
- Cons: They can be less precise than other application methods, and overspray might affect the workspace or other areas of the bowl.
Each type of glue offers unique benefits, so your choice will depend on your specific needs for the project, including the bowl’s intended use, the types of buttons used, and your personal preferences for working with adhesives.
Troubleshooting Common Issues in Button Bowl Crafting
Crafting a button bowl is a fun and creative project, but like any DIY activity, you might encounter a few hiccups along the way. Below are some common issues that crafters face when making button bowls, along with effective solutions to help you achieve a beautiful and durable result.
Buttons Falling Off
- Problem: Sometimes buttons may not adhere properly and can fall off either during or after the crafting process.
- Solution: Ensure that each button is coated with a sufficient amount of glue. Press each button firmly onto the balloon to secure its placement. Consider applying an additional layer of glue over the entire surface once the initial arrangement has dried to reinforce the buttons.
Balloon Sticks to Glue
- Problem: The balloon may stick to the glue as it dries, complicating the removal process and potentially damaging the bowl.
- Solution: Lightly coat the balloon with a thin layer of petroleum jelly or cooking oil before applying glue. This layer acts as a release agent, making it easier to remove the balloon without sticking.
Uneven Glue Application
- Problem: An uneven application of glue can lead to areas where the buttons are not securely attached or where the glue dries unevenly, creating a less attractive finish.
- Solution: Use a paintbrush to apply glue evenly across the balloon’s surface. For larger projects, consider using a sponge brush to cover broader areas more uniformly.
Glue Drying Too Quickly
- Problem: In warmer conditions or when using quick-setting adhesives, the glue may dry too quickly, not giving you enough time to position the buttons correctly.
- Solution: Work in small sections, applying glue to just one part of the balloon at a time. This method allows you to focus on securing the buttons properly before the glue sets.
Balloon Bursts During Crafting
- Problem: Balloons can unexpectedly pop during the crafting process due to over-inflation or accidental puncture, which can scatter buttons and glue.
- Solution: Do not over-inflate the balloon, and choose high-quality balloons that are less prone to bursting. Work in a calm environment where the balloon is less likely to be disturbed or poked.
Difficulty in Achieving Desired Bowl Shape
Problem: The final bowl may not form the desired shape, sometimes collapsing or becoming warped.
Solution: Ensure the glue is completely dry before deflating the balloon. Consider using a mold or form that supports the balloon’s shape during the drying process. Additionally, apply consistent layers of glue to maintain an even thickness around the balloon.
By anticipating and addressing these common crafting challenges, you can enhance your button bowl making experience and ensure a successful, enjoyable project.
Conclusion
To sum up, making a button bowl is an enjoyable and imaginative method to recycle your unused buttons. By using simple materials and straightforward instructions, you can create an exceptional and customised bowl that serves a lot of functions.
Crafting a button bowl is not only an excellent opportunity to display your skills but also yields a functional and decorative item for your home. Collect your buttons, secure some adhesive, and prepare to make an exquisite and practical button bowl that is bound to leave an impression!
Thanks to Designs by Kristen for this cute project.
If you liked this project, you might also like to view Buttons into a belt...


