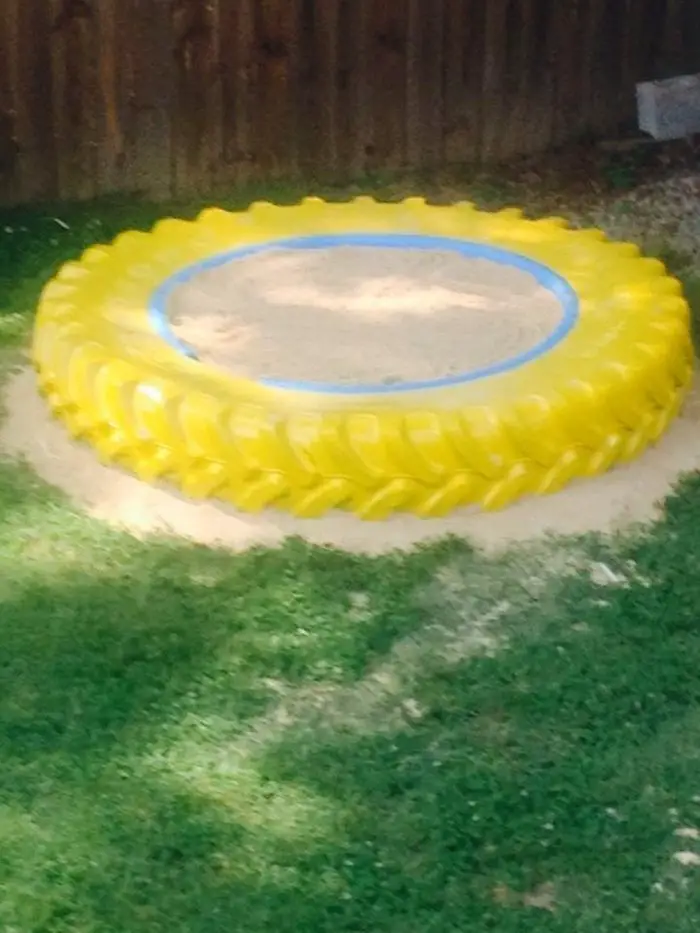
Looking for a fun and easy DIY project for the kids this summer? Why not try turning an old tire into a sandbox?
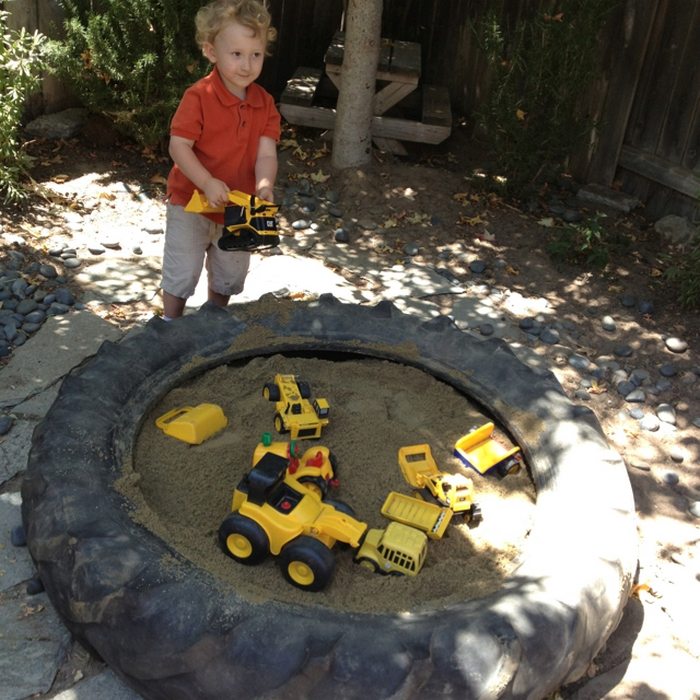
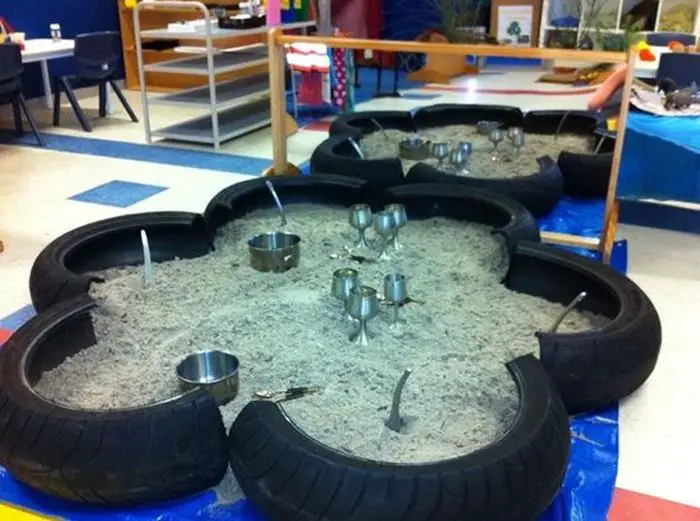
You don’t have to dig just to give your kids a sandbox to play at. Use tractor tires!
It’s a great way to upcycle a tire that would otherwise end up in a landfill, and the kids will love playing in their very own sandbox.

Looking for a fun and unique sandbox for your kids? Check out these wonderful DIY tire sandboxes! They’re easy to make and your kids will love playing in them.
Contents
- 1 Making a DIY Tire Sandbox
- 2 Safety Considerations for Tire Sandboxes
- 3 Creative Decoration Ideas
- 4 Alternative Uses for Tire Sandboxes
- 5 FAQ for DIY Tire Sandbox
- 5.1 What type of tire is best for a tire sandbox?
- 5.2 How much sand will I need to fill a tire sandbox?
- 5.3 Is it safe to use any old tire for a tire sandbox?
- 5.4 Can I place the tire sandbox on the grass?
- 5.5 How do I maintain the tire sandbox?
- 5.6 Can I paint the tire sandbox?
- 5.7 Are there any creative ways to use a tire sandbox besides as a play area?
- 5.8 How do I ensure my tire sandbox is safe for kids?
- 6 Wonderful DIY tire sandbox ideas
- 7 Conclusion
Making a DIY Tire Sandbox
What are the materials needed to make a DIY tire sandbox?
To make a DIY tire sandbox, you’ll need the following tools and materials.
- Tractor Tire
- Pool noodle
- Old sheet/cloth or weed guard
- Sand
- Plywood (for sandbox cover)
- Reciprocating saw
- Scissors
How to make a DIY tire sandbox?
First, You have to do some looking to find a used tractor tire, sand, and plywood. You can usually find these at a garage sale, or even ask a friend or neighbor if they have an old one they’re not using. Once you have your tire, clean it out well and make sure there are no sharp edges.
With little perseverance, you can have these things for free.
1. Determine the size and location
Decide the size of tire you can use. You can make the hole bigger using the reciprocating saw if it’s too small for your kid. Just remember to be careful, and keep your child safe while you’re working.
When deciding the location of your tire sandbox, we usually recommend placing it outdoors. However, you may want to consider not placing it in an area that gets direct sunlight for extended periods of time. This is because the sandbox can become quite hot, making it uncomfortable for your kids to play in.
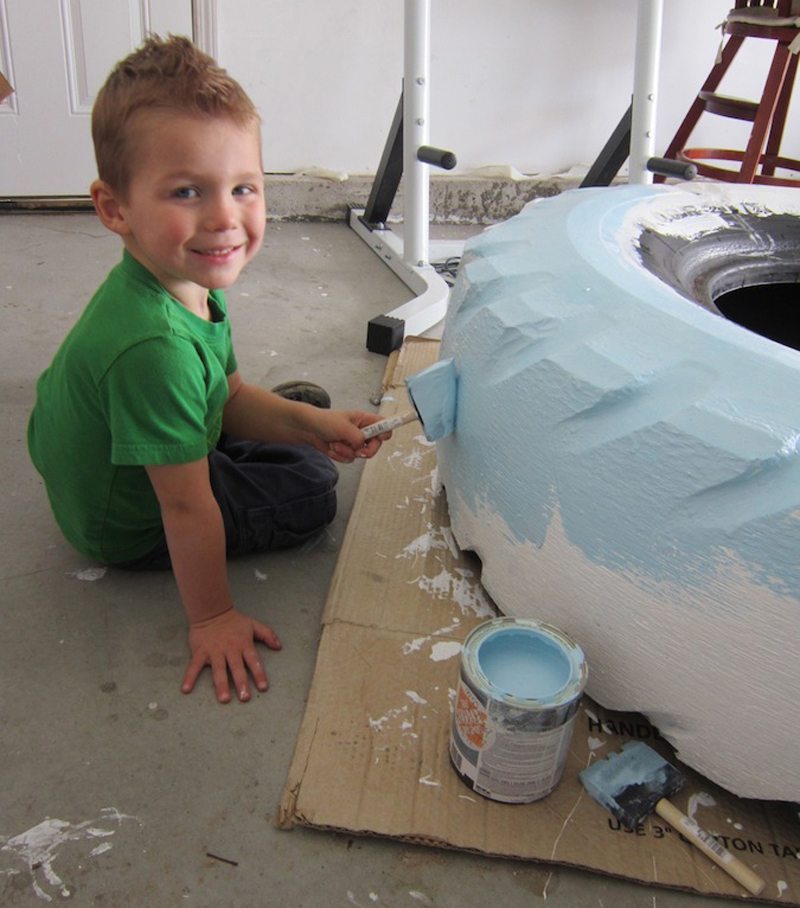
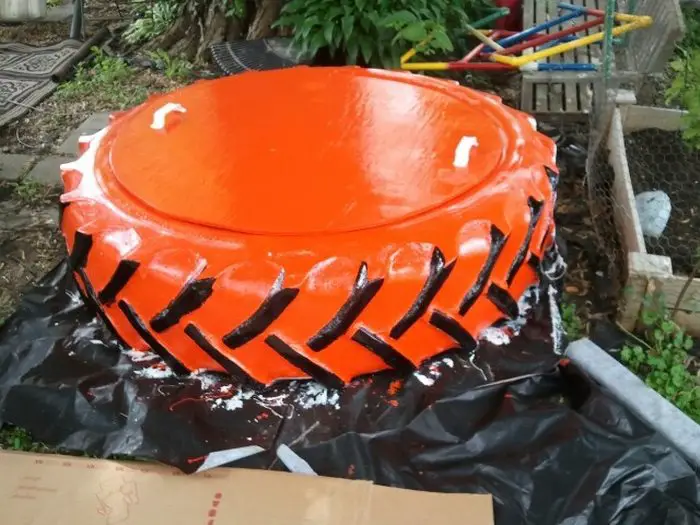
2. Clean and paint the tire
Before you start painting, be sure to clean the tire and let it dry completely.
Use light-colored exterior paints.
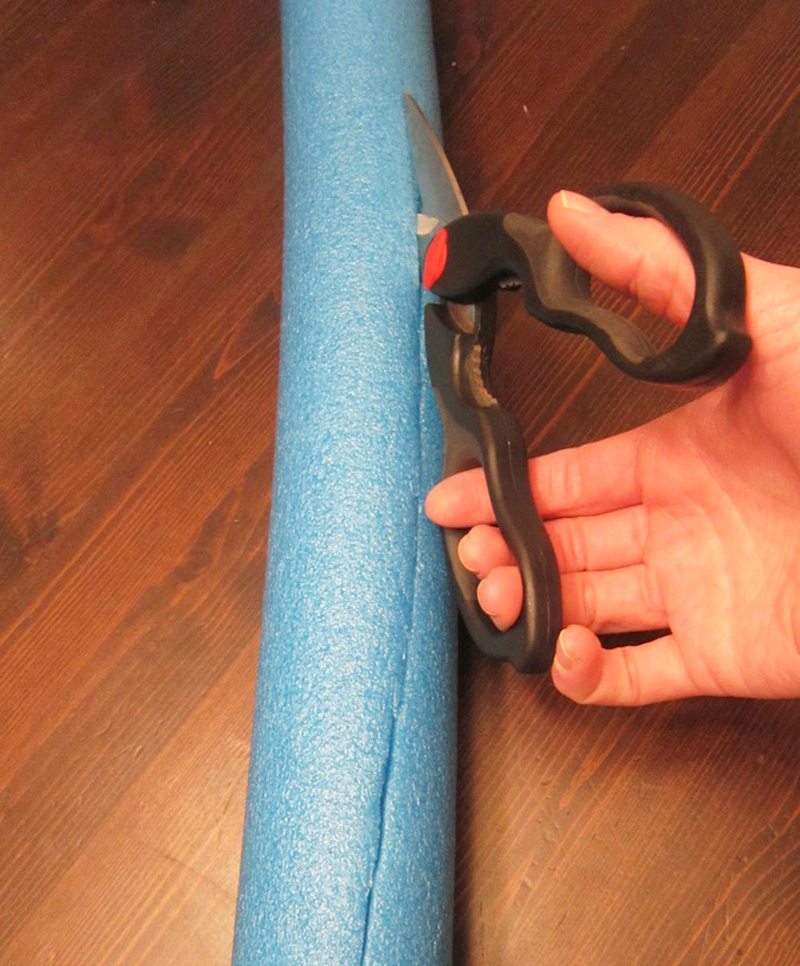
3. Cover the raw edges
When the tire dries up, cut open the pool noodle to cover the raw edges. When the tire dries up, cut open the pool noodle to cover the raw edges. This will help to protect the tire and keep it from getting damaged.
4. Fill up the tire with sand
To fill up the tire with sand, simply pour the sand into the tire until it is full.
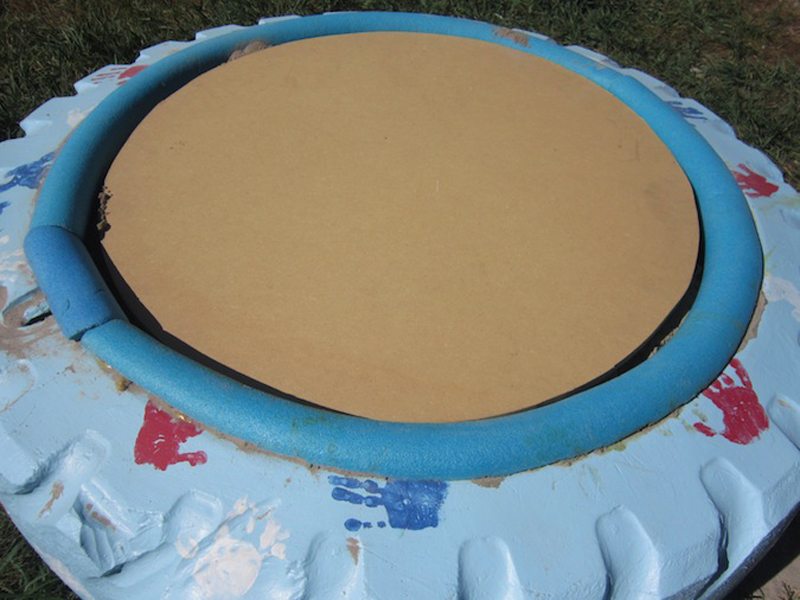
5. Measure and cut the plywood
To measure and cut the plywood, use a tape measure to measure the desired size of the plywood. Then, use a saw to cut the plywood to the desired size. This will be used to cover the sandbox when not in use.
Now that you have your DIY Tire Sandbox all setup, it’s time to have some fun!
This is a great way to keep the kids entertained while they get to play in the sand. They can build sandcastles, make mud pies, or just play in the sand. It’s an excellent way for them to get some exercise and fresh air. Plus, it’s the perfect way to keep them occupied while you’re busy with chores and other things in the house.
Just make sure that they stay hydrated and take breaks in between to avoid getting too hot. Have fun! 😎
Thanks to I Heart Nap Time for this wonderful tutorial.
Safety Considerations for Tire Sandboxes
Creating a tire sandbox is a fantastic way to repurpose an old tire. However, ensuring the safety of the little ones playing in it is crucial. This section covers key safety aspects when building a DIY tire sandbox.
Check for Harmful Substances
When repurposing an old tire for a sandbox, it’s essential to ensure it’s safe for children. Tires can contain chemicals or metals that might be harmful. Here’s how to check for these substances:
Inspect for Chemical Residues
Old tires are often exposed to various chemicals throughout their usage. These chemicals might linger on the tire surface.
Look for stains or discolored patches on the tire. These could indicate chemical spills or treatments. Pay close attention to any unusual odors as well, as they might signal the presence of chemicals.
Use a strong detergent and water to thoroughly clean the tire. Scrub the entire surface, both inside and out. After cleaning, rinse the tire well and let it dry completely. This reduces the risk of chemical exposure to children.
Verify the Absence of Lead-Based Paints
Older tires may have been coated with lead-based paints. Lead is a hazardous substance, particularly harmful to children.
Use a home lead testing kit to check for the presence of lead-based paint. These kits are readily available and easy to use. Follow the instructions carefully for accurate results. If you’re uncertain about the results, seek professional help. A professional can conduct more thorough tests and guide safe handling.
Examine for Metal Wires
Tires have metal wires in their structure. Over time, these wires can become exposed, posing a risk to children.
Inspect the tire closely for any protruding metal wires. Run your hands carefully over the surface to feel for any sharp edges. If you find exposed wires, use pliers to remove or bend them back into the tire. Wear gloves to protect your hands during this process.
Consult with Professionals
If in doubt, consult with a professional. They can help identify any potential hazards in the tire and suggest ways to mitigate them.
Secure the Sandbox
Ensuring the stability of your DIY tire sandbox is critical for the safety of children. Here’s how to effectively secure the sandbox:
Choose a Level Ground
When setting up a tire sandbox, the first step is to ensure it sits on level ground. This is crucial because an uneven surface could lead to the tire shifting or rolling, which could be dangerous for children playing around it. To check for levelness, use a spirit level or observe how water behaves on the surface – it should not pool or flow in any direction.
Anchor the Tire
After finding a level spot, focus on securing the tire. Despite its weight when sand-filled, anchoring the tire provides an additional safety measure. This can be done using stakes or heavy-duty ground anchors.
These anchors should be placed around the perimeter of the tire. Drive them deep into the ground to ensure they hold the tire firmly in place. This prevents any accidental movement, especially when children are playing energetically.
It’s also a good idea to regularly check these anchors. Over time, natural elements like wind, rain, and the constant movement of children playing can loosen them. A quick inspection and tightening now and then will maintain the sandbox’s safety and stability. This way, you can be confident that the tire sandbox is a secure and enjoyable play area for children.
Fill Properly
Properly filling the tire with sand is crucial for its stability. The uneven filling can lead to an imbalance, making the tire prone to shifting or tipping, especially when children play. To ensure even filling, start by adding sand gradually and spreading it evenly across the base of the tire.
Use a rake or your hands to distribute the sand. As you fill, periodically shake or tap the tire to settle the sand and reveal any uneven spots. Aim for a level surface of sand across the entire area of the tire. This even weight distribution helps keep the sandbox stable and safe for children’s play.
Regular Checks
Regular maintenance of the tire sandbox is essential to ensure its ongoing safety. Over time, factors like play activity, weather conditions, and natural wear and tear can affect the sandbox’s stability. Periodically check the anchors that secure the tire to the ground.
Ensure they are firmly in place and not loosened by soil shifts or erosion. If they are loose, re-secure them to maintain the stability of the sandbox. Additionally, check the level of the sand. Sand can be displaced during play or eroded by wind and rain.
Add more sand to keep the surface level and ensure the tire remains properly filled. By conducting these regular checks, you can ensure the tire sandbox remains a safe and enjoyable play area for children.
Smooth Edges
When transforming an old tire into a playful sandbox, one critical aspect to consider is the potential hazard posed by its rough or sharp edges. These edges are common in used tires and can lead to injuries like scratches or cuts during play. Therefore, it’s essential to address this issue to ensure the safety of the children using the sandbox.
Using Pool Noodles
A practical and child-friendly solution is to use pool noodles. Pool noodles are soft, flexible, and easy to handle. Cut the noodle lengthwise and fit it around the tire’s edge to use them. This method creates a soft, cushioned barrier over sharp or rough surfaces. Ensure the pool noodles are securely attached to the tire. Strong adhesive, zip ties, or duct tape can be used. This enhances safety and adds a playful, colorful touch to the sandbox.
Implementing Rubber Edging
For a more durable solution, consider using rubber edging. This material is specifically designed for covering sharp edges and is commonly used in childproofing. It can be purchased at hardware stores and is often used in playgrounds and schools. Measure the circumference of the tire and cut the rubber edging to size. Then, affix it around the tire’s edge. Rubber edging is typically more weather-resistant than pool noodles, making it a long-lasting option.
Creative Decoration Ideas
Creating a DIY tire sandbox is not just about functionality; it’s also an opportunity for creative expression. Decorating the tire can make it an attractive and exciting feature in your garden or play area. Here are some creative ideas to transform a simple tire into engaging play equipment.
Painting the Tire
One of the easiest ways to brighten up a tire sandbox is with paint. Choose vibrant, weather-resistant outdoor paints. You can create patterns or designs by using a single color or multiple hues. Consider involving the kids in this activity. They can add their personal touch by painting handprints or simple drawings on the tire.
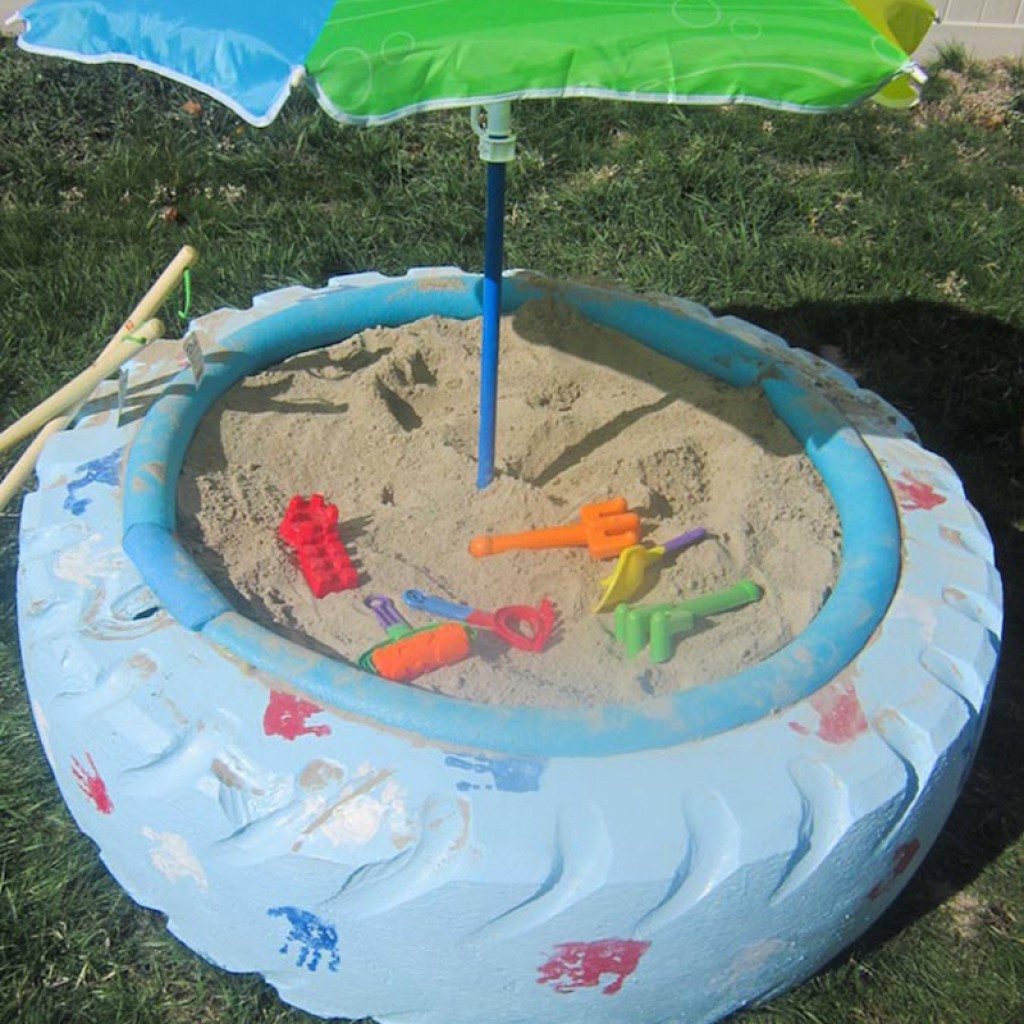
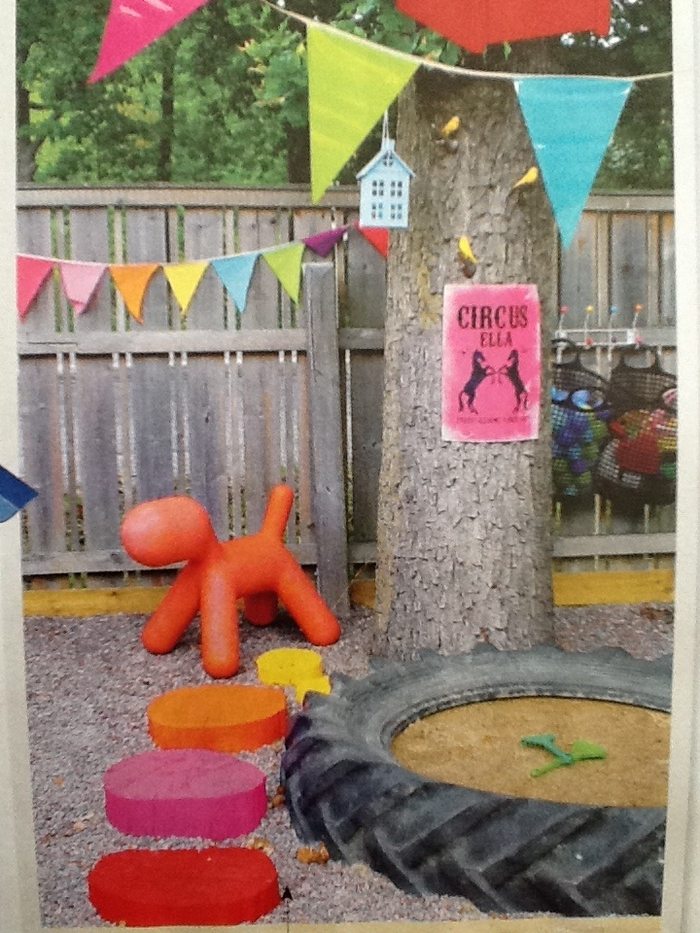
Themed Sandbox
Transform the sandbox into a themed play area. For instance, if your child loves the sea, you can paint the tire blue and add accessories like a small flag to mimic a ship. Green and brown paint with animal stickers or figures can be used for a jungle theme. Themes can be tailored to your child’s interests, making the sandbox a more engaging play space.
Adding Accessories
Accessorize the sandbox to increase its appeal. Attach a small umbrella to provide shade and add a beach feel. Place comfortable cushions or seating around the tire for a cozy reading nook. LED string lights can also be added for a magical touch, especially during evenings.
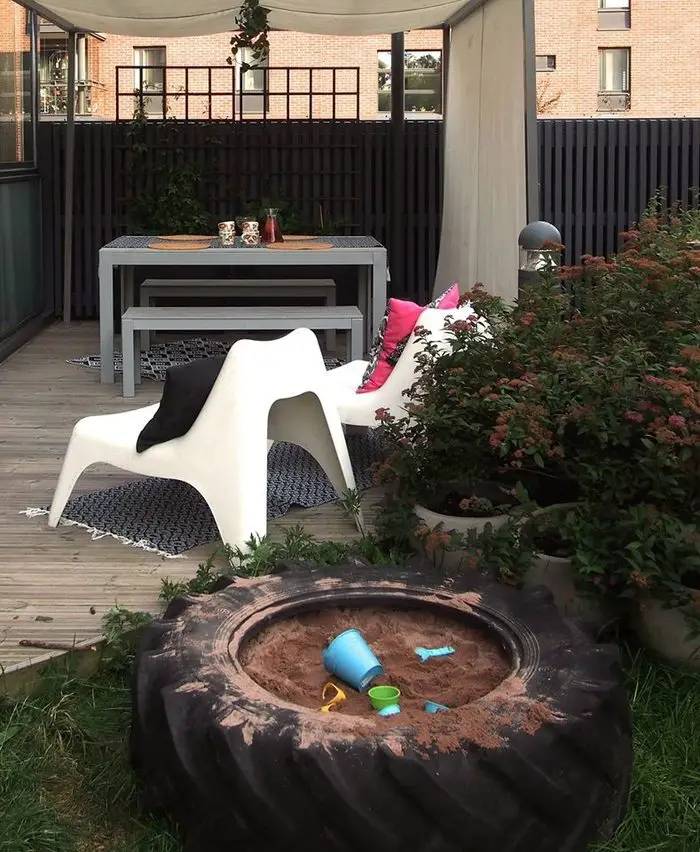
Garden Integration
If you have a garden, integrate the sandbox with the surroundings. Plant flowers around the tire or use creepers to partially cover it. This beautifies the sandbox and helps it blend naturally with your garden.
Seasonal Decorations
Decorate the sandbox according to seasons or festivals. For Christmas, add lights and ornaments. During fall, use autumn leaves and pumpkins for decoration. This keeps the sandbox feeling fresh and exciting throughout the year.
These decoration ideas can turn a simple tire sandbox into a delightful and inviting play area. It encourages creativity and can be a fun project for the whole family.
Alternative Uses for Tire Sandboxes
A tire sandbox is a versatile and eco-friendly addition to any outdoor space. Beyond its traditional role as a play area, a tire sandbox can serve various alternative purposes. These creative uses extend the functionality of a tire sandbox and add unique elements to your garden or yard.
Mini-Garden
Transform your tire sandbox into a mini-garden. Fill the tire with soil instead of sand and plant flowers, herbs, or small vegetables. This repurposing is visually appealing and educational for children, teaching them about gardening and plant care.
Outdoor Seating
Another innovative use of a tire sandbox is as outdoor seating. Adding a sturdy base and cushioning on the tire can make it a comfortable and quirky seat. This is ideal for small gardens or as extra seating during outdoor gatherings.
Water Feature
A tire sandbox can also become a mini pond or water feature. Line the tire with a suitable waterproof liner and fill it with water. Add aquatic plants and small fish for a tranquil garden addition. Using a tire sandbox creates a focal point in your garden and can be calming.
Ball Pit
Convert the tire sandbox into a ball pit for a fun and safe play area. Fill the tire with colorful plastic balls instead of sand. This appeals to younger children and can be a great addition to birthday parties or playdates.
Art Station
A tire sandbox can also be a dedicated outdoor art station. Place chalk, paint, and other art supplies containers in the tire. Children can use the tire’s surface as a canvas, fostering creativity and outdoor play.
Each of these alternative uses for a tire sandbox not only maximizes the utility of the tire but also adds a unique and creative touch to your outdoor space. Whether it’s a garden feature, a play area, or a relaxation spot, a tire sandbox can be much more than just a sandbox.
FAQ for DIY Tire Sandbox
What type of tire is best for a tire sandbox?
A large tractor or truck tire works best for a tire sandbox. These are spacious and durable, ideal for creating a safe play area.
How much sand will I need to fill a tire sandbox?
The amount of sand needed depends on the size of the tire. Generally, a large tractor tire may need around 200-300 pounds of sand.
Is it safe to use any old tire for a tire sandbox?
Inspect the tire for harmful substances and sharp edges. Using a tire free from chemical residues and lead-based paints is best.
Can I place the tire sandbox on the grass?
Yes, but ensure the ground is level. Grass under the tire sandbox may die due to lack of sunlight and water, so consider this in your placement decision.
How do I maintain the tire sandbox?
Regularly check the tire for stability and the sand for cleanliness. Cover the sandbox when not in use to keep it clean and dry.
Can I paint the tire sandbox?
Absolutely! Use weather-resistant paint to add color and fun to your tire sandbox. Let the paint dry completely before filling it with sand.
Are there any creative ways to use a tire sandbox besides as a play area?
A tire sandbox can be transformed into a mini-garden, outdoor seating, or even a water feature. These alternative uses add versatility to your tire sandbox.
How do I ensure my tire sandbox is safe for kids?
Secure the tire firmly to the ground, ensure it’s on level ground, and use pool noodles or rubber edging to cover sharp edges. Regularly inspect for safety.
Wonderful DIY tire sandbox ideas
Click on any image to start the lightbox display. Use your Esc key to close the lightbox. You can also view the images as a slideshow if you prefer 8-)
Conclusion
Creating a DIY tire sandbox offers a unique, fun, and eco-friendly way to engage children in outdoor play. With a focus on safety and creativity, a tire sandbox can be more than just a play area. It can transform into a garden, seating, or artistic corner, making it a versatile addition to any yard or garden.
If you want more playground DIY projects, check out our swing ideas for kids!


