Crafting your own dreamcatcher is an enchanting way to give your home a unique and special flair. Plus, you get to delve into the long and vibrant history of dreamcatchers and the immense cultural value they’ve held for ages!
Dreamcatchers have been around for hundreds of years, and have their origin in the culture of Native American tribes. It is believed that dreamcatchers have the power to filter out bad dreams, allowing only good dreams to pass through.
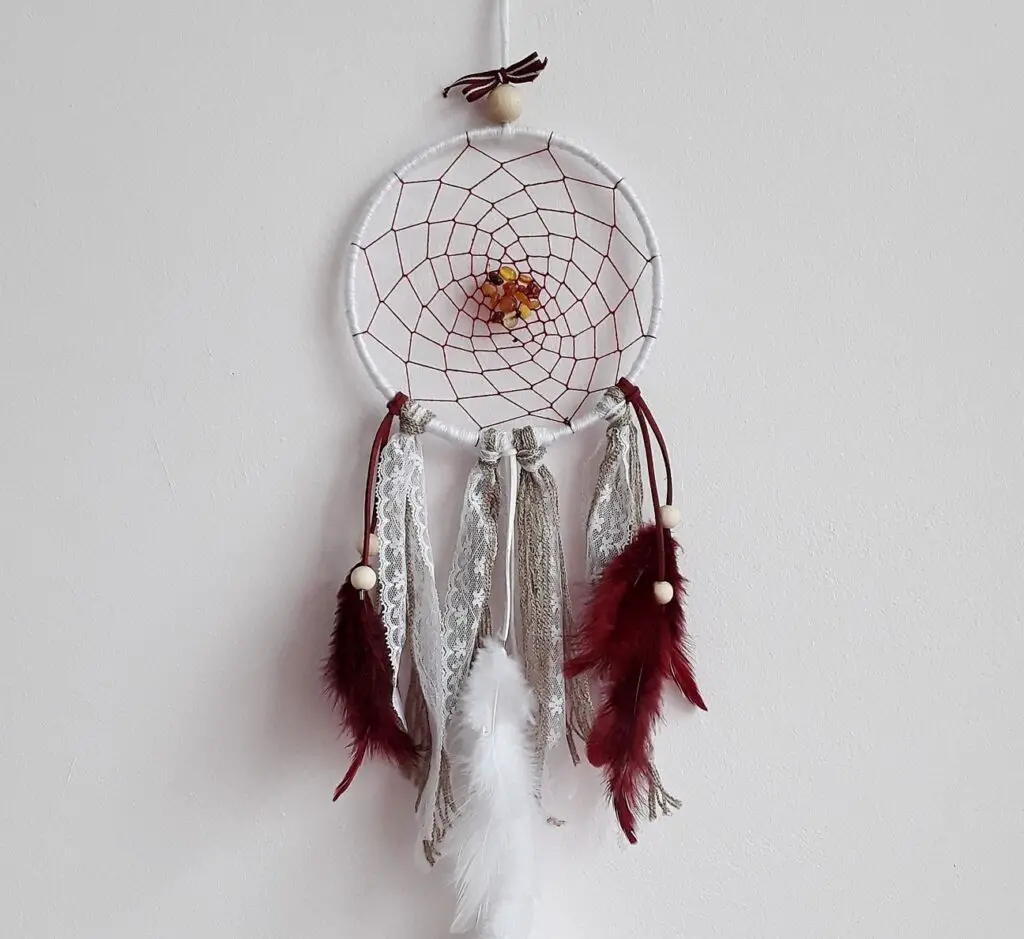
The dreamcatcher is shaped like a web, with a round hoop in the centre, and feathers, beads, and other decorative pieces hung from it. The dreamcatcher is often seen as a symbol of protection.
In Native American culture, dreamcatchers were hung in the home, believed to protect children and families from bad dreams. They were often placed above the bed, or near a window, and were made by mothers or grandmothers.
Creating your own dreamcatcher is a great way to express your creativity. It is also satisfying to design something unique. Dreamcatchers have deep spiritual meanings. So, crafting your own dreamcatcher is a unique and enjoyable experience, and this step-by-step guide will provide you with all the instructions for crafting your own dreamcatcher.
In this guide, you will learn the materials and tools needed to make the dreamcatcher, what steps to follow in the process, and how to decorate and personalize the dreamcatcher. With this guide, you will have all the information you need so you can start crafting your own dreamcatcher and probably make the craft a profitable business. What do you think?
Contents
- 0.1 Step 1: Gather your materials — it’s time to unleash your inner artist!
- 0.2 Step 2: Cut the hoop to size and wrap it with twine for a pop of colour and texture
- 0.3 Step 3: String beads and charms to the dreamcatcher’s web
- 0.4 Step 4: Create a web of colourful yarn to catch sweet dreams
- 0.5 Step 5: Add feathers for a touch of magic
- 0.6 Step 6: Tie a knotted loop of twine at the top of the hoop
- 0.7 Step 7: Hang your dreamcatcher proudly in your favourite spot
- 0.8 Step 8: Now, it’s time to dream!
- 1 Wrapping It Up
Step 1: Gather your materials — it’s time to unleash your inner artist!

With just a few simple supplies, you can start crafting your own dreamcatcher. And, you don’t need an art degree to make something amazing.
All you need is the right materials and some creativity. You’ll need a variety of materials such as:
- yarn
- string/twine
- beads
- feathers
- ribbons
- hoop
Make sure you have everything you need before you begin. And, be sure to have fun mixing and matching colours and textures when crafting your own dreamcatcher, you’ll see you’ll be making something special.
Step 2: Cut the hoop to size and wrap it with twine for a pop of colour and texture
Now that the hoop is cut to the perfect size, it’s time to get the dreamcatcher ready to hang! Start by wrapping the hoop with twine to add a pop of colour and texture. You can choose any colour or pattern of twine you like, or mix and match several colours to create a unique look.
If you’re feeling particularly creative, you can even add beads or charms along the way. Keep wrapping until the entire hoop is covered, then tie the ends of the twine with a knot. Your dreamcatcher is soon ready to hang in your favourite spot!
Step 3: String beads and charms to the dreamcatcher’s web

Whether you’re a total beginner or a seasoned crafter, you can make a beautiful and unique dreamcatcher to hang up in your home.
The third step in creating your own dreamcatcher is to string beads and charms to the dreamcatcher’s web. This is the part where your dreamcatcher really starts to come to life! You can use a variety of beads and charms to give your dreamcatcher a unique and personal touch.
Whether you choose colourful glass beads, delicate metal charms, or even stones with special meanings to you, adding these elements to your dreamcatcher will make it truly one-of-a-kind. Enjoy this step, and let your creativity flow as you design your own personal dreamcatcher!
You can also make a DIY unicorn dreamcatcher if you want to be more creative. Look around your home and find quirky items that you can incorporate into your dreamcatcher. Perhaps you can add a few feathers to give it a rustic feel, or maybe a few beads that you picked up at a local artisan market.
Get creative and incorporate elements that you feel drawn to. Maybe you will add a few charms that represent your passions or interests, or even some stones that are special to you.

Step 4: Create a web of colourful yarn to catch sweet dreams
Crafting your own dreamcatcher is an exciting and rewarding experience! The fourth step is to create a web of colourful yarn to catch sweet dreams. Start by tying a piece of twine to the hoop, and then carefully wrap the yarn around it in a circular pattern, making sure all the strands are even.
As you do this, imagine the colourful web you are weaving to catch all your wonderful dreams. When you’re finished, tie off the yarn and admire your beautiful work of art!
Step 5: Add feathers for a touch of magic
Once you’ve finished creating the dreamcatcher web, it’s time to add those special finishing touches. Step 5 of crafting your own dreamcatcher is adding feathers for a touch of magic. Whether you choose to use natural feathers or colourful ones, their gentle swaying motion will look magical and bring your dreamcatcher to life.
Dreamcatchers are a timeless symbol of beauty and mystery. Whether you choose to use natural feathers that have been carefully hand-picked or vibrant fabric with an array of dazzling colours, their gentle swaying motion will look truly magical and bring your dreamcatcher to life.
As the feathers move in the breeze, they will create a calming atmosphere and create a unique atmosphere that will captivate the onlooker. Every dreamcatcher is unique and special, with its own energy and aura, making it a beautiful addition to any home.
Let the peace of the dreamcatcher fill your home with a tranquil feeling and watch as your dreams take flight. When crafting your own dreamcatcher, you can add more charms, beads, and other small decorations to the feathers for a truly unique dreamcatcher.
Get creative and be sure to use the colours and shapes that you feel best to represent your dreamcatcher, then hang it up and enjoy all of its beauty!
Step 6: Tie a knotted loop of twine at the top of the hoop
Now it’s time to work on your hoop a little bit more. Continue being creative. This will be the centre of your dreamcatcher and will be used to hang it once you are finished. Make clean and beautiful knots.
You can also use a colourful string in different thicknesses to make it more unique. Experiment with different colours and patterns, add glitter, paint, or whatever else you can dream up. Attach beads and feathers to give it personality. Crafting your own dreamcatcher can be fun and rewarding.
Step 7: Hang your dreamcatcher proudly in your favourite spot
Congratulations! You have finished crafting your own dreamcatcher, and now it’s time to proudly hang it in your favourite spot. Hang your dreamcatcher away from direct sunlight and high humidity to maintain its colour and shape. When you hang your dreamcatcher, take a moment to appreciate the unique beauty you have created.
Let the dreams flow through and your dreamcatcher will protect them, allowing only the good dreams to pass through and filter away the bad. Enjoy seeing your dreamcatcher sway in the breeze and have faith that it will work its magical powers to give you sweet dreams.
Step 8: Now, it’s time to dream!
Now that you’ve completed all the steps of crafting your own dreamcatcher, it’s time to dream! Depending on the colours, shapes, and sizes of your dreamcatcher, you may awaken to find you’ve crafted a dreamcatcher that symbolizes your hopes, your dreams, and your lifetime ambitions.
Wrapping It Up
To wrap up, crafting your own dreamcatcher is a gratifying way to express your creativity and take a moment to relax. By following the step-by-step instructions in this guide, you can make a beautiful dreamcatcher that is unique and special. And, crafting your own dreamcatcher will be a whole lot of fun.
Whether you give it as a gift or hang it up in your own home, the dreamcatcher will be a symbol of the creative process and the beauty of your handmade items. Crafting your own dreamcatcher is a worth-it endeavour. Creating a dreamcatcher of your own design can be a rewarding and fulfilling experience. It’s the perfect way to bring a little bit of magic into your home and make it uniquely yours.
Crafting your own dreamcatcher, is especially great for a rainy day project, as it can take some time to perfect the intricate webbing and to get the feathers and beads just right. But the end result is always worth it!
Not only will you have a beautiful piece to hang in the bedroom or living room, but you’ll also be able to enjoy the satisfaction of having crafted something special with your own two hands.
Are you ready to try crafting your own dreamcatcher?


