Giving gifts can be difficult sometimes, maybe because I really think about it long and hard. I don’t want to give a gift just for the sake of giving. I want it to be something that the recipient will truly appreciate and love – a braided crib bumper for new parents!

My friend recently had a baby and during her baby shower, she received a lot of gifts – the usual. To celebrate, I wanted to give her something more special.
So off I went to research unique baby stuff and I came across a DIY project for a braided crib bumper. I fell in love at first sight. Not only is it super useful, but I can also personalize the colours, too.

Contents
How to make a DIY Braided Crib Bumper?
I made several braided crib bumpers so she’d have something to use while the others were being washed. If you’re looking for a practical, inexpensive, yet really useful gift, I’d recommend you make this one. It’s so easy!
Here are the tools and materials that you will need to create a DIY Braided Crib Bumper:
Materials
- Fabric
- An optimal selection for a crib fabric would be one that offers both softness and longevity, with a minimum width of 45 inches and a length of 2-3 yards depending on the crib dimensions.
- Poly filling
- You will need enough poly filling to stuff the braided fabric strips and make the bumper soft and cushiony.
- Thread
- Select a thread that corresponds with the hue of the fabric and utilize it to sew the terminations of the interlaced strips in unison.
Tools
- Scissors
- Use a pair of sharp fabric scissors to cut the fabric into strips.
- Sewing machine
- Utilizing a sewing machine can speed up and efficiently complete the task of sewing strips together. Nevertheless, in the absence of a sewing machine, manual sewing of the strips remains a viable option.
- Pins
- Use pins to hold the strips together as you braid them.
- Tape measure
- To accurately determine the appropriate dimensions of both the crib and fabric strips, use a tape measure.
- Needle
- Use a needle to hand-sew any finishing touches, such as decorative elements like ribbons or bows.
By using these tools and materials, you can create a beautiful and personalized DIY braided crib bumper that makes a thoughtful and unique gift for new parents.
Step-by-Step Instructions
Creating your own braided crib bumper allows the freedom to select desired colours and patterns. You can personalize it to match the nursery decor or the parents’ preferences. It’s a great way to show that you put a lot of thought and effort into the gift.
In addition, a DIY braided crib bumper is easy to make, even for those who are not experienced in sewing. You can easily find these materials at any craft store or online.
Choose the Fabric
When selecting the fabric, it’s important to consider the overall aesthetic of the nursery as well as the parents’ preferences.
A Fabric that Matches the Overall Decor
You can even choose a fabric that matches the bedding or curtains to create a cohesive look. Choose a fabric that you adore for the bumper.
Considering the amount of time you will spend in the nursery, it is important to ensure that the sight of the bumper pleases you. Choose a fabric that complements the nursery’s decor or the parents’ preferences.
The Length
Ensure the fabric is of sufficient length to braid a bumper that fits around the entire crib. Measure the crib rails and add extra length for a secure fit of the bumper. Consider the bumper’s firm attachment to the crib, avoiding excessive looseness or tightness. Regarding the fabric’s hue, there are numerous choices available.
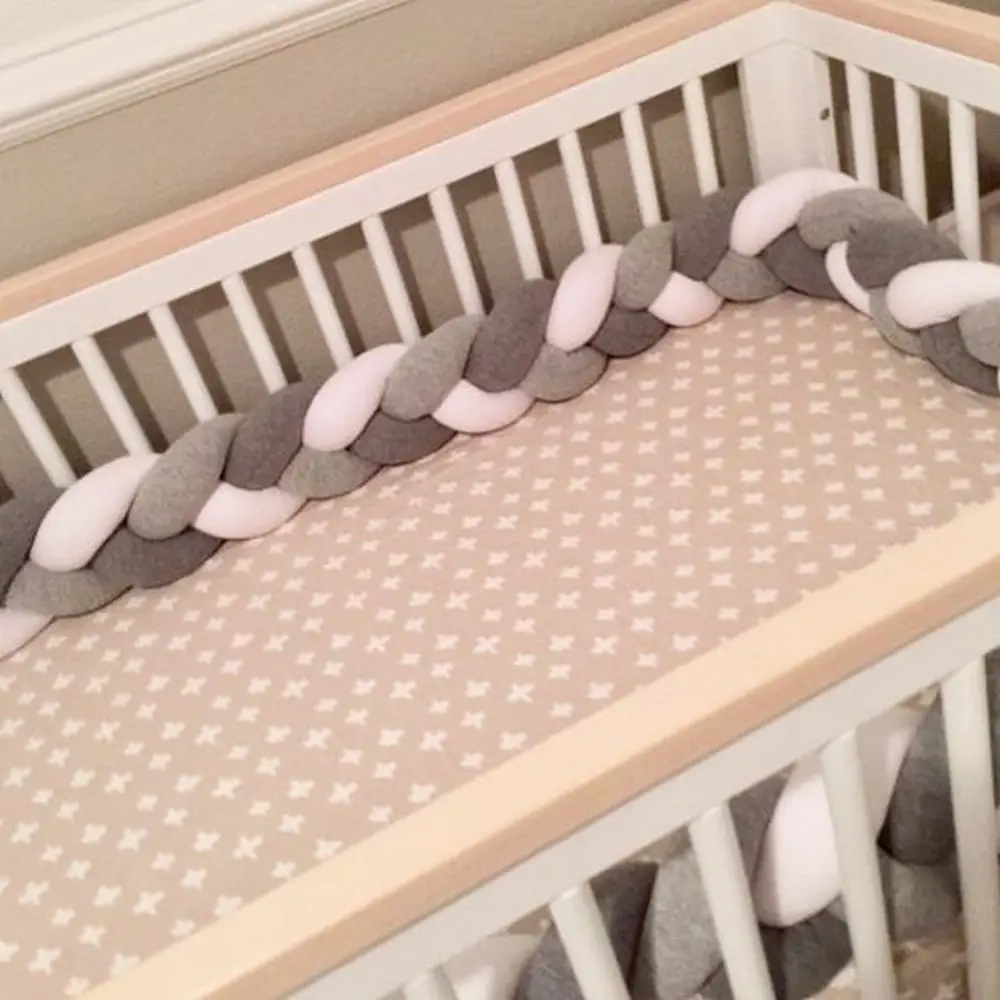
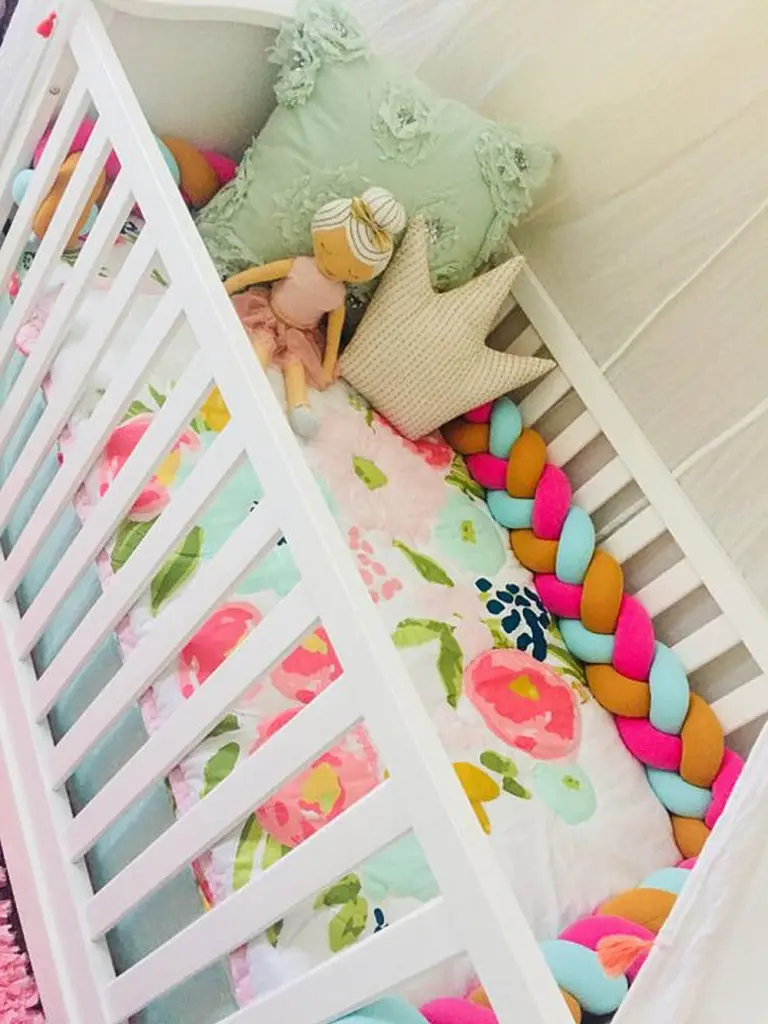
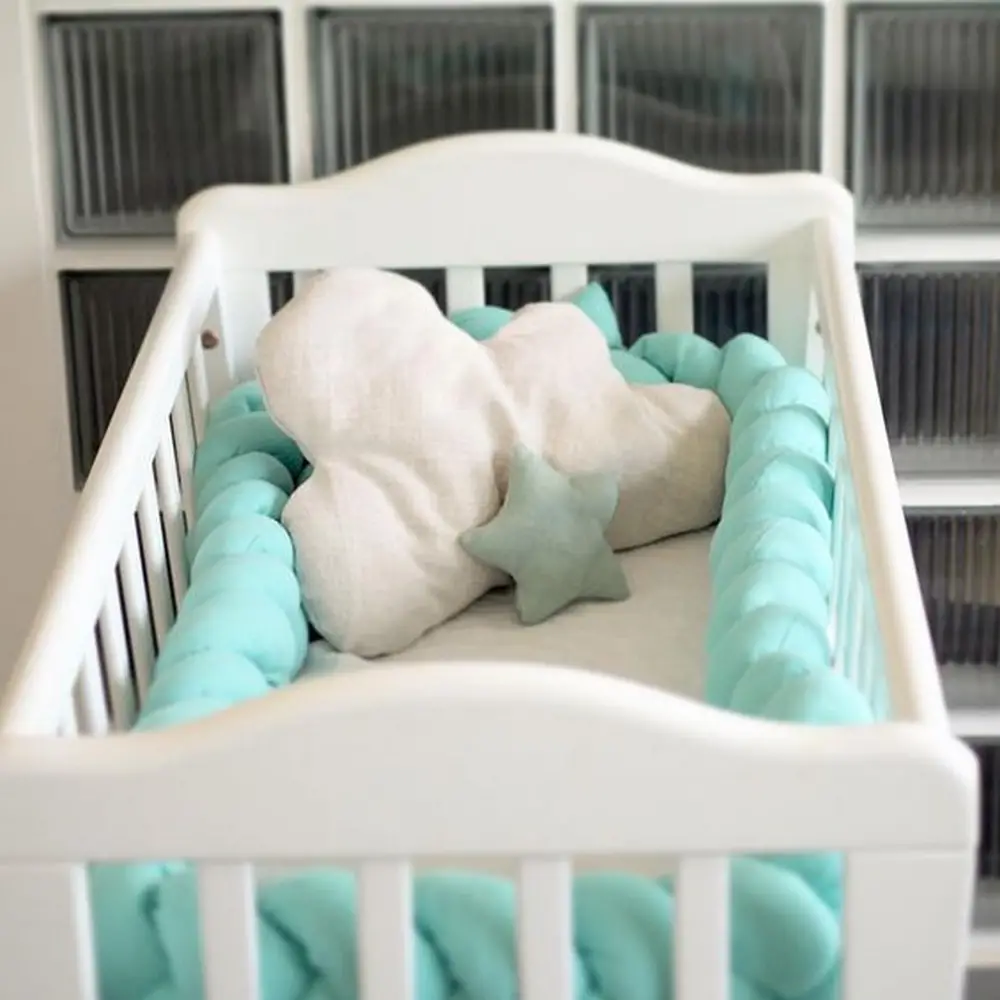
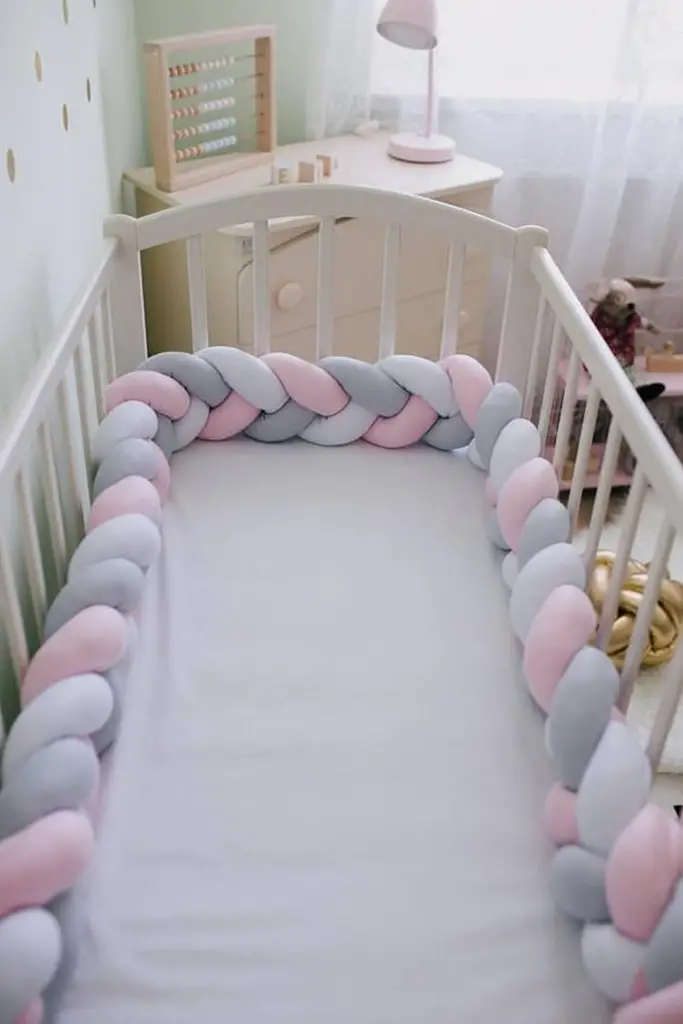
The Colour
Opt for a single colour for a classic and simple braided crib bumper, or choose multiple colours for a personalised and original touch. Unsure of which colour to select? Take into account the colour scheme of the remaining elements in the nursery or draw inspiration from the parents’ personal style.
Type of Fabric
When choosing the fabric for your crib bumper, the possibilities are infinite. Whether you opt for a plush and comforting fleece or a contemporary and stylish cotton, ensure that it matches your preferences in terms of size and hue.
Choosing the right fabric for your baby’s crib bumper can be both fun and exciting! There are countless options to personalize your nursery decor, ranging from soft pastel colours to bold patterns.
Mix and Match
Be bold and experiment with different hues and designs to craft a distinctive and aesthetically pleasing crib bumper that will elevate the appearance of your child’s crib. Utilize your ingenuity and inventiveness to produce a superb and practical crib bumper that ensures your infant’s security and comfort.
Cut the fabric
After choosing your fabric, the next phase of creating a DIY braided crib bumper involves cutting it into three long strips. Each strip should measure about 10-12 inches in width and 2-3 yards in length, depending on the crib’s size and the preferred thickness of the bumper.
To achieve an even and symmetrical bumper, it’s crucial to ensure that all three strips are of equal length. A ruler or measuring tape can help in achieving precision while cutting the fabric.
After cutting the strips, fold them lengthwise and sew them completely to form a tube shape. This will facilitate the braiding process and secure the stuffing.
When stitching the strips, it’s important to use a strong and durable thread capable of enduring the weight and pressure of the poly-filling. You can utilise a sewing machine or manually sew, depending on your preferred way of sewing.
Add the Poly-Filling
Once you have sewn the three long strips of fabric into tube-like shapes, the next step in making a DIY braided crib bumper is to stuff them with poly-filling. The poly-filling will give the bumper its cushiony and soft texture, making it comfortable and safe for the baby.
To stuff the fabric with poly-filling, start by placing a small amount of filling at the end of one of the tube-like strips. Push the filling into the fabric using your fingers or a tool, ensuring it is evenly distributed along the length of the strip.
Stuff the filling continuously through the strip until you reach the opposite edge, then repeat the same procedure with the other two fabric strips. It’s important to pack the filling tightly to ensure that the bumper is firm and supportive.
Braid the Strips
Once all three strips are stuffed, you can begin braiding them together to form the bumper. As you braid, continue to stuff the filling inside to create a consistent and uniform shape.
When braiding the strips, make sure to keep the edges aligned and the tension even to prevent the bumper from becoming lumpy or misshapen.
Sew the End Together
After completing the strips, stitch them together firmly to form a loop using your preferred sewing method, whether it be by hand or machine. Ensure the bumper remains intact by sewing the ends together firmly.
Add Finishing Touches
Adding decorative elements to your DIY braided crib bumper is a great way to personalize it and make it even more special. Ribbons or bows are a popular choice for adding a touch of cuteness and charm. You can choose ribbons or bows that match the fabric you used for the bumper, or go for a contrasting colour for a more eye-catching look.
Braided Crib Bumper Design Ideas
When making a DIY braided crib bumper, add personalized and distinctive elements to enhance its uniqueness.
- Colorful Stripes
- Create striped patterns on your bumper with various fabric colors to match the nursery’s color scheme.
- Ombré Effect
- A design concept is to utilise varying tones of a single hue to produce an ombré outcome. This method is a fantastic approach to incorporate depth and dimension to the bumper.
- Patterned Fabric
- To add visual interest to your bumper, consider using patterned fabric such as polka dots, stripes or florals.
- Personalized Embroidery
- Personalize your bumper further with embroidered details, such as the baby’s name, initials, or a heartfelt message.
- Ruffles and Lace
- To achieve a feminine and romantic aesthetic, consider incorporating ruffles and lace along the edges of the bumper. This is an excellent choice for parents expecting a baby girl.
These are just a few design ideas to get you started. The possibilities are endless when it comes to creating a DIY braided crib bumper that is both beautiful and functional.
Click on any image to start the lightbox display. Use your Esc key to close the lightbox.


Maintenance and Care for Braided Crib Bumpers
Creating a DIY braided crib bumper adds a personal touch to your nursery. But it’s important to keep it clean and well-maintained for your baby’s safety and comfort. Here’s how you can care for your braided crib bumper to ensure it stays fresh and safe for your little one.
Washing
- Opt for detergents that are gentle and designed for baby items. These detergents are less likely to irritate your baby’s sensitive skin.
- Avoid detergents with strong fragrances or dyes, as they can cause allergic reactions.
- If the bumper is machine-washable, set your washing machine to a delicate cycle. This setting is gentler and prevents damage to the fabric.
- Use cold water to prevent the colors from bleeding and to maintain the fabric’s integrity.
- If possible, place the bumper in a mesh laundry bag to provide extra protection during the wash cycle.
- For hand washing, fill a basin with cold water and add a small amount of mild soap.
- Use a soft brush or a gentle hand motion to clean the fabric. This method is especially important for more delicate bumpers.
- Rinse thoroughly to ensure all soap residues are removed.
Drying
- Lay the bumper flat or hang it in a well-ventilated area. Good air circulation is crucial for thorough drying.
- Avoid direct sunlight when air drying, as this can cause the fabric to fade over time.
- If you’re using a tumble dryer, select a low-heat or air-dry setting. High temperatures can shrink the fabric or damage the filling.
- Consider adding dryer balls to keep the bumper fluffy and to ensure even drying.
- Before reattaching the bumper to the crib, make sure it is completely dry. Any dampness can lead to mold or mildew, which are hazardous to your baby’s health.
- It might take longer than expected to dry completely, especially if it’s thick or heavily filled.
- After washing and drying, inspect the bumper for any loose threads or damage. Regular checks help maintain the bumper’s condition and safety.
Fabric Care
- Regularly inspect the bumper for any signs of wear and tear, such as loose threads, tears, or fraying edges. Babies often tug or chew on their crib bumpers, so it’s important to catch any damage early.
- Look for any loose decorations or embellishments that could pose a choking hazard.
- If you find any damage, mend it immediately. Small tears or loose threads can quickly become bigger problems if not addressed.
- Use a sewing kit to repair minor damages. For larger issues, you might need to use a sewing machine or seek professional help.
- Regularly fluff your braided bumper to maintain its shape and comfort. This is especially important for bumpers filled with materials like polyester fiberfill.
- Gently shake the bumper or use your hands to redistribute the filling evenly. This prevents lumps and ensures a consistent shape.
- For fleece bumpers, avoid high heat when washing and drying, as it can cause the material to pill or lose its softness.
- Cotton bumpers may wrinkle easily. Use a low-heat iron if necessary, but avoid direct heat on any decorative elements.
- Do not use bleach or fabric softeners, as they can break down the fibers and fade the colors.
- Choose mild, baby-friendly detergents that are less likely to cause irritation and damage to the fabric.
Storage Tips
- Choose a cool, dry place for storage. Extreme temperatures and humidity can damage the fabric and filling of the bumper.
- Avoid storing the bumper in basements or attics where the environment can fluctuate and might be prone to dampness.
- Ensure the area is well-ventilated to prevent the buildup of moisture. Mold and mildew thrive in moist environments and can be harmful to your baby’s health.
- Avoid folding the bumper too tightly. Tight folds can create permanent creases and misshape the bumper.
- Instead, loosely roll or fold the bumper. This helps in maintaining its shape and prevents any unnecessary stress on the fabric and seams.
- If your bumper is filled with materials like poly-filling, give it a good fluff before storing. This redistributes the filling and helps it maintain its shape while stored.
- Use a breathable fabric bag for storage. Breathable materials like cotton allow air circulation, which is vital for preventing mildew.
- Avoid plastic bags or containers, as they can trap moisture and cause the fabric to become musty.
- Consider labeling the storage bag if you have multiple nursery items in storage. This makes it easier to find the bumper when you need it again.
With proper maintenance and care, your DIY braided crib bumper will remain a safe, clean, and beautiful addition to your baby’s nursery. Regular cleaning, careful fabric care, and proper storage will keep the bumper in great condition, ensuring comfort and safety for your little one.
FAQ on Braided Crib Bumper
What materials are best for making a braided crib bumper?
The best materials for a braided crib bumper are soft, durable, and safe for babies. Cotton and fleece are popular choices due to their softness and ease of care. Choose fabrics that are hypoallergenic and free from harmful chemicals.
How do I wash my braided crib bumper?
Wash your braided crib bumper with gentle, baby-safe detergents. If it’s machine-washable, use a delicate cycle with cold water. For handwashing, use mild soap and a soft brush. Always air-dry the bumper in a well-ventilated area to prevent shrinkage and keep the fabric’s integrity.
Can I customize my braided crib bumper?
Yes, you can customize your braided crib bumper. Choose fabrics and colors that match the nursery’s theme. You can also add personalized touches like embroidery or decorative ribbons.
How often should I clean my braided crib bumper?
Clean your braided crib bumper regularly, depending on how frequently it’s used and exposed to dirt or spit-up. A good rule is to wash it every few weeks or when it appears dirty.
Is it safe to use a braided crib bumper?
While braided crib bumpers are popular, it’s important to use them safely. Ensure they are firmly tied to the crib and that there are no loose or small parts that could pose a choking hazard. Always follow the latest safety guidelines for crib bumper use.
Conclusion
There you have it – a simple and easy DIY braided crib bumper that makes a thoughtful and unique gift for new parents. By following these steps and using the right tools and materials, you can create a beautiful and personalized crib bumper that will be cherished for years to come.
Watch this video so you can start making these adorable braided crib bumpers!


