We have a lot of nail polish at home – and I mean A LOT. My eldest daughter loves painting her nails, playing matchy-matchy with her outfit. Because her friends know this about her, she receives a lot of nail polish. There are a few, though, which she doesn’t like so they end up in her drawer.

One time, I came across a DIY project for nail polish marbled flower pots. I was drawn to them and so I asked my daughter if I could use her excess nail polish. She agreed, saying that it was better than throwing them away. When she saw the flower pots, she was so happy seeing her “babies” imprinted on them. We can’t deny it—the finished products are so beautiful!
If you have unused bottles of nail polish at home, put them to good use. Create art out of your boring flower pots. You can also give these out as gifts to family and friends.
Contents
Making Nail Polish Marbled Flower Pots
Materials
- Terra cotta flower pots
- Big bowl of water
- Nail polish of different colors
- Gloss White Rust-oleum spray paint
Tools
- Pipe cleaner
- Button
Instructions
Prepare Your Work Area:
- Cover your work surface with newspaper or a plastic sheet to protect it from spills and spray paint.
- Wear gloves to keep your hands clean and protect your skin from harsh chemicals.
Prime the Flower Pots:
- Start by cleaning the terra cotta pots to remove any dirt or grease. Dry them thoroughly.
- Apply a coat of Gloss White Rust-oleum spray paint to each pot. This will help the colors stand out and ensure better adhesion of the nail polish.
- Allow the paint to dry completely, following the drying time recommended on the spray paint can.
Prepare the Marbling Bath:
- Fill the big bowl with room temperature water. The water should be deep enough to submerge the flower pot entirely or at least up to the desired level of marbling.
Adding Nail Polish:
- Carefully pour your choice of nail polish colors onto the surface of the water. Do this one color at a time, allowing each color to spread before adding the next.
- Use a variety of colors for a vibrant effect, or stick to a monochromatic scheme for a more subtle look.
Create Your Design:
- Take the pipe cleaner and use it to gently swirl the nail polish on the water’s surface. You can create swirls, zigzags, or any pattern you like.
- Work quickly as the nail polish will start to harden and clump on the water’s surface if left too long.
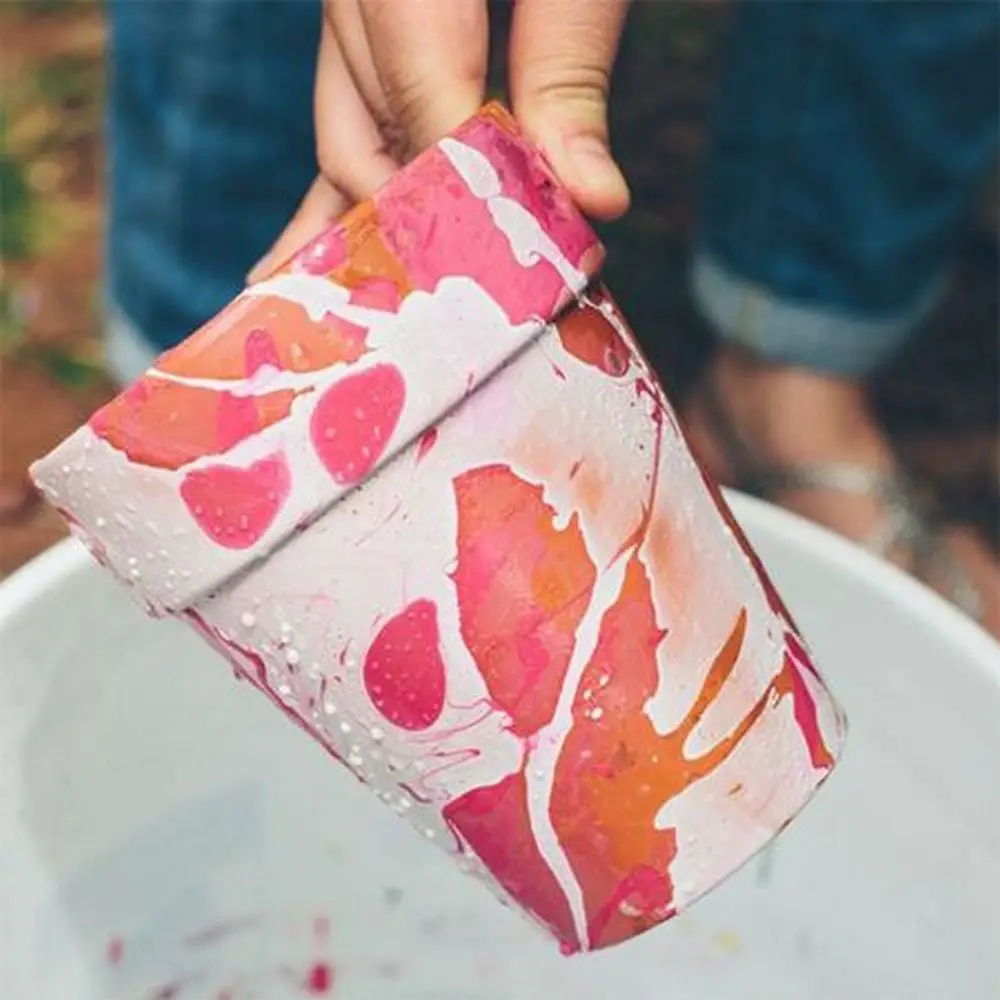
Dip the Pots:
- Slowly dip your flower pot into the water. You can dip it straight down or roll it sideways, depending on which part of the pot you want to marble.
- The nail polish will adhere to the surface of the pot creating a marbled effect.
Remove Excess Polish:
- Before lifting the pot out, use the button to gather and remove any remaining nail polish from the water’s surface. This prevents unwanted smudges as you remove the pot.
Dry the Pots:
- Carefully pull the pot out of the water and check the design. If you’re satisfied, set the pot aside on a non-stick surface or hang it up to dry.
- Allow the pot to dry completely, undisturbed, to ensure the nail polish sets properly.
Seal the Design:
- Once dry, consider applying a clear sealant spray to protect the marbled design from water and wear. This step is especially important if the pots will be used outdoors.
Cleaning Up:
- Clean your tools with nail polish remover and properly dispose of any used materials.
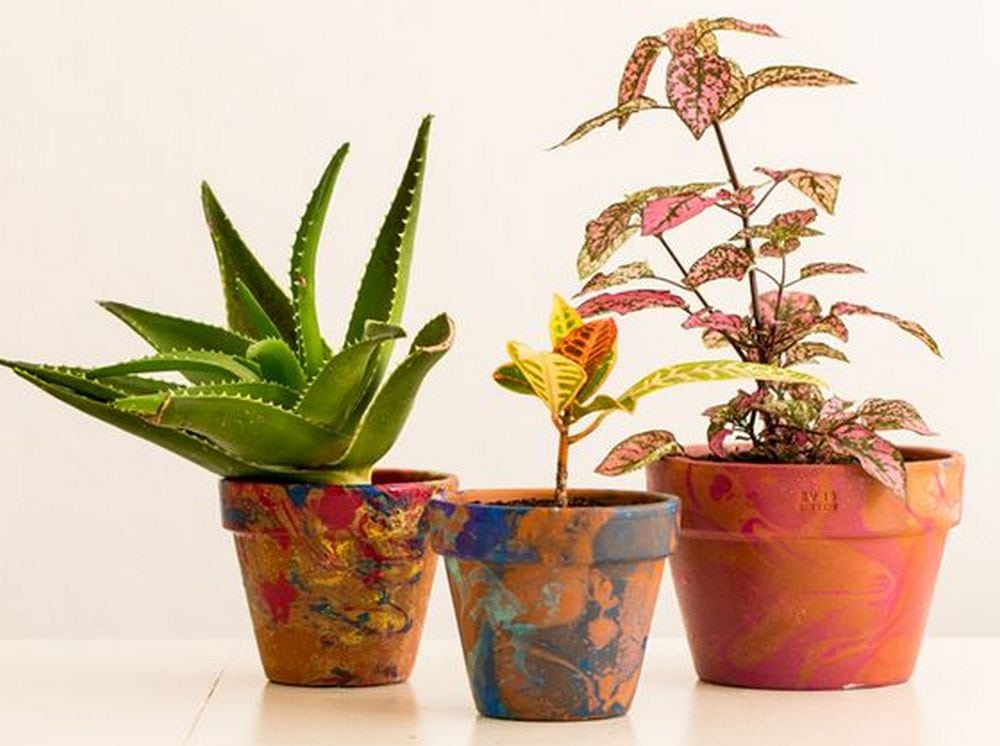
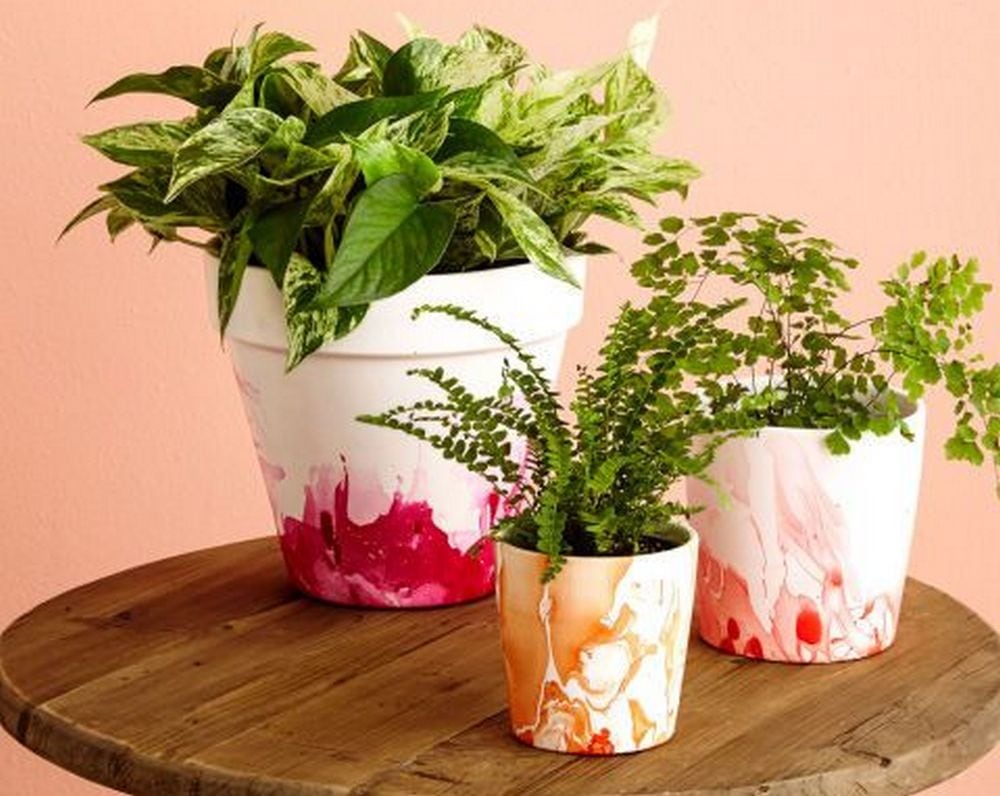
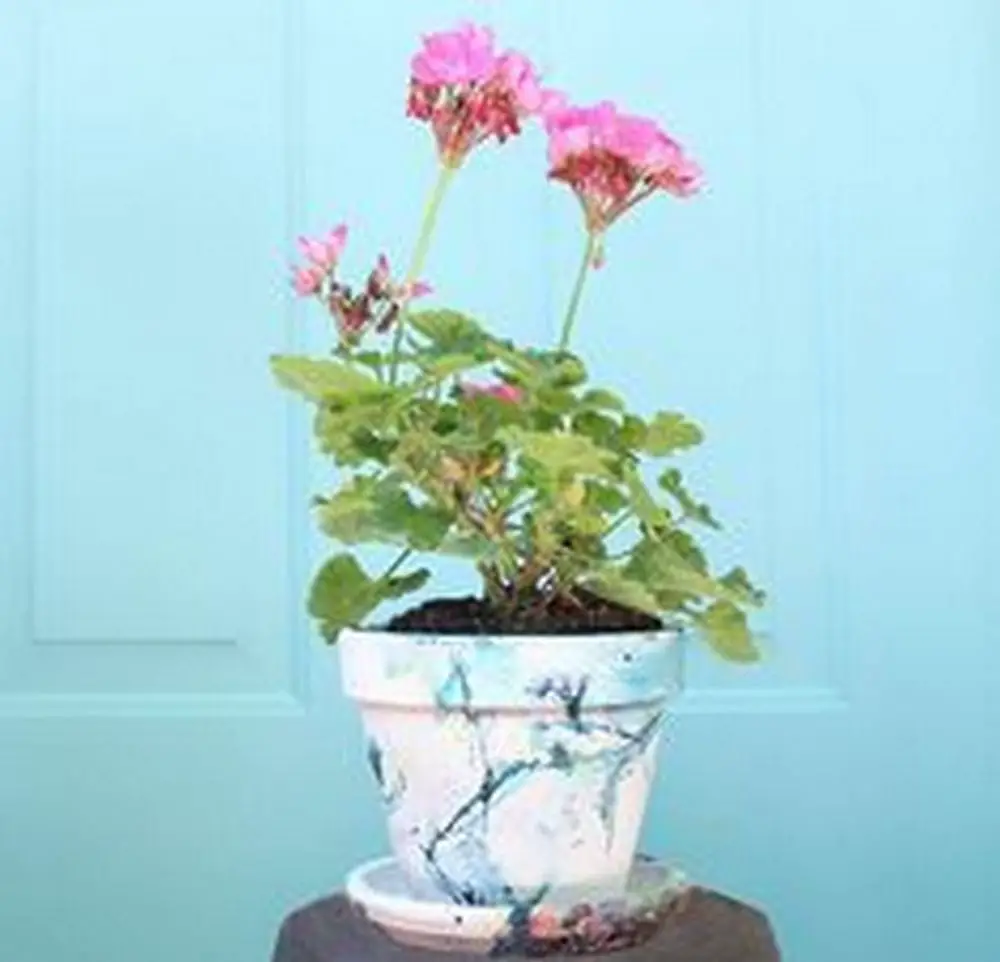
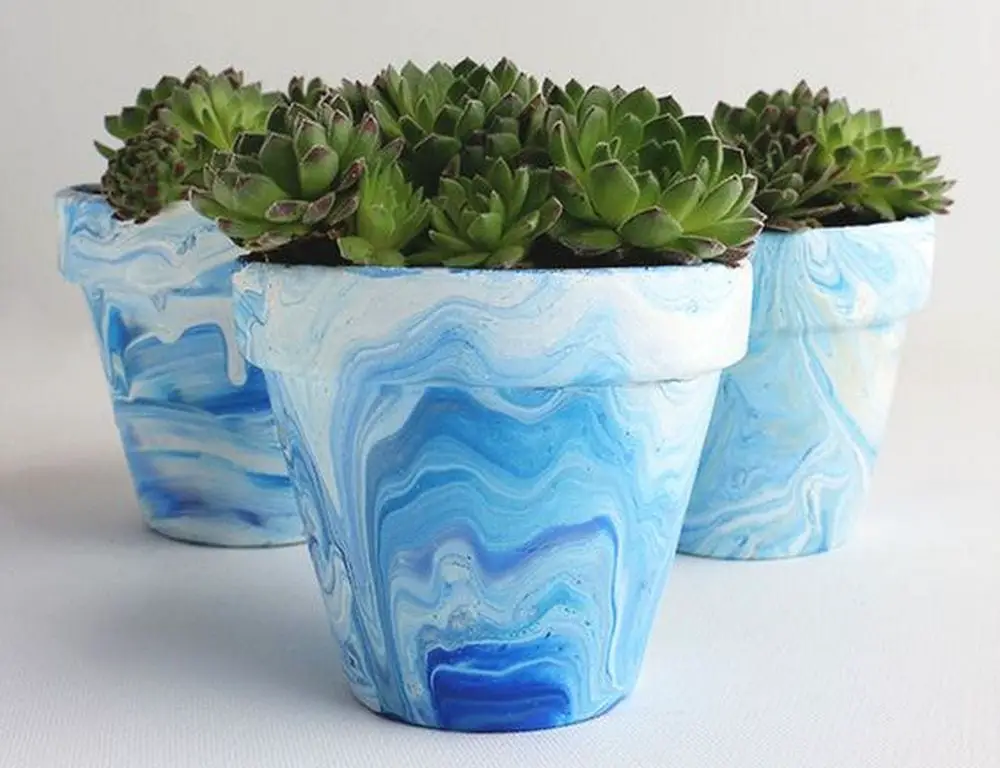
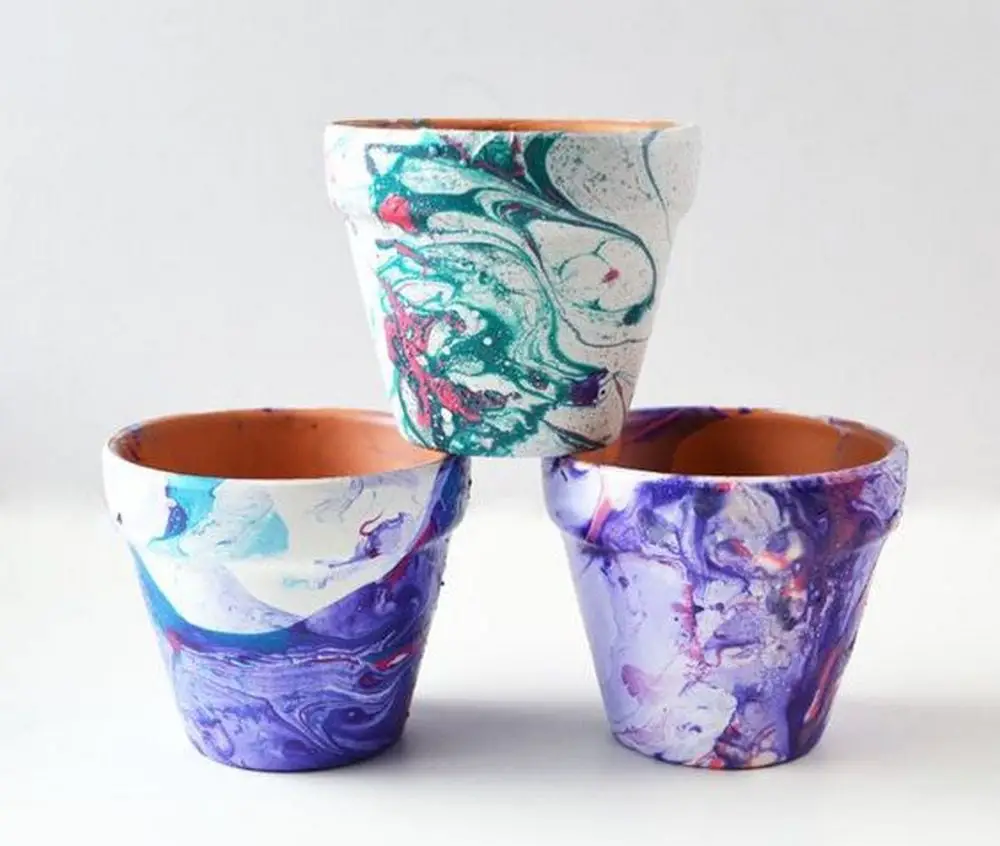
DIY nail polish marbled flower pots design ideas
Click on any image to start the lightbox display. Use your Esc key to close the lightbox.
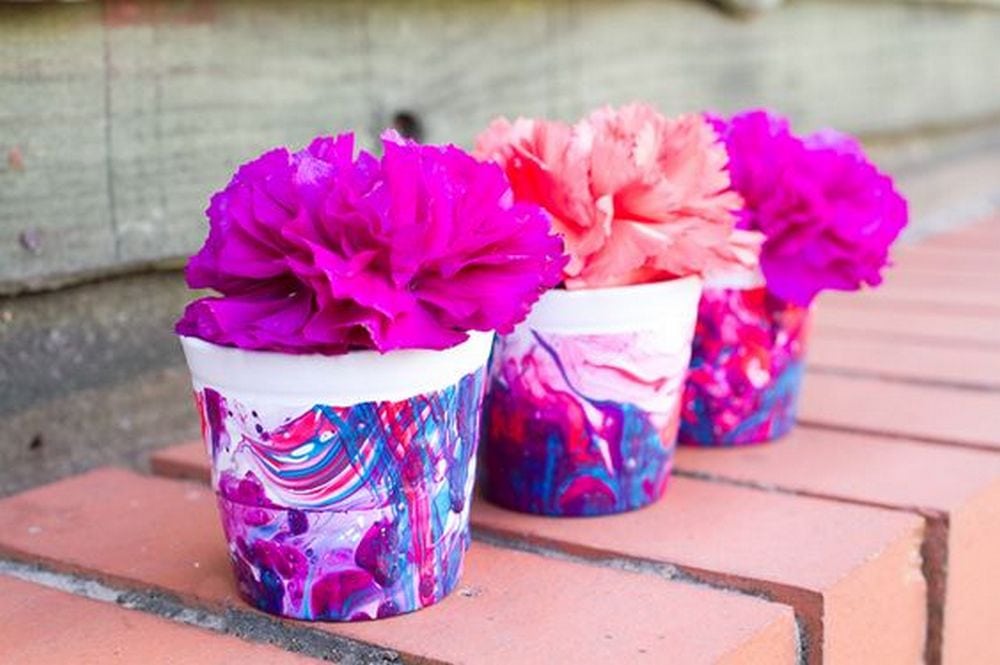
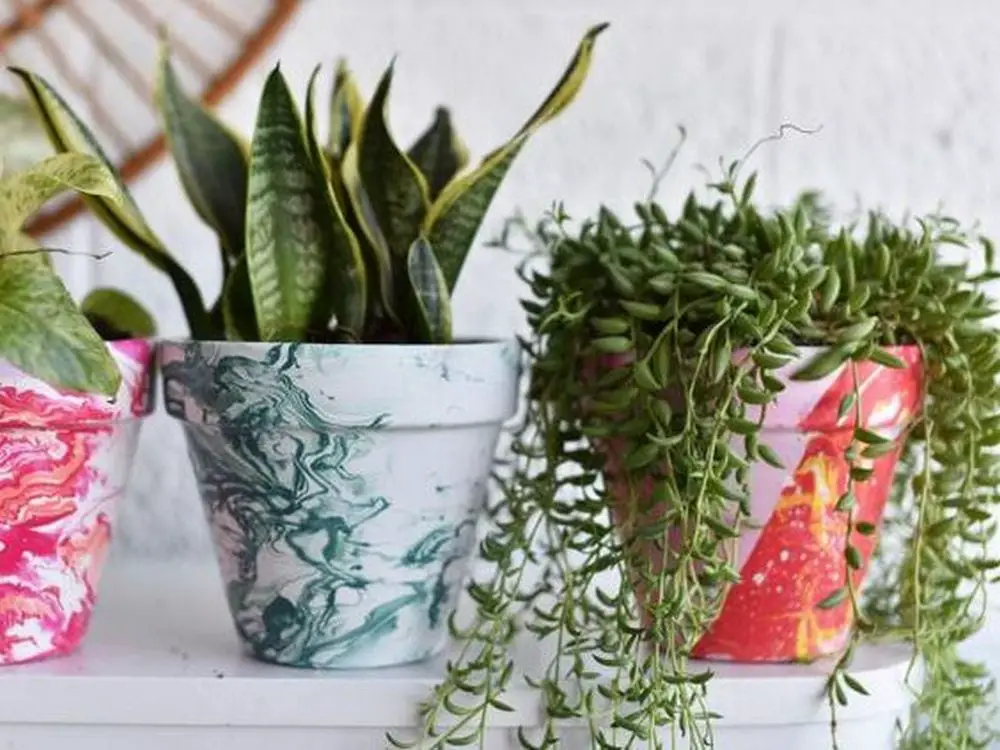

You can get step-by-step instructions here…
Choosing the Right Nail Polish for Marbling
Creating nail polish marbled flower pots can transform ordinary terra cotta pots into eye-catching pieces of art. The key to achieving a stunning marbled effect lies in selecting the right type of nail polish. This guide will help you understand the characteristics of suitable nail polishes for marbling and ensure your nail polish marbled flower pots turn out beautifully every time.
Viscosity
For nail polish marbled flower pots, the viscosity of the nail polish is crucial. You want to choose polishes that are neither too thick nor too thin. Thick polishes may not spread well on the water’s surface, while too thin polishes can overly disperse and create faint, undefined patterns.
Ideally, medium viscosity polishes work best as they spread evenly and allow for more control when creating designs. Test the polish by observing how it flows when dripped into water; it should form a bead that slowly spreads.
Drying Time
The drying time of nail polish also affects the marbling process. For crafting nail polish marbled flower pots, it’s best to use polishes that do not dry too quickly. Fast-drying polishes can harden on the water’s surface before you have a chance to create your design, leading to clumps rather than a smooth marbled effect. Look for traditional nail polishes as opposed to quick-dry formulas, and always work in a cool, humid environment to slow down the drying process.
Color and Finish
The color and finish of the nail polish can dramatically impact the aesthetics of your nail polish marbled flower pots. While you can use any color, vibrant and contrasting shades tend to make the most striking patterns. Additionally, consider using a mix of finishes such as matte, gloss, and metallic to add depth and interest to your marbling. Metallic polishes, in particular, can give your flower pots a shimmering, luxurious look.
Compatibility
When selecting nail polishes for your nail polish marbled flower pots, it’s essential to check for compatibility among different brands and types. Some polishes may not mix well on the water’s surface, leading to separation or uneven marbling. Experiment with small amounts first to see how the polishes interact. This trial and error method can save you time and ensure that the polishes you ultimately use will blend beautifully.
Choosing the right nail polish for your nail polish marbled flower pots is about balancing viscosity, drying time, and aesthetic preferences to create a custom piece that stands out. With these tips, you’re well on your way to producing stunning, unique flower pots that are as functional as they are beautiful.
Decorating Ideas for Marbled Pots
Nail polish marbled flower pots offer a unique aesthetic that can enhance any space, making them more than just containers for plants. Their vibrant, swirled colors can serve multiple decorative purposes in both indoor and outdoor settings. Here are some creative ideas to maximize the decorative potential of your nail polish marbled flower pots.
Centerpieces and Table Accents
Nail polish marbled flower pots make stunning centerpieces for tables, whether it’s for everyday use or special occasions. Fill them with a matching bouquet or a simple arrangement of greenery to complement the colors in the marbling. They can also be used to hold utensils or napkins in creative dining setups, adding an artistic touch to meals and gatherings.
Home Office Enhancements
Brighten your workspace by using nail polish marbled flower pots as stylish desk organizers. They can hold pens, pencils, or small office supplies, bringing both functionality and style to your home office. The unique patterns ensure that each pot is a one-of-a-kind piece, personalizing your work area while keeping it organized.
Artistic Displays
Convert your nail polish marbled flower pots into art pieces by using them as bases for sculptures or as standalone decorative objects on mantels and shelves. You can also group several marbled pots together, varying their sizes and colors, to create a dynamic visual display that draws the eye and stimulates interest.
Seasonal Decorations
Adapt nail polish marbled flower pots for seasonal decorations throughout the year. For Halloween, you might use pots with orange and black marbling to hold candy or spooky decorations. During Christmas, pots with red, green, and gold marbling can be filled with festive baubles or used to display poinsettias. This versatility makes them a fun and reusable decorating option for any holiday.
Outdoor Embellishments
Nail polish marbled flower pots are not just for indoor use; they can also add color and personality to outdoor spaces. Use them in gardens or on patios to hold plants or as part of a decorative garden path. Their vibrant colors can stand out against the green backdrop of a garden or the neutral tones of patio furniture, enhancing the overall beauty of outdoor living areas.
With these decorating ideas, nail polish marbled flower pots can transform any space, proving their versatility beyond traditional plant holding. Each pot becomes a piece of art that reflects personal style and creativity, making them valuable additions to any decor scheme.
Conclusion
Making marbled flower pots from leftover nail polish is a fun approach to use it and turn basic terra cotta pots into striking works of art. Apart from improving the appearance of your house or garden, this do-it-yourself project provides an interesting and entertaining hobby. Every finished pot is a tribute to your imagination and a useful as well as an attractive item.


