Last Updated on January 24, 2025 by Team Ideas24
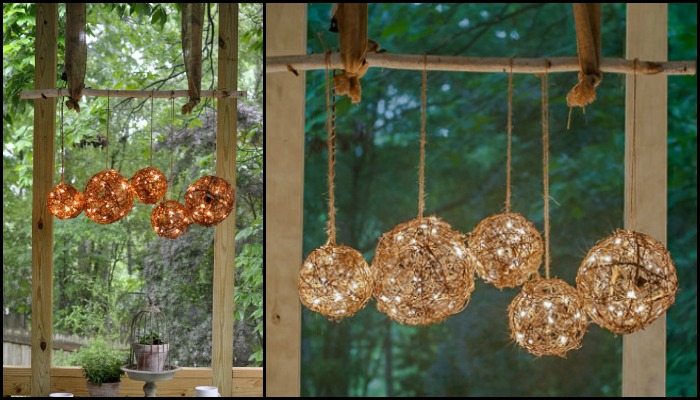
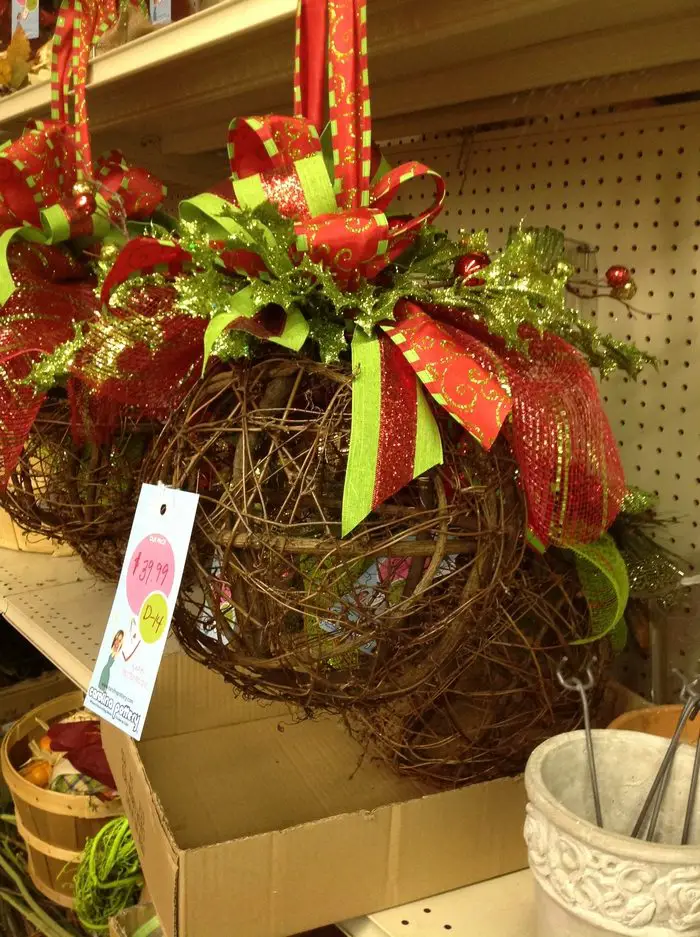
Think your outdoor area could use some decorative lights? Perhaps these DIY lighted grapevine balls are the perfect project for you!
They’re easy to make and will add a touch of elegance to any space. Plus, they’re a great way to recycle old grapevines!

It’s a great money-saving project for those who have access to grapevines. It’s also very easy to do!
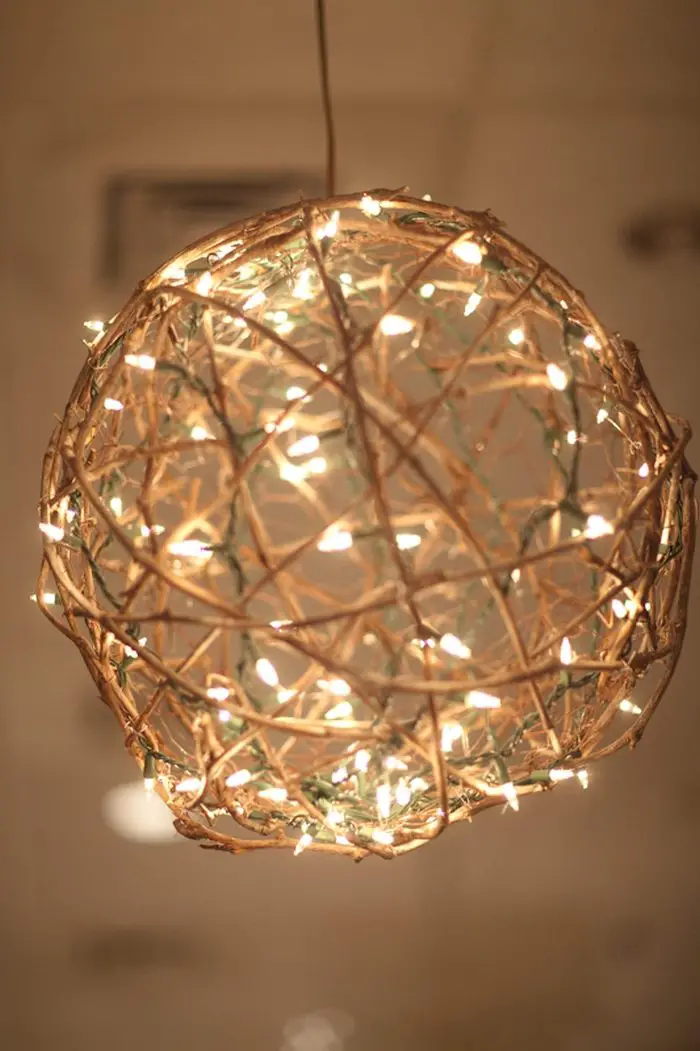
These grapevine balls are perfect as outdoor holiday decorations, but you can also use them when you want to create a warm and intimate ambience. They’re quite versatile and will do just as well indoors.
These beautiful decorations can be used to spruce up your home or office, and they make great gifts, too! There are plenty of ways to personalize your grapevine balls, so get creative! You can try different color combinations, add some beads or other embellishments, or even make them into cute animal shapes.

Not sure how to get started? Check out these brilliant DIY grapevine ball designs for some inspiration!
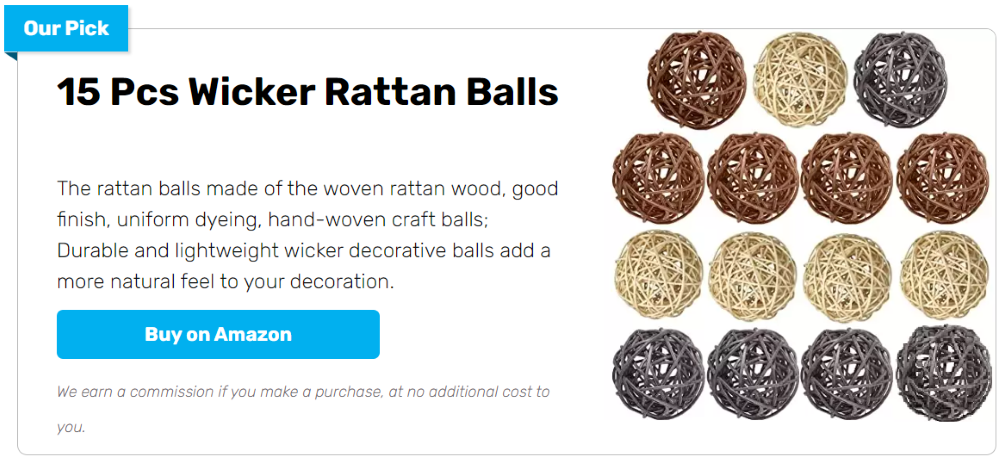
Don’t have grapevines near you? No problem! You can use cheap wire as an alternative – and still achieve the same result!
Is this going to be your next project?
With just a few simple supplies, you can create these beautiful lights to add a touch of whimsy to your space. So grab your supplies and get started on your Grapevine Ball Lights today!
To make your own grapevine balls, you will need these supplies:
- Grapevine
- Floral Wire
- Beach Balls (various sizes)
- Christmas Lights
- Hanging Material (chain, twine, rope, etc)
- Wire Cutters
Contents [show]
How To Make Lighted Grapevine Balls
Making your own lighted grapevine balls is a fun and easy way to add some festive flair to your home this holiday season. Just simply follow the steps below and you will have your grapevine balls in no time!
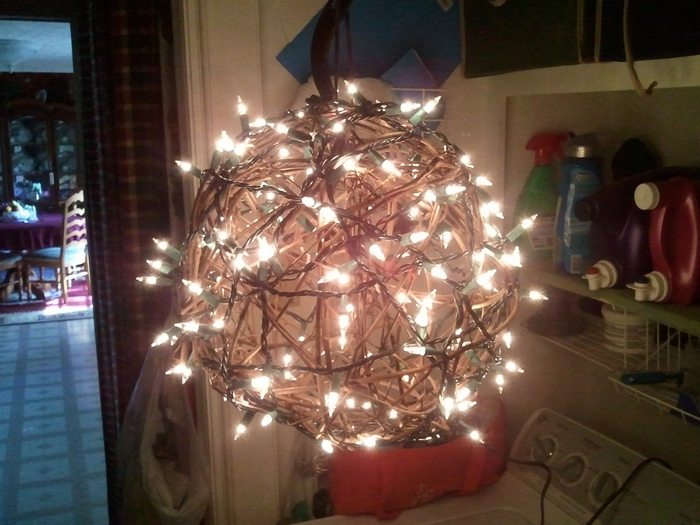
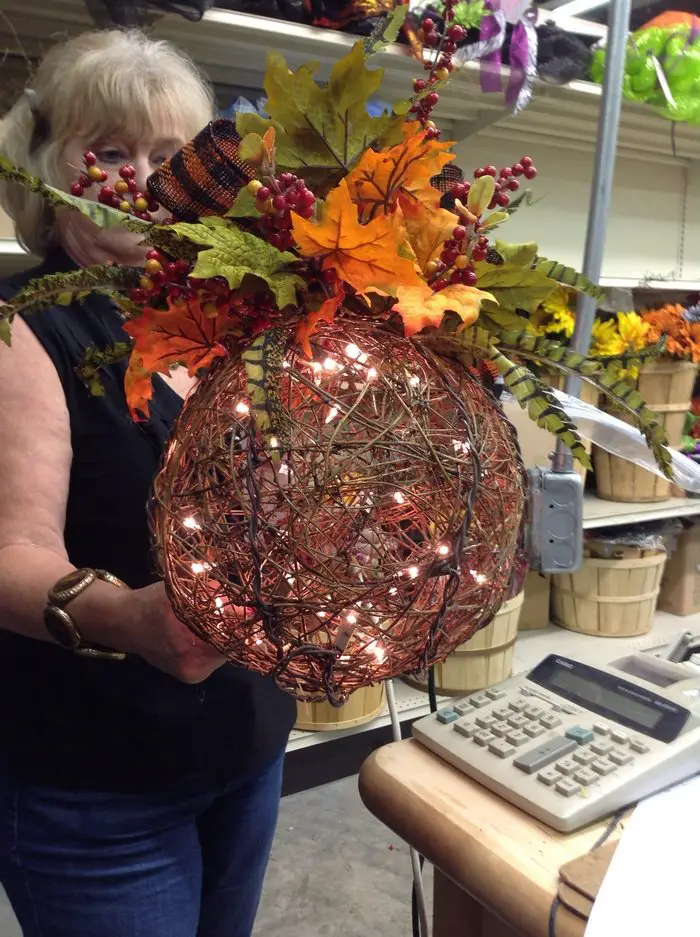
1. Simply thread some string lights inside the balls and tie them in place with a bit of garden twine.
2. Thread the lights to the 2 medium balls and then, take the large ball and thread it onto the lights. Make sure to wrap the lights around the balls evenly so that the grapevine ball is evenly lit.
3. To hang a DIY grapevine ball, follow these simple steps. First, screw two white eye hooks into the ceiling. Next, take a piece of burlap ribbon and tie it around the grapevine ball, making sure the ball is secure. Finally, hang the grapevine ball from the eye hooks.
4. While I worked on the placement, I balanced the birch branch on a couple of chairs. The balls had to touch and be relatively stationary to hide the wiring.
5. There are two outdoor extension cords connected to the lights. One loop of burlap ribbon hides the plugs of each cord. Between the screen and railing, the extension cord is hidden down the side of the porch. Finally, the porch project is coming together!
Then, string up the balls however you like – you could even make a chandelier! Not only are grapevine balls a beautiful way to decorate your outdoor space, but they’re also very affordable. So what are you waiting for? Give them a try today!
You can get step-by-step instructions from Robin over at All Things Heart and Home!
Brilliant DIY grapevine ball designs
Click on any image to start the lightbox display. Use your Esc key to close the lightbox. ?

Indoor vs. Outdoor Use of Grapevine Balls
Lighted grapevine balls offer a versatile decoration option that can enhance both indoor and outdoor spaces with their natural beauty and rustic charm. However, the way you use them in different environments can impact their longevity and effectiveness as decor elements. Here’s how to make the most of grapevine balls in various settings.
Outdoor Placement Tips
When using grapevine balls outdoors, it’s crucial to consider weather resistance. To protect them from moisture and decay, consider applying a weatherproofing sealant which helps preserve the vines against rain and humidity. For outdoor gatherings or garden settings, grapevine balls can be hung from trees, porches, or pergolas, adding a whimsical touch to the natural landscape. Secure them with sturdy materials like outdoor-rated twine or wire to ensure they remain in place, especially in windy conditions.
Indoor Decorating Ideas
Grapevine balls can bring a touch of nature into your home and create a cozy, inviting atmosphere. You can place them in a decorative bowl on a coffee table, integrate them into a fireplace mantel display, or hang them in windows where they can catch the light. For indoor use, you might consider incorporating battery-operated fairy lights inside the grapevine balls, providing a soft, ambient glow without the need for electrical cords.
Transitioning Between Environments
Grapevine balls are incredibly adaptable, allowing for easy transitions between indoor and outdoor uses depending on the season or occasion. For instance, grapevine balls used as part of a summer outdoor decoration can be brought indoors during the winter months, adorned with seasonal embellishments such as pine cones or red ribbons to complement holiday decor. This flexibility makes grapevine balls a cost-effective and versatile choice for year-round decorating.
By considering these tips, you can maximize the durability and aesthetic appeal of grapevine balls, making them a standout feature in any setting.
Upcycling and Eco-Friendly Tips for Decorative Projects
Embracing upcycling in DIY projects fosters creativity and significantly contributes to environmental sustainability. By reusing materials that might otherwise be discarded, you can create unique, eco-friendly decorations that add charm and character to your home. Here are some useful tips to consider when upcycling for decorative purposes.
Source Sustainable Materials
Begin your project by sourcing materials that can be easily upcycled. Look for items like old vines, branches, or reclaimed wires that can be transformed into stunning decorative pieces. Local gardening communities, yard sales, and online marketplaces are excellent sources for finding affordable and sustainable materials.
Use Natural Treatments
Opt for natural or homemade treatments when preparing your materials to minimize environmental impact. For instance, instead of using synthetic varnishes or sealants, you can preserve and protect your creation with a mixture of beeswax and linseed oil. This not only avoids harsh chemicals but also maintains the natural aesthetics of your materials.
Incorporate Eco-Friendly Lighting
If your decoration project involves lighting, choose eco-friendly options such as LED fairy lights or solar-powered lights. These choices are not only better for the environment due to their lower energy consumption but also offer greater flexibility in how and where you can display your creations without reliance on electrical outlets.
Reuse and Recycle End-of-Life Components
Consider the lifecycle of the materials you’re using. Once a decoration has served its purpose or is in need of replacement, think about how components can be reused or recycled. For example, metal wires can be reshaped into new forms, and natural elements like branches can be composted to minimize waste.
By incorporating these upcycling and eco-friendly practices, you enhance the aesthetic value of your DIY projects and contribute positively to environmental conservation. These sustainable approaches encourage a more mindful and creative way of decorating that can be both rewarding and responsible.
Common Challenges and Troubleshooting in Crafting Grapevine Balls
Crafting decorative items like grapevine balls can be a rewarding DIY project, but it may come with its own set of challenges. Knowing how to address these issues can help ensure your project’s success and enhance the longevity of your creations.
Here are some common challenges you might encounter, along with effective troubleshooting tips.
Uneven Shape
One of the frequent issues crafters face is achieving a uniform shape when forming their creations. This can result from unevenly distributed vines or not having a solid frame to guide the initial shape.
Solution: Use a spherical template, such as an old beach ball or a balloon, as a guide. Wrap the vines around this template evenly, securing them with floral wire at various points. Once the structure is stable, remove the template.
Loose or Detaching Vines
Vines may become loose or detach from the structure over time, especially if they were not initially secured properly.
Solution: Ensure that all vines are tightly wrapped and securely fastened with floral wire or twine. For added stability, apply a small amount of strong, weather-resistant adhesive at the joints where vines intersect, which can help prevent them from coming loose.
Difficulty in Lighting Installation
Installing lights within or around your creation without compromising the structure or the distribution of light can be tricky.
Solution: Plan the placement of lights before you start wrapping the vines. Integrate a clear path for stringing the lights, ensuring they are evenly spaced. Use small clips or ties to secure the lights discreetly without damaging the vines. Opt for lightweight LED lights to minimize the strain on the structure.
Weather Damage for Outdoor Use
Exposure to elements like rain, wind, and sunlight can deteriorate your creations faster than anticipated, especially when placed outdoors.
Solution: Apply a weatherproof sealant to protect the vines from moisture and UV rays. Choose a sealant that is clear and flexible to maintain the natural look of the vines. Additionally, place your creations in sheltered locations where they are less exposed to harsh conditions.
By anticipating these common challenges and preparing solutions ahead of time, you can enhance both the creation process and the durability of your decorative grapevine balls, making them a lasting part of your home or garden decor.
Conclusion
Crafting lighted grapevine balls is a creative and enjoyable way to add a rustic charm to any space. These versatile decorations can be customized with lights, colors, and other embellishments to suit personal tastes and seasonal themes. With some basic materials and a little imagination, anyone can transform simple grapevines into beautiful, eco-friendly decor.
FAQ: Lighted Grapevine Balls
- What type of lights should I use for grapevine lighting balls, and how do I attach them?
- To create beautiful grapevine lighting balls, choose string lights with 50 mini bulbs per strand, using dark green or black wires for a seamless look, or white wires for a modern style when paired with white grapevine balls. Prepare your workspace by clearing enough room to work comfortably and gathering all materials.
- Wrap the lights around the grapevine balls randomly to enhance their natural charm, then secure the mini light plug to an extension cord with electrical tape to keep it safe from weather and critters. These glowing grapevine balls will add a magical ambiance to any setting.
- How do I ensure the mini light plug is secure and protected from the elements?
- To protect the mini light plug from the elements, wrap electrical tape securely around the connection point where the plug meets the extension cord. This seals the junction, reducing the risk of accidental unplugging and providing a barrier against moisture to prevent water damage.
- The tape also deters critters and insects from tampering with the cords, enhancing the durability of your setup. These simple steps will ensure your mini lights remain reliable and functional throughout the season.
- How do I prepare grapevine for use in making lighting balls?
- Preparing grapevine for lighting balls is an essential step in this DIY project. Harvest grapevine while it’s soft and pliable, avoiding dry vines that can crack and complicate crafting. Strip the vine of leaves, grapes, and twigs while wearing gloves to protect your hands from scratches and stains, ensuring it’s completely bare and ready for use.
- Use the grapevine soon after harvesting to retain flexibility, or store it in a cool, damp place if immediate use isn’t possible, and consider sourcing it locally from farms where it’s often unwanted.
- How can I hang grapevine lighting balls in my garden?
- To hang a DIY grapevine ball, start by screwing two white eye hooks into the ceiling, then secure the ball with burlap ribbon and hang it from the hooks. For outdoor setups, use chains, twine, or rope to suspend the balls from tree branches, allowing flexibility in height and placement.
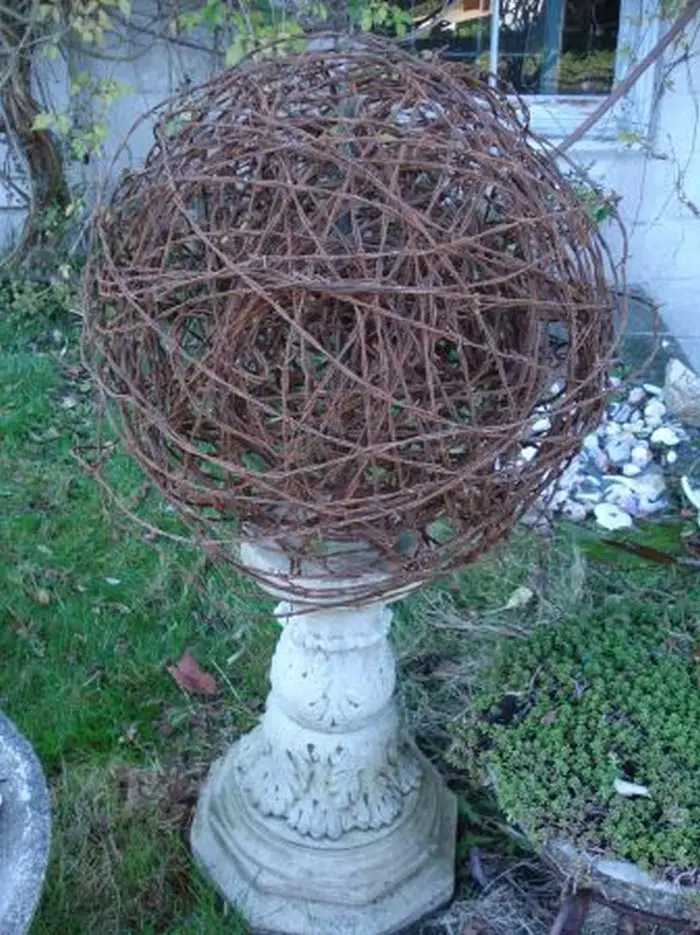
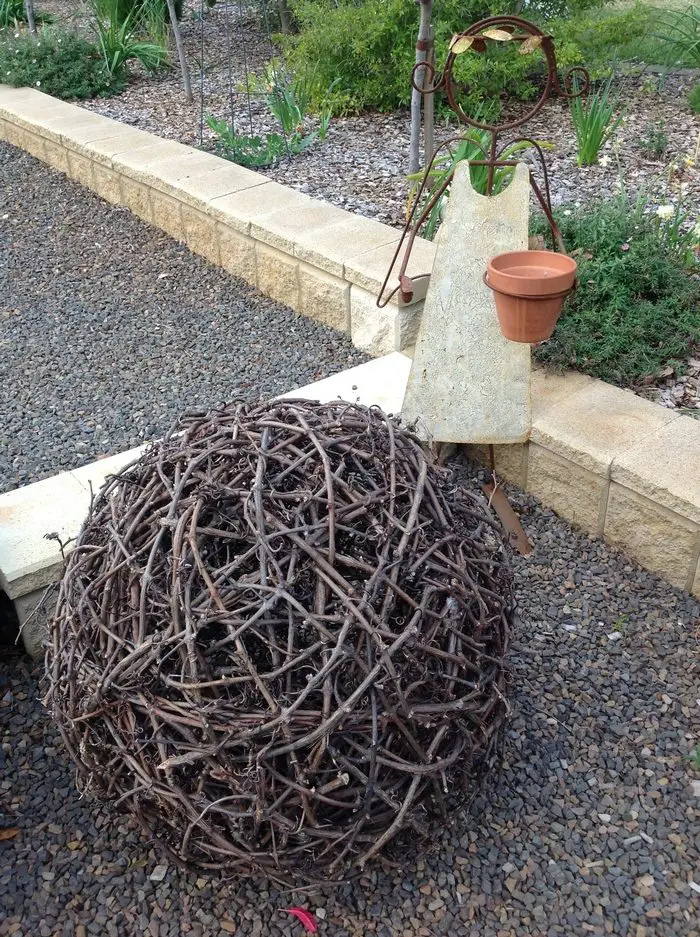
- For a whimsical option, you can temporarily hang them using an extension cord, although it’s not a long-term solution. Alternatively, place the grapevine balls directly on the garden floor for a rustic, grounded aesthetic that enhances the ambiance without additional materials.
- How can I enhance the ambiance in my garden with minimal effort?
- By placing the grapevine balls on the ground, you can effortlessly create a charming ambiance without the need for additional labor.
- What are the potential drawbacks of using certain materials?
- Using an extension cord isn’t the best long-term solution, as it’s not technically correct or sturdy, but it can be a temporary fix if you’re eager to hang the balls.
- Can I place the grapevine balls on the ground instead of hanging them?
- Yes, placing the grapevine balls on the ground in your garden is a viable alternative to hanging them, adding versatility to your decor.
- What should I do if I don’t have the ideal materials?
- If you lack the ideal materials, consider improvising with items around your home, like chains from bicycles or tools from a workshop.
- What materials can I use to hang the grapevine balls?
- To hang the grapevine balls, you can use chains, twine, ropes, or even an extension cord, providing a variety of options based on what you have available.
- How do I assemble a grapevine ball using a beach ball as a form?
- To craft a stunning grapevine ball, use a spherical template like an old beach ball or balloon as your guide. Start by stripping fresh grapevine of all grapes and leaves, leaving clean, flexible stems for crafting.
- Inflate the template to your desired size and wrap the grapevine around it, securing the layers with pre-cut floral wire as you work. Once the ball is dense and stable, slightly deflate the template to make removal easier, leaving you with a beautifully shaped grapevine ball ready for decoration.
- How do you protect the electrical components?
- Secure the mini light plug with electrical tape to shield it from moisture and critters, ensuring the lights remain functional and safe.
- What materials can be used for hanging the grapevine ball?
- Utilize a chain or rope for hanging, or in a pinch, even an extension cord can be used, though not recommended for long-term use.
- What do you do after the grapevine ball is complete?
- Celebrate your creation, then proceed to string lights around the ball. Ensure you enjoy the process and admire your handiwork.
- What are some potential challenges or things to avoid?
- Avoid letting the grapevine dry out before use, don’t wait too long to remove the beach ball, and be prepared for some messiness with leftover leaves and grapes.
- What should you do if you encounter difficulties while wrapping?
- If wrapping becomes challenging, try using different sizes of beach balls to create varied grapevine balls and ensure you deflate and remove the beach ball before the grapevine becomes too tight.
- How do you secure the grapevine during assembly?
- Use pre-cut floral wire to secure the grapevine at various points as you wrap it around the beach ball, ensuring stability.
- How do you handle the beach ball during the wrapping process?
- Wrap the grapevine around the inflated beach ball initially, then deflate it midway to make removal easier without damaging the structure.
- How do you prepare the grapevine for use?
- First, strip the grapevine of all grapes and leaves, ensuring it’s clean and flexible. Harvest the vines while they’re still growing and pliable to prevent cracking.
If you liked this project, you might also like to view the Whimsical Decor for Your Fairy Garden…