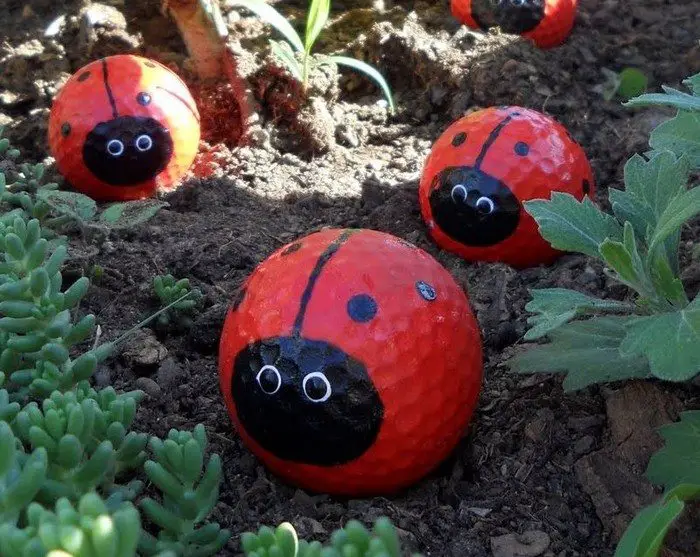
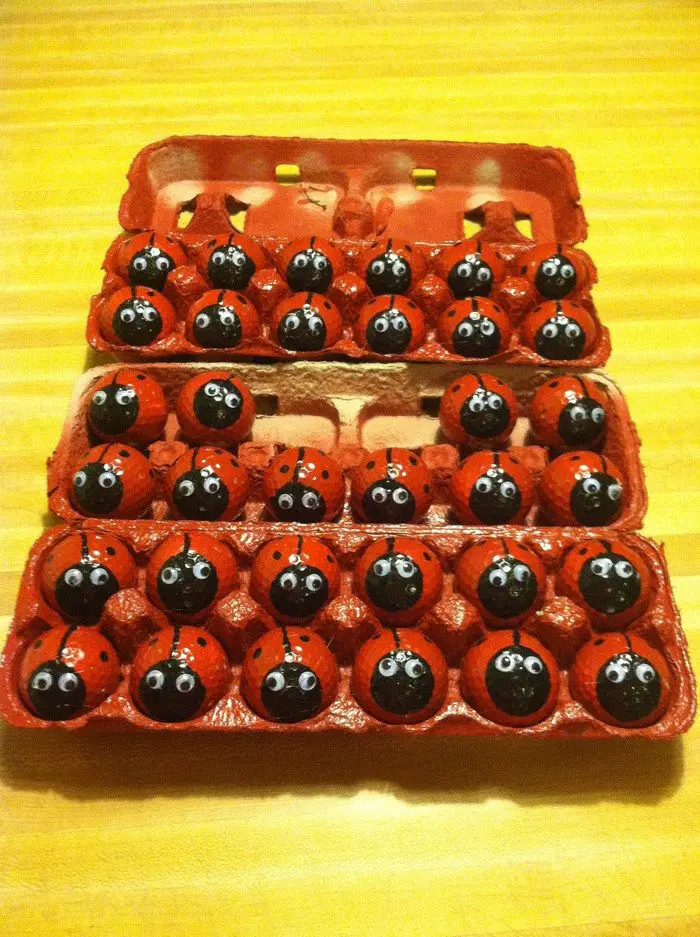
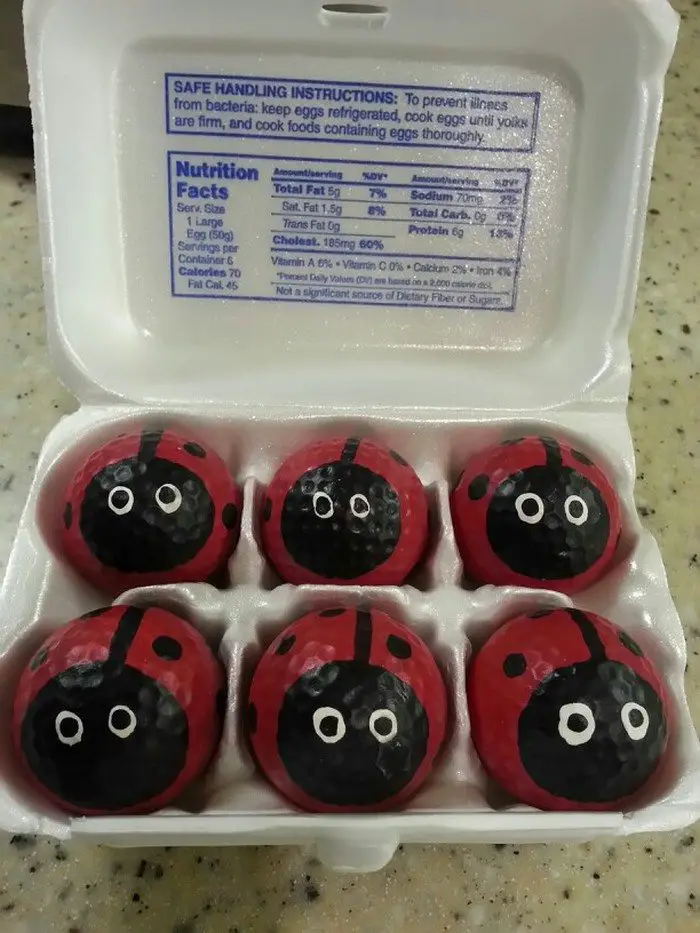
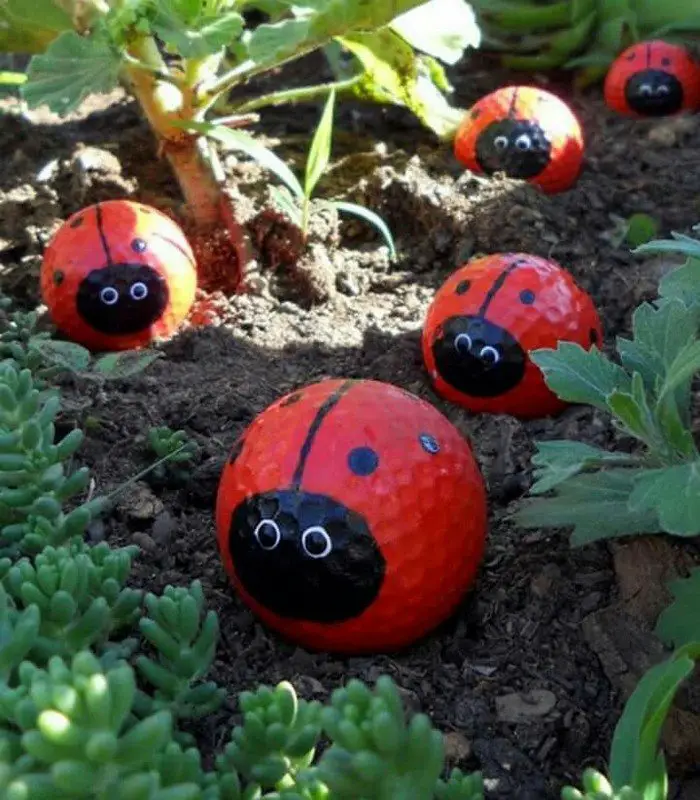
Got a number of unused golf balls at home? Then recycle them and make a cute decoration for your garden!
Painting these balls to look like ladybugs is easy so it’s a great project to do with kids. As long as they already have good control of their hands, they can definitely make their own beautiful DIY ladybugs. Just don’t forget to wear an appropriate mask when you spray paint these balls!

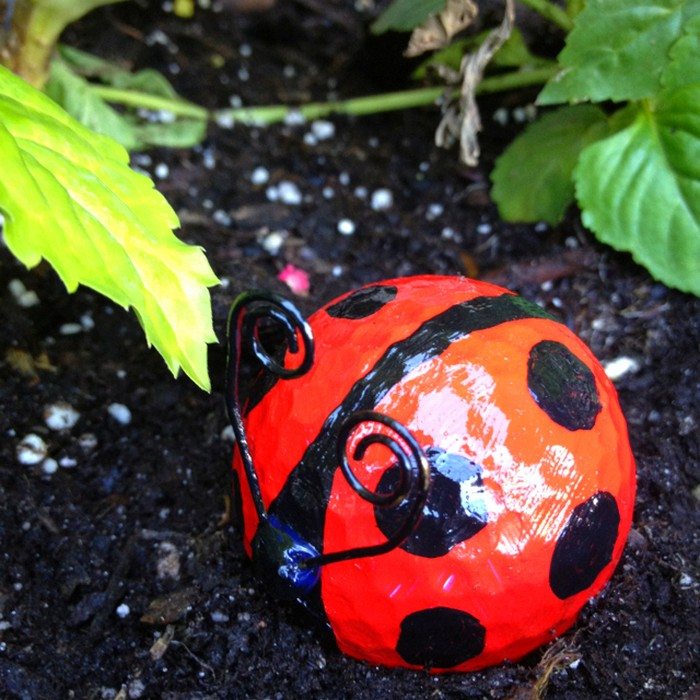
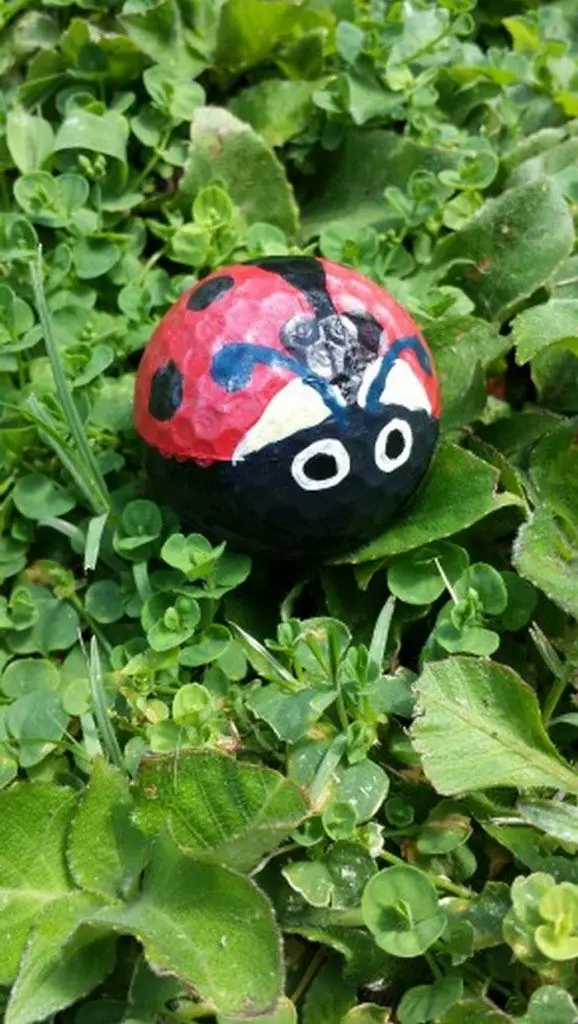
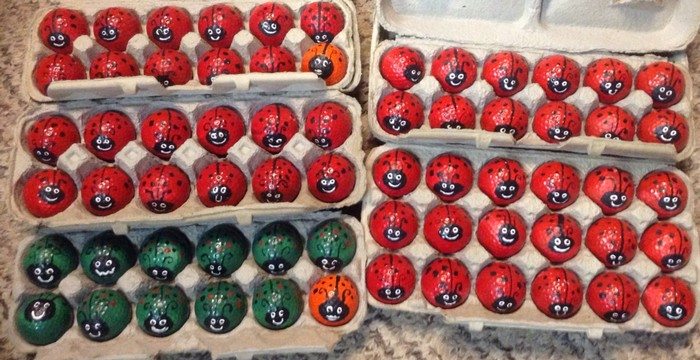
The featured DIY ladybugs here are an example of the basic way to make this cute decor idea. But you can be more creative. Use other recyclable materials such as old wire hangers and empty plastic bottles to create the legs and wings!
Is this going to be your next family fun activity? Lets move on to making your own golf ball ladybugs.
Contents
- 1 Lets Build Gold Ball LadyBugs
- 2 Creative Variations for Golf Ball Ladybugs
- 3 Outdoor Decorating Tips with Golf Ball Ladybugs
- 4 Golf Ball Recycling: Creative and Eco-Friendly Ideas
- 5 FAQ for Golf Ball Ladybugs and Recycling Crafts
- 5.1 Can any type of golf ball be used for these crafts?
- 5.2 What kind of paint should I use for golf ball crafts?
- 5.3 Are these crafts suitable for all ages?
- 5.4 How can I make the golf ball ornaments weather-resistant for outdoor use?
- 5.5 Do I need any special tools for these projects?
- 5.6 How can I safely cut a golf ball for jewelry making?
- 5.7 Is it eco-friendly to use golf balls for crafts?
- 5.8 Can these crafts be used for educational purposes?
- 5.9 Where can I display the golf ball ladybugs?
- 5.10 How long does it take to make a golf ball ladybug?
- 6 Conclusion
Lets Build Gold Ball LadyBugs
Materials:
- Golf Balls
- Sandpaper
- Primer Spray Paint
- Acrylic Paint (Red, Black, White)
- Varnish
Tools:
- Paintbrush
Instructions
Prepare the Golf Balls
- Begin by cleaning the golf balls. Remove any dirt or grime with a damp cloth.
- Once they are dry, use sandpaper to lightly sand the surface. This helps the paint adhere better for your golf ball ladybugs.
Apply Primer
- In a well-ventilated area, apply a coat of primer spray paint to each golf ball.
- Hold the spray can about 6-8 inches away from the ball for even coverage.
- Let the primer dry completely before moving to the next step for your golf ball ladybugs.
Paint the Base Color
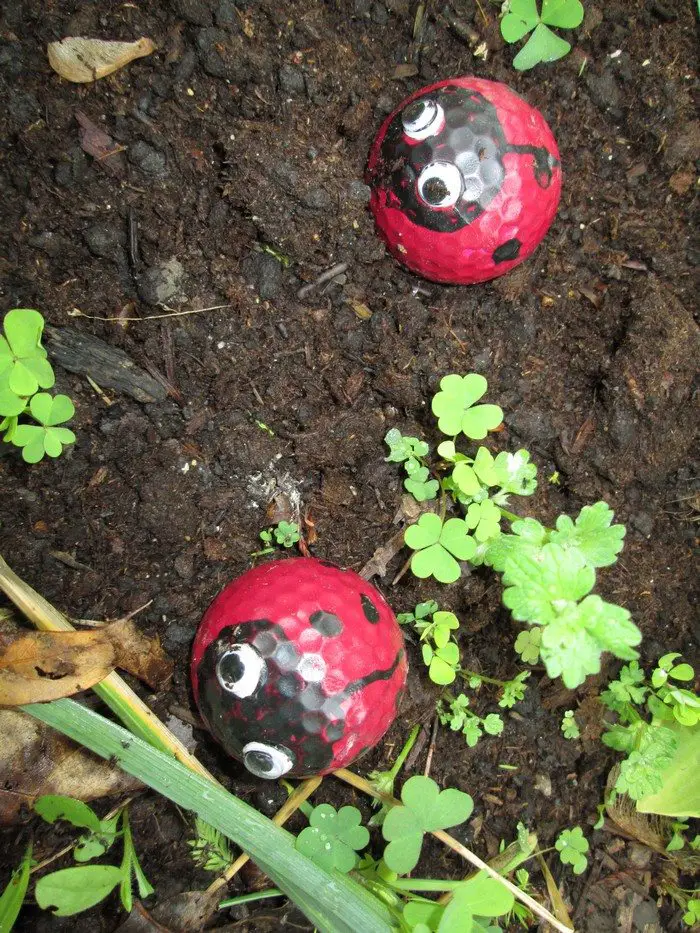
- Once the primer is dry, paint the entire golf ball with red acrylic paint. This forms the base color of your golf ball ladybugs.
- Apply two coats for a more vibrant color, allowing the paint to dry between coats.
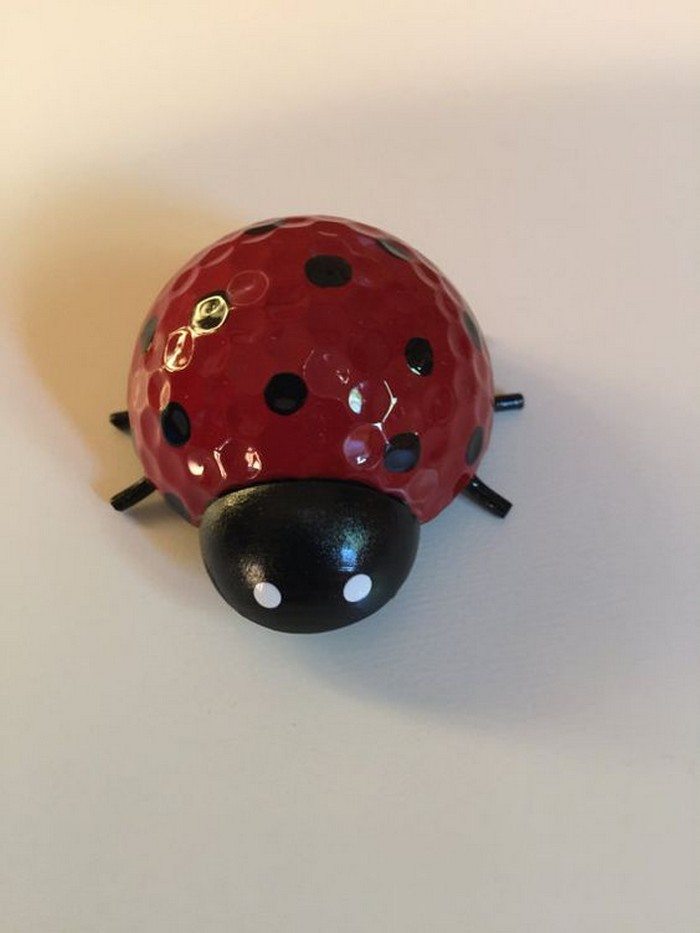
Add Details
- Using black acrylic paint, draw a straight line down the center of the ball. This creates the golf ball ladybug wings.
- Paint the head at one end of the golf ball in black.
- Add small black dots over the red areas to mimic the golf ball ladybugs spots.
- Use a tiny brush or a toothpick to add white dots for the eyes on the head.
Apply Varnish
- After the paint has completely dried, apply a coat of clear varnish for your golf ball ladybugs.
- This will protect the paint from weather and wear, especially if you plan to use it outdoors.
- Allow the varnish to dry thoroughly.
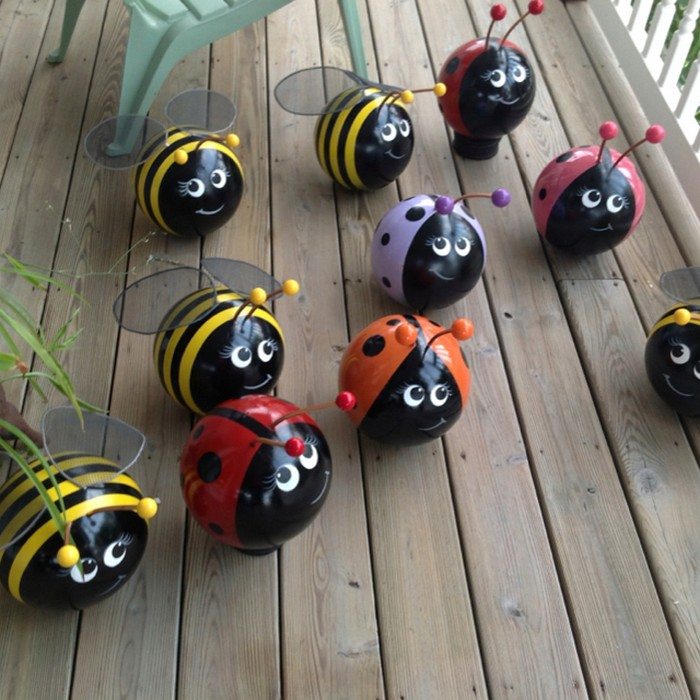
Creative Variations for Golf Ball Ladybugs
Golf ball ladybugs are a fantastic starting point for creative garden decorations. By just changing colors and patterns, you can unleash a world of possibilities. These variations not only add charm to your garden but also offer a fun way to upcycle golf balls.
Butterfly Bliss
Add colorful butterflies to your group of golf ball ladybugs. Use vibrant acrylic paints to mimic the patterns of real butterflies. Add thin wire or plastic for the wings. This twist brings a touch of whimsy to your garden.
Buzzy Bees
Create adorable bees as buddies to your golf ball ladybugs. Paint them in black and yellow stripes. Small wings from recycled materials can complete the look. These bees can buzz around flower pots and garden corners.
Crawling Critters
Go beyond the insect world. Turn golf balls into small animals like turtles or frogs. Use additional materials for legs and eyes. These critters can be a surprising addition to your outdoor space.
Garden Gnomes
Turn your golf balls into miniature garden gnomes. Paint them with bright colors to create the classic gnome hat and beard. These tiny guardians add a fairytale touch to any garden. Let these gnomes play around with your golf ball ladybugs.
Fanciful Fish
Create a school of fish with your golf balls. Use shades of blue and green for a watery effect. Attach them to sticks or hang them to give an illusion of swimming in your garden. These fishes are great with your golf ball ladybugs.
Whimsical Flowers
Transform golf balls into blooming flowers. Paint them in bright, floral colors. Add wire or sticks as stems. These everlasting blooms will brighten up your garden all year round.
Holiday Ornaments
Paint golf balls to match holiday themes. Think of Christmas, Halloween, or Easter. Use them as festive garden decorations or as part of a seasonal display.
Solar System Models
Create a mini solar system. Paint golf balls to represent different planets. This educational and decorative project is perfect for space enthusiasts.
Each variation keeps the spirit of recycling alive. They make your garden a showcase of creativity. The golf ball ladybugs are just the beginning of your crafting journey.
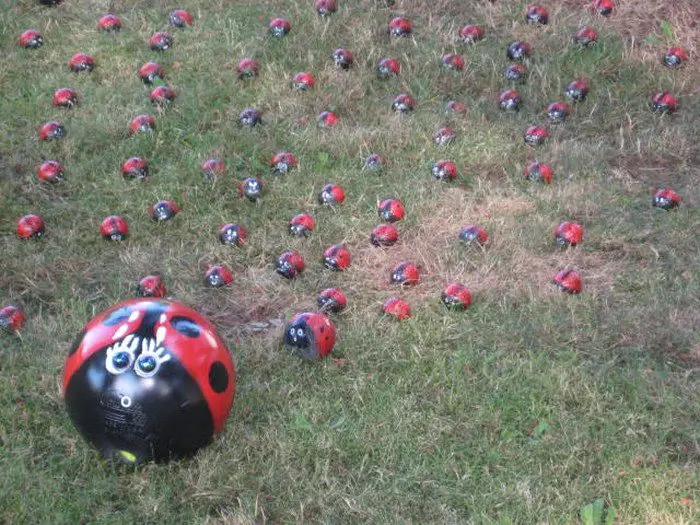
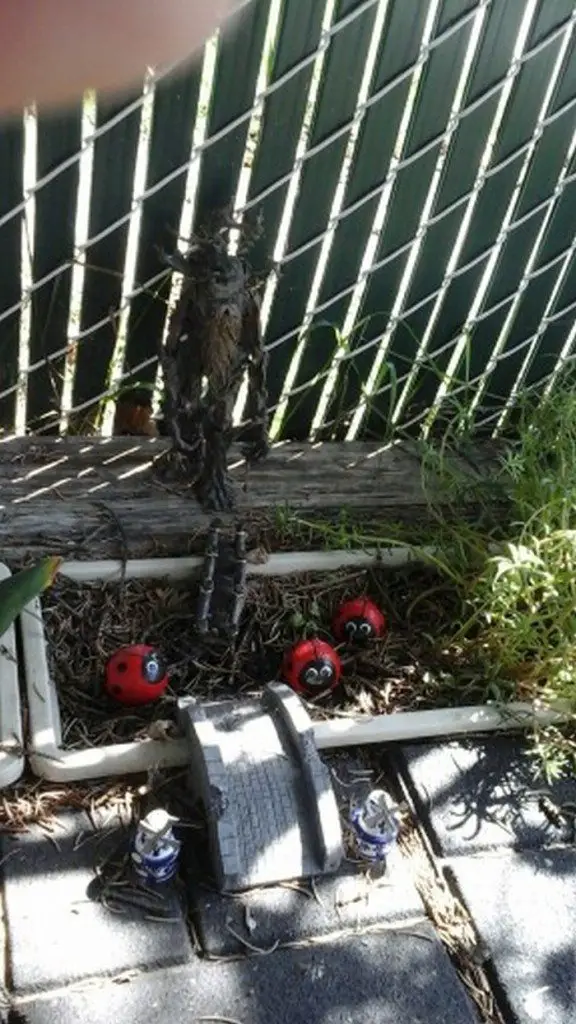
Outdoor Decorating Tips with Golf Ball Ladybugs
Golf ball ladybugs are not just fun to make, they’re also perfect for adding a unique touch to your outdoor spaces. Here are some tips to make the most out of these adorable decorations.
Strategic Placement
When placing your golf ball ladybugs, think about how they can best enhance your garden’s natural beauty. Here are some detailed ideas:
- Near Flower Beds: Position the ladybugs around the edges of your flower beds. They can mimic real ladybugs, adding a touch of realism and charm. Their bright colors will complement the flowers, creating a vibrant look.
- Along Garden Pathways: Line your pathways with these ladybugs. They can serve as cute markers, leading the way through your garden. This not only adds an element of fun but also guides visitors on a designated path.
- On Garden Benches: Place a few ladybugs on the seats or backrests of your garden benches. They can be a delightful surprise for someone taking a rest. It also makes the benches more inviting and engaging.
- Among Potted Plants: Tuck the ladybugs into your potted plant arrangements. They can peek out from behind leaves or sit boldly on the soil. This adds a playful element to your potted plants, both indoors and outdoors.
- Atop Garden Stones: Set them on top of garden stones or rocks. This natural setting is perfect for them, blending them seamlessly into the landscape. They’ll look like they’re sunbathing or resting, adding life to your stone features.
- By Water Features: If you have a pond, fountain, or birdbath, place some ladybugs around these areas. Their presence can create a whimsical, lively scene, especially near water.
By carefully choosing their placement, your golf ball ladybugs can significantly enhance the visual appeal of your garden. They add color, character, and charm, making your outdoor space more engaging and delightful.
Weatherproofing
To make sure your golf ball ladybugs retain their charm throughout various weather conditions, here’s a detailed approach to weatherproofing:
- Choosing the Right Varnish: Select a high-quality, weather-resistant varnish specifically designed for outdoor use. Look for products that offer UV protection to prevent the colors from fading in the sun. A varnish that’s waterproof will also shield the paint from rain damage.
- Proper Application: Apply the varnish evenly in a well-ventilated area. Make sure the painted golf balls are completely dry before applying. For best results, apply multiple thin coats rather than a single thick one. This ensures even coverage and better protection.
- Regular Maintenance: Check your ladybugs periodically, especially after extreme weather conditions. Look for signs of wear, such as chipping or fading. Quick touch-ups to the paint followed by a fresh coat of varnish can keep them looking new.
- Annual Reapplication: The varnish tends to wear off over time. Reapply a new coat of varnish annually, preferably at the start of spring. This routine maintenance will refresh the look of your ladybugs and reinforce their protection against the elements.
- Storing During Extreme Weather: If possible, consider bringing your ladybugs indoors during harsh winter months or extreme weather conditions. This can significantly extend their lifespan and maintain their appearance.
Following these weatherproofing tips lets golf ball ladybugs stay vibrant and delightful for years. Regular maintenance and careful selection of varnish can make a big difference in preserving these charming garden decorations.
Grouping for Impact
Creating clusters of golf ball ladybugs in your garden can significantly enhance its aesthetic appeal. Here’s how to effectively group them for maximum impact:
- Designing Focal Points: Select areas in your garden that you want to highlight. Place a group of ladybugs there to draw attention. This could be around a special plant, a garden sculpture, or a water feature. A cluster of these colorful ladybugs can turn an ordinary spot into a captivating focal point.
- Adding Elements of Surprise: Hide some ladybugs in unexpected places. Tuck them under leaves, near the base of a tree, or amongst garden rocks. Visitors will delight in discovering these hidden gems as they explore your garden.
- Varying Sizes for Visual Interest: Use ladybugs of different sizes to create a more dynamic display. Larger ones can stand out as main features, while smaller ones can add detail and depth. This variation in size creates a more natural and engaging scene.
- Pairing with Other Golf Ball Creatures: Combine ladybugs with other golf ball creatures like bees, butterflies, or turtles. This mix of characters can turn a section of your garden into a whimsical storybook scene. It’s also a great way to showcase your creativity and crafting skills.
- Creating Themed Areas: Consider making themed areas in your garden. For instance, a ‘bug zone’ with various insect-themed golf ball crafts. Or a ‘fairy garden’ with ladybugs, flowers, and mythical creatures. These themed areas can be fun, especially for kids.
Grouping your golf ball ladybugs and other crafts allows you to transform your garden into an enchanting and visually stunning space. This strategy not only showcases your creativity but also brings life and character to your outdoor area.
Golf Ball Recycling: Creative and Eco-Friendly Ideas
Recycling old golf balls is not only eco-friendly but also opens up a world of creative possibilities. Here are some innovative ideas to repurpose golf balls, extending their life beyond the golf course.
Home Decor Accents
Golf balls can be turned into attractive home decor accents with a little creativity. Here’s how:
- Vase Fillers: Paint golf balls in colors that complement your room’s palette. Use them as fillers in clear glass vases. They can add color and interest to floral arrangements or stand alone as a modern art piece.
- Bookshelf Decorations: Create themed golf balls, like miniature globes, animals, or abstract patterns. Place them on bookshelves amongst books. They can act as bookends or simply as decorative elements that reflect your style.
- Centerpiece Elements: Incorporate painted golf balls into table centerpieces. Combine them with candles, flowers, or other decorative items for a unique and eye-catching display. They work well for special occasions or as permanent fixtures on your dining table.
Garden Markers
Golf balls are perfect for making durable and playful garden markers:
- Labeling Plants: Use a permanent marker or paint to write the names of plants or vegetables on the golf balls. Their round shape and smooth surface make them easy to write on. This is especially helpful for identifying young plants or organizing your garden.
- Color Coding: Assign different colors to different types of plants. For example, use green for herbs, red for vegetables, and blue for flowers. This color-coding system can make gardening more organized and visually appealing.
- Decorative Touches: Beyond functionality, these golf ball markers add a whimsical touch to your garden. You can paint them to look like bugs, or fruits, or just in bright, cheerful colors. They not only serve as markers but also as fun, decorative elements in your garden beds and pots.
Christmas Ornaments
Creating Christmas ornaments from golf balls is a delightful holiday project. Here’s how to do it:
- Festive Designs: Use acrylic paints to add holiday-themed designs like snowflakes, Santa Claus, reindeer, or Christmas trees. Glitter can be added for extra sparkle.
- Ribbon Loops: Attach a loop of decorative ribbon or twine to each golf ball. This allows them to be easily hung on the Christmas tree. The ribbon color can match your overall tree decoration theme.
- Gift Tags: Paint them with the recipient’s names and use them as unique gift tags. They can later be used as ornaments, making them a thoughtful two-in-one gift.
Children’s Art Projects
Golf ball ladybugs provide an excellent base for various kids’ art projects:
- Painting and Decorating: Kids can use non-toxic paints to create their designs. They can also glue on items like googly eyes, feathers, or sequins for added decoration.
- Educational Crafts: Use these projects to teach children about colors, patterns, or even the basics of recycling. It’s a fun, hands-on way for them to learn important concepts.
- Group Activities: These crafts are perfect for group settings like classrooms or birthday parties. They offer a fun and interactive way for children to express their creativity while socializing.
DIY Jewelry
Golf balls can be transformed into unique and stylish jewelry apart from just golf ball ladybugs:
- Painting for Jewelry: Paint golf balls in various colors and patterns suited for jewelry. Metallic, pastel, or neon colors can give different styles, from elegant to funky.
- Necklaces and Earrings: Cut the golf balls into slices for lighter pieces, ideal for earrings or pendants on necklaces. Drill a small hole for attaching to chains or earring hooks.
- Keychains and Charms: Attach a small loop to a painted golf ball to create a keychain or bag charm. These can be personalized, making them great gifts or craft fair items.
Each of these ideas showcases the versatility of golf balls in crafting and decorating. By recycling them, we not only reduce waste but also add a creative flair to our surroundings.
Click on any image to start the lightbox display. Use your Esc key to close the lightbox.![]()

FAQ for Golf Ball Ladybugs and Recycling Crafts
Can any type of golf ball be used for these crafts?
Yes, all types of golf balls can be used. It’s a great way to recycle old or damaged balls that are no longer suitable for golfing.
What kind of paint should I use for golf ball crafts?
Acrylic paint works best for its durability and color variety. Make sure to use a primer for better paint adherence and a varnish to protect the finished product.
Are these crafts suitable for all ages?
Yes, most of these crafts are suitable for all ages. Younger children should be supervised, especially when using paint and small decorations.
How can I make the golf ball ornaments weather-resistant for outdoor use?
Apply a weather-resistant varnish over the painted golf balls. This will help protect them from elements like sun and rain.
Do I need any special tools for these projects?
Basic crafting tools like brushes, glue, and scissors are usually sufficient. For some projects, like jewelry making, additional tools like a drill may be needed.
How can I safely cut a golf ball for jewelry making?
Cutting a golf ball requires care. Use a sharp utility knife and cut slowly. It’s best to have an adult handle this part of the project.
Is it eco-friendly to use golf balls for crafts?
Yes, using golf balls for crafts is a form of upcycling, which is eco-friendly as it repurposes materials that might otherwise be discarded.
Can these crafts be used for educational purposes?
Absolutely! These projects can teach children about recycling, creativity, and following instructions. They are great for both home and school settings.
Where can I display the golf ball ladybugs?
They can be displayed in gardens, on patios, or even indoors. Just make sure they are varnished well if they are going to be exposed to the elements.
How long does it take to make a golf ball ladybug?
The time can vary, but typically it takes about an hour to paint and decorate one, not including drying time.
Conclusion
DIY golf ball ladybugs offer a fun, creative, and eco-friendly way to add charm to your home and garden. These projects not only recycle old golf balls but also provide an opportunity for family bonding and creativity. The versatility of golf balls in crafting is remarkable, as they can be transformed into various decorative and functional items.
If you liked this project, you might also like to view DIY Ladybug Rocks...


