
Whether you’re a sewing master or an all-around crafter, you may be one of the many who have a big collection of buttons stashed away. Somehow, you can’t bring yourself to throw them away. You just might need them someday. So you keep them in a jar, maybe, or a box in the rear of the closet, perhaps. But let’s face it, there’s no way that you’ll be able to use them all up on fixing buttonless shirts.
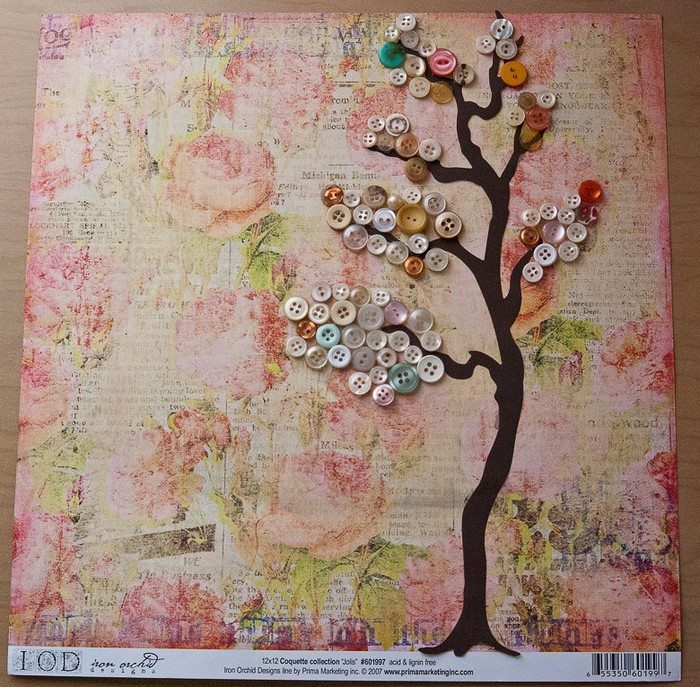
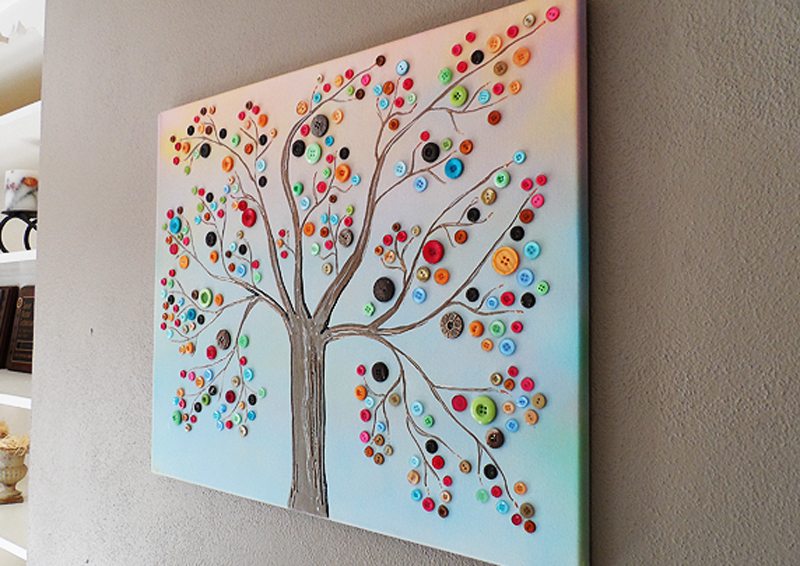
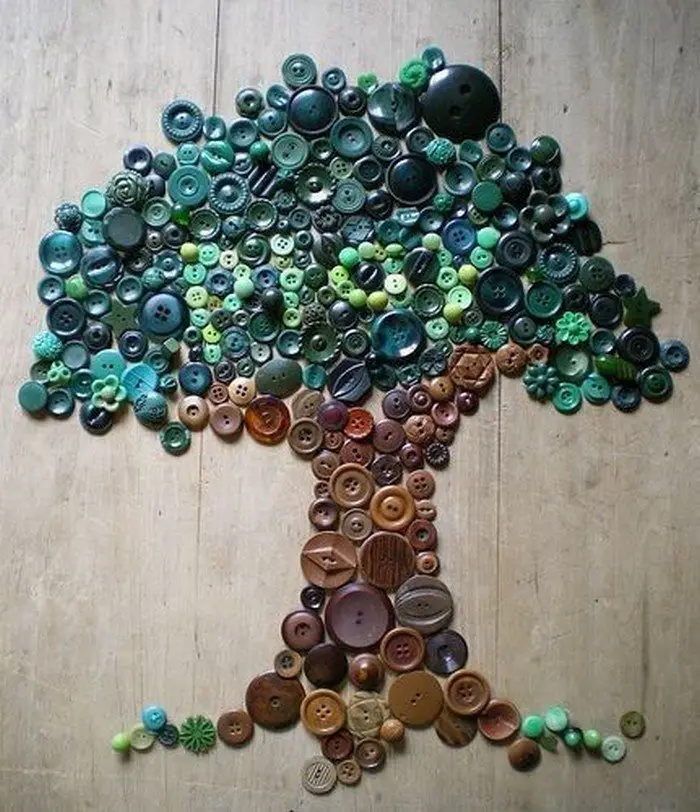
So why not put that heap of buttons to good use by making some pretty wall art? We think this is a good one to hang in your daughter’s room!
Making a button tree wall art is a great arts and crafts project for bonding with your kids, too. :)

Contents
Advantages of Having a Button Tree Wall Art
Here are the advantages of creating creative button tree wall art:
1. Personalization: Button tree wall art offers a canvas for your creativity, allowing you to tailor your space to reflect your unique style and personality. Whether you prefer a vibrant and eclectic look or a more subdued and elegant aesthetic, you can customize the colours, button sizes, and tree designs to align with your decor preferences.
This flexibility ensures that your button tree wall art will seamlessly integrate into your home, serving as a reflection of your taste and creativity.
2. Cost-Effective: Embarking on a button tree wall art project is not only a creative endeavour but also a budget-friendly one. Buttons are widely accessible and typically affordable, making them an economical choice for DIY decor. You can easily source buttons from craft stores, and thrift shops, or even repurpose buttons from your existing collection or old clothing.
By using readily available materials, you can create stunning button tree wall art without breaking the bank, making it an accessible and cost-effective way to enhance your home decor.
3. Ease of Creation: One of the most appealing aspects of button tree wall art is its simplicity and accessibility as a DIY project. Unlike more complex art forms that may require advanced artistic skills or specialized techniques, creating button tree wall art is straightforward and enjoyable for crafters of all levels.
With just a few basic materials and simple steps, you can embark on this creative endeavour without feeling overwhelmed or intimidated. Whether you’re a seasoned crafter or a beginner looking for a fun and rewarding project, button tree wall art offers a satisfying creative outlet that anyone can enjoy.
Making button tree wall art is a simple and enjoyable DIY project that doesn’t require advanced artistic skills. With just a few steps, you can create a stunning piece of art to adorn your walls.
4. Versatility: One of the standout advantages of button tree wall art is its versatility in terms of size, scale, and design. Whether you’re decorating a cozy nook or a spacious living room, you can tailor your button tree artwork to fit any space seamlessly.
This flexibility allows you to create pieces ranging from small, subtle accents to large, statement-making murals, depending on your preferences and the dimensions of the wall you’re working with. With the ability to adjust the size and scale of your design, you can customize your button tree wall art to complement the specific area you intend to decorate, ensuring a perfect fit and cohesive look.
5. Unique Decor: Button tree wall art serves as a distinctive and captivating addition to your home decor, infusing your space with charm and personality. The intricate details and textures of the buttons lend a tactile and visually engaging quality to the artwork, drawing attention and sparking conversation among guests.
Unlike mass-produced decor items, button tree wall art offers a sense of uniqueness and individuality, allowing you to showcase your style and creativity. Whether displayed in a living room, bedroom, or hallway, this handmade artwork adds a touch of whimsy and character to any interior setting, making it a cherished focal point in your home.
Button tree wall art can be tailored to fit any space, whether you want a small accent piece or a large mural. You can adjust the size and scale of your design to suit the area you intend to decorate.
Is this going to be your next family activity?
What are the materials needed to create a button tree wall art?
Materials:
- Canvas
- Plenty of buttons
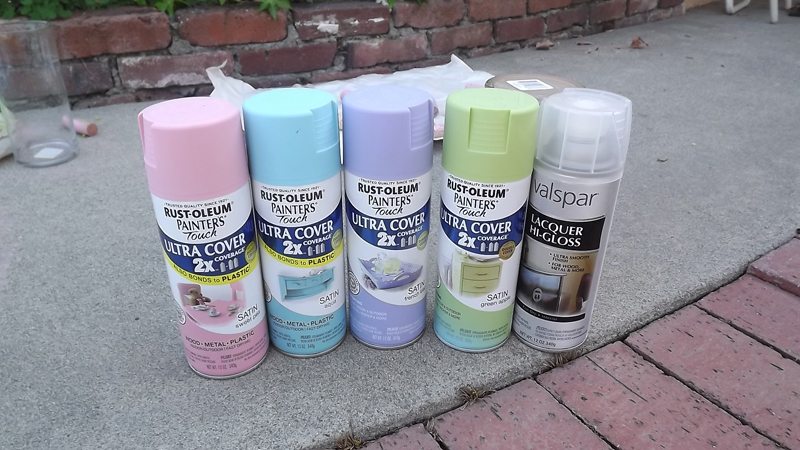
- Pastel Colour Spray Paint (suggested colours: purple, yellow, pink, blue)
- Glue Gun or E6000 Adhesive
- Acrylic Paint
- Paint Brush
- Dimensional Paints (suggested colours: black, brass, bright copper, gold pearl)
How to Create a Button Tree Wall Art
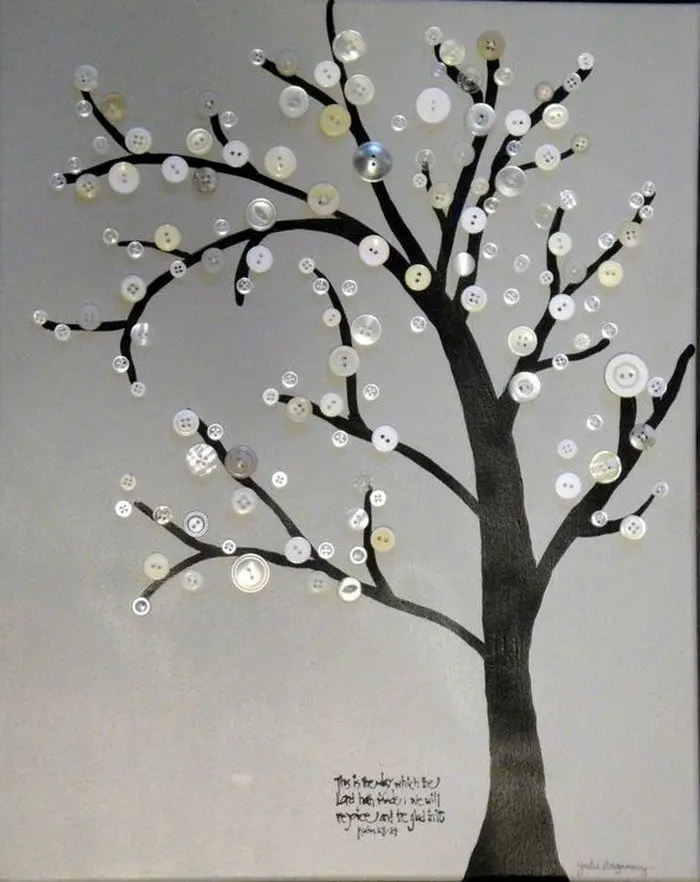
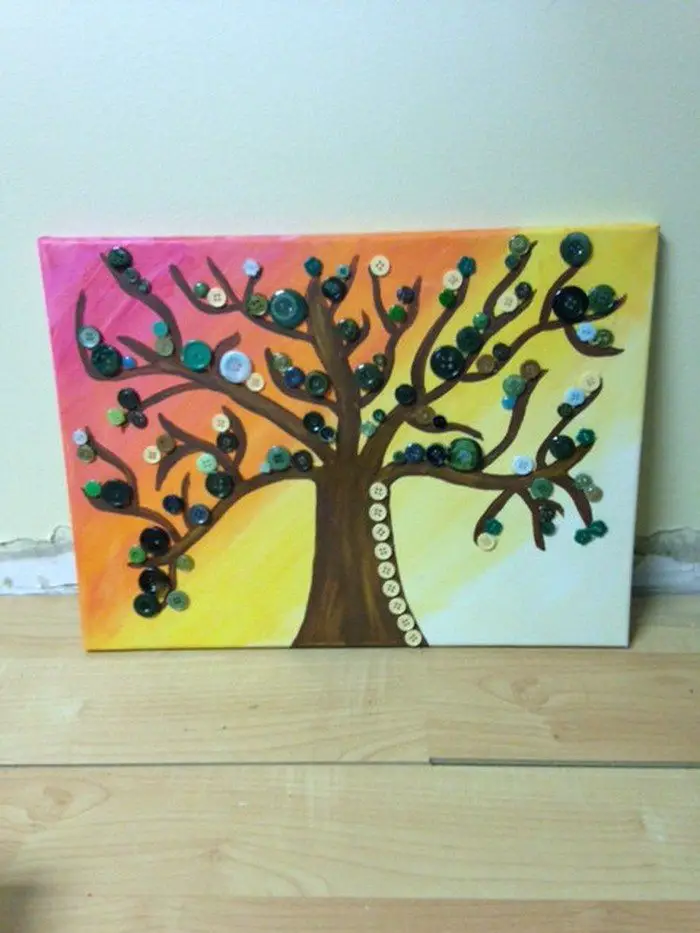
1. Before you involve the kids, lightly spray paint your canvas to give it some background. Use your instinct in doing this. A little blue here, yellow there, some pink here, and purple in some parts, until you are satisfied with it. Let it dry.
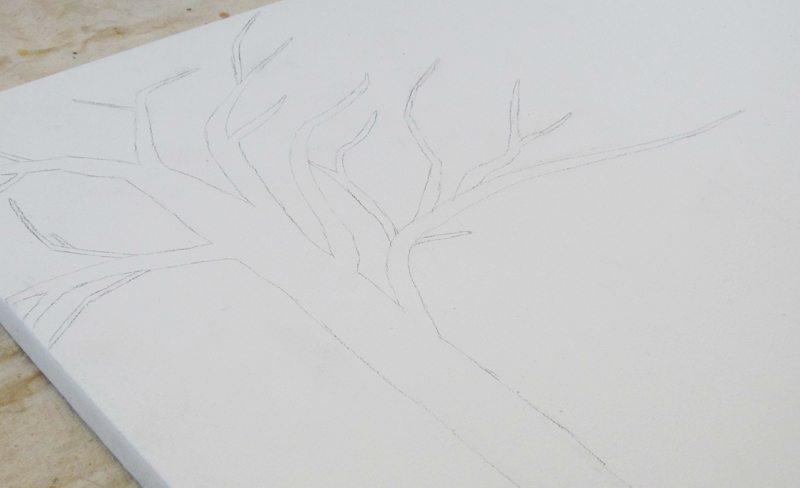
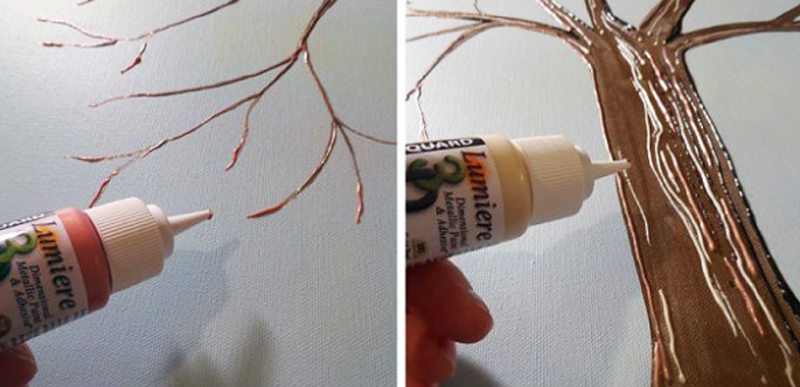
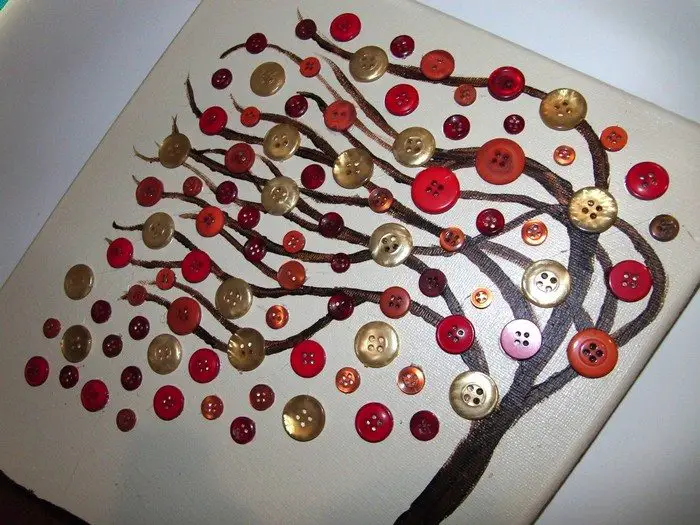
2. Now, with your guide, you can ask your kids to lightly draw the tree and its branches with a pencil.
3. Paintbrush the tree with your choice of brown.
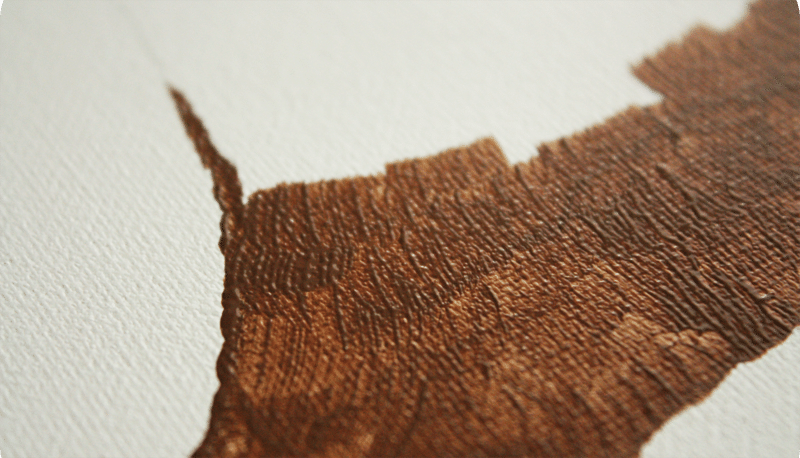
4. Give the tree some texture by using dimensional paints. Use black as shadows, bright for some light, and other colours for some “3D” effect. Again, rely on your creative instinct :)
5. Finally, let your kids enjoy sticking the buttons to the branches – the bigger the buttons, the closer to the trunk, and the smaller pieces for the smaller branches.
Click on any image to start the lightbox display. Use your Esc key to close the lightbox.![]()


Thanks to Crafts by Amanda for this great project.
Extra Tips
Creating a button tree wall art can be a delightful and creative endeavour. Here are some tips to ensure an enjoyable experience:
1. Gather a Variety of Buttons: To create dynamic and visually engaging artwork, gather an assortment of buttons in various sizes, shapes, and colours. Visit local craft stores, browse through thrift shops, or repurpose buttons from your existing collection. The diversity of buttons will offer you a broad palette to work with, allowing for intricate detailing and captivating designs in your button tree wall art.
2. Plan Your Design: Before diving into your button tree wall art project, take some time to sketch out your design on paper. Planning allows you to visualize the layout of branches and the distribution of buttons, ensuring a cohesive and well-balanced composition. Experiment with different tree shapes, branch angles, and button arrangements until you find a design that resonates with your vision.
This preliminary step helps streamline the creative process and provides a clear roadmap for bringing your artwork to life on the chosen surface.
3. Choose the Right Surface: Choose the Right Surface: Selecting the appropriate surface for your button tree wall art is essential to ensure the longevity and visual impact of your creation. Consider factors such as the size of your artwork, the intended location for display, and the overall aesthetic you wish to achieve. Canvas provides a classic and versatile option, offering a sturdy base for button application and allowing for easy hanging.
Alternatively, poster board or heavy-weight paper can be suitable choices for smaller-scale projects or temporary displays. If you prefer a more unconventional approach, explore other surfaces like wooden panels or fabric canvases for added texture and visual interest. Ultimately, choose a surface that complements your artistic vision and provides a stable foundation for showcasing your button tree masterpiece.
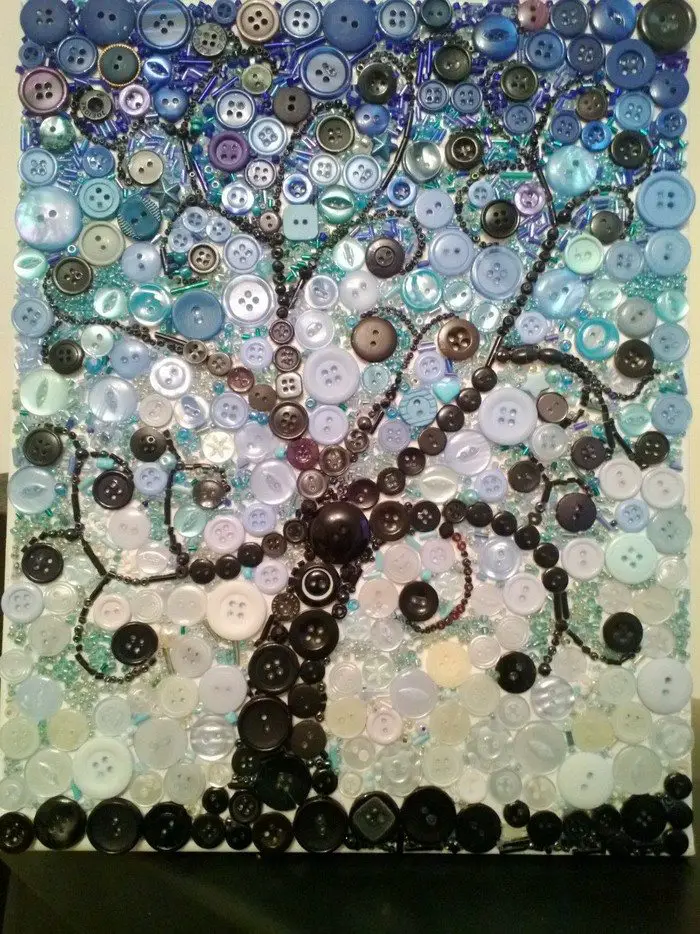
4. Experiment with Button Arrangement: Embrace experimentation and creativity as you arrange the buttons on your tree branches. This step is where you can truly let your imagination soar. Explore various patterns, colours, and textures to craft a design that speaks to your unique style and vision. Consider organizing the buttons by colour gradients, alternating sizes, or mixing different shapes to create depth and visual interest. Play with symmetry or asymmetry, layering buttons to mimic foliage or blossoms.
Don’t be afraid to try unconventional arrangements or incorporate other materials like beads or sequins for added texture. The beauty of button tree wall art lies in its versatility, so have fun exploring different combinations until you find the perfect composition that resonates with you.
5. Add Personal Touches: Elevate your button tree wall art with personalization and meaningful details. This step is where you can imbue your artwork with your unique style and personality. Consider painting a background scene that complements the theme of your design, whether it’s a serene nature backdrop or a vibrant abstract pattern.
Integrate additional elements such as delicate flowers, whimsical animals, or charming birds nestled among the branches to enhance the storytelling aspect of your artwork. You can also incorporate personal touches like your initials, a special date, or a favourite quote to infuse deeper meaning and sentimentality into the piece. Let your imagination guide you as you add these final flourishes, creating a button tree wall art that not only captivates visually but also resonates with your heart and soul.
With these tips in mind, embrace experimentation and enjoyment as you embark on your button tree wall art project. Let your imagination guide you, resulting in a stunning creation that reflects your style and personality.
The Wrap Up
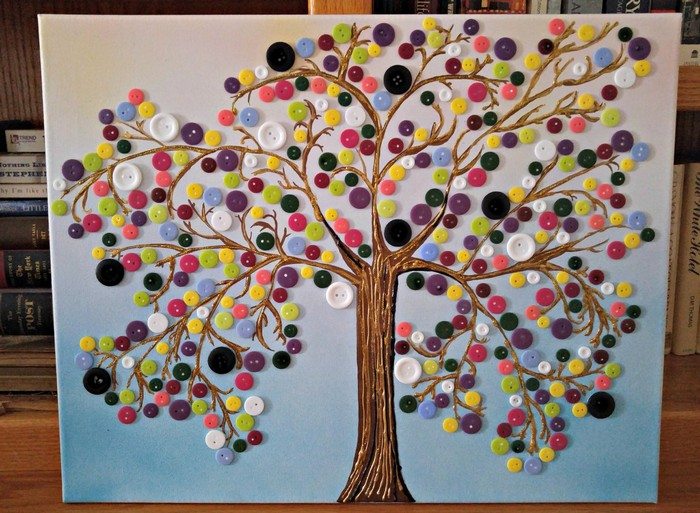
Creating a button tree wall art is a delightful and rewarding project that allows for boundless creativity and personal expression. With just five fun steps, you can transform a simple canvas or poster board into a stunning masterpiece that adds charm and character to any space. From gathering an eclectic assortment of buttons to arranging them in captivating patterns, each step offers an opportunity to explore your artistic vision and imagination.
Button tree wall art is a versatile and inclusive activity suitable for individuals of all ages and artistic abilities, making it an excellent choice for both children and adults. Whether you’re a seasoned artist or just starting, this project offers a creative outlet that encourages imagination and self-expression. So, gather your materials, let your creativity flow, and embark on a colourful journey to create your own unique button tree artwork.
Whether you’re crafting alone or with loved ones, the joy of bringing your vision to life and creating something special that can be admired for years to come is truly priceless.
Frequently Art Questions
1. What basic materials do you need to create button tree wall art?
To create button tree wall art, you’ll typically need buttons of various sizes, colours, and shapes, a canvas or poster board as a base, adhesive or glue, and optional materials such as paint and brushes for additional decoration.
2. Where can you find buttons for this project?
Buttons can be found at craft stores, fabric shops, online retailers, or even in your collection of sewing supplies. You can also repurpose buttons from old clothing or accessories.
The process is simple and doesn’t require any specialized tools. All you need is a canvas or a sturdy board as your base, a variety of buttons, and some adhesive to secure them in place. You can also add extra details with paint or markers if you want to personalize your artwork further.
3. Do you need artistic skills to make button tree wall art?
No, button tree wall art is a beginner-friendly project that doesn’t require advanced artistic skills. It’s more about creativity and arranging buttons in visually appealing patterns. Since there’s no right or wrong way to arrange the buttons, you’re free to let your imagination run wild. Whether you prefer a realistic tree silhouette or a more abstract interpretation, the possibilities are endless.
4. Can children participate in making button tree wall art?
Button tree wall art is a fun and engaging activity for children of all ages. It’s a great way to encourage creativity and fine motor skills while creating something beautiful.
5. How do you adhere the buttons to the canvas or poster board?
Regarding the attachment of buttons, you can use either craft glue or a hot glue gun to adhere them to the surface. Apply the adhesive to the back of each button and press firmly onto the canvas or poster board to ensure a secure bond.
6. Can you personalize your button tree wall art?
As for personalization, the sky’s the limit! You can tailor your button tree art to match your decor style by carefully selecting button colours and sizes that complement the room’s aesthetic. Whether you prefer a monochromatic scheme for a minimalist look or a vibrant palette to add a pop of colour, you have full control over the visual impact of your artwork.
Additionally, consider adding personalized touches such as initials or a family name to make the piece uniquely yours. You can incorporate these details into the design itself, perhaps by arranging buttons to form letters or by painting them onto the canvas. This not only adds a personal touch but also transforms the artwork into a meaningful keepsake.
Furthermore, don’t hesitate to get creative and incorporate other elements into your button tree composition. For example, you could intersperse the button leaves with tiny flower buttons or include small animal figurines nestled among the branches. These additional elements can enhance the whimsy and charm of your artwork, making it even more special.
7. How do you display your button tree wall art?
Once your artwork is complete, you can hang it on the wall using picture hanging hooks or display it on a shelf or easel for tabletop decor. This allows you to easily move and rearrange your artwork as desired, making it a versatile option for showcasing your creativity.
Whichever display method you choose, be sure to place your artwork in a prominent location where it can be admired by all. Whether it’s in your living room, bedroom, or office, your button tree wall art is sure to add a touch of charm and personality to any space. So sit back, admire your handiwork, and enjoy the beauty of your unique creation!
8. Are there different styles or designs of button tree wall art?
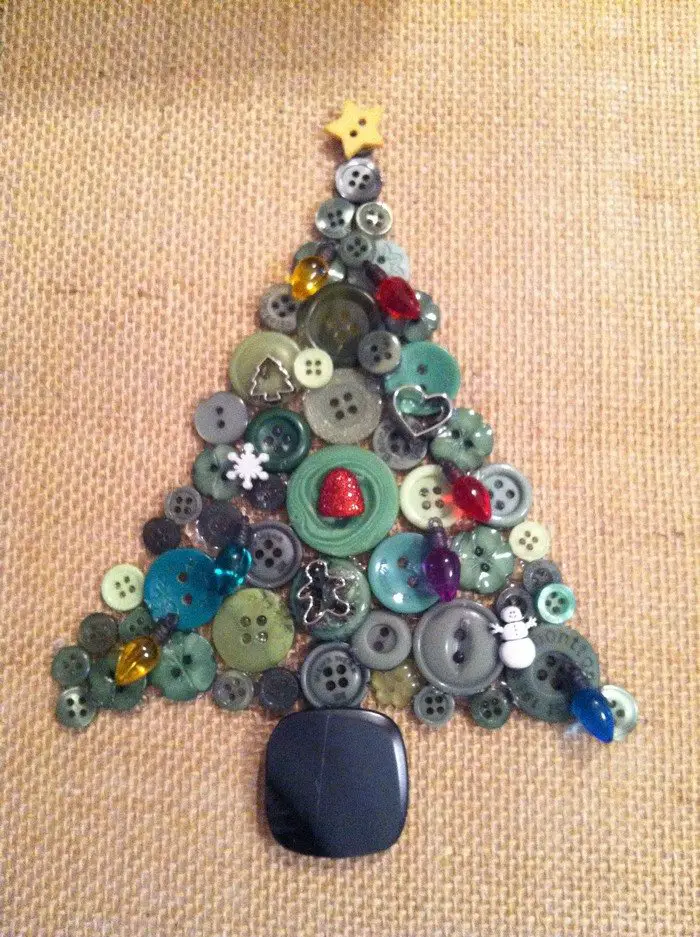
Yes, there are endless possibilities for button tree wall art designs. You can create realistic tree silhouettes, abstract designs, seasonal themes, or even whimsical fantasy scenes.
Create enchanted forests inhabited by mythical creatures, or dreamy landscapes filled with magical elements. With whimsical fantasy scenes, you have the freedom to create imaginative worlds that ignite the imagination and inspire wonder.
Whether you’re drawn to realism, abstraction, seasonal themes, or whimsical fantasy, button tree wall art offers endless possibilities for creative expression. So, let your creativity take flight and explore the vast array of designs waiting to be discovered!
9. Is button tree wall art durable?
When properly made and cared for, button tree wall art can be quite durable. However, it’s essential to handle it gently to avoid loosening or losing buttons over time.
10. Can you incorporate other materials into your button tree wall art?
Absolutely! Feel free to experiment with other materials like beads, ribbons, fabric scraps, or even small pieces of wood to add texture and dimension to your artwork.
These FAQs provide valuable information for anyone interested in creating button tree wall art. It’s a fun and versatile project that allows for endless creativity and personalization.


