Are you ready to dive into the dazzling world of DIY resin art? Imagine creating stunning, glossy art pieces that captivate everyone who sees them. With the right materials and a bit of guidance, you can transform simple ideas into eye-catching masterpieces.
Whether you’re an experienced crafter or a curious beginner, resin art offers endless possibilities for creativity and fun.
Contents [show]
Unleash Your Creativity: Fun and Easy DIY Resin Art Projects
In this step-by-step guide, I’ll walk you through everything you need to know to get started with DIY resin art. From setting up your workspace to pouring the resin, and from adding pigments to curing your creation, we’ve got you covered. You’ll learn the basics and some creative tips to ensure your first resin art project is a success.
Why is resin art so popular? The glossy finish and depth of colors can make even the simplest designs look professional. Plus, the versatility of resin means you can create anything from coasters and jewelry to abstract wall art and decorative trays. The best part? Each piece is unique, just like you.
So, grab your gloves and let’s get mixing! Whether you’re looking to create personalized gifts or add a splash of color to your home, DIY resin art is the perfect way to showcase your creativity.
Let’s embark on this artistic adventure together and turn your imaginative ideas into beautiful DIY resin art pieces that you’ll be proud to display. Ready to get started? Let’s go!
Materials Needed
Creating beautiful DIY resin art requires the right materials. Here’s an in-depth look at what you’ll need and why each item is essential for your project:
- Epoxy Resin
- Quality Matters: Make sure to choose a high-quality, clear epoxy resin. Low-quality resins can turn yellow over time or may not cure properly, resulting in a sticky or cloudy finish. High-quality resin ensures your artwork remains clear and glossy.
- Types of Resin: There are different types of resin available, such as UV resin and polyester resin. However, epoxy resin is often preferred for DIY resin art projects because it has a longer working time and produces a more durable finish.
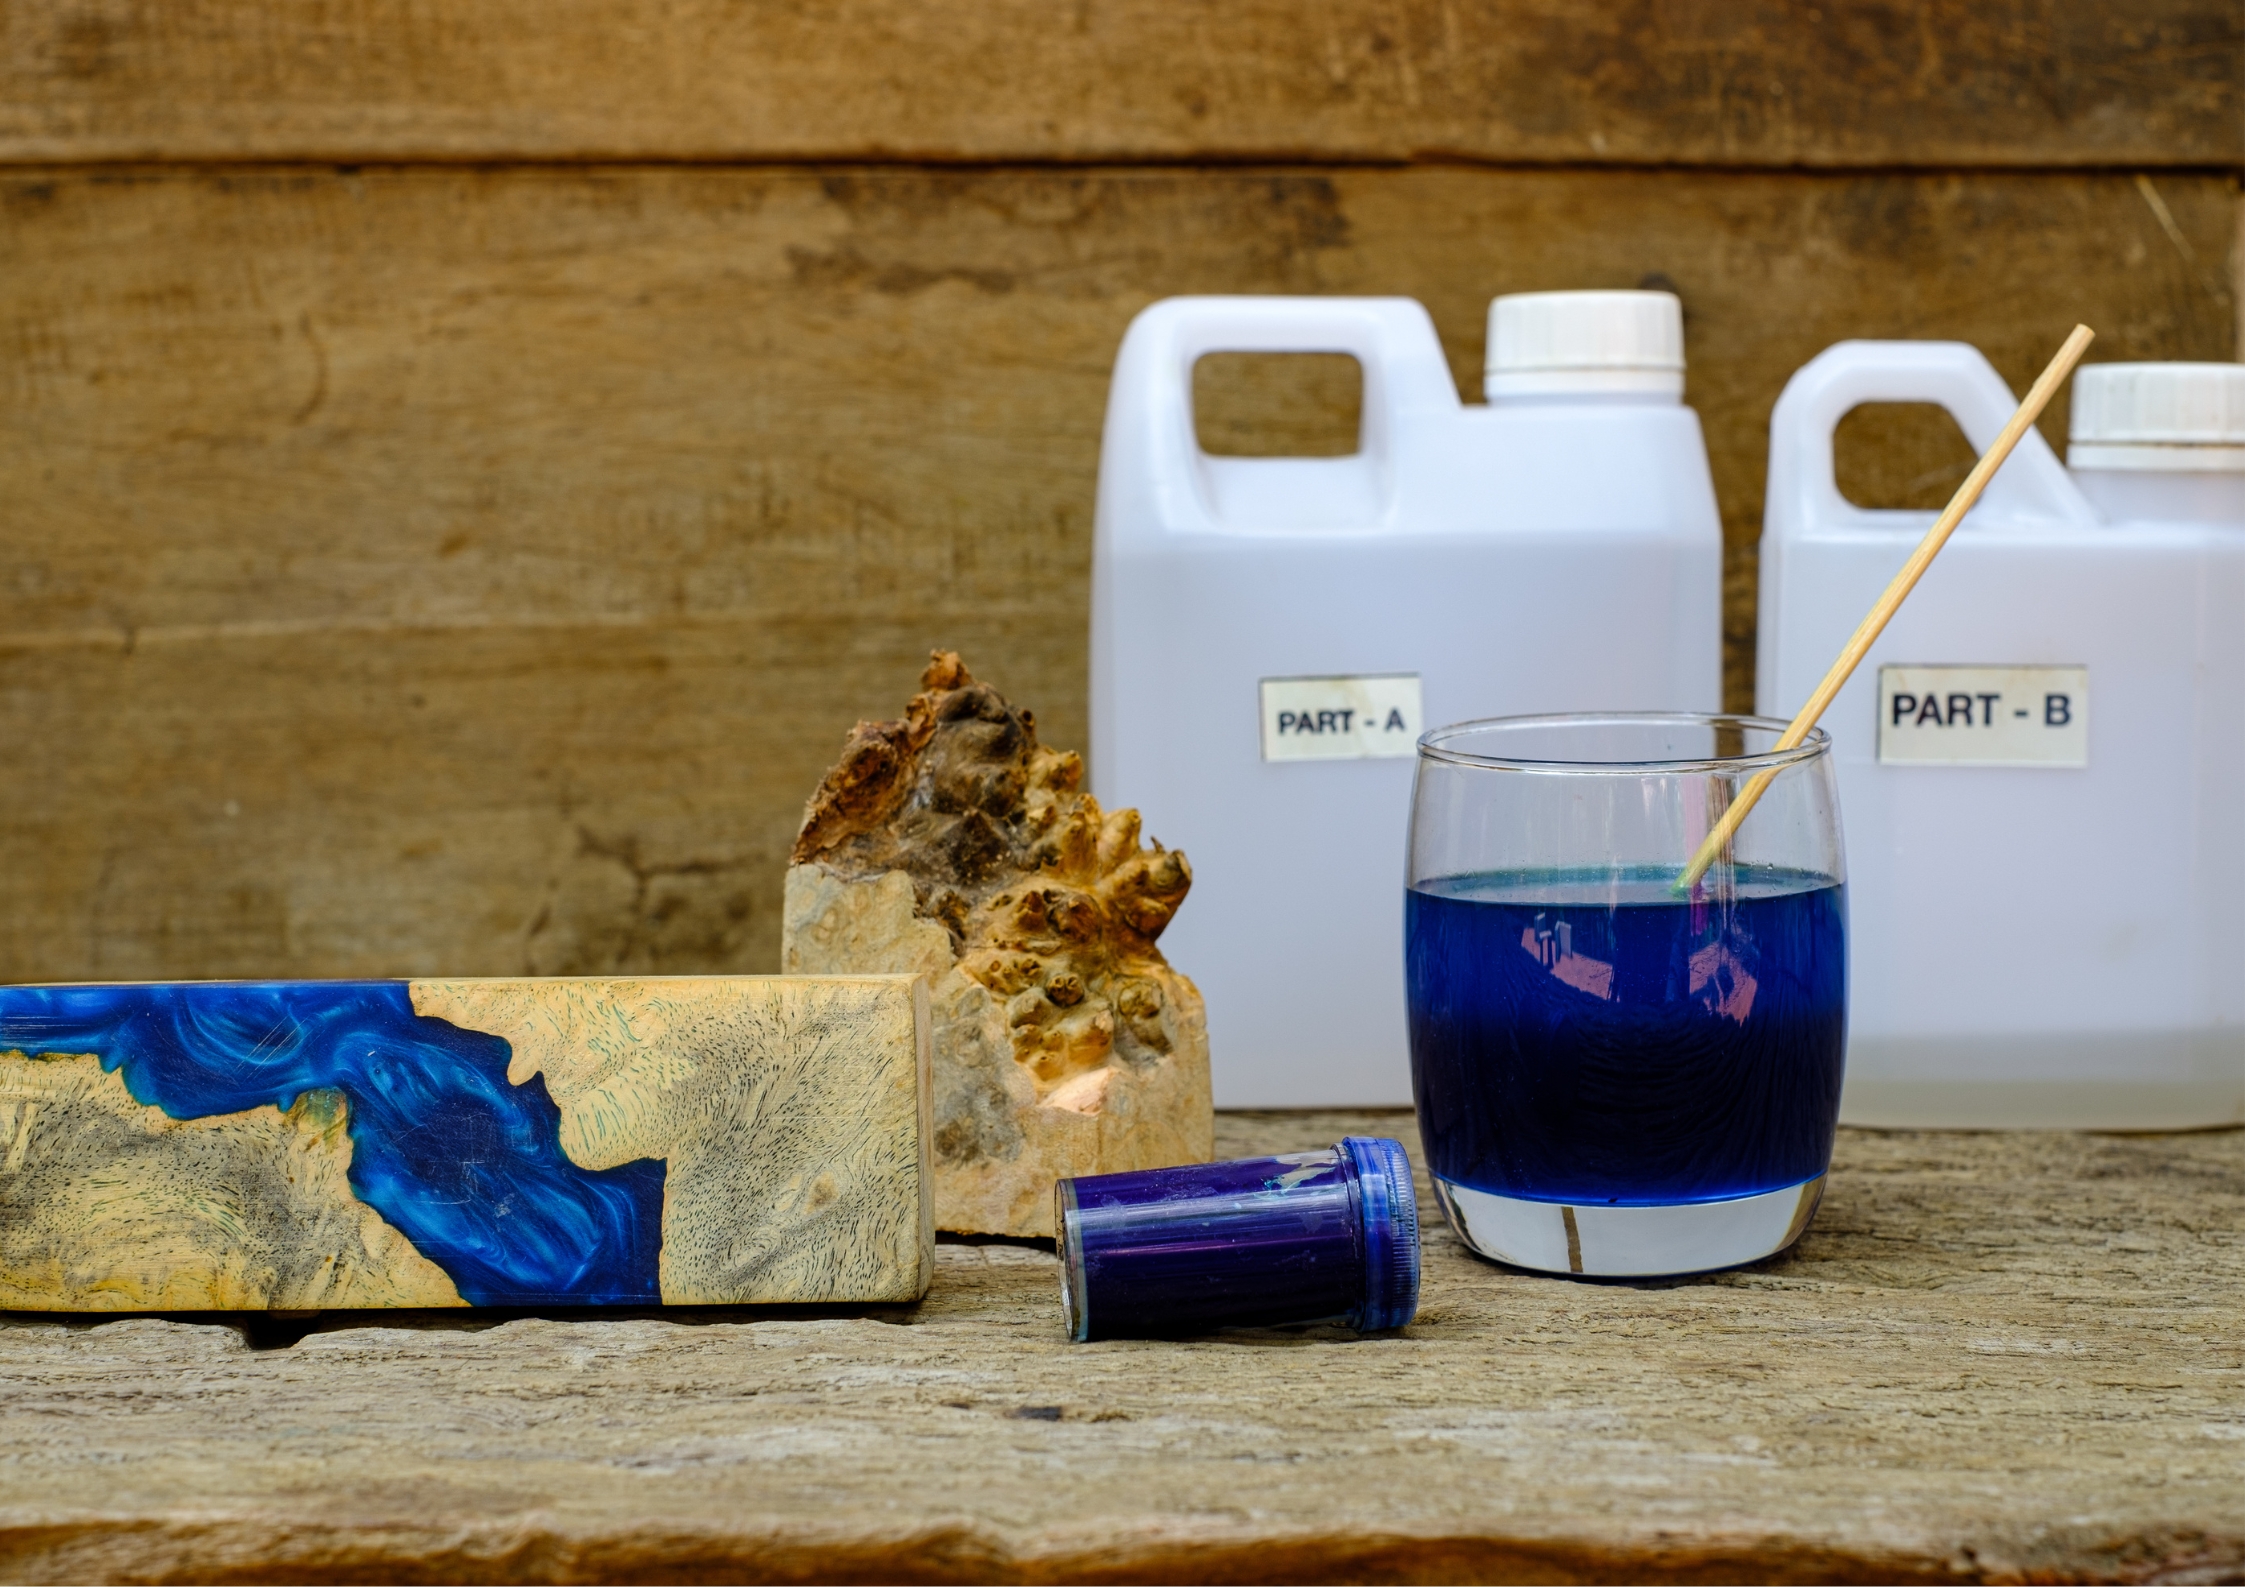
- Resin Hardener
- Purpose: The hardener is a crucial component that, when mixed with the resin, initiates the chemical reaction that causes the mixture to cure and harden.
- Mixing Ratio: The resin and hardener must be mixed in the correct ratio, typically 1:1, but always refer to the manufacturer’s instructions for precise measurements.
- Mixing Cups
- Disposable or Reusable: You can use disposable cups for easy cleanup or reusable cups for a more eco-friendly option. Ensure the cups are made of a material that won’t react with the resin.
- Clear Measurements: Choose cups with clear measurement markings to help ensure you mix the resin and hardener accurately.
- Stir Sticks
- Material: Wooden or plastic stir sticks work well. Avoid using anything that can break down or shed particles into your resin mix.
- Size: Use sticks that are long enough to reach the bottom of your mixing cups and sturdy enough to thoroughly mix the resin and hardener.
- Protective Gloves
- Nitrile or Latex: Nitrile gloves are often preferred over latex because they are more resistant to chemicals and less likely to cause allergic reactions.
- Purpose: Gloves protect your skin from your DIY resin art, which can be irritating and difficult to remove once it hardens.
- Protective Mask
- Safety First: Resin can emit fumes that may be harmful if inhaled over long periods. A protective mask, such as a respirator with organic vapor cartridges, helps prevent inhalation of these fumes.
- Comfort: Choose a mask that fits well and is comfortable to wear for extended periods.
- Plastic Sheet or Drop Cloth
- Workspace Protection: Resin is sticky and can be difficult to remove from surfaces once it hardens. A plastic sheet or drop cloth protects your workspace and makes cleanup easier.
- Disposable or Reusable: Like mixing cups, these can be disposable for convenience or reusable for a more sustainable option.
- Resin Color Pigments
- Types of Pigments: There are several options for coloring resin, including powdered pigments, liquid pigments, and alcohol inks. Each type offers different effects, so you can experiment to find what works best for your project.
- Mixing: Ensure pigments are mixed thoroughly with the resin to avoid clumping and achieve an even color distribution for your DIY resin art.
- Heat Gun or Torch
- Removing Bubbles: After mixing and pouring the resin, bubbles can form within the mixture. A heat gun or torch helps to pop these bubbles by gently heating the surface.
- Usage: Use these tools carefully to avoid overheating or burning the resin, which can cause yellowing or other imperfections.
- Molds
- Silicone Molds: Silicone molds are flexible and non-stick, making it easy to remove the cured resin. They come in various shapes and sizes, perfect for creating coasters, jewelry, and more.
- Flat Surfaces: For freeform art, use a flat surface covered with a plastic sheet or drop cloth. Ensure the surface is level to avoid uneven curing.
- Measuring Spoons
- Embellishments: If you plan to add glitter, beads, or other small embellishments to your DIY resin art, measuring spoons can help you add consistent amounts and prevent overloading your mixture.
- Accuracy: Using measuring spoons ensures that you add the right amount of embellishments, maintaining the desired aesthetic and structural integrity of your piece.
- Level
- Even Curing: A level is essential to ensure your resin art cures evenly. If your surface is not level, the resin can pool to one side, resulting in an uneven finish.
- Check and Adjust: Before pouring your resin, use the level to check your workspace and adjust as needed. Recheck periodically to ensure nothing has shifted during the curing process.
Having the right materials is crucial for creating beautiful DIY resin art. Each item plays an important role in ensuring your artwork turns out as planned, with a smooth, glossy finish and vibrant colors.
Take the time to gather these materials and set up your workspace properly, and you’ll be well on your way to creating stunning DIY resin art pieces.
Step-by-Step Guide
Set Up Your Workspace
Before you dive into the fun part of creating DIY resin art, it’s crucial to set up your workspace properly. Resin can be messy and sticky, so you’ll want to protect your surfaces and ensure your area is well-ventilated. Here’s a detailed breakdown:
- Choose a Suitable Area: Find a well-ventilated space, like a garage or a room with open windows. Proper ventilation is important because resin can emit fumes that might be harmful if inhaled for a long time.
- Cover Your Workspace: Lay down a plastic sheet or a drop cloth to protect your table or floor from resin spills. Resin can be tough to clean off surfaces once it hardens, so this step is very important.
- Organize Your Tools: Arrange all your materials within easy reach. Having everything prepared and within reach will help the process go smoothly and prevent any frantic searches for tools while working with resin.
- Safety First: Put on your protective gloves and mask. The gloves will protect your skin from the resin, which can cause irritation, and the mask will help you avoid inhaling any fumes.
By setting up your workspace thoughtfully, you can focus on the creative process without worrying about making a mess or exposing yourself to harmful substances.
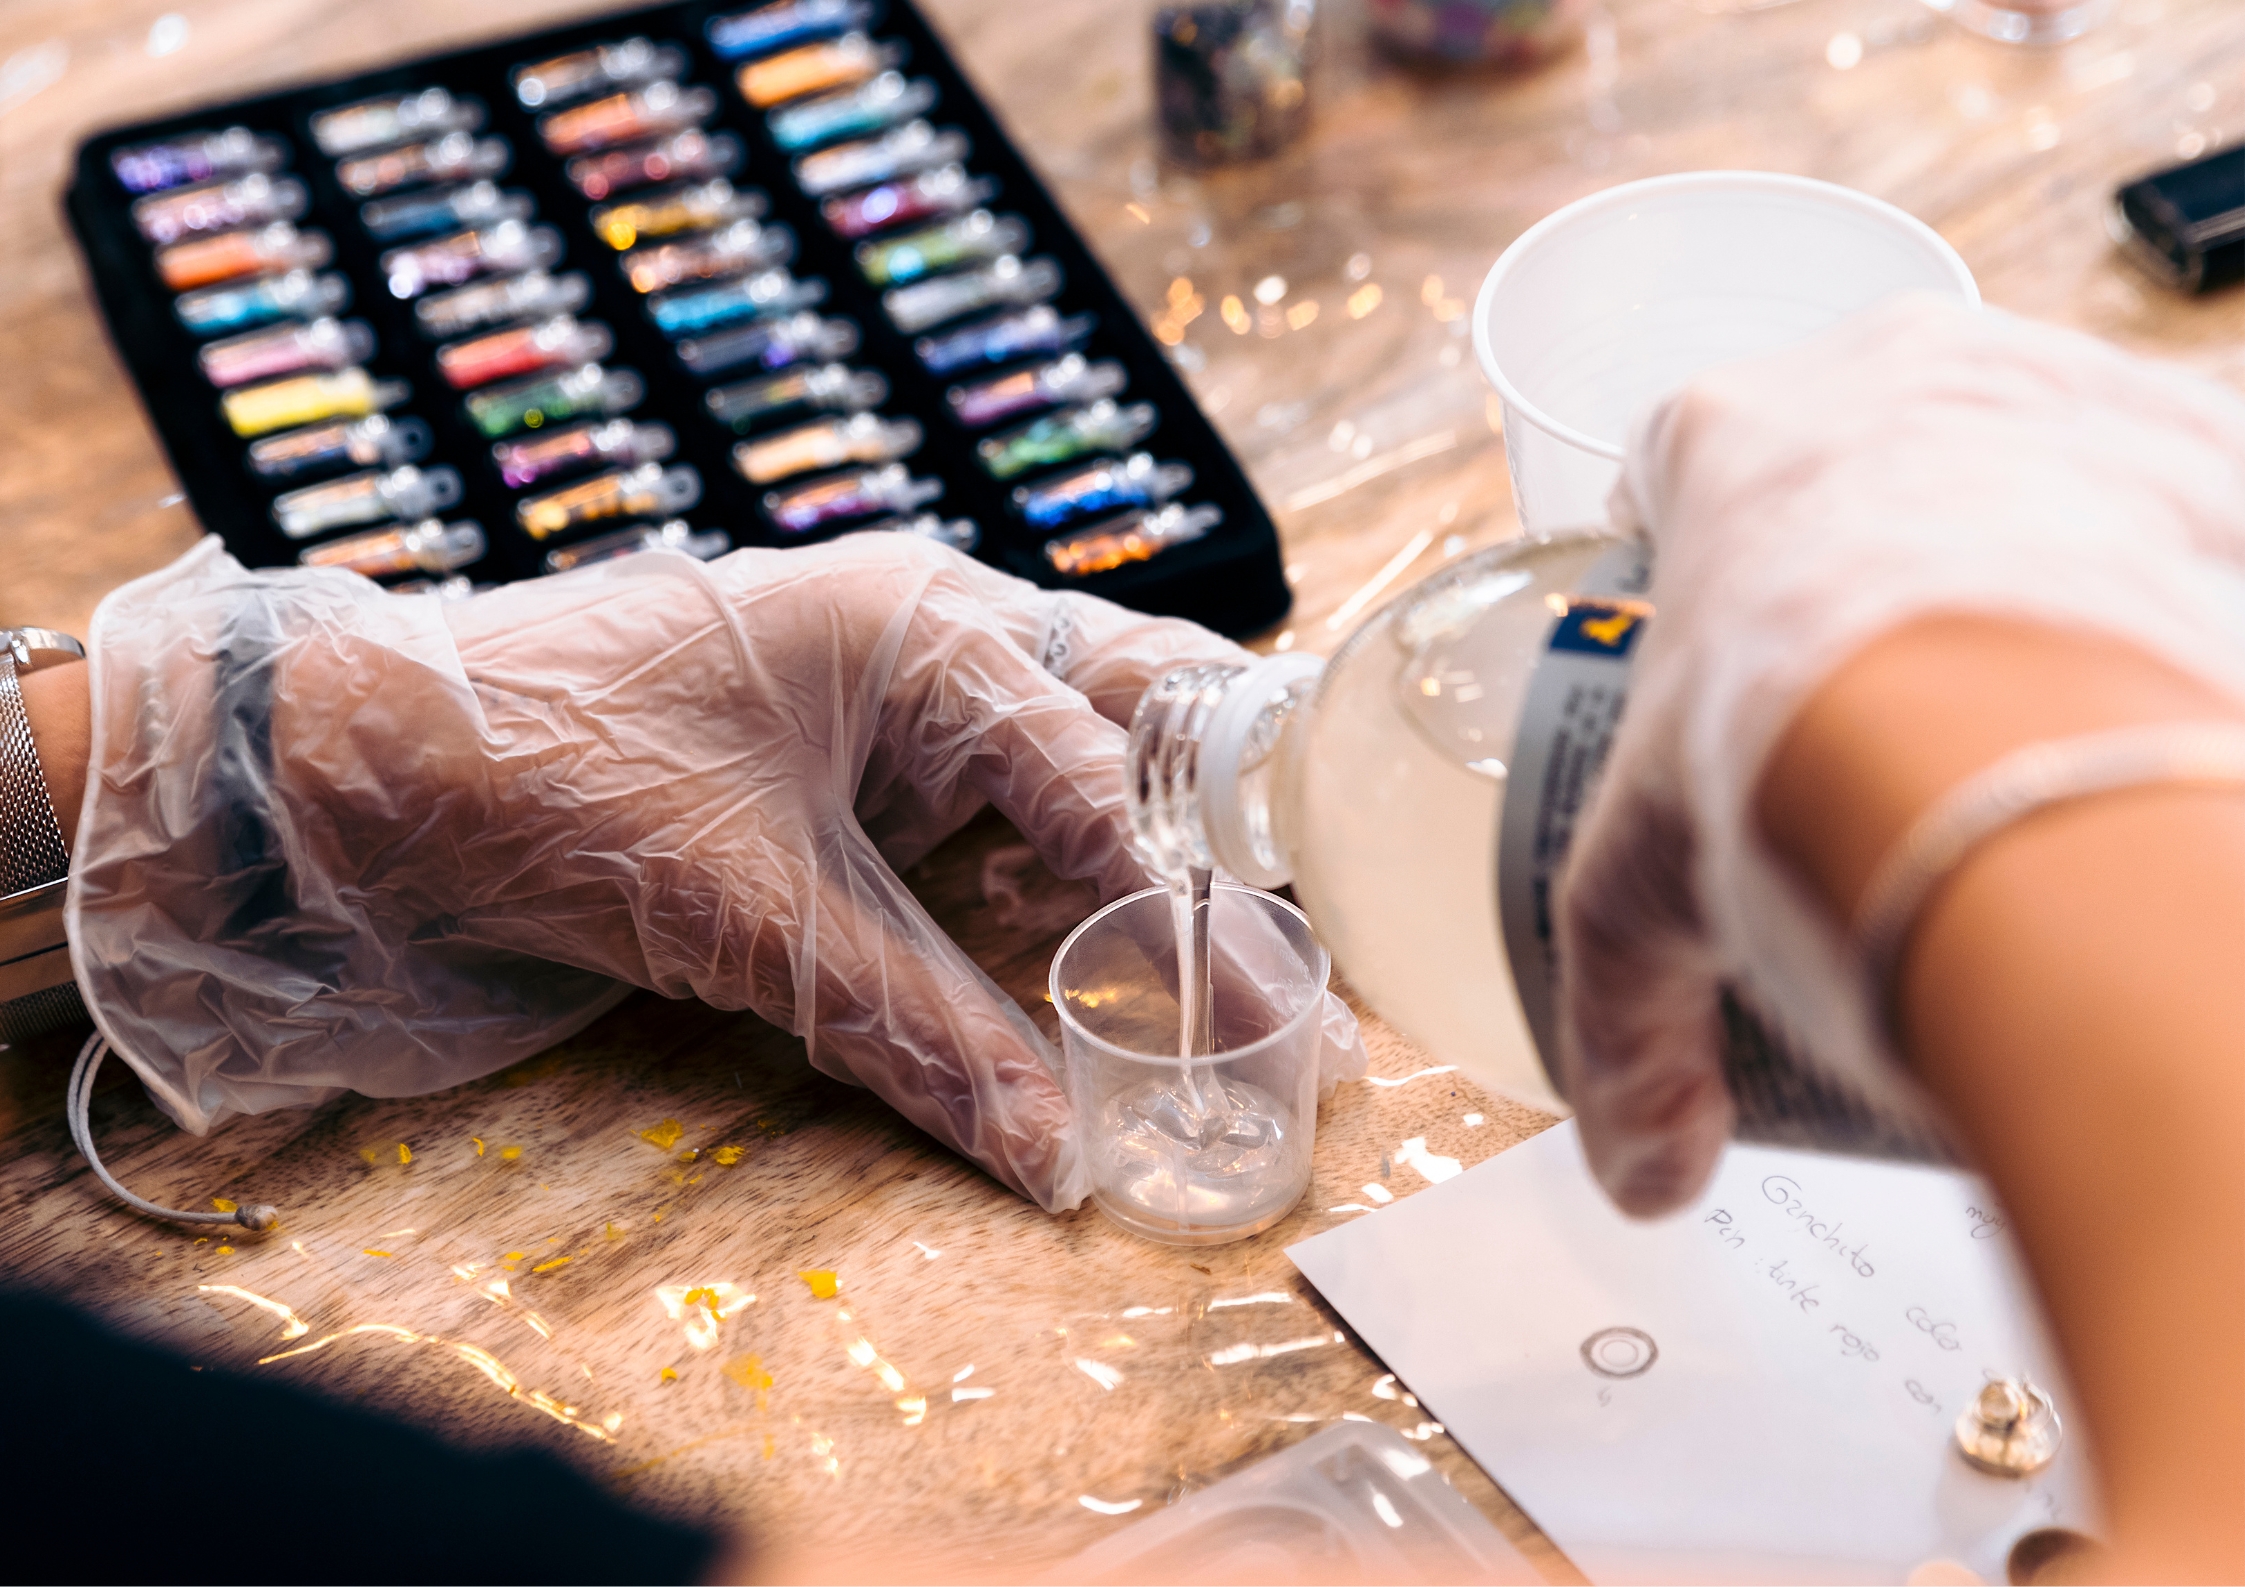
Measure and Mix Your Resin
Mixing resin properly is crucial to achieving the best results in your DIY resin art. Here’s a step-by-step guide to ensure you get it right:
- Read the Instructions: Every resin brand is different, so it’s important to read the instructions that come with your resin kit. Most resins require a 1:1 ratio of resin to hardener, but this can vary.
- Measure Carefully: Use measuring cups to measure the resin and hardener. Ensure that you measure them accurately, as the wrong ratio can affect the curing process and final outcome of your DIY resin art.
- Combine in a Mixing Cup: Pour the measured resin and hardener into a mixing cup. Start with the resin first and then add the hardener.
- Stir Thoroughly: Use a stir stick to mix the resin and hardener together. Stir slowly and steadily for about 3-5 minutes, making sure to scrape the sides and bottom of the cup. This thorough mixing is essential to ensure the resin cures properly.
- Avoid Bubbles: Stirring too quickly can introduce bubbles into the mixture. To minimize bubbles, stir slowly and try to avoid lifting the stir stick out of the resin too often.
Mixing the resin correctly is a key step that can greatly affect the quality of your finished DIY resin art. Take your time with this step to ensure your resin art turns out beautifully.
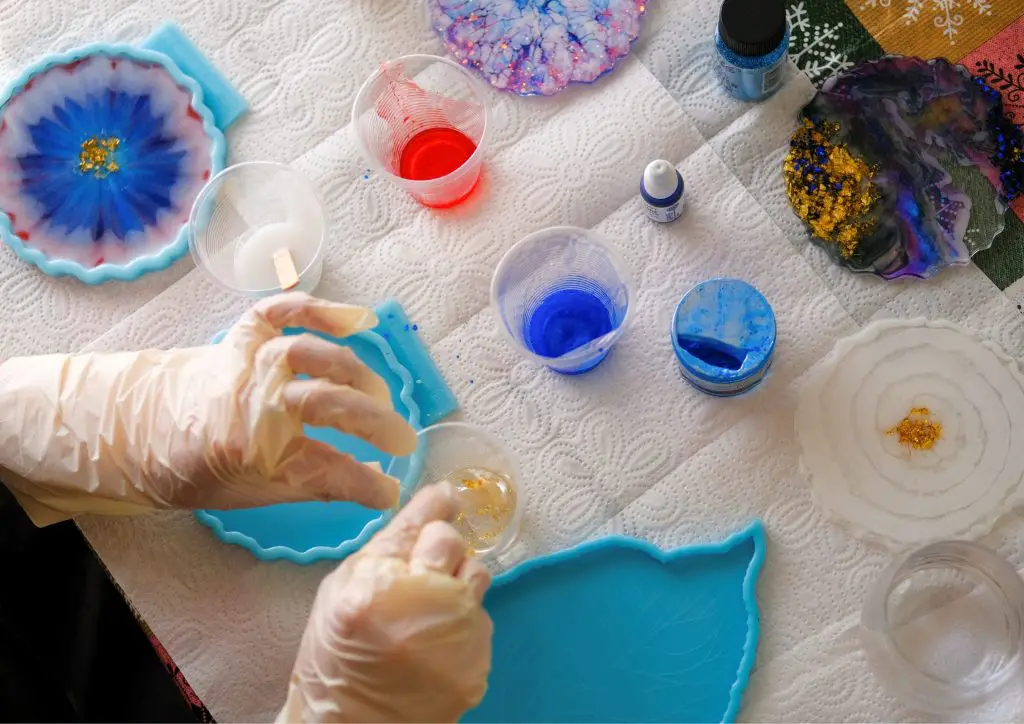
Add Color
Adding color to your resin is where you can really let your creativity shine. There are many different types of pigments you can use to achieve various effects. Here’s a detailed guide:
- Choose Your Colors: Decide on the colors you want to use for your DIY resin art project. Resin pigments come in various forms, such as powdered pigments, liquid pigments, and alcohol inks. Each type offers different effects, so experiment to see what you like best.
- Separate the Resin: If you want to use multiple colors, pour the mixed resin into separate cups. This will allow you to mix each color individually.
- Add Pigments: Add a small amount of pigment to each cup of resin. Start with a little; you can always add more if needed. The amount of pigment you use will depend on the intensity of the color you want to achieve.
- Mix Thoroughly: Stir each cup of resin and pigment until the color is evenly distributed. Make sure there are no clumps of pigment left.
- Experiment with Effects: You can create different effects by layering colors, swirling them together, or using a stick to create patterns. Don’t be afraid to experiment and try new techniques.
Adding color is a fun and creative step that allows you to personalize your resin art. Play around with different pigments and techniques to find your unique style.
Pour the Resin
Pouring the resin is where your DIY resin art project starts to take shape. Here’s a detailed guide on how to do it:
- Prepare Your Mold or Surface: If you’re using a mold, make sure it’s clean and dry. If you’re working on a flat surface, ensure it’s level and protected with a plastic sheet.
- Pour Slowly: Pour the resin slowly into the mold or onto the surface. Pouring slowly helps to minimize the introduction of air bubbles into the resin.
- Layering Colors: If you’re using multiple colors, you can pour them in layers. Start with one color and let it settle slightly before adding the next. This can create interesting depth and layering effects.
- Creating Patterns: Use a stick or other tool to swirl the colors together, creating unique patterns. You can also tilt the surface to allow the colors to flow and blend naturally.
- Watch for Bubbles: Keep an eye out for any bubbles that form during the pouring process. You’ll deal with these in the next step.
Pouring the resin is a rewarding part of the process where you can see your design come to life. Take your time and enjoy experimenting with different pouring techniques.
Remove Bubbles
Bubbles in your resin can affect the final appearance of your DIY resin artwork. Here’s how to get rid of them:
- Use a Heat Gun or Torch: After pouring, you’ll likely see some bubbles in the resin. Use a heat gun or a torch to gently pass over the surface. The heat will cause the bubbles to rise to the surface and pop.
- Work Quickly: Bubbles should be dealt with soon after pouring, while the resin is still liquid. If the resin starts to set, it will be harder to remove the bubbles.
- Be Careful: Hold the heat source at a safe distance to avoid burning the resin. Keep it moving to prevent overheating any one spot.
- Check for More Bubbles: After the initial pass, wait a few minutes and check again. Sometimes new bubbles can form as the resin settles. Repeat the process if necessary.
Removing bubbles is an important step to ensure your resin art has a smooth, clear finish. Take your time and be thorough to achieve the best results.

Let It Cure
Curing is a crucial part of the resin art process. Here’s how to do it properly:
- Level Surface: Place your piece on a level surface to ensure even curing. Use a level to check your workspace.
- Cover Your Work: Cover your resin art with a box or a clean plastic sheet to protect it from dust and debris while it cures.
- Curing Time: Most resins take about 24-48 hours to fully cure. Check the instructions on your resin kit for the exact curing time. Don’t rush this step; patience is key to achieving a hard, durable finish.
- Avoid Disturbance: Keep the area around your resin art calm and free from vibrations or movement to prevent disturbing the curing process.
Letting your resin cure properly is essential for a hard, clear finish. Be patient and give it the time it needs.
Demold and Finish
The final step is to demold and finish your DIY resin art. Here’s how to do it:
- Check for Curing: Ensure the resin is fully cured before removing it from the mold. It should be hard and no longer tacky to the touch.
- Demolding: Gently remove your DIY resin art from the mold. Silicone molds are flexible and make this process easier. If you used a flat surface, you can now trim any excess resin around the edges with a utility knife.
- Sanding Edges: If the edges are rough, you can sand them down with fine-grit sandpaper. Be gentle to avoid scratching the surface.
- Adding a Finish: For extra shine and protection, you can add a finishing coat of resin. Mix a small batch and apply it evenly over your DIY resin art piece. Let it cure completely.
- Final Touches: Clean your piece with a soft cloth to remove any dust or fingerprints.
Demolding and finishing your DIY resin art is the final step in creating a beautiful piece. Take your time to ensure it looks polished and professional.
DIY Resin Art Ideas
Now that you know the basics, here are a few DIY resin art ideas to get your creative juices flowing:
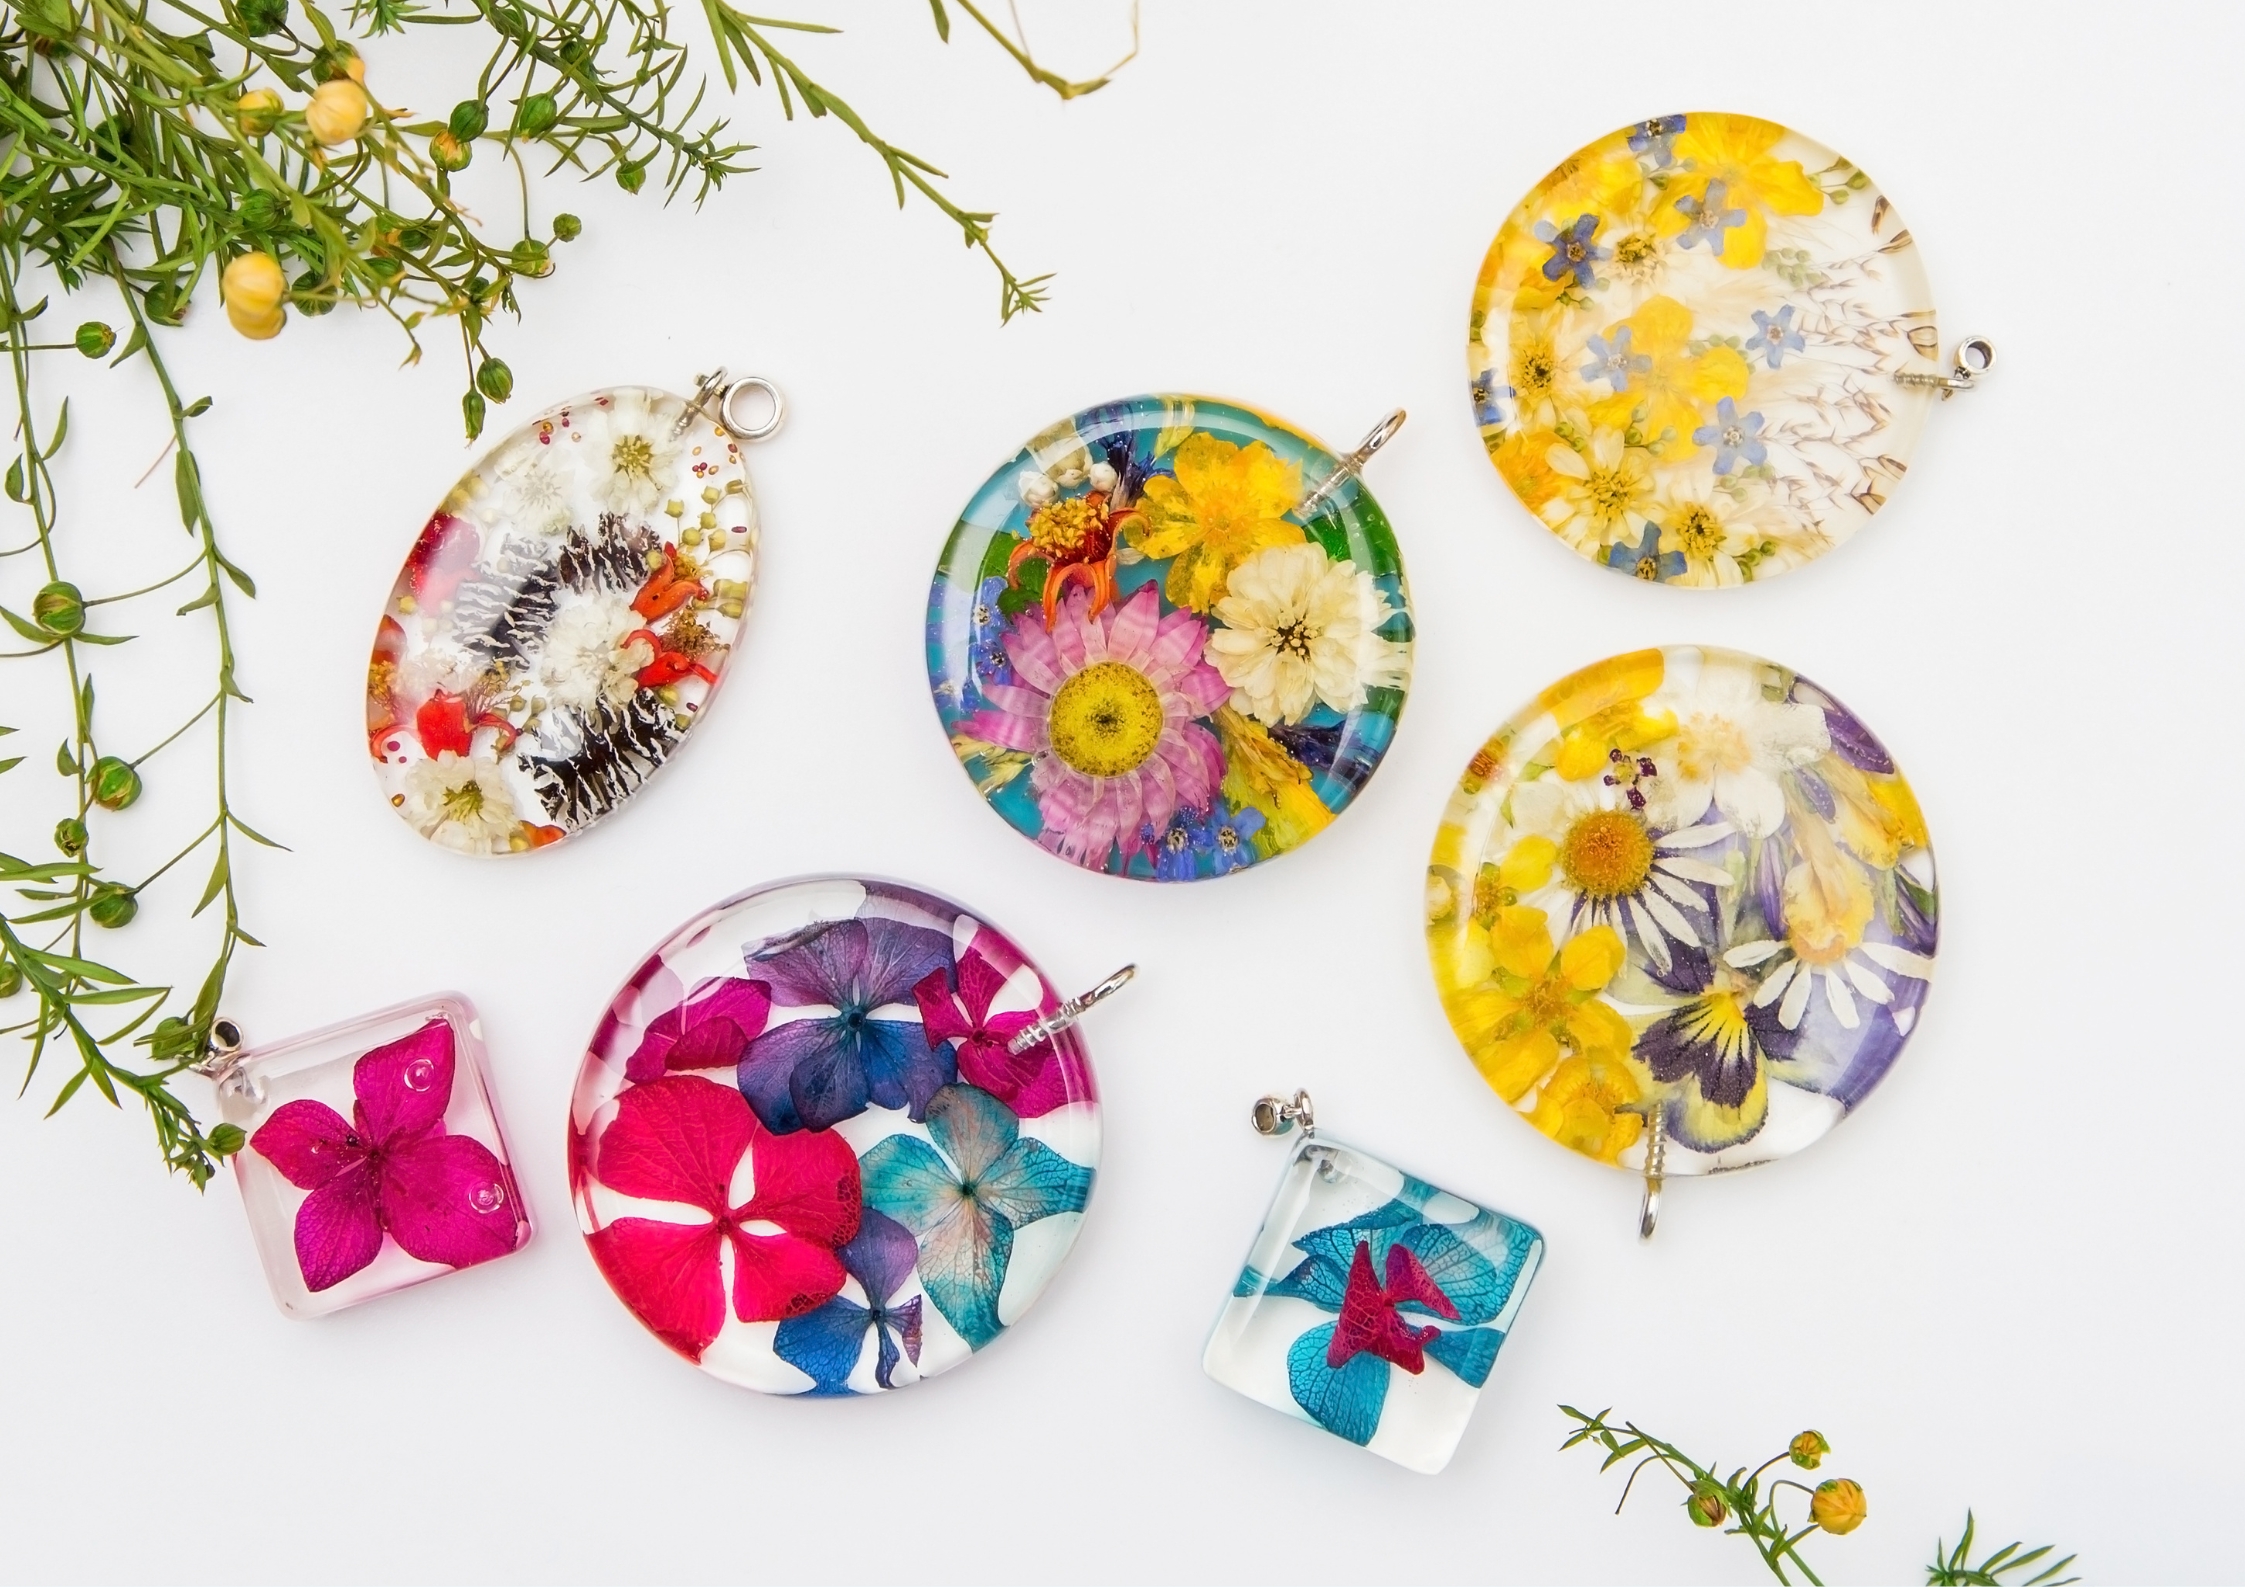
- Resin Coasters: Use silicone coaster molds to create unique, functional pieces. Add embellishments like glitter, dried flowers, or small trinkets to give each coaster a personal touch. You can also experiment with different color combinations and techniques, such as creating a marble effect or using metallic pigments for a more luxurious look.
- Jewelry: Make beautiful pendants, earrings, and rings with small molds. You can embed tiny items like pressed flowers, leaves, or even miniature photos inside the resin. This makes for great personalized gifts or unique pieces to sell. Experiment with different shapes and sizes of molds to find the ones you like best.
- Decorative Trays: Pour resin into a tray mold and add embellishments to create stunning decorative trays. These trays can be used for serving or as decorative pieces in your home. You can add glitter, colored pigments, or even small stones and shells to create a beach-inspired tray.
- Abstract Art: Pour different colors of resin onto a flat canvas or wooden panel to create stunning wall art. You can use a variety of techniques, such as pouring in layers, using a stick to create swirls, or tilting the surface to let the colors flow and blend naturally. Add metallic pigments or foil accents for extra sparkle.
- Photo Frames: Create custom photo frames by pouring resin into a frame mold. You can embed small decorations, such as beads or sequins, around the edges to make the frame more interesting. These frames can hold your favorite photos and make for thoughtful gifts.

Advanced Tips and Tricks
Once you’ve mastered the basics, you might want to explore more advanced techniques to take your DIY resin art to the next level:
- Adding Texture: Create texture by adding materials like sand, tiny pebbles, or even pieces of fabric into your DIY resin art. This can give your artwork a unique feel and add visual interest.
- Layering: To add depth to your pieces, try layering different colors of resin. Pour a layer, let it partially cure, and then add another layer on top. This can create a 3D effect, especially if you embed objects between the layers.
- Embedding Objects: Experiment with embedding larger objects into your DIY resin art, such as small figurines, crystals, or dried flowers. This can create a dramatic effect and make your pieces truly one-of-a-kind.
- Using Molds Creatively: Think outside the box with molds. You don’t have to stick to traditional shapes. Use silicone molds in unique shapes or create your own custom molds using silicone putty.
- Finishing Touches: After your resin piece has cured, you can add finishing touches like painting details on top of the resin with acrylic paint, or adding a layer of varnish for extra shine.
Conclusion
Creating DIY resin art is a fantastic way to express your creativity and make beautiful, personalized pieces for your home or as gifts. With a little practice and experimentation, you’ll be able to create stunning works of art that will impress everyone.
So, gather your materials, follow the steps, and let your artistic side shine! Happy crafting!