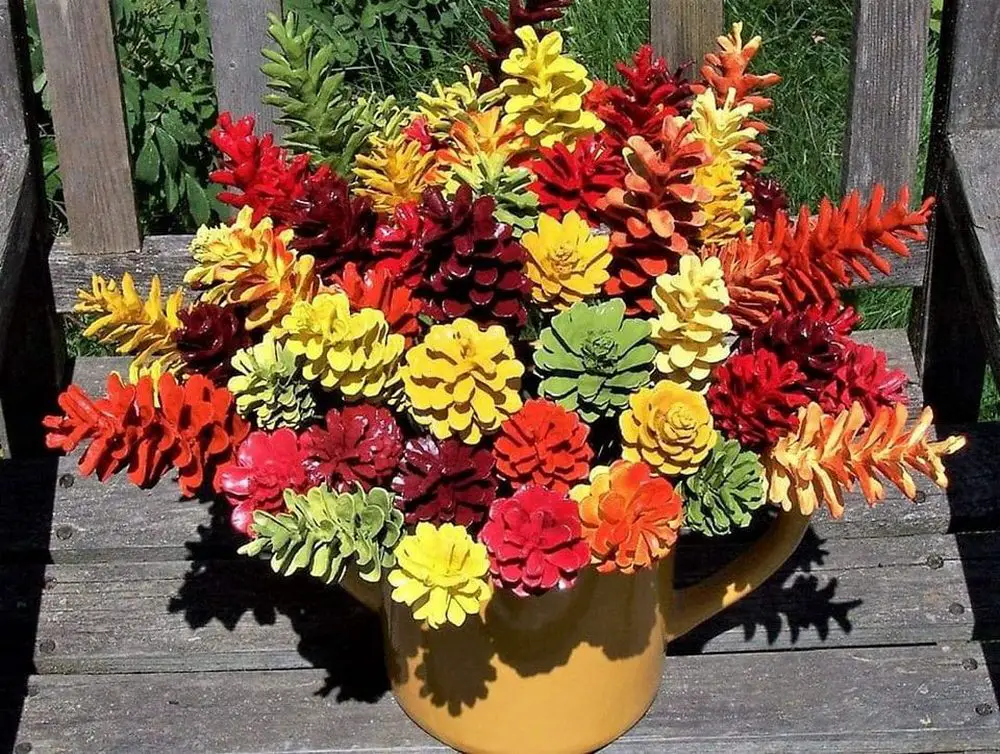
Pinecone flowers are a creative and sustainable way to add a natural touch to your decor. This DIY project transforms ordinary pinecones into stunning, floral-like displays. Perfect for craft enthusiasts and eco-friendly decorators, pinecone flowers offer a unique blend of rustic charm and artistic flair.
In this article, we’ll guide you through creating pinecone flowers, providing tips and techniques to enhance your crafting experience.
Contents
- 1 Gathering Materials
- 2 Preparation Steps
- 3 Safety Precautions for Crafting with Pinecones
- 4 Creating Pinecone Flowers
- 5 Decorative Ideas
- 6 Maintenance and Care
- 7 FAQ on DIY Pinecone Flowers
- 7.1 What are pinecone flowers, and how are they made?
- 7.2 Can pinecone flowers be used for outdoor decorations?
- 7.3 How long do pinecone flowers last?
- 7.4 Are pinecone flowers safe for pets and children?
- 7.5 Can I customize the colors of my pinecone flowers?
- 7.6 What type of paint is best for pinecone flowers?
- 7.7 Are there eco-friendly options for creating pinecone flowers?
- 7.8 How can I use pinecone flowers for a special event?
- 7.9 Where is the best place to find pinecones for making pinecone flowers?
- 7.10 What is the best way to clean pinecone flowers?
- 8 Conclusion
Gathering Materials
Creating pinecone flowers begins with gathering the right materials or crafting tools. This section will outline your needs and offer tips for selecting the best pinecones for your project.
Essential Materials
- Pinecones: Gather a range of sizes and shapes. Smaller pinecones are great for delicate flowers, while larger ones make a bold statement. Collect as much as possible since you will use more pinecones than you believe you need. This allows for experimentation and choosing the best specimens for your project.
- Paint: Use acrylic paints, which are preferred for their rich color and fast drying time. They’re also water-soluble, making cleanup easy. Choose a palette that suits your decor or the season. Think beyond traditional flower colors; metallics or pastels can add a unique touch.
- Brushes: Include a mix of brush sizes. Fine-tip brushes are essential for detailed work, while wider brushes quickly cover larger areas. Invest in good quality brushes. They hold paint better and will last longer, making your crafting experience more enjoyable.
- Glue: A strong craft glue or hot glue gun works best. They ensure a secure bond, which is crucial for pieces that will be handled or hung. Consider glue with a precision tip for delicate work. This helps in applying the right amount of glue without making a mess.
- Wire: Choose wire that is easy to bend but strong enough to hold the pinecones’ weight. Floral wire is an excellent choice. Get varying lengths for different project needs. Longer wire is useful for bouquet stems, while shorter pieces work for individual flowers.
- Sealant: Like a spray varnish, a clear sealant protects the painted pinecones from moisture and wear. Choose from matte, satin, or glossy finishes. Each gives a different look to your finished pinecone flowers.
Choosing the Best Pinecones
Selecting the right pinecones is crucial for creating beautiful pinecone flowers. Here are expanded tips on how to find the best pinecones, focusing on size and shape, condition, and types.
- Diversity: Choose a variety of sizes. Small pinecones are perfect for delicate designs, while larger ones create a bold, dramatic look.
- Shape Matters: Some pinecones have a more open, petal-like appearance, ideal for mimicking flowers. Others are tighter and more cylindrical, suitable for different styles.
- Natural Curves: Look for pinecones with a natural curve or twist, adding character to your flowers.
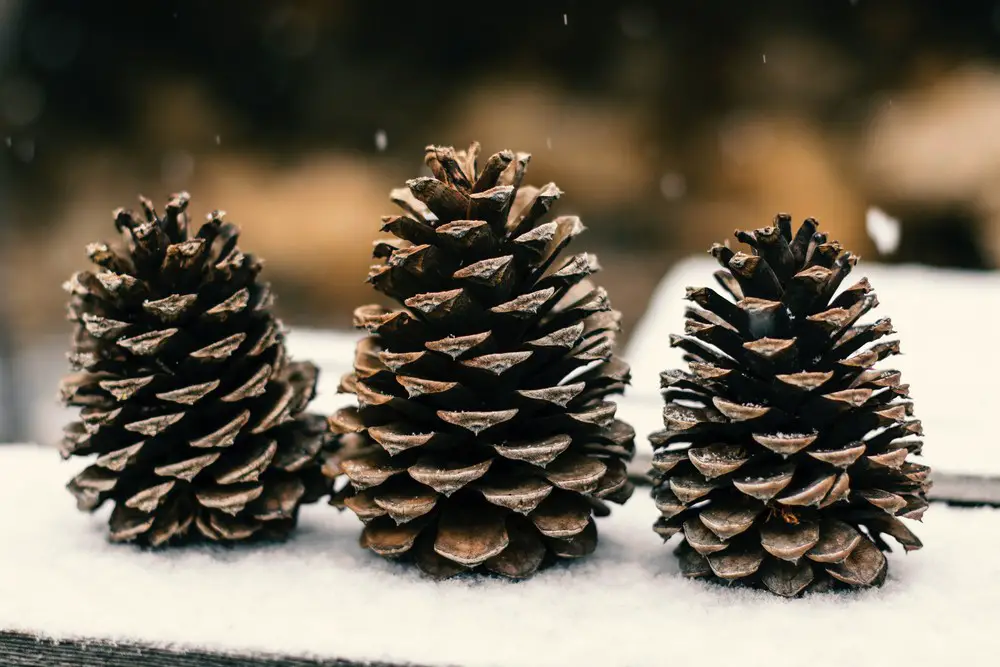
- Dry and Intact: Ensure the pinecones are dry. Wet pinecones might close up or mold. They should also be free from significant damage.
- Cleanliness: Avoid pinecones with excessive dirt or sap, as these can be difficult to clean and might affect paint adherence.
- Pest-Free: Check for signs of bugs or larvae. A quick bake in the oven at a low temperature can eliminate hidden pests and ensure the pinecones are safe to use.
- Species Variation: Different trees produce different pinecones. Experiment with various types to find your preferred style.
- Texture and Patterns: Some pinecones have a more pronounced texture or unique patterns, adding visual interest to your flowers.
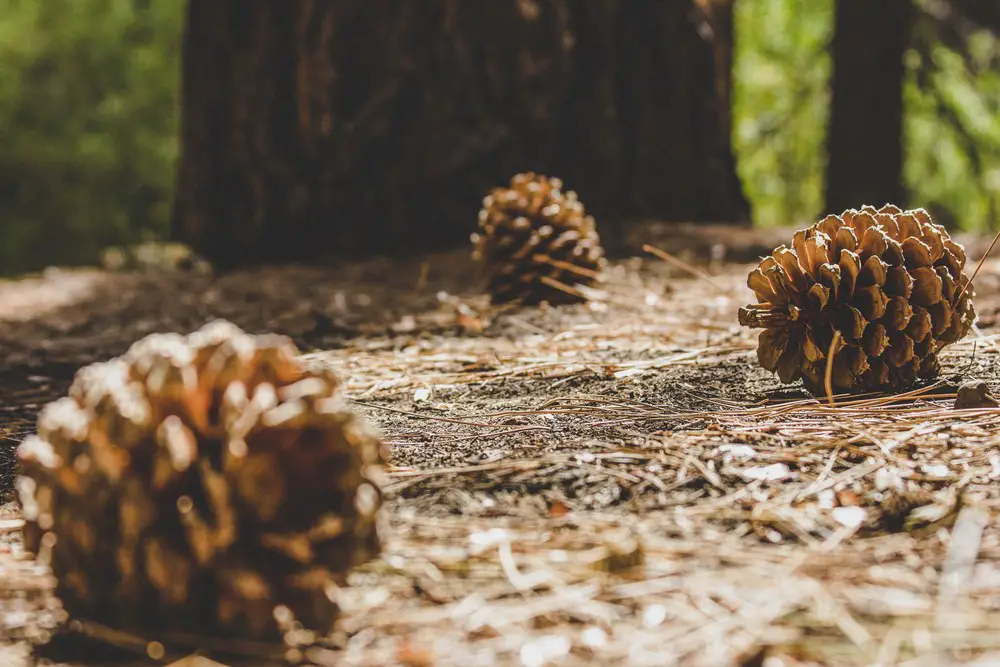
- Local Availability: Explore local parks, forests, or even your backyard. The variety you find locally can inspire unique creations.
- Seasonal Gathering: Fall and early winter are ideal times to collect pinecones, as they are more likely to have fallen naturally.
- Community Sources: Ask friends or family who might have pine trees in their yards. They can be a great source of pinecones.
- Preserving Natural Color: If you prefer a rustic look, you can preserve pinecones’ natural color and texture by applying a clear sealant.
Preparation Steps
Proper preparation of pinecones is essential for successful crafting, just like with making pine cone faeries. Here are the steps to get your pinecones ready for transformation into beautiful flowers.
Rinse and Soak
The first step in cleaning pinecones involves gently rinsing them under running water. This process helps remove loose dirt, debris, and small insects hiding within the scales. After rinsing, prepare a mixture of water and a small amount of vinegar.
Soaking the pinecones in this solution eliminates sap, which can be sticky and difficult to work with. Additionally, the vinegar helps to ward off any remaining pests. This soaking process cleans the pinecones and prepares them for the next step, drying.
Drying
Once the pinecones are cleaned, they need to be thoroughly dried. The simplest method is to lay them out on a towel and allow them to air dry. However, this natural drying process can take some time, and if you’re eager to start your project, there’s a quicker method.
Baking the pinecones in an oven at a low temperature speeds up the drying process and causes the pinecones to open up, which is ideal for crafting. This method ensures that the pinecones are completely dry and ready to be turned into beautiful flowers.
Trimming
Once your pinecones are dry, the next step is to prepare them for crafting. Start by using garden shears to trim the base of each pinecone. This creates a flat surface, making it easier to attach stems or bases in later stages of your project.
Trimming is crucial for ensuring your pinecone flowers can stand upright or be incorporated into various decorative arrangements. Trimming must be done carefully to maintain the integrity of the pinecone’s natural shape.
Splitting
For pinecones that you wish to have a more petal-like appearance, consider carefully splitting some of the scales. This technique adds a unique texture and aesthetic to the pinecone, making it more flower-like. However, this step requires a gentle touch and precision to avoid breaking the scales.
Carefully work around the pinecone, creating small splits that enhance its appearance without compromising its structure. This step can be particularly effective in creating various flower styles and adds more detail to your pinecone flowers.
Safety Precautions for Crafting with Pinecones
When crafting pinecone flowers, it’s essential to prioritize safety. By taking some simple precautions, you can ensure a safe and enjoyable crafting experience.
Protective Wear
Using gloves is a key safety measure. Gloves protect your hands from the sap often found on pinecones, which can be sticky and difficult to remove. Additionally, pinecones can have sharp edges that might cause small cuts or scrapes. Wearing gloves helps prevent these minor injuries.
Furthermore, wearing a mask is advisable if you’re sensitive to dust, pollen, or the fumes from paints and sealants. This is particularly important when working with pinecones collected from the outdoors, as they can carry allergens.
Working in a Well-Ventilated Area
Crafting should always be done in a well-ventilated area, especially when it involves paints, glues, and sealants. This is crucial when using products that emit fumes, which can be harmful if inhaled in enclosed spaces.
Ensuring good air circulation helps dissipate these fumes, making your crafting environment safer and more comfortable. If working indoors, open windows or use a fan to aid ventilation. When possible, working outdoors, offering both ventilation and natural light, is an excellent option.
Safe Handling of Tools
Tools such as garden shears and hot glue guns are commonly used in crafting pinecone flowers. While essential, these tools can be hazardous if not handled correctly. Always use garden shears carefully, keeping your fingers away from the blades and cutting away from your body.
When using a hot glue gun, be mindful of the hot tip and the glue, which can cause burns if touched. It’s important to keep these tools out of children’s and pets’ reach and focus on the task to avoid accidents. By handling these tools responsibly, you can safely enjoy crafting your pinecone flowers.
Adhering to these safety precautions ensures your well-being and makes crafting more enjoyable and stress-free. With these measures, you can fully immerse yourself in the creative joy of making pinecone flowers.
Creating Pinecone Flowers
Crafting pinecone flowers involves a blend of creativity and technique. Here’s a guide to help you transform simple pinecones into stunning floral art.
Base Preparation
The first step in creating pinecone flowers is ensuring each has a flat base. This is crucial for stability, especially if you plan to display the pinecones upright or incorporate them into arrangements.
A flat base also makes the pinecone easier to handle during crafting. If you haven’t already done so in the preparation phase, use garden shears or a similar tool to trim the bottom of the pinecone. Carefully remove enough of the base to create a stable, flat surface, but be cautious not to over-trim, as this could cause the pinecone to lose its natural shape.
This process might vary slightly depending on the pinecone’s size and shape, so take your time to achieve the best result. Once you have a flat base, your pinecone is ready for the next step: painting.
Shaping
If you’ve decided to enhance the natural shape of your pinecones by splitting the scales, this step is crucial in achieving a flower-like appearance. Using a small tool, such as a craft knife or tweezers, gently pry and bend the scales outward. This should be done carefully and patiently, as the scales can be brittle. The goal is to mimic the open petals of a flower, creating a sense of bloom and fullness. This shaping can be done before painting, which allows the paint to reach the inner parts of the pinecone more easily, or after the base coat of paint has been applied, depending on your preference and the desired effect.
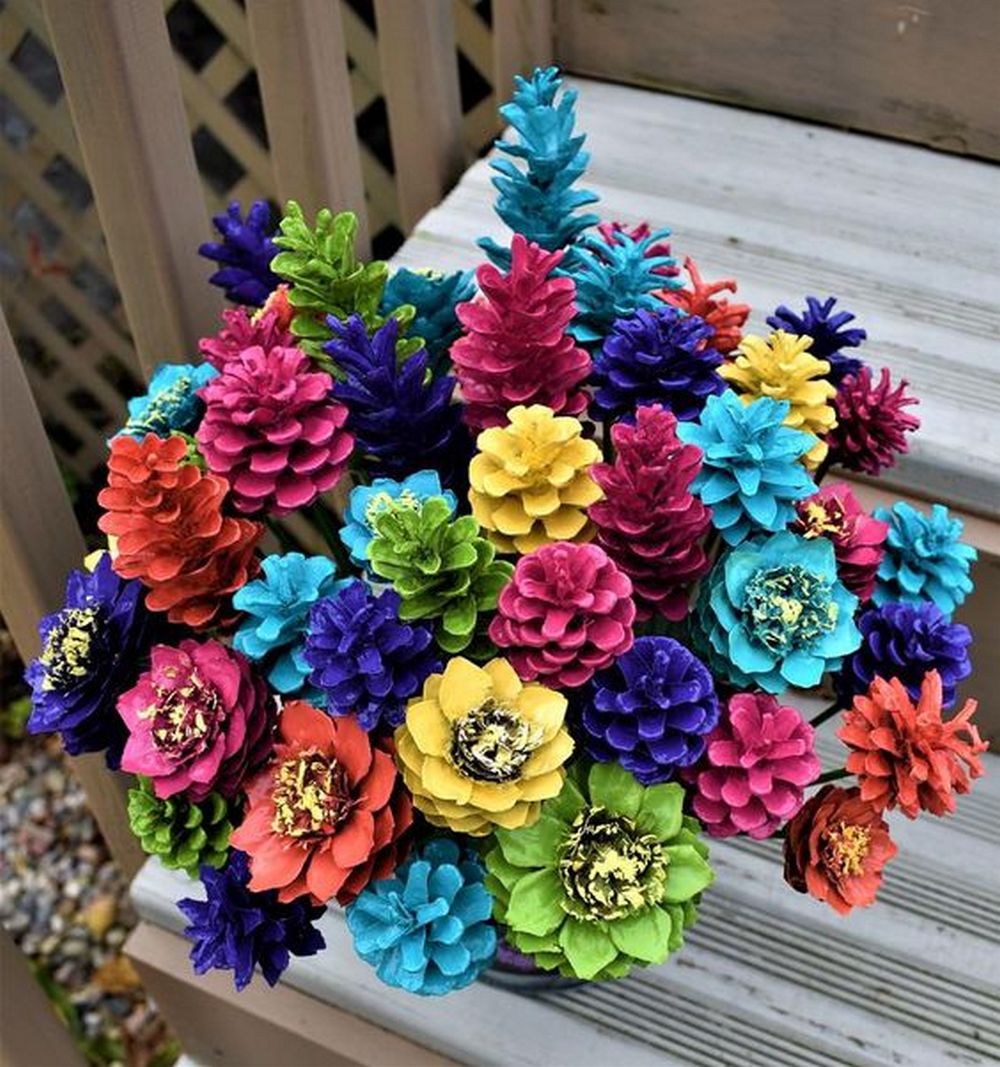
Painting
Painting is where your pinecone truly begins to transform into a flower. Start by choosing your paint colors. You might opt for a single color for a simple, elegant look or multiple colors to create a more vibrant, eye-catching effect. When selecting colors, consider where the pinecone flowers will be displayed or the theme they are meant to complement.
Begin painting from the pinecone’s base, working your way to the tips of the scales. These tips act like the petals of your flower, so adding a highlight or a contrasting color can enhance the floral effect.
For a gradient look, start with a darker shade at the base and gradually blend into lighter shades towards the tips. Alternatively, for a multicolored effect, paint individual scales or groups of scales in different colors.
Be mindful of the paint’s consistency. Too much paint can cause the scales to stick together, while too little might not give the desired coverage. After painting, allow the pinecone to dry completely before proceeding to the next steps.
This drying process is essential as it sets the paint and ensures that additional details or embellishments can be added without smudging. The transformation during this painting phase is remarkable, as the pinecone starts to take on a new life as a beautiful, handcrafted flower.
Painting Tips
- Dry Brush Technique: Use a dry brush for a rustic and textured look. This involves lightly dipping your brush in paint, wiping off the excess, and gently brushing over the scales. This method highlights the texture of the pinecone and gives it a more natural, weathered appearance.
- Layering Shades: To add depth and dimension to your pinecone flowers, layer different shades of the same color. Start with a darker shade as the base, then lightly brush on lighter shades towards the tips of the scales. This creates a gradient effect that can be strikingly beautiful.
- Textured Painting: For an interesting texture, experiment with sponging or dabbing paint onto the pinecone. This can be done with a sponge, a piece of cloth, or crumpled paper. Dabbing creates a stippled effect, which adds depth and interest to your pinecone flower.
Adding Details
After the base coat of paint on your pinecone is dry, it’s time to enhance your creation with detailed work. This step is where your artistic flair comes into play. One effective technique is to paint the edges of the pinecone scales in a contrasting color.
This method highlights the petal-like appearance of the scales, giving your pinecone flower a more dynamic and intricate look. Choose a color that stands out against the base coat for maximum impact.
Another way to add detail is by using a fine brush or a paint pen to add small dots or lines, mimicking the texture of natural flower petals. These details can be as subtle or as bold as you like.
Observe the patterns and textures of real flower petals and try to replicate them on your pinecone for a more realistic effect. This detailing not only adds depth to your pinecone flower but also brings it to life, making it look more like a real bloom. Allow these details to dry thoroughly, ensuring the added paint doesn’t smudge or run.
Attaching the Stem
Attaching a stem is essential for pinecone flowers intended to be part of a bouquet or displayed in a vase. You can use floral wire or a wooden skewer as a stem. Both options have advantages: floral wire is flexible and easy to manipulate, while wooden skewers offer more rigidity and support for larger pinecones.
To attach the stem, apply a strong adhesive to the pinecone base. Then, press the end of your chosen stem material into the glue. Be generous with the glue to ensure a secure bond, but be careful not to over-apply it to avoid a messy appearance. If using hot glue, work quickly, as it dries fast. Hold the stem in place for a few minutes to allow the adhesive to set.
Once the glue is dry, your pinecone flower has a stem and can be arranged or displayed as desired. This step is crucial for adding versatility to your pinecone flowers, allowing them to be integrated into various decorative settings, such as flower arrangements, wreaths, or standalone displays. Adding the stem transforms your pinecone from a simple nature item into a versatile and elegant craft piece.
Final Touches
The final touches set your pinecone flowers apart, giving them a polished and professional look. One of the key steps in this phase is applying a sealant to the pinecone. This protects the paint from chipping or fading and allows you to choose the finish that best suits your design.
A matte finish can give a more natural and rustic look, while a glossy or satin finish will make the colors pop and add a touch of elegance. Spray sealants are easy to use and provide an even coating. When applying the sealant, make sure to do it in a well-ventilated area and cover all surfaces evenly. Allow the sealant to dry completely before handling the pinecone.
Once the sealant is dry, you can further personalize your pinecone flowers with various embellishments. Adding glitter can bring a sparkle that catches the eye, perfect for holiday decorations or special occasions. Beads can be glued at the center or along the edges of the scales to add sophistication and texture. For a softer touch, consider attaching small pieces of fabric or ribbon, which can complement the colors of the paint and add a unique dimension to your flower.
These embellishments should be attached with care and precision. Use a strong adhesive that dries clear to maintain a clean look. When adding these details, think about the overall aesthetic you want to achieve. Less can sometimes be more, so it’s important to balance adding interest and maintaining the natural beauty of the pinecone.
With these final touches, your pinecone flower is complete. This phase of the project is where your creativity truly shines, allowing you to transform a simple pinecone into a work of art. Whether displayed independently or as part of an arrangement, these pinecone flowers will surely be a beautiful and unique addition to any decor.
Decorative Ideas
Pinecone flowers are a delightful craft project and a versatile decorative element that can enhance various settings in your home or at events. Here are some imaginative ways to use pinecone flowers in your decor, incorporating the focus keyword ‘pinecone flowers’ to emphasize their versatility and charm.
Home Decor with Pinecone Flowers
Pinecone flowers can bring a touch of nature indoors, adding warmth and texture to your living space. Arrange a bouquet of pinecone flowers in a rustic vase for a centerpiece on your dining or coffee table.
You can also create a pinecone flower wreath for your front door, combining pinecone flowers with greenery for a welcoming entrance. Consider attaching pinecone flowers to a string of lights for a whimsical, illuminated garland draped over a mantelpiece or along a staircase.
Seasonal Decorations Using Pinecone Flowers
Pinecone flowers are perfect for seasonal decorations. Mix pinecone flowers with real or faux leaves in warm, earthy tones for autumn to create a seasonal display. Pinecone flowers can be painted in reds, greens, and whites during the winter holidays and combined with holly or evergreen sprigs for festive decor. Spring decor can include pinecone flowers painted in pastel shades and fresh or silk flowers for a cheerful arrangement.
Thematic and Event Decor with Pinecone Flowers
Pinecone flowers are also ideal for thematic decorations or event decor. For a nature-themed party or a rustic wedding, pinecone flowers can be used in table settings, as part of the centerpieces, or even as unique boutonnieres and corsages. They can be customized to match any color scheme, making pinecone flowers a flexible choice for coordinating with specific themes or decor styles.
Personalized Gifts and Crafts
Pinecone flowers make wonderful gifts, especially when personalized. Create a set of pinecone flowers in someone’s favorite colors, or make a special arrangement that reflects their personality or interests. Pinecone flowers can also be used in other crafts, like making ornaments, adding them to picture frames, or incorporating them into homemade candles for a unique touch.
Incorporating pinecone flowers into your decor or as part of your gift-giving is a creative outlet and a way to bring a piece of the natural world into everyday life. Their versatility and natural beauty make pinecone flowers a delightful addition to any space or occasion.
Maintenance and Care
With their natural and rustic charm, pinecone flowers require some care to maintain their beauty over time. Here’s how you can preserve and care for your pinecone flowers to ensure they remain a stunning part of your decor for years.
Preserving Pinecone Flowers
- Avoid Direct Sunlight: To prevent the colors of your pinecone flowers from fading, it’s best to keep them out of direct sunlight. Sunlight can cause the paint to fade and the pinecone to dry out and become brittle.
- Dust Regularly: Pinecone flowers can accumulate dust, dulling their appearance. Gently dust them with a soft brush or a feather duster to keep them looking fresh. For intricate designs, using compressed air (like the ones used for keyboards) can help remove dust from hard-to-reach areas.
- Use a Protective Sealant: If you haven’t already sealed your pinecone flowers, consider applying a clear acrylic spray sealant. This adds a layer of protection against dust and moisture and helps keep the colors vibrant.
Handling and Storage
- Gentle Handling: Pinecone flowers can be delicate, especially those with split scales. Handle them gently to avoid breaking or damaging the scales.
- Proper Storage: If you need to store your pinecone flowers, choose a dry, cool place. Wrap them individually in tissue paper or bubble wrap to prevent the scales from getting crushed. Storing them in a cardboard box or a plastic container can protect them from dust and moisture.
- Avoid Moist Environments: Keep pinecone flowers away from damp areas, as moisture can cause the pinecones to close up or develop mold. This is particularly important for pinecone flowers in bathrooms or other humid areas.
FAQ on DIY Pinecone Flowers
What are pinecone flowers, and how are they made?
Pinecone flowers are decorative crafts made from pinecones, which are transformed to resemble flowers. They are made by shaping, painting, and sometimes splitting the scales of pinecones to create a floral appearance.
Can pinecone flowers be used for outdoor decorations?
Yes, pinecone flowers can be used outdoors. However, they should be coated with a weather-resistant sealant to protect them from moisture and fading due to sunlight.
How long do pinecone flowers last?
Pinecone flowers can last for many years with proper care. Keep them out of direct sunlight and in a dry environment to maintain their appearance.
Are pinecone flowers safe for pets and children?
While pinecone flowers are generally safe, they should be kept out of reach of small children and pets due to small parts and the potential choking hazard.
Can I customize the colors of my pinecone flowers?
Absolutely! Pinecone flowers are highly customizable. You can paint them in any color to match your decor or for specific themes and occasions.
What type of paint is best for pinecone flowers?
Acrylic paint is ideal for pinecone flowers due to its vivid colors, ease of use, and quick drying time.
Are there eco-friendly options for creating pinecone flowers?
Pinecone flowers are an eco-friendly craft. Natural pinecones and non-toxic paints and sealants make them a sustainable decor option.
How can I use pinecone flowers for a special event?
Pinecone flowers are great for events like weddings or parties. They can be used in centerpieces, bouquets, or as part of the decor. Customizing them to the event’s theme adds a unique and personal touch.
Where is the best place to find pinecones for making pinecone flowers?
Pinecones can be found in many natural settings, such as parks, forests, and even your backyard. Fall and winter are the best times to collect them.
What is the best way to clean pinecone flowers?
Gently dust pinecone flowers with a soft brush or use compressed air to remove dust. Avoid using water or damp cloths, which can damage the paint and structure.
Conclusion
Pinecone flowers blend nature and creativity, transforming simple pinecones into beautiful, long-lasting decorations. This DIY project allows for personal expression and provides an eco-friendly way to enhance your home decor.


