Working from home has perks, but sometimes you need a side hustle or a new hobby. Candle-making can be both. It’s not just about creating a decorative lighting piece that makes the room look nice. It is also an opportunity to make money.
Turning candle scraps into new candles is easy and cost-effective. You’re not just being crafty; you’re also recycling. You’ll create something beautiful and make money or enjoy a new hobby, all while being kind to the planet.
Contents
Gather Your Materials
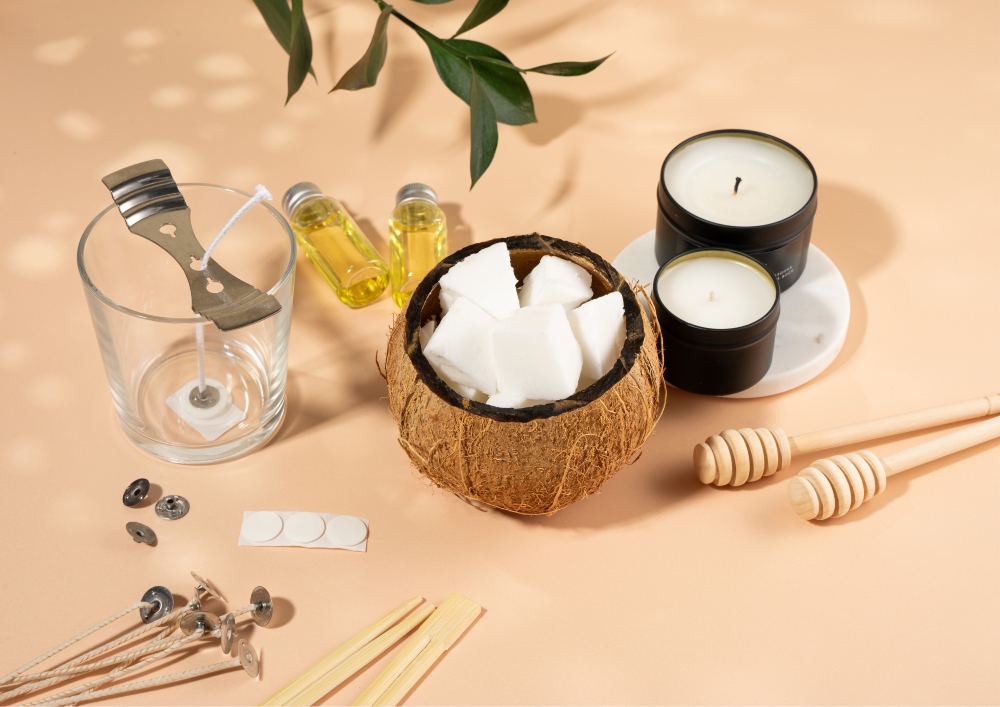
Before diving in, let’s make sure you have all you need. A few simple items are all it takes to start your candle-making journey.
Candle Scraps – Gather all your used and leftover candles. These scraps are the main ingredient in your new custom candle. Don’t throw them away; recycle them into something new.
Wicks – You’ll need one wick for each candle you make. The wick is the core of the candle and helps it burn evenly. Choose cotton or wooden wicks for the best results.
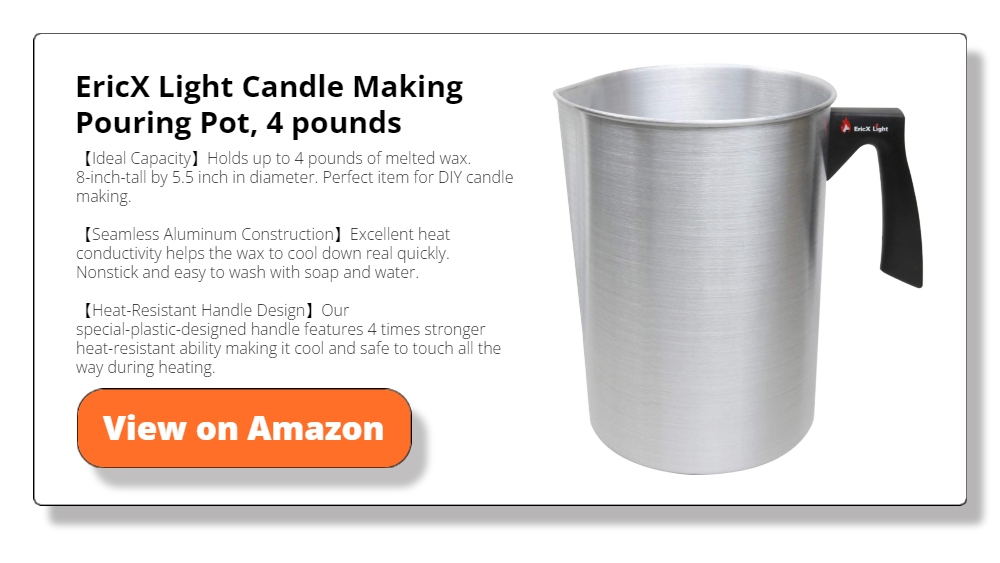
Melting Pot – Use a small metal pot specifically for melting wax. Don’t use a pot you cook food in. The pot you use for candle making may contain inedible ingredients you do not want to be mixed with your stew or soup.
Mold – This is where the magic happens. You pour the melted wax into the mold to shape your candle. Silicone or metal molds work great.
Stir Stick – Grab a wooden or metal stick to stir the wax. Stirring helps the wax melt evenly and blends any added scents or colors.
Heat Source – You do not need a special heater for candle-making since a stove is sufficient to melt your wax. If you are making candles for income, you will want to invest in electric wax heaters.

Thermometer – A simple kitchen thermometer will do. It’s important to know the wax temperature to get the best results. Too hot or too cold can ruin your candle.
Scent Oils – These are optional but add a nice touch. Scent oils give your candle a unique fragrance. Choose smells that you enjoy or that sell well.
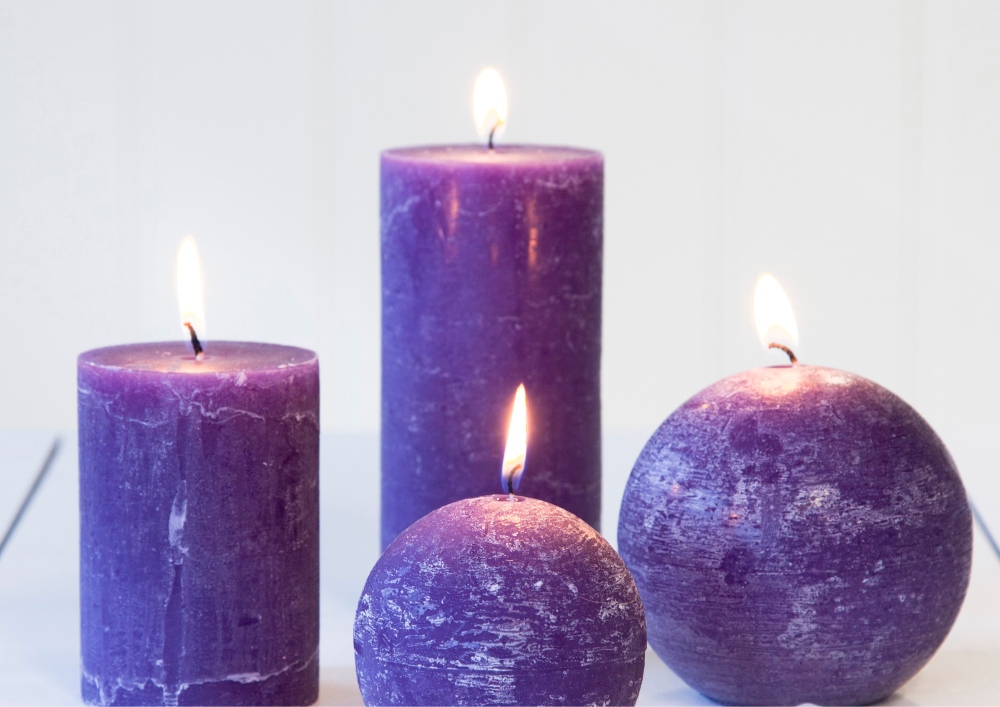
Color Dyes – Also optional but fun. Color dyes let you get creative with your candle’s look. Pick colors that match your home decor or that are popular sellers.
You’re all set with your materials. Having everything ready makes the process smoother and more fun. Next, let’s move on to preparing your workspace.
Prepare Your Work Area
Before you start melting and pouring, you need a good workspace. Setting it up right will make your candle-making easier and safer.
Clear the Area
First things first, clear your workspace of any clutter. You’ll want a clean, open area to spread out your materials. A clear and clean area puts you in a better state of mind while working on your candles.
Make sure to remove anything flammable. Wax is hot, and accidents can happen. Clearing the area minimizes the risk of starting a fire. It’s always better to be safe than sorry.
Also, keep pets and kids away. Curiosity might lead them to your workspace. A simple bump can ruin your project or cause an accident.
Safety First
Always prioritize safety. Wear clothes that won’t mind getting waxed on. Wax can splatter, and it’s not easy to clean.
Use heat-resistant gloves when handling hot materials. This helps you avoid burns when touching the melting pot or molds. It pays to find high-grade gloves that protect you while giving you full movement of your fingers.
Always have a fire extinguisher nearby. You’re working with hot wax and open flames. There is always a chance a fire could start while you’re melting the wax or testing new candles. A fire extinguisher can help you control a small fire before it gets out of hand.
Ventilation Matters
Good ventilation is key. Melting wax produces fumes that you shouldn’t be inhaling. Open windows or use an exhaust fan to keep the air clean.
If you’re adding scent oils, good ventilation is even more critical. These oils can be strong and cause headaches or nausea if you’re not careful. Make sure fresh air is flowing through the area at all times.
Organize Your Tools
You want to ensure your tools are within reach when you enter the next step. Put the melting pot, stir stick, and thermometer near the stove. Keep the wicks, molds, and any extras like scents or colors in a separate area.
Organization speeds up the process. You won’t have to hunt for what you need in the middle of melting wax. Everything should be within arm’s reach but not so close that it’s in the way.
Placing your tools in a common area reduces the time it takes to find them. A system for your tools lets you lower the chances of making a mistake. You can also focus more on properly mixing your scent oils and wax color when your tools are easy to find.
Your workspace is ready. A well-prepared area sets the stage for a successful candle-making session. Up next, we’ll sort those candle scraps.
Sorting Candle Scraps
Now that your workspace is ready let’s sort those candle scraps. This step helps you create candles with consistent color and scent.
Separate by Color
Start by dividing your candle scraps into different color groups. Putting all the reds, blues, and greens together makes for a consistent finish. You want to avoid ending up with a candle that mixes unwanted colors. Keeping colors together lets you predict the final look of your candle.
Divide by Scent
After sorting by color, the next step is to divide them by scent. Mixing too many scents can create a clearer aroma. Keep similar scents together, like floral, citrus, or woodsy. You want to create a mix that blends well when you light that candle.
Check for Debris
Before moving on, inspect your sorted wax for any debris. Look out for bits of old wick, matches, or dust. These can ruin the quality of your finished candle. Removing them now saves you the trouble of dealing with it later.
Measure Your Wax
Now, measure the wax you’ve sorted. Knowing how much you have helps in choosing the right size mold. Use a kitchen scale for accuracy. Ensure you have enough to fill your mold but not so much that it overflows.
Decide on Mixing
Lastly, decide whether to mix colors or scents to create something new. You can take this chance to get creative. If you mix, ensure your chosen colors and scents go well together. An exciting mix can lead to a unique, custom candle that’s all your own.
While this may seem like extra work, it is worth taking. Organizing your wax materials gives you better control over the color and design of your candle.
Melting the Scraps
You’ve sorted your scraps, and your workspace is set. Now comes the exciting part: melting the wax. Doing it right is key to a great-looking and long-lasting candle.
Choose Your Heat Source
The first step is to choose your heat source for melting the wax. Most people use a stovetop, but a hot plate works too. Make sure it’s clean and free from any residue. Choosing a source that allows for controlled, even heat, is best.
Sudden spikes in temperature can ruin your wax, so pick the right heat source. Set everything up near a power outlet using an electric heat source.
Prep Your Melting Pot
Before you begin, make sure your melting pot is clean and dry. Any water or debris can mess with the wax quality. Place the pot on the heat source and make sure it’s stable. The last thing you want is for it to tip over and spill hot wax everywhere. If your pot doesn’t have a pour spout, consider using a funnel for when it’s time to pour.
Start the Heat
Turn on your heat source and set it to a low setting. You want to melt the wax slowly to prevent it from burning. Wax heated too quickly can develop an unpleasant smell and may not set correctly in the mold. Be patient, as rushing this step can ruin your candle.
Monitor the Temperature
Use a thermometer to keep an eye on the wax temperature. Too hot or too cold can mess up your final product. Aim for a temperature range specified by the type of wax you’re using. Knowing the exact temperature helps you add extras like scent or color at the right time.
Stir Occasionally
As the wax starts to melt, give it an occasional stir with your stir stick. Stirring helps to distribute heat evenly and speeds up the melting process. It also lets you mix additional items like color or scent more effectively. Don’t stir too fast; you want to avoid introducing any air bubbles into the wax.
Add Extras
If you’ve chosen to add extra elements like scents or colors, now’s the time. Add these when the wax melts, and you’ve turned off the heat. Stir well to ensure the oil is spread evenly around the wax. Remember that adding too much can affect how the candle burns, so use these extras sparingly.
With your wax material in a liquid state, you are ready to form your candle.
Setting the Wick
In this step, we will properly place the wick in your new candle. This step is crucial for your signature candle to burn bright. Here are the steps:
Choose the Right Wick
Choosing the right wick is more important than you might think. The wick’s size and type affect how your candle burns. A wick that’s too large can cause your candle to burn too fast and too hot. On the other hand, a wick that’s too small might drown in the melted wax.
For beginners, cotton wicks are usually the best choice. They burn cleanly and are easy to handle. Pick one that matches the size and type of wax you’re using.
Prep the Wick
Before inserting the wick, you’ll need to prep it. Some wicks come pre-coated with wax, making them easier to set. If yours isn’t, dip it in the melted wax for a few seconds. This makes it more rigid and easier to position in the mold.
It also helps the wick burn more evenly once the candle is complete. Lay out the wick on a clean surface to make it easy to grab when ready.
Secure the Wick
To secure the wick, you have a few options. Some people like to use a bit of melted wax at the bottom of the mold to hold it in place. Others prefer a wick holder or pencil to keep the wick centered while the wax hardens. Whatever method you choose, make sure the wick stays upright and centered.
Double-Check Placement
Once the wick is secured, take a moment to double-check its placement. It should be straight and centered within the mold. If it’s leaning to one side, your candle will burn unevenly. Now is the time to make any last-minute adjustments. Make sure it’s perfectly positioned before you pour in the melted wax.
The wick is the backbone of your candle, so you want to ensure it is placed correctly.
Pour and Cool
You will be making the candle in this step. Here are the steps to take:
Preheat the Mould
First things first, preheat your mold. A cold mold can make the wax cool too quickly, leading to cracks or uneven surfaces. You can preheat it by placing it in a warm oven for a few minutes or using a hairdryer. Just make sure it’s not too hot to touch. A warm mold helps the wax spread evenly, giving you a smoother final product.
Pour the Wax
Ensure the wax is still warm while liquid to keep it from hardening as you pour it onto the mold. Gently pour the wax onto the mold while holding the pot with a firm grip on your gloved hands. Slowly filling the mold helps you avoid trapping air within the wax and making bubbles.
Let It Sit
After pouring, let the wax sit undisturbed. It needs time to cool and solidify. Depending on the wax type and room temperature, this could take a few hours. Allow the wax to form into your custom candle over time.
Check for Sinkholes
As the wax cools, keep an eye out for sinkholes. These are small gaps that can form as the wax contracts. If you spot any, just reheat some scraps and pour them into the hole until it’s level with the rest of the candle.
Top It Off
The last step in this section is to top off your candle. If you’ve had to fill in sinkholes or the surface is uneven, now’s the time to make it right. Melt more wax and pour it over the top to create a smooth, even surface.
At this point, your custom candle is nearly done. There are just a few steps to consider next.
Final Touches
Your candle is almost ready! These last steps can make your candle look and burn even better.
Remove from Mould
Now comes the moment of truth: taking your candle out of the mold. To do this, gently tap the sides of the mold to loosen the wax. If it’s stubborn, place it in the freezer for a few minutes to shrink the wax slightly. Once it’s loose, carefully turn the mold upside down and let the candle slide out. Handle it gently to avoid breaking or chipping it.
Trim the Wick
After removing your candle from the mold, you’ll see that the wick is likely too long. A long wick can cause your candle to burn too fast and produce too much smoke. Use scissors to trim it down to about a quarter-inch. This size is the ideal length for most candles and ensures a cleaner, more even burn.
Clean the Surface
You will want to clean the surface of your candle. Sometimes, there might be a bit of excess wax or even some debris trapped. Use a soft cloth to wipe the candle gently. A little warm water and mild soap can do the trick for tougher spots. Make sure to dry it off completely before moving on.
Test Burn
Before you use or sell your candle regularly, you should perform a test burn. Light the wick and let it burn for a few hours. You can see how evenly it burns and if the wick is the right size.
Monitor how well it melts and if it produces any smoke. You can adjust your next candle if the smell is not right or the wax is not burning well.
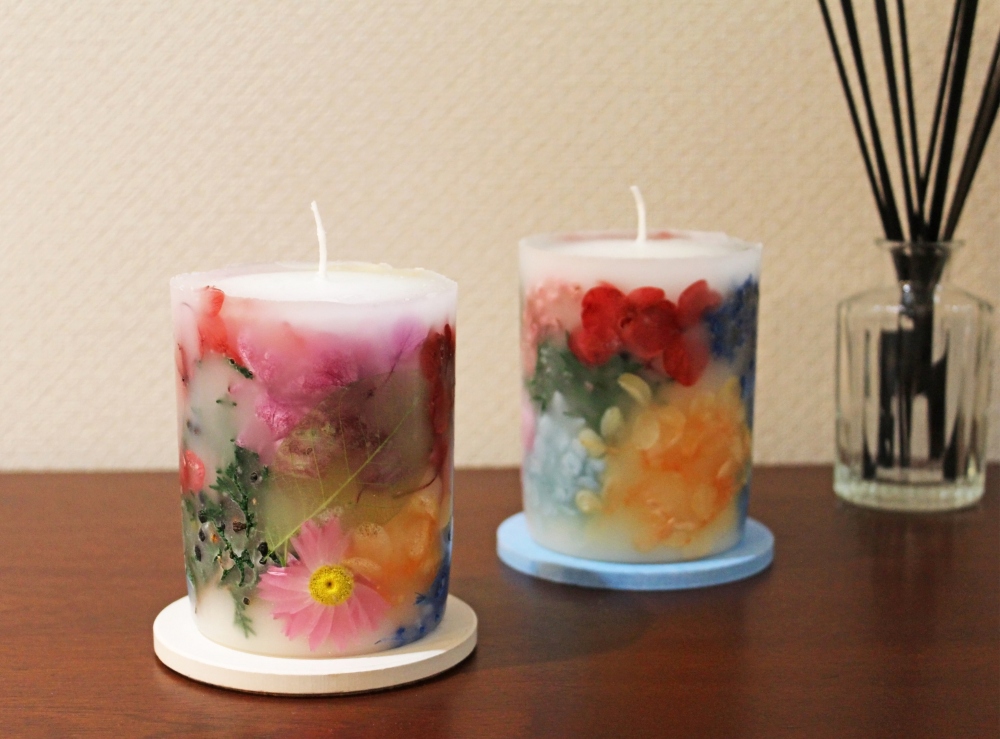
Add Decorations
The final step is adding any decorations you like. Decorations could be as simple as tying a ribbon around it or as elaborate as painting designs on the surface. Make sure any decorations are safe and won’t catch fire. Adding that personal touch can make your candle truly one-of-a-kind.
Conclusion
Congratulations, you just made your candle. You also picked up a new skill that opens the door to new income opportunities.
Team Ideas24 Always prioritize safety when heating the wax and mold. Wear safety gloves and be mindful of flammable objects when making your candle.


