If you’re tired of the daily struggle of scouring through your drawers in the morning for your favourite necklace or earrings, then you know it’s time to make things a little easier on yourself. Invest in a reliable jewellery organizer and avoid experiencing again the frustration of trying to find the perfect accessory. Now, all you have to do is take a few simple steps and you’ll have the perfect spot to store your jewellery!
In this blog post, we’ll be exploring how to create a DIY jewellery organizer for all your delightful pieces. You don’t need to go out and buy an expensive one — just a few simple materials and a bit of creativity are all you need to craft an organiser that’ll keep your jewellery safe and secure.
If you’ve ever looked at store-bought jewellery organizers and thought, “I can make something better than this,” then you’re right. You just have to be crafty! Crafting a DIY jewellery organizer doesn’t have to be intimidating or take a lot of time.
With the right supplies, some creativity, and a bit of patience, you can create a beautiful and unique jewellery organizer that fits your style and budget. There’s no need to be a skilled DIYer or have a lot of time on your hands.
While it seems intimidating to craft something from scratch, a DIY jewellery organizer can actually be quite simple. A jewellery organizer can be easily made using simple materials you can find in the thrift store or home improvement store. Plus, it’s more affordable than buying a pre-made jewellery organizer.
This blog post will provide the steps on how to craft the perfect DIY jewellery. So, get ready!
Contents
Creative & Practical: DIY Jewellery Organizers
Making your own DIY jewellery organizer is a fun and easy way to keep your pieces of jewellery organized and tangle-free. Of course, it’s stylish too! So, why not try making your own DIY jewellery organizer and show off your fabulous collection in style?
All you need are some basic materials, tools, measurements, and a few easy steps to make your own DIY jewellery organizer.
Materials:
- 1/2 inch thick plywood board
- 1/4 inch thick plywood board
- 1-inch wood screws
- Saw
- Sandpaper
- Drill
- Paint or stain (optional)
- Picture hangers
Tools:
- Measuring tape
- Pencil
Measurements:
- 12 x 12 inches plywood board
- 12 x 9 inches plywood board
- 10 x 6 inches plywood board
Steps:
- Cut the plywood boards to the measurements listed above using a saw.
- Sand the edges and surfaces of the plywood boards to smooth out any rough spots.
- Take the 12 x 12-inch plywood board and measure and mark every 2 inches along the top and bottom edge of the board. Then, measure and mark every 1 inch along the two sides of the board. This will give you a grid of marks to drill holes for the hooks.
- Using a drill bit that is slightly smaller than the size of your hooks, drill holes at each mark on the plywood board.
- Take the 12 x 9-inch plywood board and centre it vertically on top of the 12 x 12-inch board. Attach the two boards together using wood screws, placing a screw every 2-3 inches.
- Take the 10 x 6-inch plywood board and centre it horizontally at the bottom of the 12 x 12-inch board. Attach the two boards together using wood screws, placing a screw every 2-3 inches.
- Paint or stain the plywood boards as desired, allowing them to dry completely.
- Attach picture hangers to the back of the plywood board to hang it on the wall.
- Screw in hooks into the drilled holes on the 12 x 12-inch board, spacing them evenly.
- Hang your jewellery on the hooks, making sure to space them out evenly.

This simple design can be modified to suit your needs by adjusting the measurements or adding additional hooks or boards. Be sure to plan out your design and measurements in advance to ensure a successful project.
Crafting a Jewelry Keeper: DIY Design Tips
Designing your own DIY jewellery organizer can be a fun and creative process. Here are some steps to help you design your own:
- Determine your needs: The first step in designing your jewellery organizer is to determine your needs. Consider how much jewellery you have, their types, and the space available for the organizer.
- Choose the style: Think about the style of the organizer you want. Do you want something rustic and natural-looking, or something sleek and modern? Do you want a wall-mounted organizer or a freestanding one?
- Select the materials: Depending on your chosen style, you can choose materials such as wood, metal, or fabric. You can also use recycled materials like old frames or boxes to create your organizer.
- Sketch your design: Sketch out your design on paper or use a design tool on your computer. Include measurements, placement of hooks or compartments, and any decorative elements you want to add.
- Plan the functionality: Plan out the functionality of the organizer. Consider how you want to arrange your jewellery and what types of hooks or compartments will work best for your needs.
- Carefully gather your supplies: Once you have your design, gather all the materials and tools you will need before starting. It’s a good idea to have a checklist of all that you need.
- Perfectly make your organizer: Follow your design plan and assemble your jewellery organizer. Take your time, and make sure to measure and cut accurately.
You can also add some sparkle with jewels and decorations. After you’ve created a DIY jewellery organizer that meets your needs, it’s time to add some sparkle to it! Whether it’s colourful beads, glittery rhinestones, sequins, or other decorative items, you can bring some personality to your jewellery storage.
Customize your jewellery organizer to fit your unique style. Plus, your fashion-forward DIY jewellery organizer will make storing and organizing your jewellery an exciting activity.
Follow these steps and you can create a beautiful and functional DIY jewellery organizer that fits your needs and style.
Then, whether you want to place it in your closet, in your bedroom, or even in your bathroom, make sure the spot you choose is one that you can easily access and is also aesthetically pleasing. Consider the colour of your jewellery organizer and the colour of the wall that it will hang on to create a visually appealing look.
Design It Yourself: Making a Personalized Jewelry Organizer
Customizing your DIY jewellery organizer is a great way to make it more personalized and functional. Here are some more ideas to help you customize your jewellery organizer:
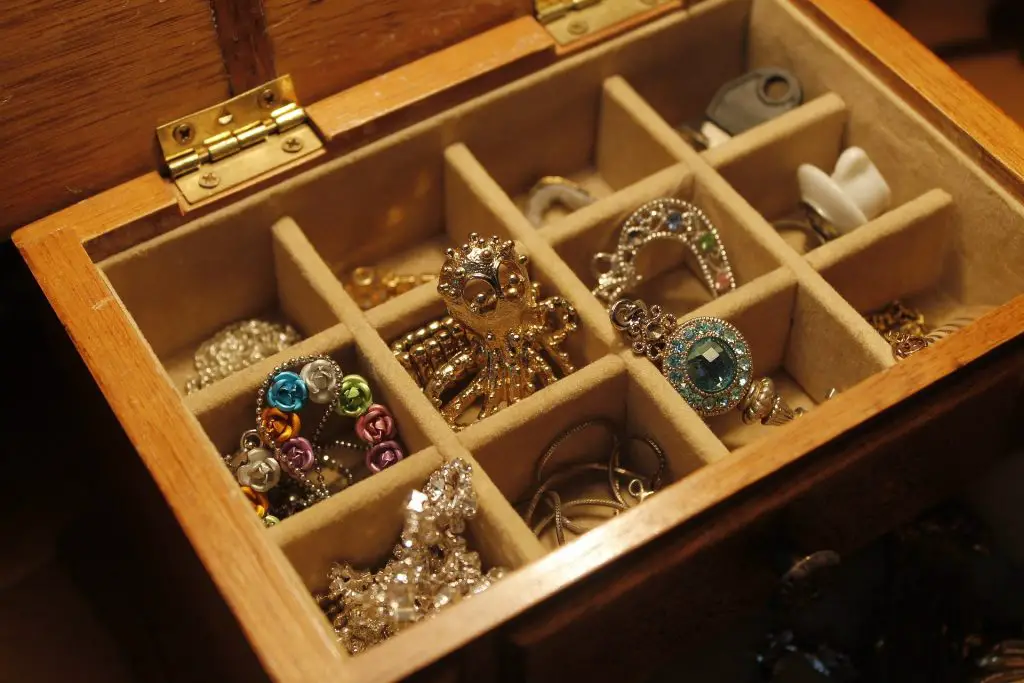
- Use specific storage compartments: Consider the types of jewellery you have and create specific compartments for each. For example, you can create hooks for necklaces, drawers for bracelets and watches, and earring holders for studs and hoops.
- Add a mirror: Adding a mirror to your jewellery organizer can make it more functional and convenient. If it will match the design, you can attach a small mirror to the front of the organizer or create a mirror backing.
- Make it modular: If you have a large jewellery collection, you can create a modular organizer that can be expanded as needed. For example, you can create multiple smaller organizers that can be attached together to create a larger unit.
- Use recycled materials: Consider using recycled materials to create your jewellery organizer. For example, you can use old picture frames, wine corks, or even branches to create a unique and eco-friendly organizer.
Customizing your DIY jewellery organizer can help make it more functional, stylish, and reflective of your personal style. The possibilities are endless, so have fun and get creative! You can even craft a DIY handprint jewellery dish for a more unique storage option.
The Takeaway
Overall, a DIY jewellery organizer is a great way to get organized and showcase your favourite jewellery pieces. With the right supplies, some patience and a bit of creativity, you can make a personalized jewellery organizer that will be the centrepiece of your vanity.
Whether you choose to make something simple out of cardboard or something more complex out of wood, you will be able to create a beautiful jewellery organizer that will keep you organized and looking stylish.
You’ll feel like a true fashionista with your own DIY jewellery organizer. Give your earrings, necklaces and bracelets a home of their own and arrange them by colour, pattern and sparkle. With your organized collection, you’ll always know the perfect piece to complete any outfit.
Have fun with the process of crafting your own jewellery storage solution, and enjoy the satisfaction of creating a space that reflects your own amazing style. You’ll love being able to find your favourite pieces in moments, as well as having a unique and beautiful way to show them off.
Are you now excited to create your DIY jewellery organizer?


