Kids are so into Star Wars they’d be happy to get anything Star Wars-related. My husband loves it and my sons do, too. As for me, let’s just say I’m… supportive.
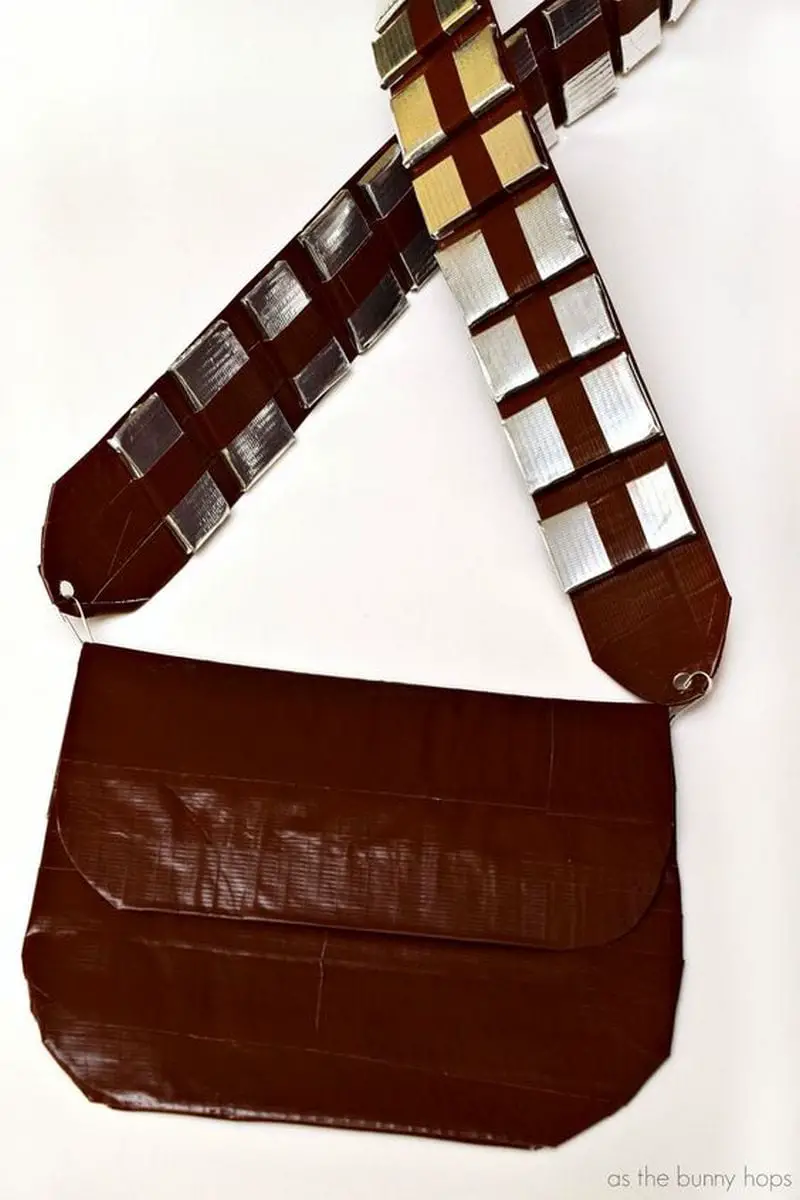
My youngest son adores Chewbacca. For his birthday, I got him a Chewbacca cake. The day after, he came up to me asking me to make him a Chewbacca toy bandolier. Since I didn’t know what that is, I did some research. Fortunately, I found a tutorial for a DIY project for the said toy.
This DIY bandolier is so easy to make – no sewing needed!
Don’t forget to put in Star Wars toys!
I’m not really good at sewing. If you’re anything like me, this project is definitely for us non-sewers. I swear this has nothing to do with a thread and a needle.
If you’re anything like me, you’re not really good at sewing. But that’s okay because this project is definitely for us non-sewers. I swear, it has nothing to do with a thread and a needle. So if you’re looking for a sewing project that is quick, easy, and satisfying, then this is definitely the one!
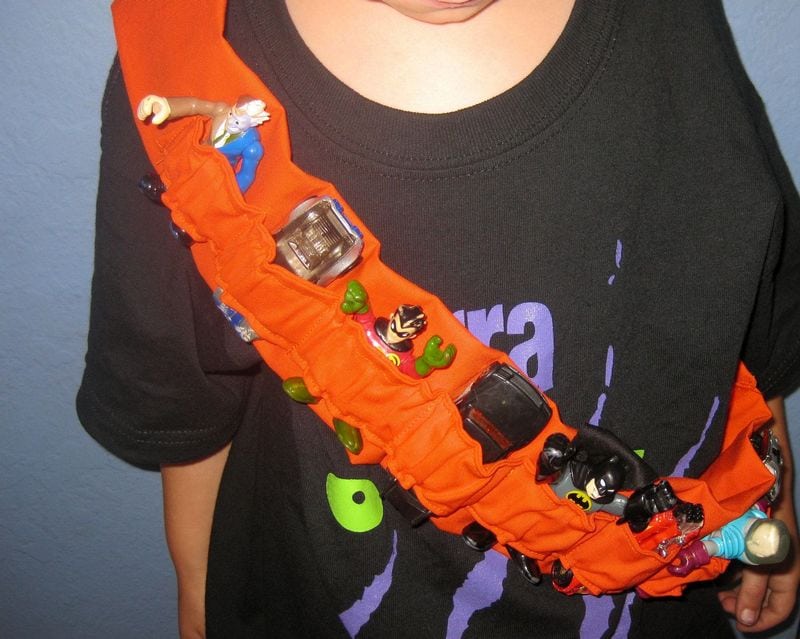
When kids want to hit the road with their favorite toys, the best way to do it is with a bandolier. They can easily load all their playthings into the bandolier and they’re good to go. Plus, the bandolier keeps everything organized and within reach, so kids can focus on having fun.
Here are some amazing DIY bandolier designs that will inspire you!
Contents
Cute DIY toy bandolier designs ideas
Click on any image to start the lightbox display. Use your Esc key to close the lightbox.


If you’re looking for a fun and unique gift, consider a bandolier filled with Star Wars toys! It’s a great way to keep all their playthings together, and your recipient will love being able to put them all together.
You will need the following tools and materials to make your own bandolier toy:
- Crossbody bag (either fabric or leather)
- Duct tape
- Self-healing mat
- Elastic
- Hot glue
- toys
- Craft knife or scissors
- Glue gun
How to make a DIY toy bandolier
Once all materials are ready, all you need is a little bit of time to put this together. But, it will be well worth it when you see your child’s face light up when they see their new bandolier.
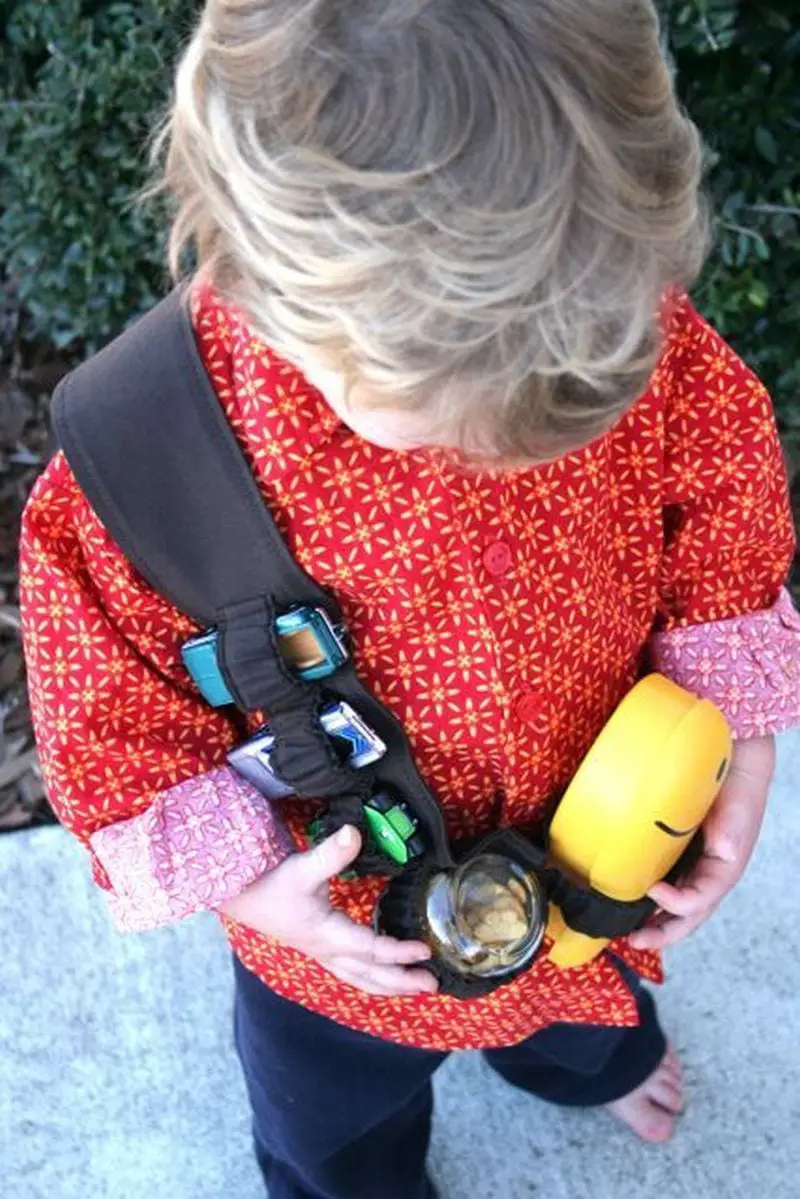
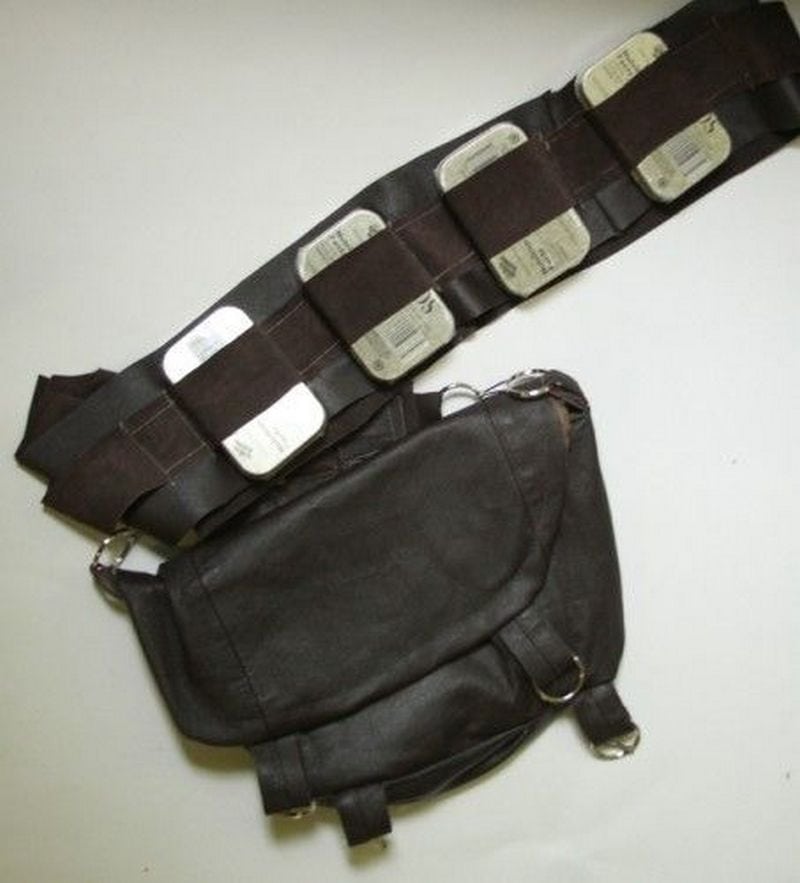
1. Make the cross-body
First, take a look around for a cross-body bag that catches your eye. If you have an old sling bag or body bag that you’re no longer using, perfect! If not, don’t worry – you can always buy or reclaim one from a store or garage sale.
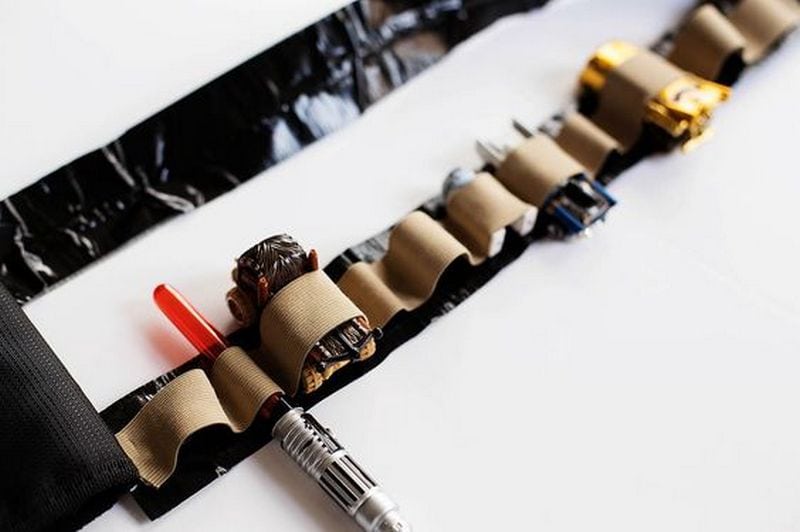
2. Add a duct tape
To add some extra details to your straps, you can cut duct tape or fabric lengthwise using a craft knife or scissors. This will give your straps a little extra personality!
3. Add the loops
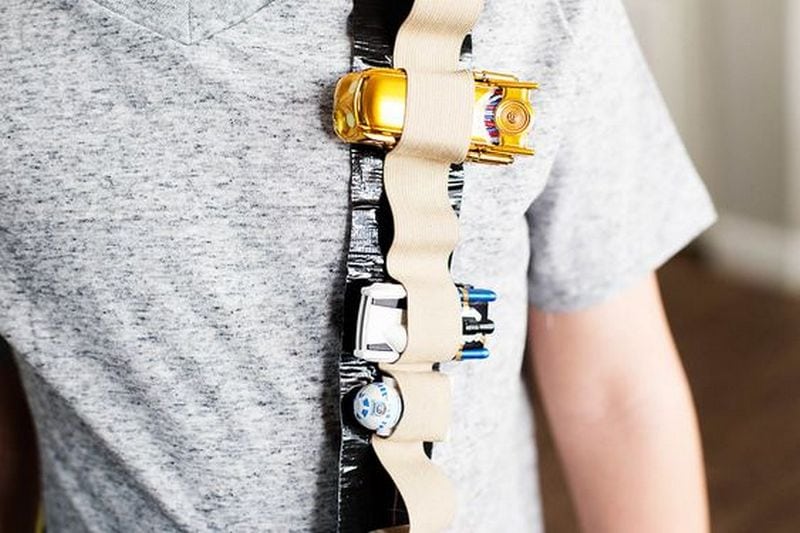
To make the loops, you can use a colored elastic garter band (with your favorite color).
Attach the elastic garter band using hot glue down the strap. Hot glue works well, but you can sew it for more support. Make different sizes of loops. The sizes will differ dispensing on the toys you would like to insert.
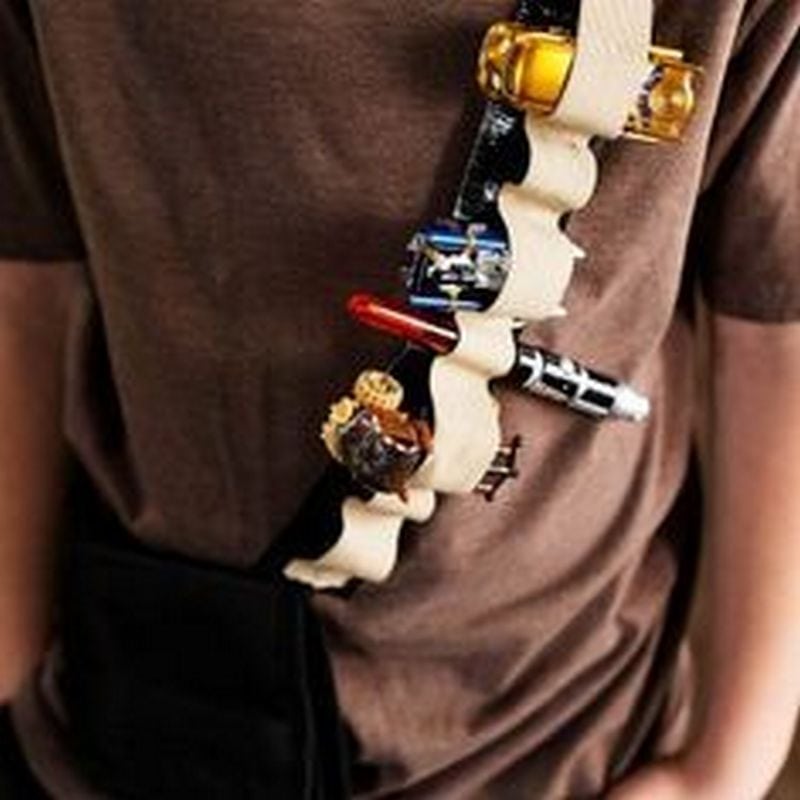
What a great way to keep your child’s toys organized and within reach!
Star Wars miniatures can be easily inserted into this DIY bandolier – making it the perfect gift idea! Your little ones will have a blast with this! They can easily load all their stuff into the bandolier and they’re good to go! 😎
Thanks to Allfortheboys for this great project. You can get step-by-step instructions here…


