Are your kids always insisting on helping you out with doing the laundry? Let them – by making them a cardboard washing machine!
OK, it might not actually clean some dirty clothes, but it will definitely keep the kids busy while you are busy doing the actual laundry!

You’ll love this as it’s so easy to make and it practically won’t cost you anything but a bit of time. You can make a very simple version of it, but we’re quite confident you’re going to enjoy making it as detailed as possible! To make their playset even more realistic, you can give them additional accessories like an empty detergent bottle and an extra small plastic basket for carrying the clothes.

The benefit of building your own DIY washing machine playset is that it’s not just easy and cheap, but it’s also one that your little helper would surely love to have! Money’s no object as you can choose to give your kid the washing machine model that you want!
Building this playset can be a great bonding time with you and your kids. You can teach them how to do it, and they will be your small assistants. This will help them learn new things, boost their creativity, DIY skills, knowledge and confidence.
Get some inspiration from our album below. :)
Do you need an extra washing machine at home for the kids?
You’ll be needing the following tools and materials to build your DIY cardboard washing machine.
Contents
Crafting a Cardboard Washing Machine
Materials
- Used Cardboard Box
- Duct Tape
- Electrical Tape
- Kraft Paper
- Round Laundry Basket
- Round Objects (such as bottle caps; to serve as control switches)
Tools
- Cutter
- Scissors
- Marker
- Glue Gun

Instructions
1. Disassemble the box
If your cardboard is still assembled as a box. You may want to disassemble this, to make it easier for you to design the front or top panel and cut a circle on it. Whatever size you want, as long as you enjoy building it and surely your kids will enjoy to help!
2. Design the front panel
Using the recycled cardboard box, draw the design you desire. First, you can draw a big circle for its door. You can use your laundry basket as a pattern. Then, draw some small circles for the buttons. You can add some, numbers and other features. Then colour them according to what design you want. You can even paint it. Anything creative.
3. Make a door
Since the pattern for the door has been drafted. It’s time to cut the circle. You can choose to have the washing door on the front or at the top. Attach a small and light door handle. Then, re-attach the door using a hinge.
4. Assemble the body
After finishing your design with the door. You can now assemble the box to make the body of the washing machine.
5. Add a laundry basket
before enclosing your box, don’t forget to add your laundry basket. This will serve as the washing basket.
6. Check the sides
Make sure the sides are fully attached. You can use a glue gun and support with a duck to maintain the shape.
Finally, your kids can now enjoy using it. Enjoy!
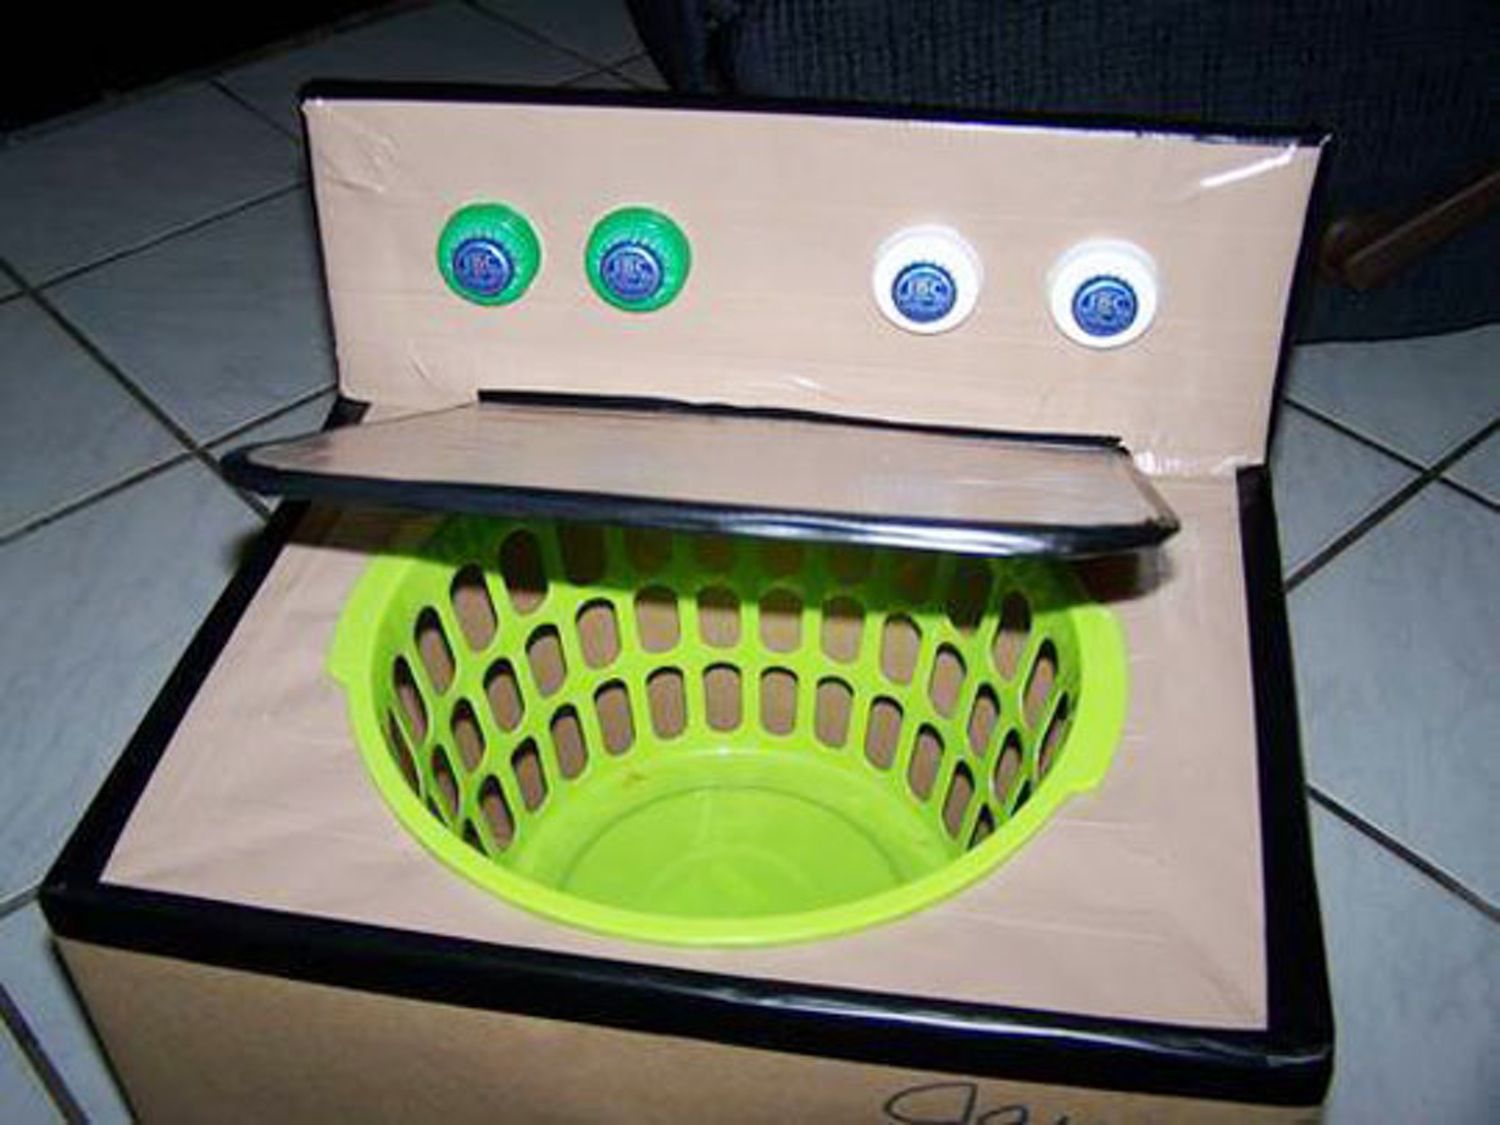
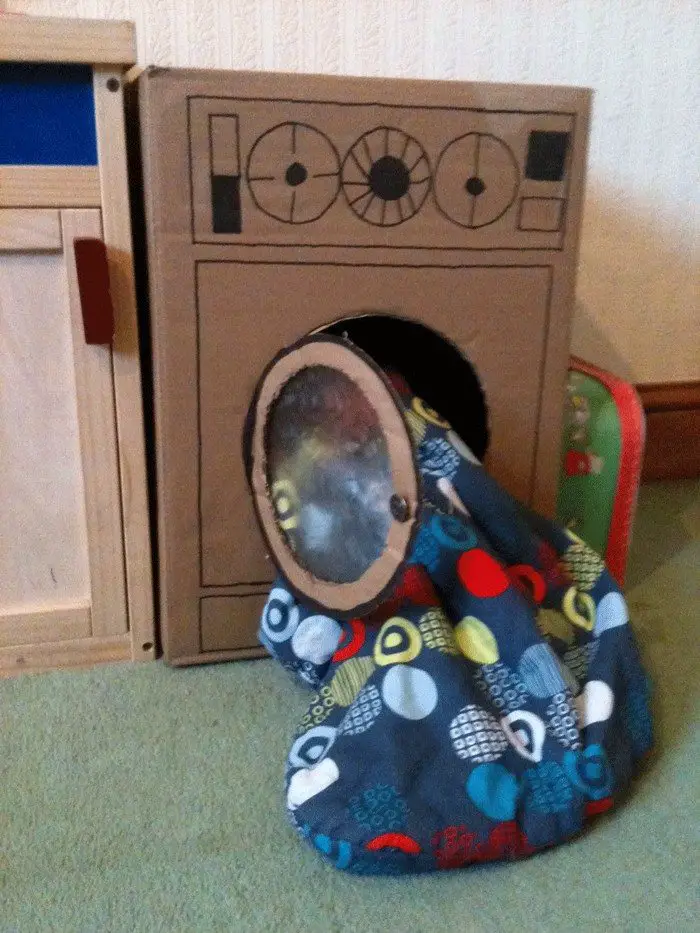
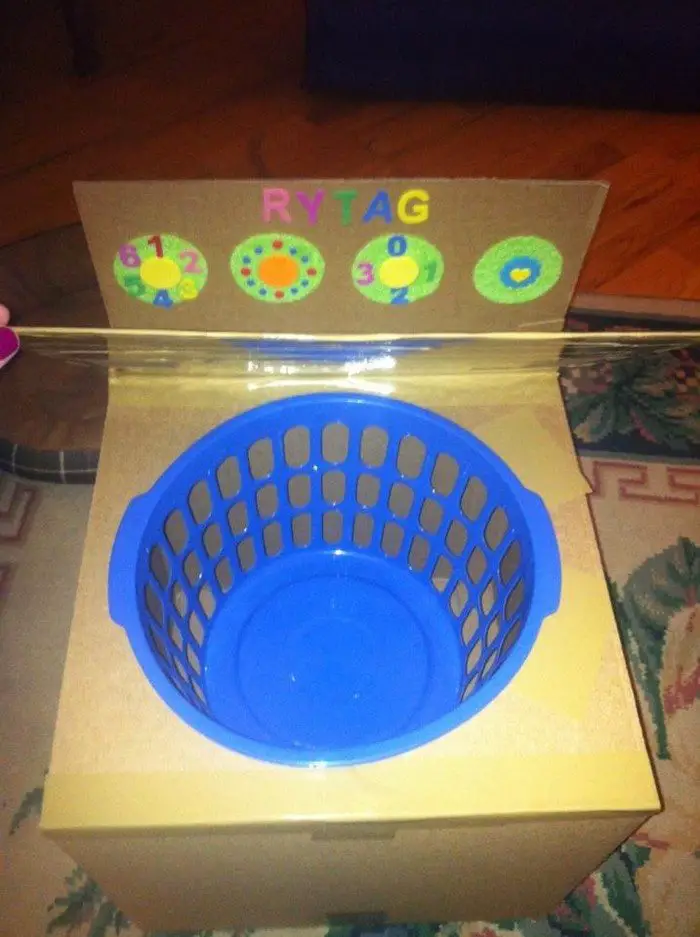
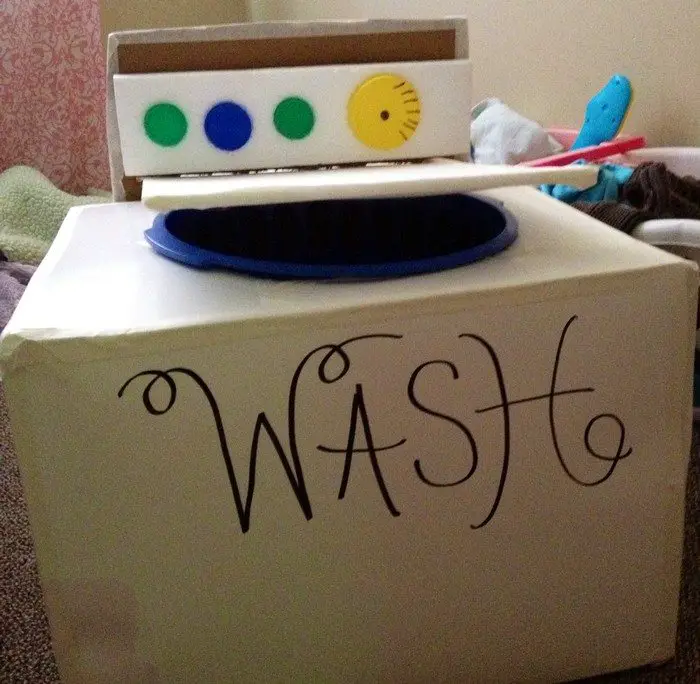
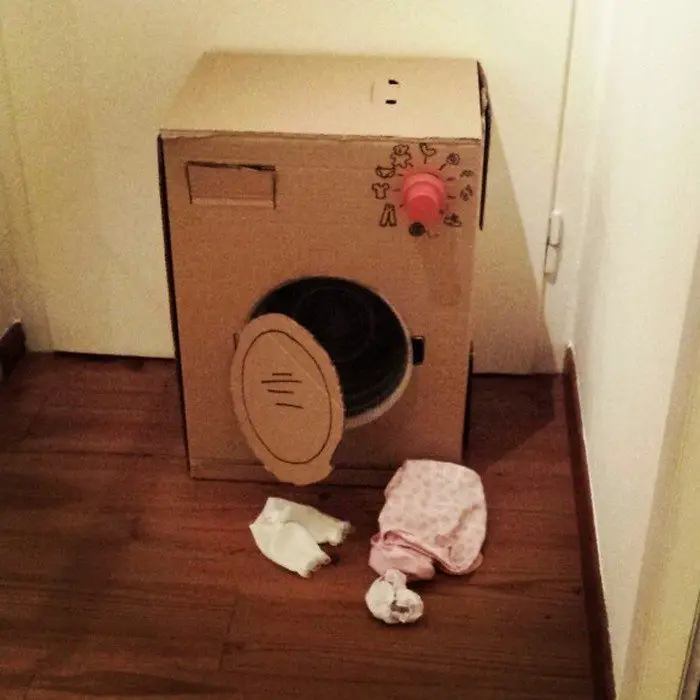
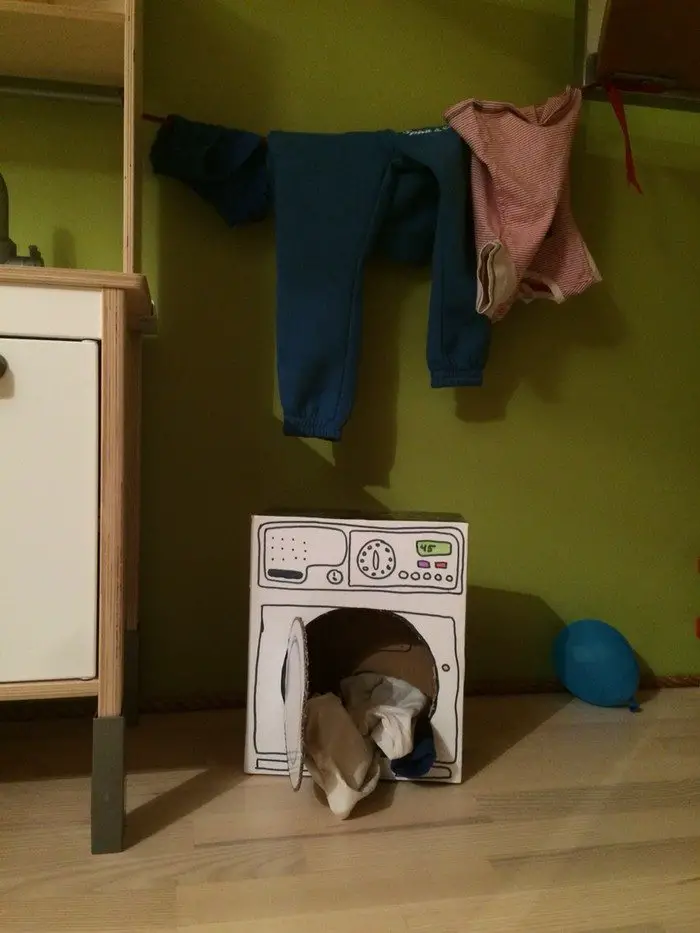
Cute cardboard washing machine ideas for kids
Click on any image to start the lightbox display. Use your Esc key to close the lightbox. ?


Thanks to Nancy Clark for this great project. You can get step-by-step instructions here…
Decorating Your Cardboard Washing Machine
Decorating your cardboard washing machine is where you and your kids can really let your creativity flow. This section is dedicated to transforming a simple cardboard structure into a playful and personalized washing machine.
With a few artistic touches, your cardboard washing machine will become a vibrant part of your child’s imaginative play.
Choose Your Theme
Start by deciding on a theme for your cardboard washing machine. Whether it’s based on your home’s actual washing machine, a cartoon, or even a futuristic design, a theme will guide your decorating decisions. This thematic approach not only makes the process fun but also gives the cardboard washing machine a character of its own.
Paint and Color
Painting is one of the easiest ways to bring your cardboard washing machine to life. Use non-toxic, water-based paints that are safe for kids. You can paint the exterior to resemble a real washing machine or let your child’s imagination run wild with bright colors and patterns. Remember to paint the control panel and buttons, making them stand out for a more realistic look.
Adding Details
For a more detailed cardboard washing machine, consider using markers or colored pencils to add finer elements like dials, labels, and logos. These small touches can make the washing machine look more authentic and provide a great opportunity for educational play, such as learning to read the settings.
Textural Elements
To give your cardboard washing machine texture and dimension, use materials like fabric scraps for a tactile door window, or craft foam for raised buttons. These elements not only enhance the visual appeal but also encourage sensory play, making the washing machine more engaging for young children.
Personalize It
Encourage your kids to personalize the cardboard washing machine with their name or imaginative brand logos. They can use stickers, glitter, or even create a unique emblem that represents their very own laundry service. This personal touch will make the cardboard washing machine truly theirs.
Final Touches
The final step in decorating your cardboard washing machine involves adding any finishing touches that tie the whole look together. This could include attaching a small plastic window for the door or using duct tape for a metallic effect.
By following these steps, you’ll transform a simple cardboard box into a delightful washing machine that sparks joy and creativity in your child’s playtime. The process of decorating together also serves as a wonderful bonding activity, creating memories as vibrant as your cardboard creation.
Educational Benefits of Crafting
Crafting projects like building a cardboard washing machine are not just fun activities; they offer a rich educational experience for children. Through the process of creating something tangible, children can develop a wide range of skills.
This section delves into the educational benefits of engaging in crafting activities, particularly through the construction and decoration of a cardboard washing machine.
Enhancing Fine Motor Skills
Working on a cardboard washing machine requires children to use their hands in precise ways, whether they’re cutting, folding, painting, or gluing. These activities refine their fine motor skills, which are crucial for writing, buttoning clothes, and other daily tasks.
Boosting Problem-Solving Abilities
Assembling a cardboard washing machine from a flat piece of cardboard into a three-dimensional play object challenges children to think critically. They learn to follow instructions, understand spatial relationships, and solve problems when they encounter issues like parts not fitting together as expected.
Encouraging Creativity and Imagination
Decorating a cardboard washing machine allows children to express their creativity and imagination. They decide on colors, patterns, and features, making choices that reflect their personal tastes and ideas. This freedom to create boosts their confidence in their creative abilities and encourages innovative thinking.
Teaching Responsibility and Patience
The process of crafting a cardboard washing machine teaches children the value of patience and responsibility. Projects take time and effort to complete, and children learn the satisfaction of seeing a task through from start to finish. This teaches them the importance of dedication and hard work.
Promoting Environmental Awareness
Using recycled materials like cardboard boxes to build a washing machine introduces the concept of sustainability to children. It teaches them about reusing and repurposing items, highlighting the importance of taking care of the environment by reducing waste.
Enhancing Educational Concepts
Crafting a cardboard washing machine can be an opportunity to incorporate educational concepts such as geometry, for understanding shapes and sizes; basic engineering, for constructing a stable structure; and even literacy, as children might label parts or write instructions. This hands-on approach to learning makes abstract concepts more concrete and understandable.
Fostering Teamwork and Communication
Building a cardboard washing machine can be a collaborative project, teaching children the value of teamwork and effective communication. Working together with siblings, friends, or parents, children learn to share ideas, provide feedback, and support each other in achieving a common goal.
Crafting, especially through projects like making a cardboard washing machine, offers a holistic educational experience. It merges play with learning, creativity with critical thinking, and individual effort with collaborative work. This not only enriches a child’s developmental journey but also instills a love for learning through doing.
Conclusion
Creating a cardboard washing machine is an engaging and rewarding project that blends creativity with learning. It offers children the chance to develop a wide array of skills, including fine motor abilities, problem-solving, and environmental awareness. This craft encourages both individual expression and teamwork, making it a fantastic bonding activity for families. Ultimately, building a cardboard washing machine transforms a simple box into a treasure trove of educational opportunities and fun.
If you liked this project, you might also like to view DIY Cardboard Bonsai Tree…


