Do you have any old t-shirts that you don’t wear anymore but don’t want to give away?
Why make beautiful rugs from old T-shirts! It’s a beautiful project you can do, especially if your shirts are in rich and vibrant colors!

OK – this project will require a bit of patience because it would take quite some time to make. BUT the process is really fun more so if you are into this kind of craft. You will even want to make another one once you see your first finished product!
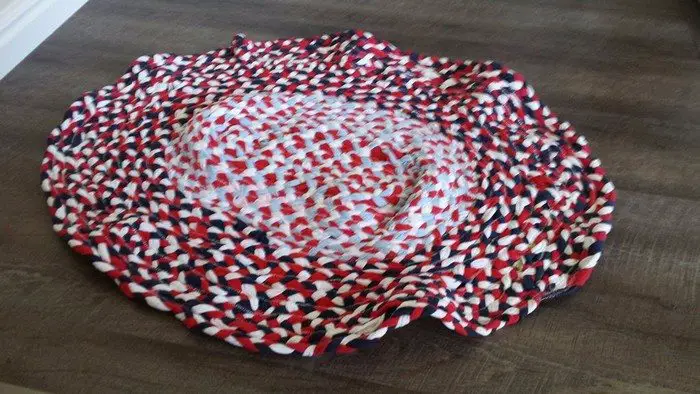
People who’ve tried it already are actually more concerned about its tendency to curl up like a bowl. To prevent this from happening, use shirts that are 100% cotton. A cotton/poly blend would work as well. Basically, you simply need to avoid using fabric that stretches.
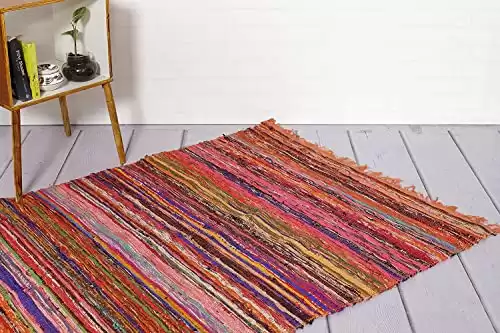
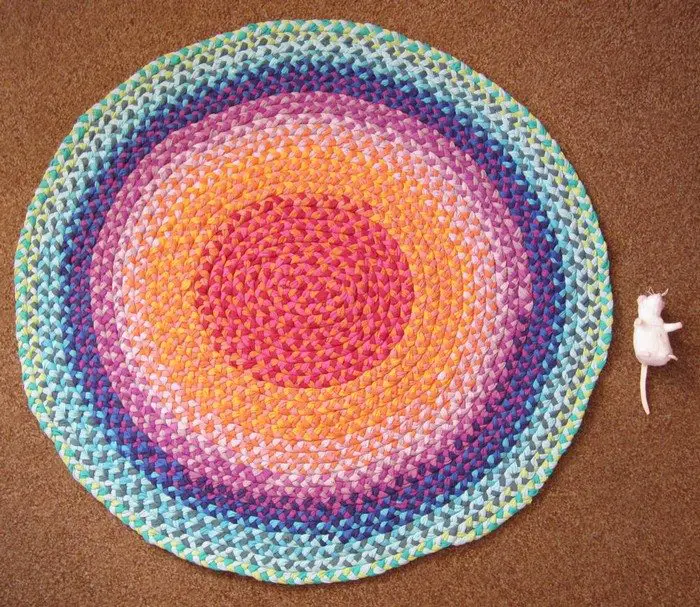
This Rug is made from recycled cotton fabric, hand braided and then stitched together, and can be used from both sides.
Also, do not braid your t-shirt yarn too tightly, and make sure the tension is even all throughout. You will know that you are braiding it with the right tension when it stays flat as you coil it.

Further guidelines on how to make a t-shirt rug successfully are in the step-by-step tutorial below. So gather your old t-shirt now and start learning how to make your own braided t-shirt rug!
Do you know anyone who would also like to try this project?
Contents
How to Knit Rugs from Old T-Shirts
Materials
- 5-10 Old T-Shirt (5 shirts make a small bedside rug)
- Needle and Thread
Tools
- Scissors
- Sewing Machine (optional)
Steps

Cut it: To turn rugs from old T-shirts, select a few garments from your closet, a thrift store, or your Aunt Marcy’s NASCAR t-shirt collection. I used 5.5 t-shirts to make a rug that is approximately 18″ in diameter, but if you have more time and patience than I do or if you want a bigger rug, you could use more shirts. The next step is to prepare the t-shirts by cutting them and turning them into yarn. I used a method that I found on YouTube but I took some photos of this step here.
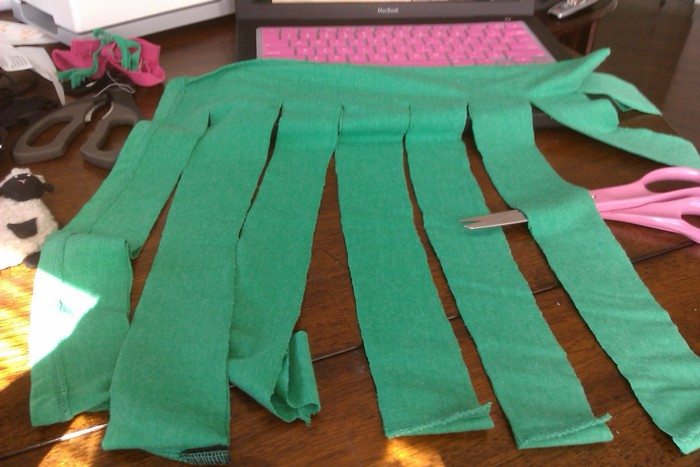
You will want to flatten the shirt out in front of you, but face it sideways so that one sleeve points toward you and the other points away from you. Next, measure out every 2 inches from the bottom seam of the shirt (which is on the left or right side now), all the way to under the sleeves of the shirt. Mark with chalk or something that won’t be obnoxiously permanent. You will want to start cutting on each mark or line you made, but leave 3-4 inches of the shirt still intact on the far side. Do this up to the sleeves, where you should cut all the way to the other seam.
After you cut all of these lines, you can pick up the shirt and arrange it so it looks like a ribcage in front of you as shown.
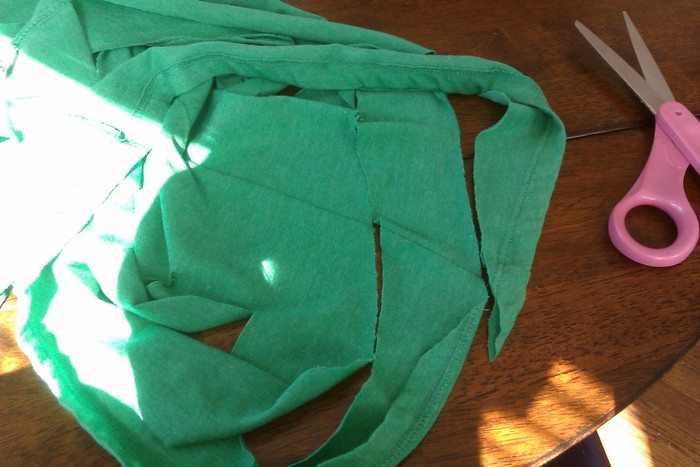
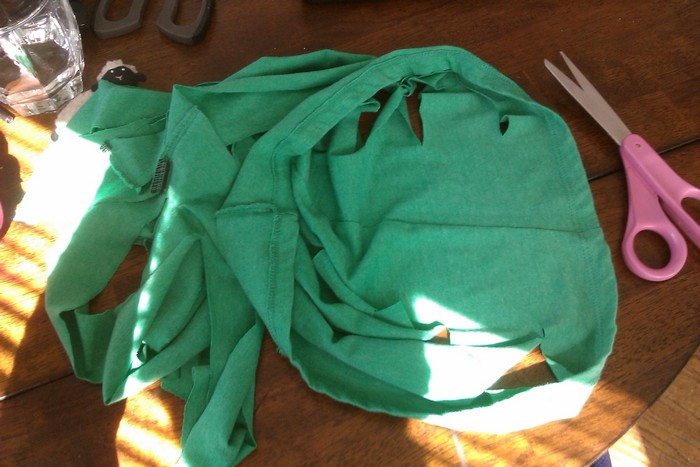
See that bit of fabric that you didn’t cut? Now you’re going to cut it diagonally so that you will end up creating one long piece of fabric from your t-shirt. This is really hard to explain, but as aforementioned, there are a crap load of YouTube videos explaining how to do this so feel free to search around if you need more coherent direction.
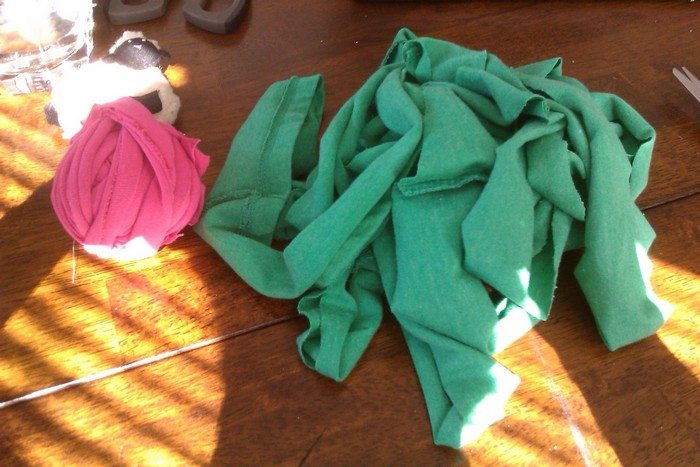
You should end up with a really long strip of fabric from your t-shirt. Stretch this out really, really well and wind it up into a ball so it is more manageable. Repeat for your other shirts.

Braid it: After you have prepared all of your t-shirts and made them into yarn, it’s time to start your braid. I used a sewing machine to start the braid and for all of my transitions, but it was only because I was so pumped to have just gotten the sewing machine that I “had” to use it. You could totally hand-sew all of these or knot them for a more care-free look.
I started by sewing the end of one yarn strip to the middle of a different colored strip to create a “T” shape. Those were the 3 pieces of the beginning of my braid and when I began to braid, it covered up the stitches (awesome!). Keep braiding until you need to sew on another color. I added a new color by sewing diagonally with the fabric placed right side to right side at a 90 degree angle, and trimming off the tiny corner. This way, when you stretch it out, the strand smoothly transitions from one color to the next. This kind of seam is used for binding in quilts also.
Keep braiding until you have added all of your shirts. You can use an office clip or a chip clip to keep the braid from unraveling if you get tired and want to take a (2 week) break like I did. It helps to keep the yarn all balled up while braiding so that it doesn’t become a big, tangly mess.
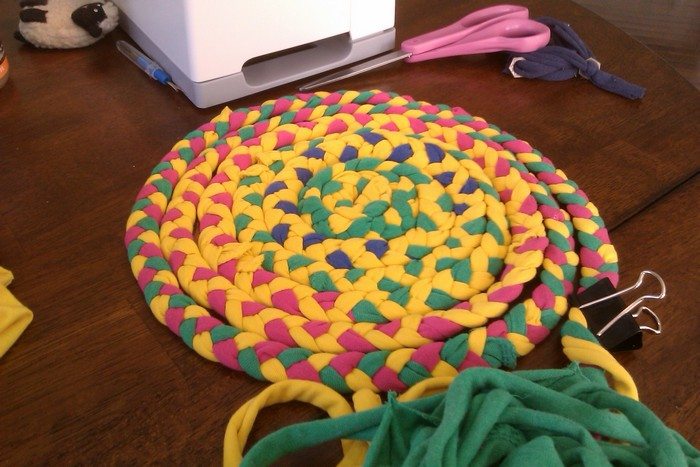
Coil it: Start pre-coiling your rug. Coil it somewhat gently so it doesn’t pucker up into a braided t-shirt bowl (LOL). But try not to let any gaps show from one ring to the next. Pre-coiling this braid will help you stay organized while you are sewing and will also give you an idea of how big your rug is going to be/if you need to add or remove shirts. I was meticulous (read: OCD) about my braid and made sure there was a distinct “top” side and “bottom” side while braiding, so it may be worth mentioning that I pre-coiled with the “bottom” side facing up, as that was the side I wanted the stitching to be on.
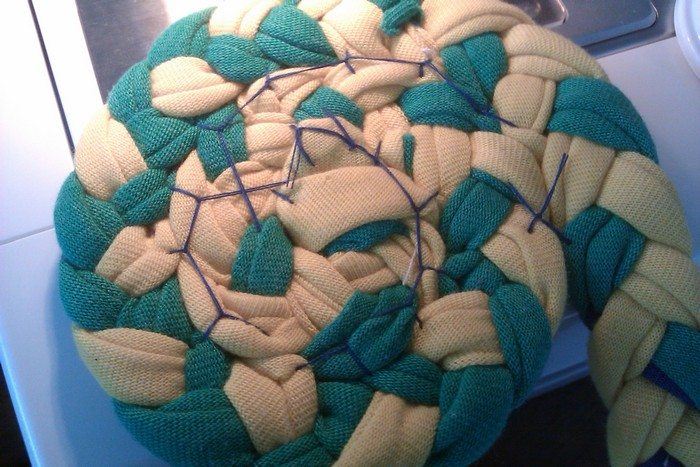
Sew it: Start sewing your braid together. I used a variation of a blanket stitch and started in the middle, working my way around and out of the spiral. This is the part that took FOREVER. Seriously. I was anticipating sewing this on the machine, but lo and behold, the dang braid was too thick to even think about squeezing under the presser foot. So, hand sew I did.
When you get to the end of your blanket, weave in the ends of your braid into the previous ring and sew to secure it.
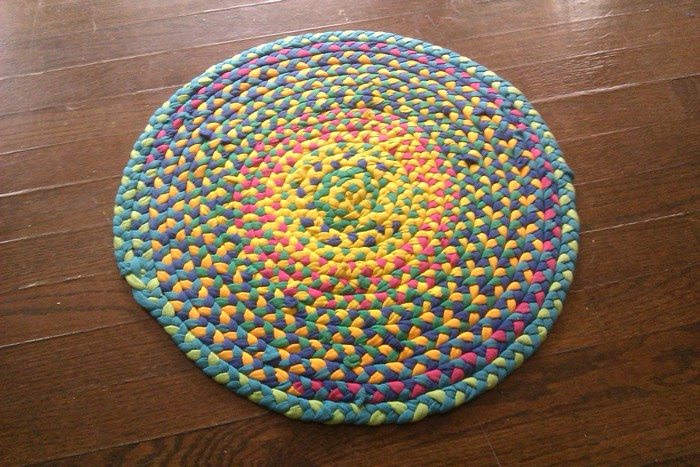
Lay it: If you got through all of those steps, throw that rug down and relish in your own awesomeness! Whew.
Thanks to suzelac for this great project!
Click on any image to start the lightbox display. Use your Esc key to close the lightbox.![]()

Design Techniques and Patterns for T-Shirt Rugs
Creating rugs from old T-shirts is not just an eco-friendly way to recycle but also a creative outlet for expressing personal style and adding a cozy touch to any room. This process allows you to transform unworn or outgrown T-shirts into a functional piece of art.
In this guide, we will explore various design techniques and patterns that can elevate the simple act of rug making into a crafty endeavor. By repurposing old T-shirts, we not only give them a second life but also contribute to a more sustainable living.
Color Selection and Arrangement
Choosing the right colors for your rug from old T-shirts is crucial in setting the tone and mood for the space it will adorn. Vibrant and contrasting colors can create a bold statement piece, while soft, complementary hues offer a more subdued and harmonious look.
Consider the color scheme of the room where the rug will be placed to ensure it complements the existing décor. Mixing different shades and tints of the same color can add depth and texture to the rug, making it more visually appealing.
Braiding Techniques
The traditional braiding technique is a popular choice for making rugs from old T-shirts. It involves cutting the shirts into strips, stretching them to create yarn, and then braiding these strips together.
To add a unique twist to your rug, experiment with different braiding styles such as fishtail, four-strand, or even a five-strand braid. Each style offers a distinct texture and pattern, allowing for customization and creativity in your rug design.
Coiling Patterns
Coiling is another technique that can be used to create beautiful rugs from old T-shirts. This method involves winding the T-shirt yarn into a tight spiral and then sewing or gluing the coils together.
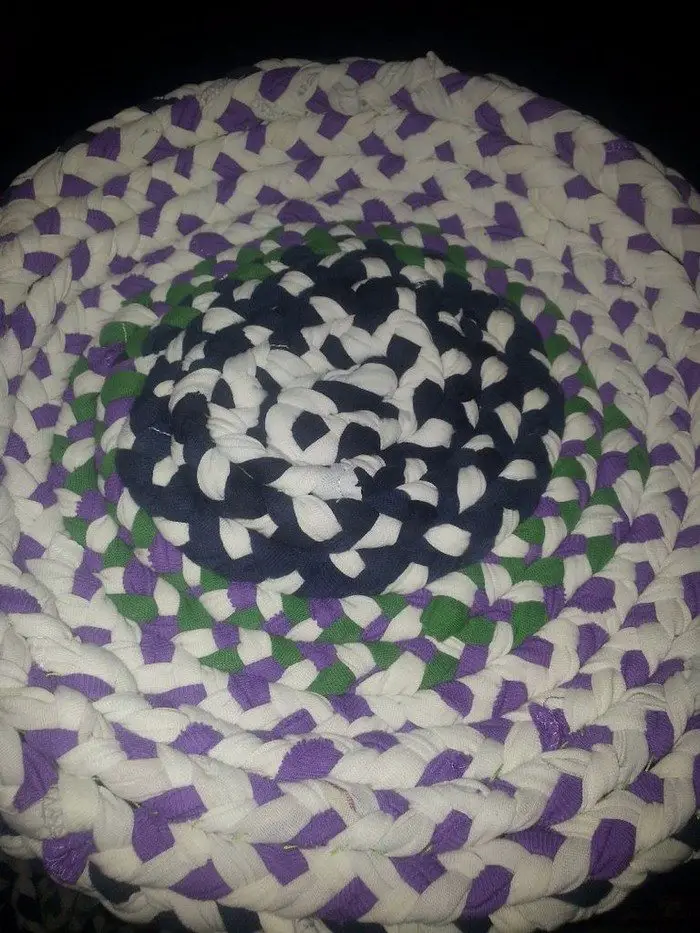
You can vary the size of the coils or alternate between different colors to create patterns such as spirals, concentric circles, or even abstract shapes. Coiling allows for a lot of flexibility in design, enabling you to make rugs from old T-shirts of any size and shape.
Crochet and Knitting
For those with crochet or knitting skills, rugs from old T-shirts can be crafted using these techniques. Crocheting or knitting T-shirt yarn can produce intricate patterns and textures not achievable with braiding or coiling.
From simple single crochet stitches to complex patterns like granny squares or hexagons, the possibilities are endless. This method also allows for greater control over the rug’s size and shape, making it easier to customize to specific dimensions.
Mosaic and Patchwork Designs
Creating a mosaic or patchwork rug from old T-shirts is a great way to repurpose smaller scraps of fabric. This technique involves cutting the T-shirts into squares or rectangles and sewing them together to form a larger piece. The resulting patchwork can be as simple or complex as desired, with the opportunity to play with color blocking, geometric patterns, or a random, eclectic mix.
Making rugs from old T-shirts is a versatile and rewarding craft that offers endless possibilities for customization and creativity. By experimenting with different design techniques and patterns, you can create a unique piece that adds warmth and personality to your home. Whether you prefer the traditional look of braided rugs from old T-shirts, the intricate textures of crochet and knitting, or the playful patterns of mosaic and patchwork, there’s a method to suit every style and skill level.
Tools and Techniques for Efficient Rug Making
Crafting rugs from old T-shirts is an innovative and sustainable approach to home decor. This method not only recycles materials that might otherwise be discarded but also offers a personalized touch to any living space. Efficient rug-making from old T-shirts requires the right set of tools and techniques.
This guide outlines essential tools and strategies to streamline the rug-making process, ensuring that your project is both enjoyable and successful.
Essential Tools for Rug Making
- Scissors: A sharp pair of scissors is vital for cutting T-shirts into strips or yarn. Fabric scissors are preferable as they can easily cut through multiple layers of fabric, making your work faster and more precise.
- Rotary Cutter and Cutting Mat: For those who seek efficiency and accuracy in cutting, a rotary cutter and cutting mat are invaluable tools. They allow for quick and precise cuts, saving time and reducing fabric waste.
- Crochet Hook or Knitting Needles: If you’re crocheting or knitting your rugs from old T-shirts, the right size of hook or needles is crucial. For T-shirt yarn, larger hooks or needles (size N/P or higher) are recommended to accommodate the bulkier fabric.
- Sewing Needle and Thread: A sturdy sewing needle and thread are necessary for sewing the ends of T-shirt strips together or for coiling and stitching the rugs from old T-shirts base.
- Measuring Tape: To ensure consistency in strip size and rugs from old T-shirts dimensions, a measuring tape is essential. Accurate measurements contribute to the uniformity and aesthetic appeal of the finished rug.
Preparing T-Shirt Yarn
- Streamlining Cutting: To expedite the cutting process, fold T-shirts in a way that allows multiple layers to be cut at once. Marking cutting lines with chalk or a fabric marker can also help maintain even strip widths.
- Stretching: After cutting the T-shirt strips, stretch them out to create yarn. This step not only elongates the fabric but also encourages the edges to curl inwards, which is beneficial for the braiding or crocheting process.
- Braiding and Crocheting
- Maintaining Tension: Keeping consistent tension is crucial for an even and flat rugs from old T-shirts. Practice maintaining steady pressure on the T-shirt yarn as you braid or crochet to prevent puckering or curling.
- Joining Strips Efficiently: Master quick methods for joining new strips of T-shirt yarn to continue your work seamlessly. Techniques such as the no-sew loop method can save time and reduce bulk in the finished rugs from old T-shirts.
Coiling and Sewing
- Systematic Coiling: Begin by coiling your rugs from old T-shirts on a flat surface to ensure it doesn’t pucker or become bowl-shaped. Pinning the initial rounds can help maintain the shape as you sew rugs from old T-shirts.
- Backstitch for Strength: When sewing your rugs from old T-shirts, use a backstitch for areas under tension. This stitch is stronger than a running stitch and will help your rugs from old T-shirts withstand wear and tear.
- Finishing Touches
- Trimming for Uniformity: After completing your rugs from old T-shirts, trim any uneven ends or loose threads. This step is crucial for achieving a polished and professional look.
- Washing and Drying: Washing your finished rug can help soften the fabric and reduce any remaining shrinkage. Lay flat to dry to maintain shape.
Knitting rugs from old T-shirts is a fulfilling project that combines creativity with sustainability. By utilizing the right tools and techniques, you can streamline the rug-making process, resulting in beautiful and durable rugs for your home. Whether you’re a seasoned crafter or a beginner, these tips can help you efficiently create a unique piece that reflects your personal style.
Color Coordination Tips for Beautiful Rugs
Crafting rugs from old T-shirts is a unique and sustainable way to add a splash of color and personality to any room. The success of these projects often hinges on effective color coordination, which can transform a simple rug into a stunning piece of decor.
This guide will provide you with tips on selecting and combining colors to create visually appealing rugs from old T-shirts, enhancing the aesthetic of your living space.
Understanding Color Theory
- Basic Color Schemes: Familiarize yourself with basic color schemes such as monochromatic, analogous, complementary, and triadic. These schemes offer a roadmap for selecting colors that harmonize well together.
- The Color Wheel: Use the color wheel as a guide to understanding which colors complement and contrast with each other. For example, colors opposite each other on the wheel (complementary colors) can make each other stand out when used together in a rug.
Selecting Your Palette
- Start with Inspiration: Draw inspiration from a favorite T-shirt, a piece of art, or the decor of the room where the rug will be placed. This can serve as the foundation for your color palette.
- Balance in Colors: When making rugs from old T-shirts, aim for a balance between warm (reds, oranges, yellows) and cool colors (blues, greens, purples). This balance can create a dynamic yet harmonious look.
- Consider Room Colors: Reflect on the existing colors in the room. Choose T-shirt colors that complement or subtly contrast with the room’s color scheme to ensure your rug enhances the space.
Playing with Patterns and Textures
- Mixing Patterns: Don’t shy away from mixing striped, solid, or graphic T-shirts. The key is to maintain a cohesive color theme throughout the rug. This approach adds depth and interest to the finished product.
- Texture Variation: Different weaves and textures of T-shirt fabric can add an extra layer of richness to your rug. Experiment with combining smooth, ribbed, or jersey textures within the same color family for a subtle yet impactful effect.
Testing Your Choices
- Layout Before Crafting: Arrange your selected T-shirt strips or yarns next to each other before starting the rug. This allows you to visualize the color combination and make adjustments as needed when crafting rugs from old T-shirts.
- Lighting Matters: View your color layout under different lighting conditions (natural and artificial) to ensure the colors work well together at all times of the day as you make rugs from old T-shirts.
Adjusting for Harmony
- Adding Neutrals: If your color scheme feels too vibrant or overwhelming when making rugs from old T-shirts, incorporate neutral shades (white, black, gray, beige) to tone it down and add a calming effect.
- Accent Colors: Use bold or bright colors sparingly as accents among more subdued shades. This technique can add pops of interest without dominating the overall design.
Effective color coordination is key to creating beautiful rugs from old T-shirts. By understanding color theory, selecting a harmonious palette, and experimenting with patterns and textures, you can craft a rug that not only recycles materials but also serves as a focal point of your decor. Remember, the goal is to express your style while achieving balance and harmony in your creation.
Conclusion
Knitting rugs using old T-shirts transforms unused textiles into cozy, eco-friendly home decor. This creative endeavor allows for endless customization in terms of color, pattern, and size. The result is a unique and sustainable addition to any room, showcasing both crafting skill and environmental consciousness.
For more projects that involve knitting, check out our crochet patterns 101 guide!!


