Are you an expecting mother looking for a comfortable baby sleeping bag for your little one? Or maybe you know someone who is? Look no further! This easy DIY project will provide your baby with a warm and cozy sleeping bag, perfect for those first few months – a pillowcase baby sleeping bag!
You’ve probably been reminded to “enjoy the journey” at some point or another. That’s wise advice for most of life’s adventures, but it’s particularly true for the 40 weeks a woman spends with a baby growing inside her.

Women today celebrate pregnancy like never before. The new attitude of expectant moms is one of cheerful anticipation and pride in their changing bodies. Many embrace this positive spirit by emphasizing what’s fun – and even funny – about pregnancy.
So here’s something expecting moms or moms with newborns will surely love – a pillowcase sleeping bag for infants!
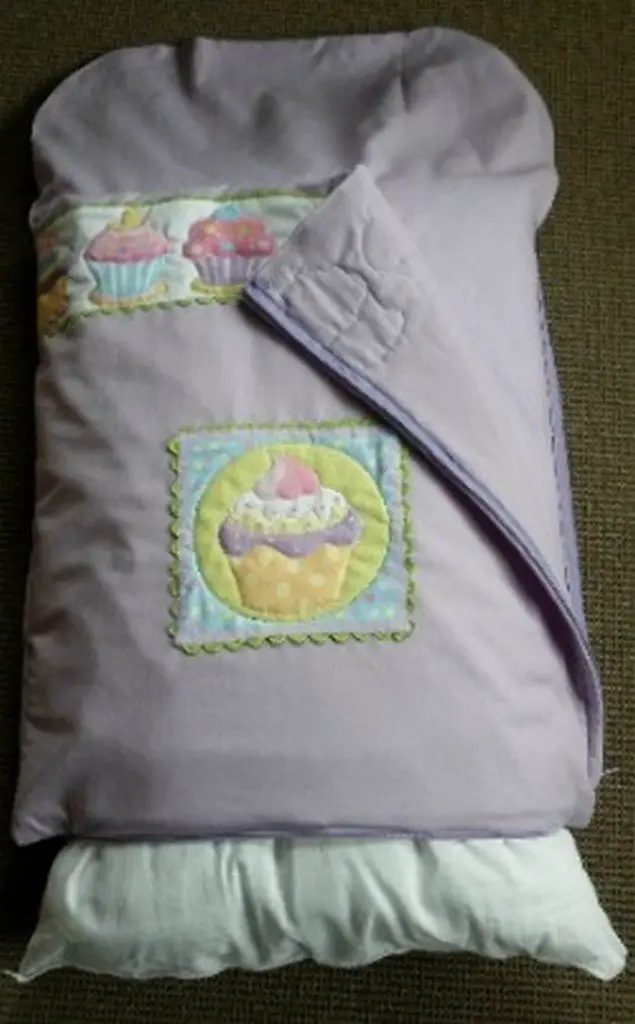
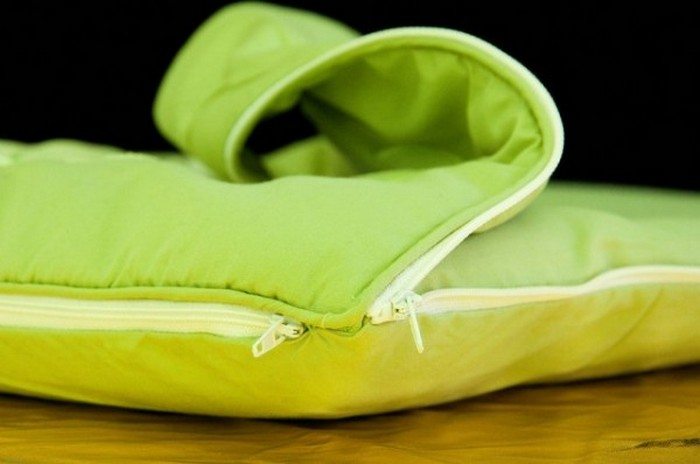
It’s basically a pillowcase that has a side zipper for opening the ‘blanket’, making it easy to place the baby in or take him/her out of the sleeping bag. Newborns like to be wrapped in a warm and cozy blanket, so this will help your baby feel snug and secure while sleeping.

To clean it, you simply remove the pillow by unzipping the bottom (not the baby, silly… the pillowcase!)
Baby sleeping bags like this are sold online, however, shipping is not always available for some locations. So if you find that the baby sleeping bag you like but they don’t ship to your location, why not DIY?!
A DIY pillowcase baby sleeping bag is an easy project. You can even finish your first one in around four hours! When it’s made with love, what could possibly go wrong? You would love it, your baby would too!
Are you an expecting mother? Or perhaps you know someone who is? This pillowcase baby sleeping bag is definitely a great gift idea!
How to Make a Pillowcase Baby Sleeping Bag
Materials You’ll Need to Create a Pillowcase Sleeping Bag for Your Baby:
- Pillowcases
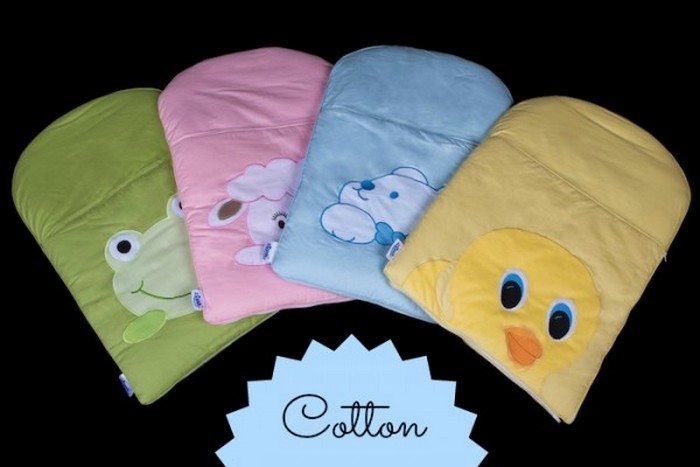
- Choose two standard pillowcases, one for the front and one for the back of the sleeping bag, that are made of snug and comfortable materials like cotton or flannel.
- Pillow or stuffing
- You may opt to use a small pillow or polyester fiberfill as alternative stuffing.
- Zippers
- Obtain two zippers, measuring 16 and 18 inches respectively. Utilise the 16-inch zipper as the opening of the pillowcase baby sleeping bag’s lower portion, and the 18-inch zipper for convenient entry to your infant from the side.
- Machine Washable Batting
- Batting is used to provide extra warmth to the pillowcase baby sleeping bag. Choose batting that is machine washable and won’t bunch up or shift around.
- Decoration Fabric
- You can use decoration fabric to add a personalized touch to the pillowcase baby sleeping bag. Choose a soft and non-toxic fabric that complements the pillowcases.
- Ric Rac
- Ric rac is a decorative trim that you can add to the pillowcase baby sleeping bag to make it look more charming and cute.
Utilizing soft and non-toxic materials while following instructions carefully will ensure a safe and cozy sleeping space for your baby.
Tools
To create a pillowcase baby sleeping bag, you will need the following:
- Sewing machine
- This will help you sew the different pieces of fabric together easily and quickly.
- Scissors
- You will need a good pair of scissors for cutting tasks.
- Pins
- Pins will help hold the fabric pieces together as you sew them.
- Tape measure
- A tape measure will help you measure and cut the fabric to the right size.
- Chalk or fabric marker
- This will help you mark the fabric where you need to sew or cut.
- Seam ripper
- This tool comes in handy if you need to undo a stitch or two.
- Thread
- You will need a thread that matches the colour of your fabric.
- Sewing needles
- You will need needles to thread your sewing machine and hand-sew certain parts of the project.
Use these tools to craft a snug and comfortable baby sleeping bag from a pillowcase.
Step-by-Step Procedure
When designing a baby sleeping bag pillowcase, it is important to keep in mind that pregnancy should be a joyful journey. Creating a cozy pillowcase baby sleeping bag can be a joyful and fulfilling project that reflects the new and positive attitude of today’s expectant moms.
1. Rounding the Corners of the Pillow
To create a safe and comfortable pillowcase baby sleeping bag, it’s important to round the corners of the back pillowcase. This is because the sharp corners can be uncomfortable and also create a restrictive shape that limits movement.
To round the corners, you can use a dinner plate as a template. Simply place the plate at the corner of the pillowcase and trace around it with a pen or fabric chalk. Make sure that the traced line is smooth and even. Using fabric scissors, cut along the traced line, being cautious not to cut too close to the fabric’s edge.
2. Making the Blanket (Front)
After rounding out the back pillowcase’s corners, proceed with modifying the second pillowcase by cutting it to size and decorating it. This pillowcase will be used as the top and blanket of the pillowcase baby sleeping bag.
The decoration process provides a chance to showcase your creativity and customize the pillowcase baby sleeping bag. You have the freedom to choose any fabric, use fabric paint, or incorporate applique designs.
Before shortening the pillowcase, accurately measure and mark the desired length, ensuring enough fabric for the baby’s legs to fit comfortably. Utilize fabric scissors to meticulously trim off the excess fabric. Afterwards, you may decorate the newly shortened pillowcase.
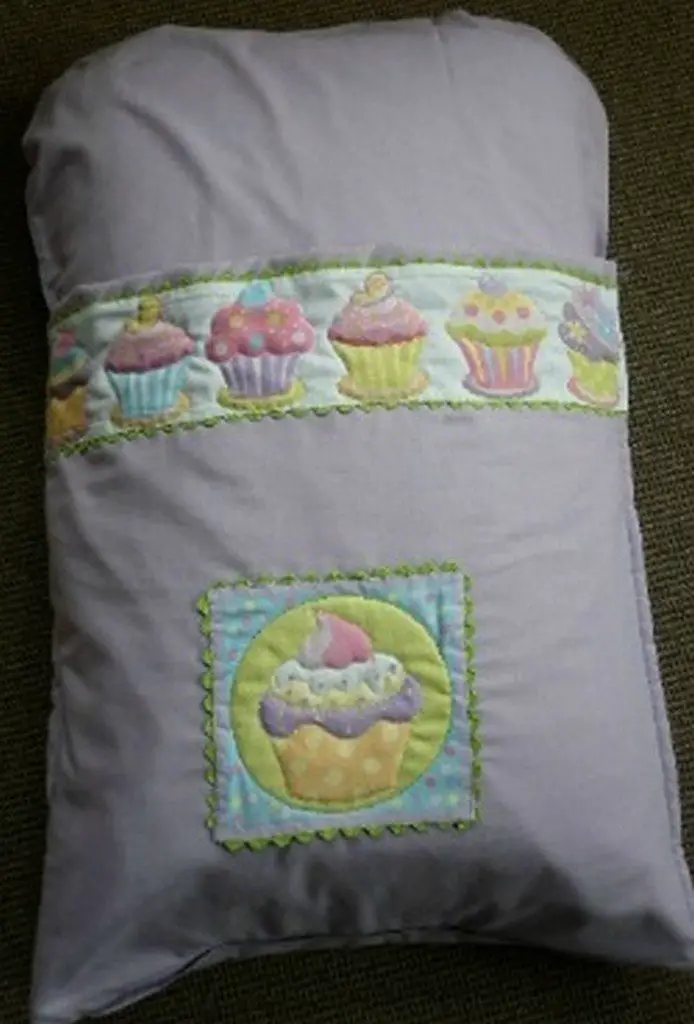
This tutorial demonstrates how to decorate a front pillowcase with cupcake fabric. The decorator fabric can be attached to the pillowcase using a sewing machine or hand-sewn.
You can opt for alternative embellishment techniques such as iron-on patches, embroidery or stencilling. There is a wide array of decoration choices at your disposal, enabling you to produce a unique and personalised pillowcase baby sleeping bag for your infant that is fashionable and cozy.
3. Batting Insert
After shortening and decorating the front pillowcase, the next step in creating a pillowcase baby sleeping bag for your baby is to insert the batting. The batting will provide insulation and help to keep the baby warm while they sleep. It is important to choose batting that is machine washable and safe for use with babies.
To insert the batting, simply place it inside the decorated pillowcase and smooth out any wrinkles or bumps. You can use your hands to gently fluff up the batting and distribute it evenly throughout the pillowcase.
Next, you may want to do some outline quilting around the decoration on the front pillowcase. Although optional, securing the batting and enhancing the pillowcase baby sleeping bag’s appearance can be achieved through this step.
Quilting stitches can be created using either a sewing machine or hand sewing, based on personal preference and proficiency. There are no limitations to the quilting patterns or styles one can use, ranging from basic straight lines to intricate designs.
Once the batting is inserted and the quilting is complete, the pillowcase baby sleeping bag starts to take shape. The next steps will involve attaching zippers and joining the two pillowcases together to create a functional and comfortable sleeping space for your baby.
4. Joining the Pillowcase
The next step in creating the pillowcase baby sleeping bag is to join the two pillowcases together. Begin by stacking the two pillowcases, with the decorated one atop the plain one. Ensure that the left sides of both pillowcases are flush.
To combine the pillowcases, one must unpick the seam of the back pillowcase to accommodate the insertion of the second pillowcase. Carefully use a seam ripper or scissors to unpick the left-hand seam of the back pillowcase.
Insert the left side of the second pillowcase into the opening, ensuring alignment with the back pillowcase. Stitch the pillowcases together along the left edge using a sewing machine or hand-sewing needle and thread for a secure seam. The two pillowcases will form a long tube-shaped structure, creating a pillowcase baby sleeping bag.
5. Adding the Zipper
After joining the pillowcases, attach a zipper to the open edge at the bottom of the back pillowcase. Begin by unpicking the seam at the bottom of the back pillowcase where it will be joined to the front pillowcase, leaving a gap for inserting and removing the pillow from the sleeping bag.
Align the 16″ zipper onto the unfolded edge of the rear pillowcase and secure it with pins. Ensure that the zipper teeth are oriented towards the interior of the pillowcase. Subsequently, stitch the zipper to the material edge with a sewing apparatus or needle and thread, taking care to maintain precision.
Test the zipper’s smooth operation after securely attaching it. This allows effortless insertion and removal of the pillow from the sleeping bag, facilitating easy replacement or washing. Almost finished and ready for use is the baby’s pillowcase sleeping bag with a firmly attached zipper.
6. Final Step
Join the front and back pillowcases on the right-hand side using the 18″ zippers to complete the baby sleeping bag pillowcase. This zipper will function as the entry point for the baby into the pillowcase baby sleeping bag.
Align the zipper face down with the open edge of the back pillowcase and secure it with pins and stitch it. Align the other side of the zipper face down with the open edge of the front pillowcase, ensuring the two sides match up, and secure it with pins. Stitch it in place using the same technique as before.
After securing the zipper, turn the sleeping bag inside out. Next, place a pillow into the rear pillowcase to establish a plush and cozy sleeping surface for your infant. This pillowcase baby sleeping bag is a convenient and adaptable choice for parents, as the pillow can be effortlessly extracted for cleaning or substitution.
Click on any image to start the lightbox display. Use your Esc key to close the lightbox.![]()


Thanks to All About Quilts for sharing tips and strategies on how to make a pillowcase baby sleeping bag.
)
The Wrap Up
Making a pillowcase baby sleeping bag in six fun steps offers a rewarding and practical solution for parents seeking a cozy and safe sleep environment for their little ones. By following this DIY project, you not only create a personalized sleeping bag tailored to your baby’s needs but also enjoy the satisfaction of crafting something with your own hands.
This DIY project combines creativity with functionality, allowing you to repurpose a pillowcase into a comfortable and convenient sleeping bag for your baby. The simplicity of the process, combined with the opportunity for customization, makes it accessible to novice crafters while still offering a sense of accomplishment upon completion.
Furthermore, by making your own baby sleeping bag, you have control over the materials used, ensuring that they are safe and suitable for your child’s delicate skin. This project also promotes sustainability by repurposing existing materials rather than purchasing new ones.
Moreover, the versatility of the finished product allows for various uses beyond just sleeping, such as travel, outdoor activities, or even as a thoughtful gift for friends or family with young children.
Overall, making a pillowcase baby sleeping bag in six fun steps is a fulfilling and practical endeavour that offers numerous benefits. From creating a cozy sleep environment for your baby to fostering your creativity and craftsmanship, this DIY project is sure to delight both you and your little one. So why not give it a try and embark on this enjoyable journey of crafting something special for your baby?
Frequently Asked Questions
1. Is it safe for babies to sleep in a sleeping bag?
Yes, sleeping bags designed for babies are considered safe sleep options. However, it’s essential to follow safe sleep guidelines, such as ensuring the sleeping bag fits properly, maintaining a comfortable room temperature, and avoiding loose bedding or toys in the crib.
Inspect the sleeping bag regularly for any signs of wear or damage. Check for loose seams, broken zippers, or worn-out fabric, and repair or replace the sleeping bag if necessary.
Create a safe sleeping environment for your baby by placing them on their back to sleep, on a firm mattress with a fitted sheet. Ensure that the crib or bassinet meets current safety standards and is free from hazards.
2. What size pillowcase should I use for this project?
It’s best to use a standard-size pillowcase for making a baby sleeping bag. This size typically provides enough fabric to create a cozy and comfortable sleeping environment for your little one.
3. Do you need sewing skills to make a pillowcase baby sleeping bag?
Basic sewing skills are helpful for this project, but you don’t need to be an expert seamstress. The steps are straightforward, and there are many online tutorials and resources available to guide you through the process.
4. Can you customize the design of the sleeping bag?
Absolutely! One of the benefits of making a DIY baby sleeping bag is the opportunity to customize it according to your preferences. You can choose different fabrics, add embellishments like appliques or embroidery, or even personalize it with your baby’s name.
5. How do you ensure the sleeping bag is the right size for your baby?
To ensure the sleeping bag fits your baby correctly, measure your baby’s length from shoulder to toe and compare it to the finished measurements of the sleeping bag. Adjust the size as needed before sewing to ensure a proper fit.
6. Is this project suitable for beginners?
Yes, this project is beginner-friendly and is a great way to start learning basic sewing techniques. The steps are simple and easy to follow, making it an enjoyable DIY project for novice crafters.
7. Can you use different materials instead of a pillowcase?
While a pillowcase is a convenient option for this project, you can certainly use different materials such as fabric yardage or old blankets. Just ensure that the fabric is soft, breathable, and safe for your baby’s delicate skin.
8. How can you wash the pillowcase baby sleeping bag?
It’s essential to wash the baby sleeping bag regularly to keep it clean and hygienic. Check the care instructions for the fabric you used, but most sleeping bags can be machine washed on a gentle cycle with mild detergent and tumble dried on low heat.
9. At what age can your baby start using a sleeping bag?
Most experts recommend waiting until your baby is around three to six months old before introducing a sleeping bag. At this age, they have better head control and are less likely to wriggle out of the sleeping bag, reducing the risk of suffocation. Always follow safe sleep guidelines and consult with your pediatrician if you have any concerns.
10. Can you make multiple sleeping bags for gifting or donation?
Making multiple sleeping bags is a thoughtful and practical way to gift handmade items to friends, family, or charitable organizations. You can customize each sleeping bag to suit the recipient’s preferences and spread comfort and joy to those in need.


