Secret compartments are not only fun for the secretive aspect, but they can also be very helpful when you need to keep valuables hidden away. A book secret compartment is one such example that lets you hide your prized belongings in plain sight.

The first time I made a book hollow, I didn’t bother looking at a tutorial and I failed. Not that I can’t use my DIY book hollow – I can put stuff inside, but it’s not pretty. It’s really a simple project so I thought I wouldn’t need to read any how-to’s, but if you want your secret compartment to look neat and really secure then I recommend you read this tutorial. :)

This would also be useful if you’re planning to make a DIY book clock.
Now find a hardbound book that wouldn’t look suspicious among your book collection. This book will be your new hiding place for small, important items. If you’re into sci-fi, choose a sci-fi book to make this project with! It’ll be so much fun, and you can really let your imagination run wild. There are so many great sci-fi books out there, so you’re sure to find one that you’ll love.
A secret compartment in a book can be a great place to store things like love letters, family photos, or other small treasures. It’s a fun way to add a little bit of intrigue to your book collection, and it’s also a great way to keep your belongings safe and out of sight. If you’re interested in adding a secret compartment to your book, here are a few design ideas to get you started.
Contents
- 1 Crafting a Book Secret Compartment
- 2 Choosing the Right Book
- 3 Preservation Tips for Your Book Secret Compartment
- 4 Alternative Uses
- 5 FAQ on Making a Book Secret Compartment
- 5.1 What type of book is best for creating a secret compartment?
- 5.2 Can I use a paperback book for a secret compartment?
- 5.3 How long does it take to make a book secret compartment?
- 5.4 Will creating a book secret compartment damage the book?
- 5.5 Can the book secret compartment hold heavy items?
- 5.6 How can I make the compartment more secure?
- 5.7 Is it legal to have a book secret compartment?
- 5.8 Can I take my book secret compartment on a plane?
- 6 Conclusion
Crafting a Book Secret Compartment
When choosing a book to use as a secret compartment, go for something with a thick spine and pages that can be easily removed. A hardcover book is ideal, as it will be sturdy enough to bring it during your travel.
Once you’ve selected your book, simply follow these easy steps and you’ll be creating your secret compartment in no time!
Tools & Materials
- Hardbound Book
- White Glue
- Tape
- Plastic Wrap/Bags
- Craft Knife (with extra blades)
- Metal Ruler
- Pencil
- Paintbrush
Instructions
1. Determine how thick your compartment will be
To start, determine how much of the book you want to seal. Leave 4-10 of the first pages free.
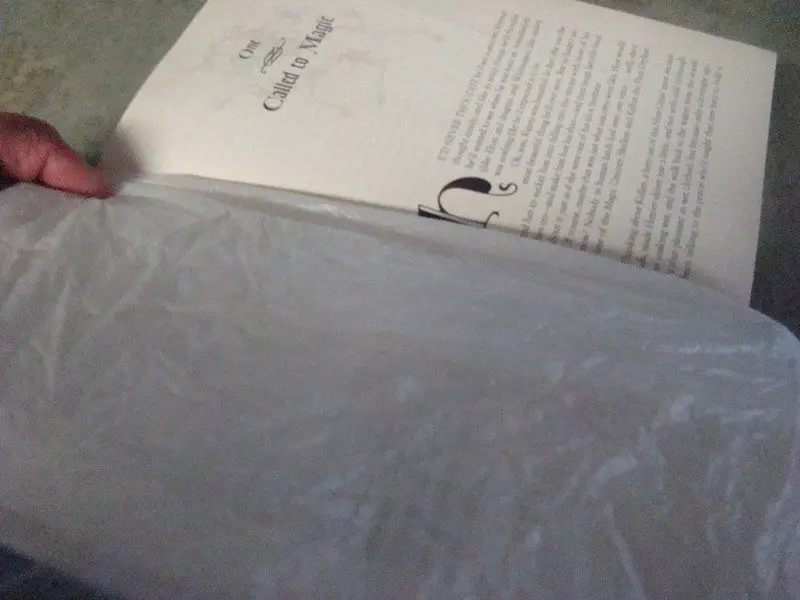
2. Wrap the pages that shouldn’t be glued with a piece of plastic
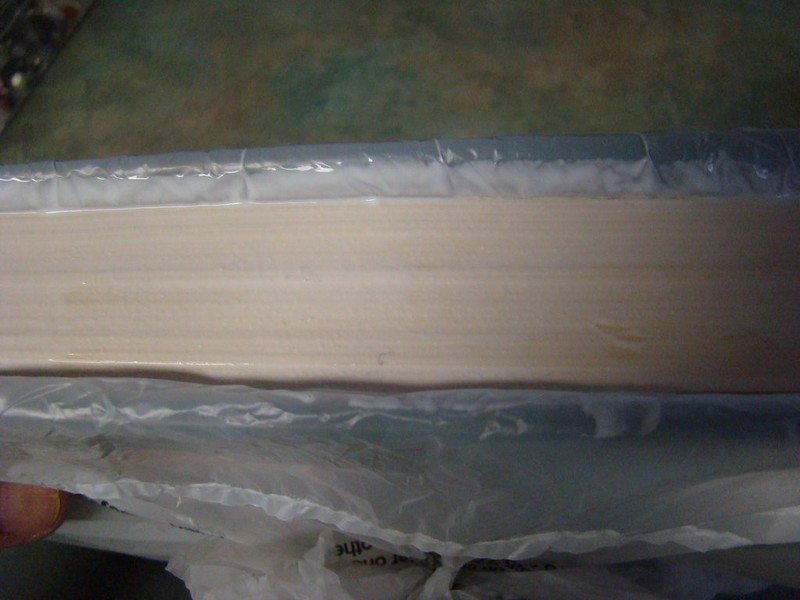
When you’re gluing pages together, you don’t want the glue to accidentally stick to the front or back cover, or any of the pages that you’re not intending to glue. To avoid this, simply wrap the pages you’re working on with plastic wrap. This will protect them from the glue and make your project turn out just the way you want it to.
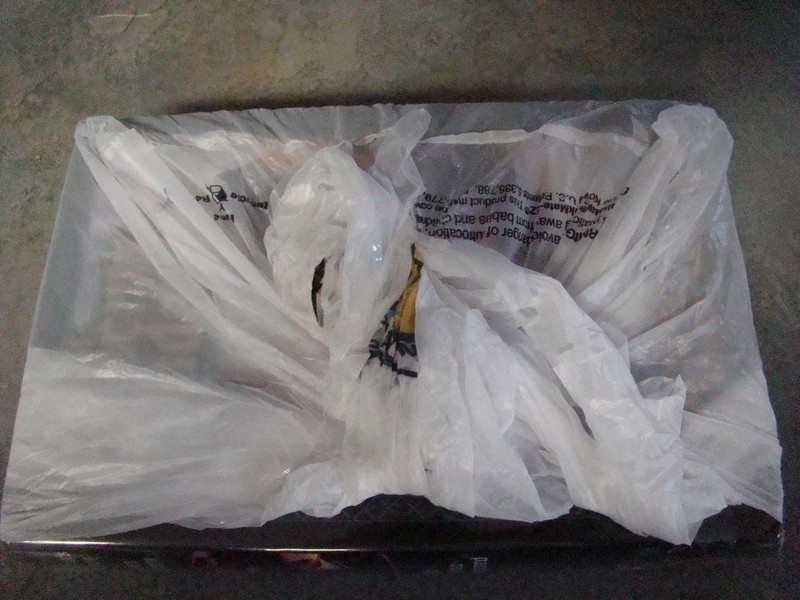
3. Glue the mid pages together
And then tape them tight. (Glue won’t stick to the plastic bags, and since they are plentiful, they make a good repurpose object for this part of the project). Repeat with the back page, making sure that the design is facing out. You can use regular clear packing tape or double-sided tape for this step. Just make sure that the entire surface is covered so that the pages are securely attached.
Hold all of the rest of the pages together and using the paintbrush spread the white glue along the three sides of the edges that are usually free. When dry this will make these pages a solid unit.

4. Let them dry
Close the book pile a bunch of heavy stuff on your closed book and let it dry for 12+ hours.

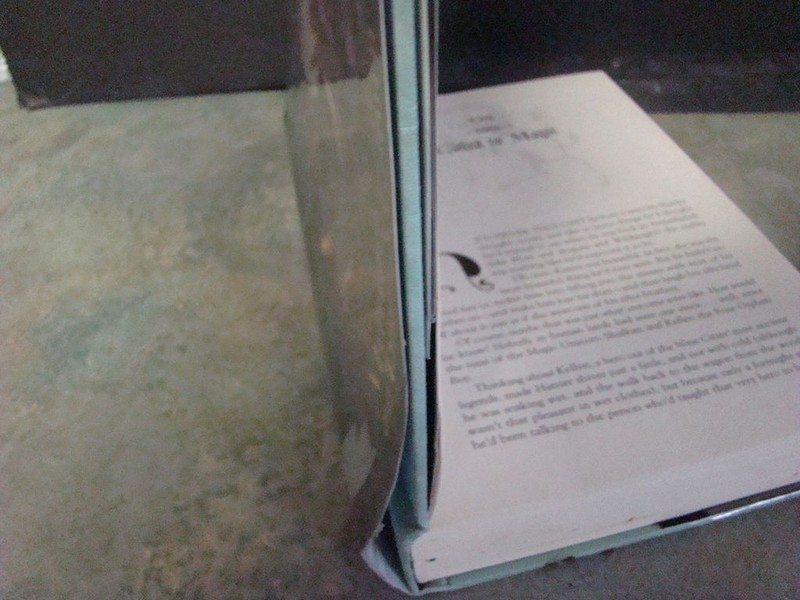
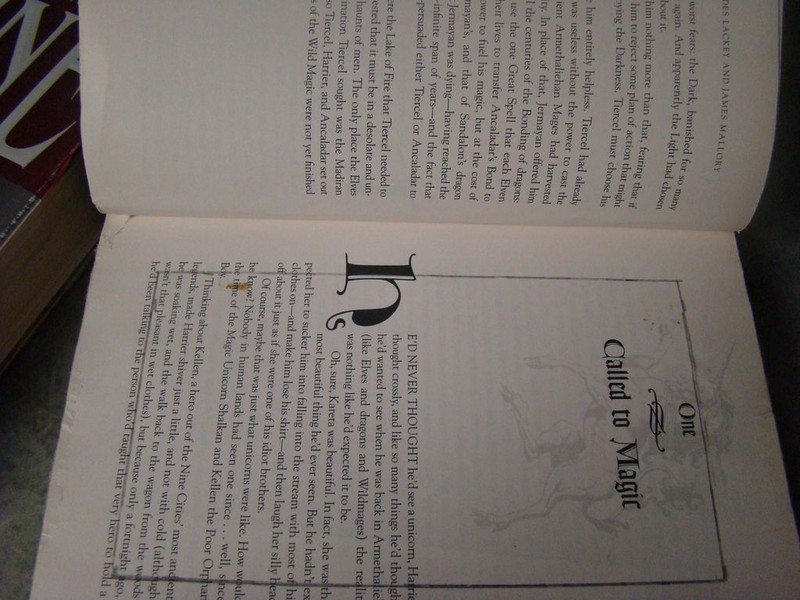
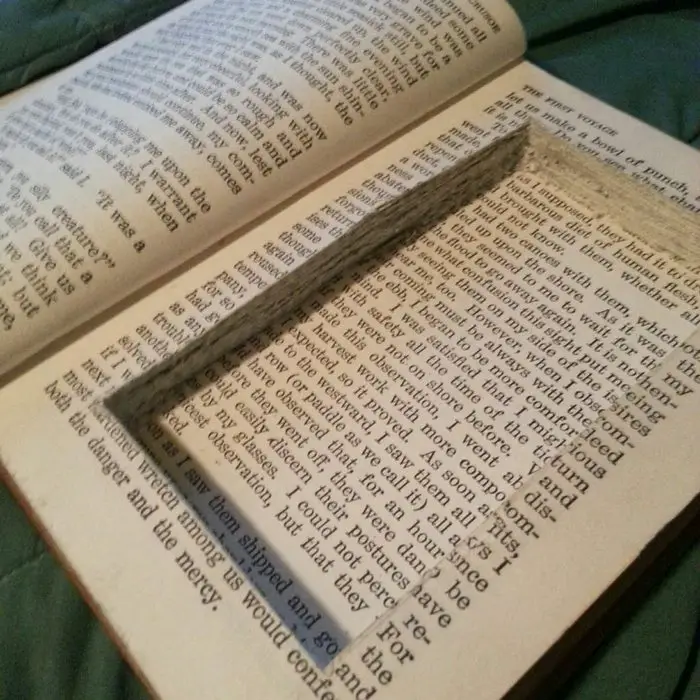
5. Mark a rectangle on the glued pages
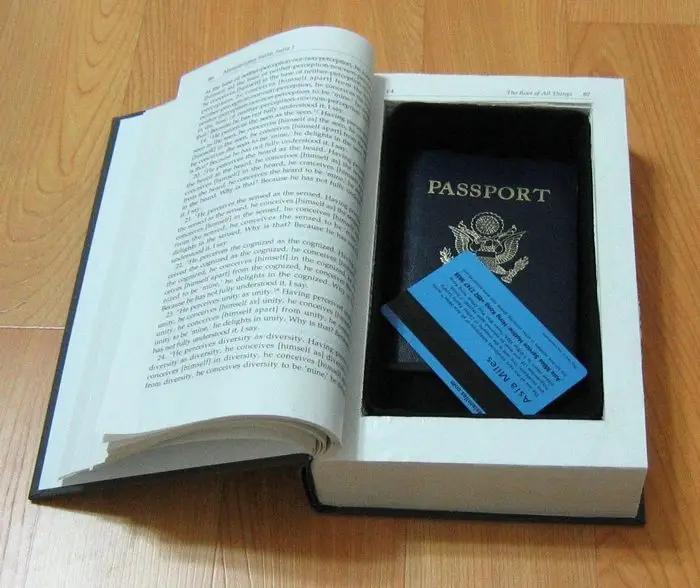
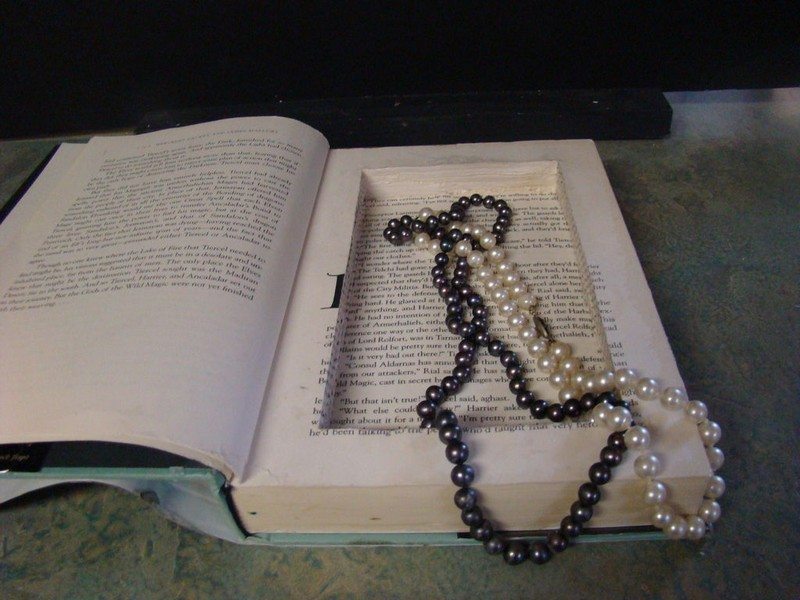
Once the glue is dry, open the book to the solid area. I wanted the hole in the book to fit the case my pearls reside in, so I traced all the way around that case. You can just mark a rectangle that is 1 inch from the 4 edges of the book. This will serve as the secret compartment.
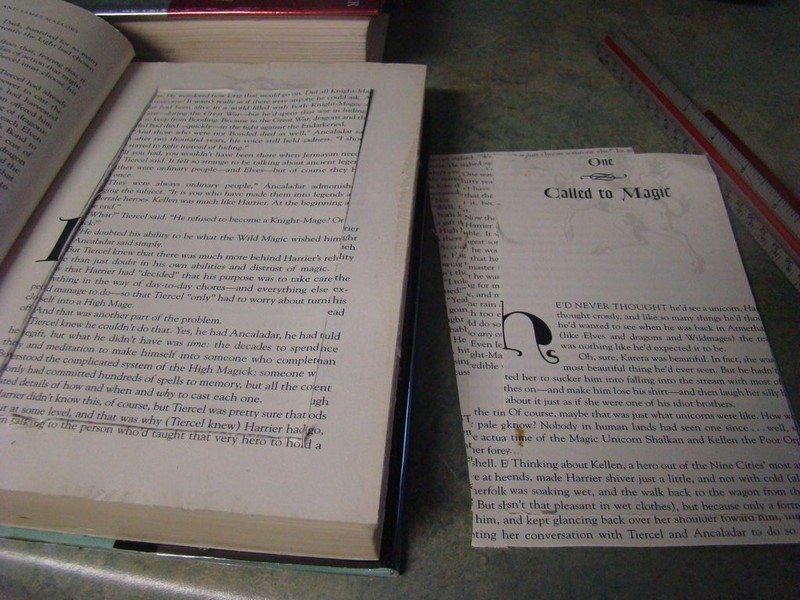
6. Cut the rectangle
Next, using the metal ruler and the craft knife, run the sharp tip of the knife along the ruler’s edge, following the lines. The hardest part of this is getting the corners nice and clean. You will cut only cut 4-5 pages at a time. When cutting a 500-600 page book means that this is a time-consuming project. Go ahead, and pause for a drink or something to eat. Do it while you are watching your favorite TV show or listening to your favorite music.
Do not cut clear thru to the bottom. You need a solid surface for the bottom.

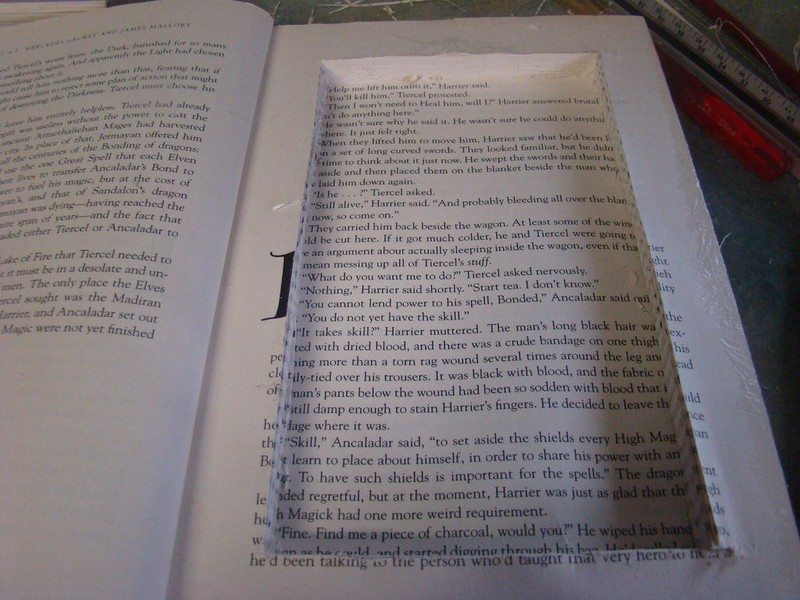
7. Glue the inside edges and let them dry
I chose to glue the inside edges of my hollow book, therefore I chose to reuse the t-shirt bags.
Let it dry again. You don’t have to do this step, but it can help to strengthen your compartment.

And you’re done! You now have a nice secret compartment to hide your valuables!
You can then use this pocket to store whatever you like.
Great job! You now have a hidden compartment that is perfect for storing your valuables. This is a great way to keep your belongings safe and out of sight. Thanks for following along!
Thanks to craftknowitall for this great tutorial!
If you liked this project, you might also want to view Turn Your Hardbound Books Into Clutches With Zipper.
Choosing the Right Book
Making a book secret compartment is an innovative way to keep your valuables hidden. The first step in this creative project is choosing the right book. Here’s how to pick the perfect book for your book secret compartment.
Size is Important
The size of the book is important. You need a book that’s big enough to hold your items but doesn’t stick out on your shelf. Think about the size of the items you want to hide when picking your book secret compartment book.
Look and Feel
The cover and overall design of the book are critical. Choose a book that blends in with the rest of your collection. The goal is for your book secret compartment to look just like any other book on your shelf.
Thickness of Pages
When creating a book secret compartment, the thickness of the book’s pages can make a difference. Thicker pages are easier to cut and create a more robust compartment. Opt for a book with durable and ample pages for your book secret compartment.
Content and Genre
Think about the content and genre of the book. A book secret compartment should be inconspicuous, so choosing a book that fits naturally with your interests will make it less likely to draw attention. If your shelf is full of mysteries, a cookbook might stand out. Select a genre consistent with your collection for your book secret compartment.
Binding Quality
The book’s binding is another factor to consider. A well-bound book will ensure the longevity of your book secret compartment. Hardcover books are typically more robust and suitable for creating a secret compartment. The spine should be sturdy enough to support the hollowed-out pages.
Color and Spine Design
The color and design of the book’s spine can impact its ability to blend in. For your book secret compartment, look for colors and designs that match the aesthetic of your bookshelf. A spine that is too unique or flashy may draw unnecessary attention to your secret compartment.
Click on any image to start the lightbox display. Use your Esc key to close the lightbox.![]()


Preservation Tips for Your Book Secret Compartment
Keeping your book secret compartment in top condition is key to ensuring it remains undetectable and functional. Here are some preservation tips to help maintain your book secret compartment over time.
Handle With Care
When dealing with your book secret compartment, it’s crucial to be gentle. Frequent or rough handling can quickly wear out the book’s spine, making the compartment obvious to anyone looking at your bookshelf.
To keep your book secret compartment looking new, open and close it with care, as if it were an antique or a rare edition. This cautious approach helps maintain its disguise and ensures the secret compartment’s entrance remains well-camouflaged among your collection.
Avoid Moisture and Sunlight
Your book secret compartment is particularly vulnerable to the elements. Moisture is an enemy to any book, but for a book secret compartment, it can be devastating. Water damage can cause the pages to swell, distort, or stick together, which might reveal the hidden compartment.
Similarly, prolonged exposure to sunlight can bleach the book’s cover and spine, drawing unwanted attention to it due to its faded appearance compared to other books on your shelf. To prevent these issues, place your book secret compartment in a part of your bookshelf that receives minimal direct sunlight and is away from windows or humid areas.
Ensuring a stable and controlled environment will keep the book’s exterior looking consistent with the rest of your collection and protect the integrity of the secret compartment inside.
Regular Dusting
Dust accumulation is not just an aesthetic issue; it can also signal neglect and attract closer inspection, which is exactly what you want to avoid with your book secret compartment. Regular dusting is essential to maintain the book’s appearance and ensure it blends seamlessly with your collection.
When dusting, use a soft, dry brush or a microfiber cloth to gently remove dust from the top edge and cover. This gentle cleaning method helps preserve the book’s cover and pages, preventing the buildup of grime that could make your book secret compartment stand out for the wrong reasons. Incorporate dusting into your regular cleaning routine to keep your entire collection, especially your book secret compartment, looking respectable and well-maintained.
Use a Protective Cover
A protective cover can be a book secret compartment’s best friend. By wrapping your book secret compartment in a clear, removable cover, you add an extra layer of defense against everyday wear and tear. These covers are particularly beneficial for books that are handled frequently, as they can shield the book from oils, dirt, and minor abrasions without compromising its discreet appearance.
Choose a cover that fits snugly around your book secret compartment to avoid drawing attention to it. The protective cover should be transparent enough to not obscure the book’s original design, ensuring that it remains inconspicuous on your shelf. This simple, proactive measure can significantly extend the life of your book secret compartment, keeping it functional and covert for as long as you need.
Alternative Uses
Your book secret compartment offers more than just a place to hide valuables. Its unique nature allows for a variety of creative and practical uses. Here are some alternative ways to make the most out of your book secret compartment.
Gift Box
Transform your book secret compartment into a unique gift box. It’s perfect for presenting special gifts like jewelry, concert tickets, or love notes. The surprise of discovering a gift hidden inside a book adds a layer of excitement and thoughtfulness to the presentation.
Travel Safe
Use your book secret compartment as a travel safe. When you’re on the move, it can securely hold passports, emergency cash, or small valuables. Tucked away in your luggage, a book secret compartment blends in, reducing the risk of theft.
Secret Message Exchange
A book secret compartment can serve as a fun and secretive way to exchange messages with someone. Whether it’s notes between friends or family members, it adds an element of mystery and fun to communication.
Decorative Storage
Apart from being functional, a book secret compartment can also be decorative. Use it to store and hide small items that clutter your space, like remote controls, keys, or even small crafting supplies. It keeps your space tidy while adding a touch of intrigue to your decor.
Personal Time Capsule
Create a personal time capsule with your book secret compartment. Fill it with mementos, letters to your future self, or snapshots of your current life. This hidden book can safeguard your treasures for years, and rediscovering them later can offer a nostalgic journey through time.
Plant Holder
For a creative twist, turn your book secret compartment into a discreet plant holder. This works especially well with larger books. Insert a small container or bag to hold the soil and plant directly inside. It’s a unique way to integrate greenery into your bookshelf, blending the charm of books with the beauty of plants.
Emergency Kit
Your book secret compartment can be a covert emergency kit. Stock it with essential items like matches, a small flashlight, a pocket knife, or a whistle. Placed on a bookshelf, it’s easily accessible yet hidden in plain sight, perfect for quick access during unexpected situations.
Game and Puzzle Keeper
Use your book secret compartment to store puzzles, game pieces, or playing cards. It’s an inventive way to keep gaming paraphernalia organized and out of view, ready for game night but hidden away to maintain a clutter-free space.
FAQ on Making a Book Secret Compartment
What type of book is best for creating a secret compartment?
Hardcover books with thick pages and a sturdy binding are ideal. Choose a book that blends in with your collection to keep the compartment discreet.
Can I use a paperback book for a secret compartment?
While possible, paperback books are less ideal due to their flimsier nature. Hardcover books offer better durability and protection for the items you wish to hide.
How long does it take to make a book secret compartment?
The time varies depending on the size of the book and your craftsmanship level. On average, expect to spend a few hours from start to finish.
Will creating a book secret compartment damage the book?
Yes, the process involves cutting into the book, which permanently alters it. Choose a book you’re willing to modify in this way.
Can the book secret compartment hold heavy items?
It’s best suited for small and relatively light items. The structural integrity of the book can only support so much weight without becoming noticeable or damaged.
How can I make the compartment more secure?
Consider adding a magnetic closure or a lock if you’re skilled in crafting. However, the primary security comes from the compartment’s discretion.
Is it legal to have a book secret compartment?
Yes, it’s legal to have a book secret compartment for storing valuables and personal items. However, using it to conceal illegal items is, of course, against the law.
Can I take my book secret compartment on a plane?
Yes, but it may attract attention during security screenings. If carrying sensitive items, be prepared to explain the compartment’s purpose.
Conclusion
Making a book secret compartment is a unique and creative way to hide valuables or personal items. By carefully selecting the right book, following detailed steps, and using preservation tips, you can create a hidden space that blends seamlessly with your book collection.


