As the crisp air and gentle snowflakes usher in the winter season, there’s no better way to embrace the magic than by adorning your door with a unique creation – a DIY winter wreath. Engaging in a winter wreath DIY project is not just about decorating; it’s about infusing the season with your style and creativity.
In this guide, embark on a journey to transform simple materials into a bespoke masterpiece, as you unravel the art and joy of a winter wreath DIY project. Dive into the enchanting world of crafting and create a welcoming symbol of the season right at your doorstep.
Contents
Gathering Supplies
Embarking on your winter wreath journey requires meticulous preparation. Here’s a detailed list of the materials and tools you’ll need:

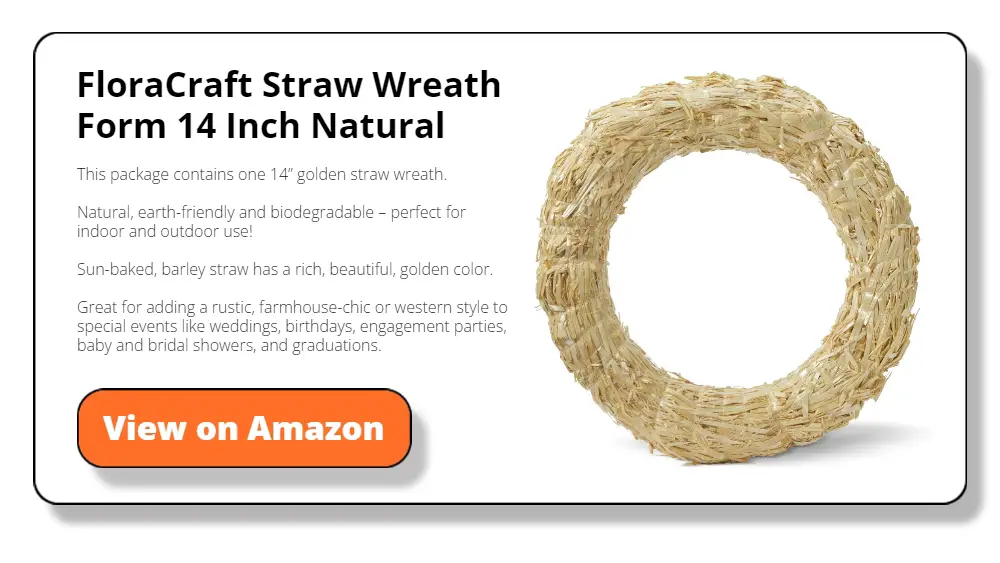
1. Wreath Form
- Opt for a sturdy base, whether grapevine, foam, or wire wreath form.
- Consider the size based on your preference and the space where you’ll display the wreath.
2. Foliage and Accessories
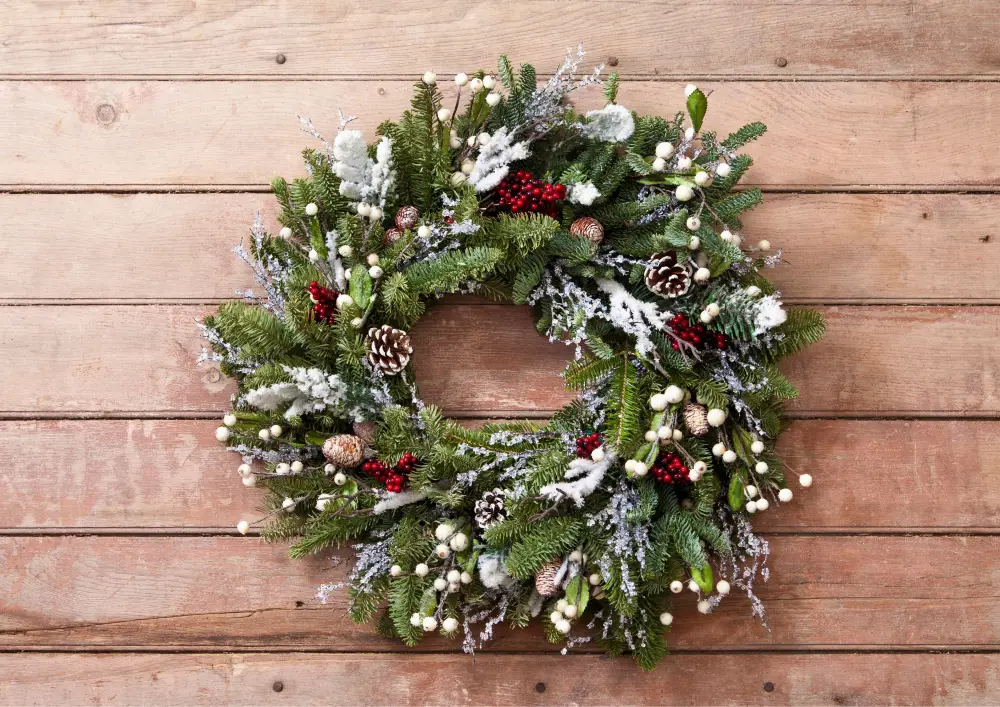
- Choose a variety of foliage such as pine branches, eucalyptus, and holly for texture.
- Seek distinctive accessories like pinecones, berries, or even miniature ornaments for a personalized touch.
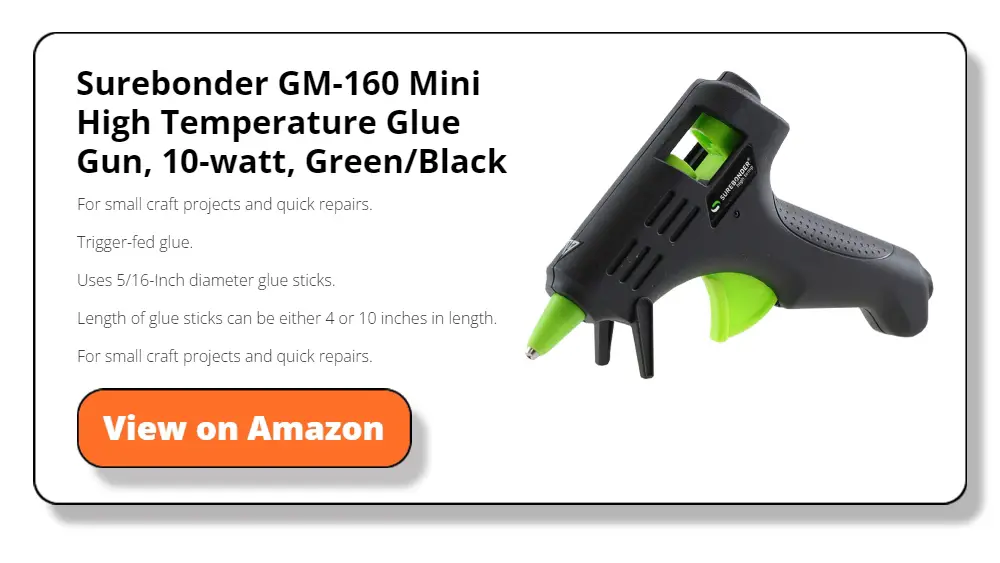
3. Tools
- Arm yourself with a hot glue gun for secure attachments.
- Keep floral wire and wire cutters handy for additional support.
Ready to move on to creating your winter wreath DIY crafting haven?
Setting Up Your Winter Wreath DIY Crafting Haven
Crafting is not just a task; it’s an experience. Create an ambience that sparks creativity and ensures a delightful winter wreath DIY crafting journey:
1. Inspiring Environment
- Choose a well-lit and spacious area with good ventilation.
- Surround yourself with winter vibes – play seasonal music or light a scented candle.
2. Safety Measures
- Prioritize safety by wearing gloves and an apron to protect against hot glue.
- Ensure your crafting area is clutter-free, minimizing the risk of accidents.
With your crafting haven set up, dive into the heart of the matter – crafting the wreath base.
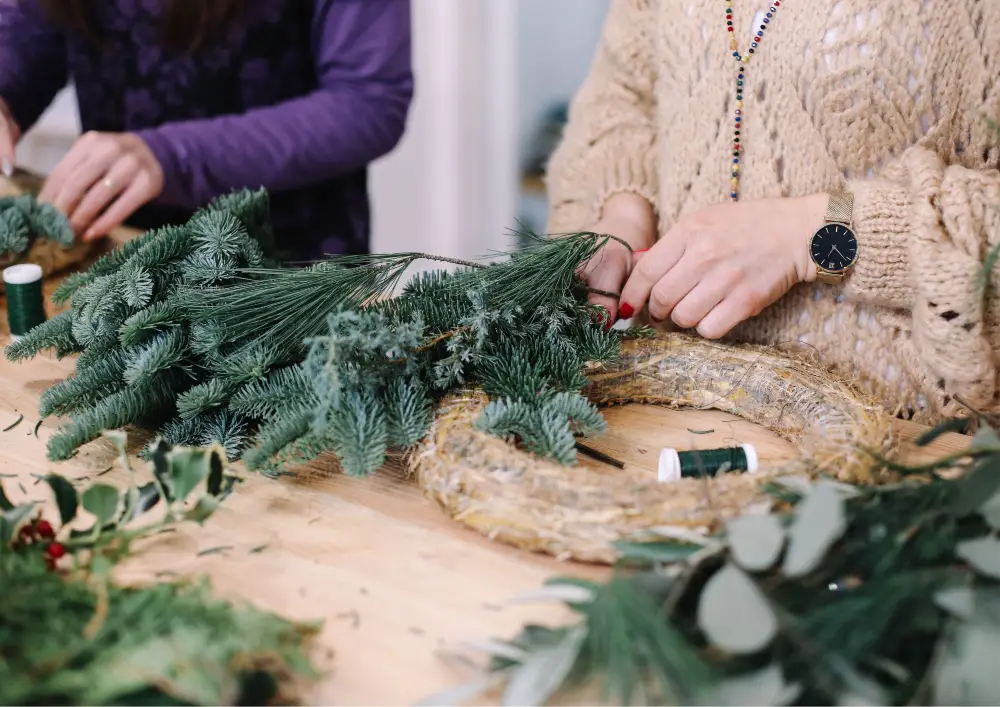
Crafting the Winter Wreath DIY Base

Securing the foundation of your wreath is a vital step that requires skill and precision. Here’s how you can go about it:
1. Securing the Wreath Form
- If using a grapevine wreath, intertwine the branches to create a sturdy structure.
- For foam or wire forms, use floral wire to secure any loose ends.
2. Building a Lush Foundation
- Layer your chosen foliage strategically, starting from the outer edges and working inwards.
- Mix different textures and shades to create a visually appealing arrangement.
Now that your base is robust and full, move on to adding your personal touch to this winter masterpiece.
Personalizing Your Masterpiece
The heart of your winter wreath DIY lies in the personal touches that transform it from a craft project into a bespoke masterpiece. This phase is where your creativity takes centre stage, infusing the wreath with elements that reflect your unique style and individuality. In this part, explore how to personalize your winter wreath DIY, ensuring that it becomes a symbol of not only the season but also your narrative.
1. Unique Elements:
- Monogram Magic: Incorporate your family’s initial or a monogram into the wreath design. This not only adds a personalized touch but also turns your winter wreath into a symbol of familial warmth.
- Sentimental Trinkets: Seek out small items or trinkets that hold sentimental value – perhaps a charm from a memorable vacation or a tiny ornament passed down through generations. Integrate these treasures into your wreath to tell a story.
2. DIY Embellishments:
- Natural Elegance: Experiment with crafting your ornaments using natural materials. Twigs, pinecones, and dried citrus slices can add an organic and elegant flair to your wreath. This DIY approach ensures that each element is not just decorative but also a testament to your crafting ingenuity.
- Upcycled Charm: Embrace sustainability by upcycling old decorations or repurposing materials. This eco-friendly touch not only contributes to a greener lifestyle but also infuses your winter wreath with a one-of-a-kind charm.
With your masterpiece now uniquely yours, go and proceed to the final steps of finishing touches and displaying your creation.
Finishing Touches and Display
The success of your DIY winter wreath hinges on the final details and how you present it to the world. Explore the last steps:
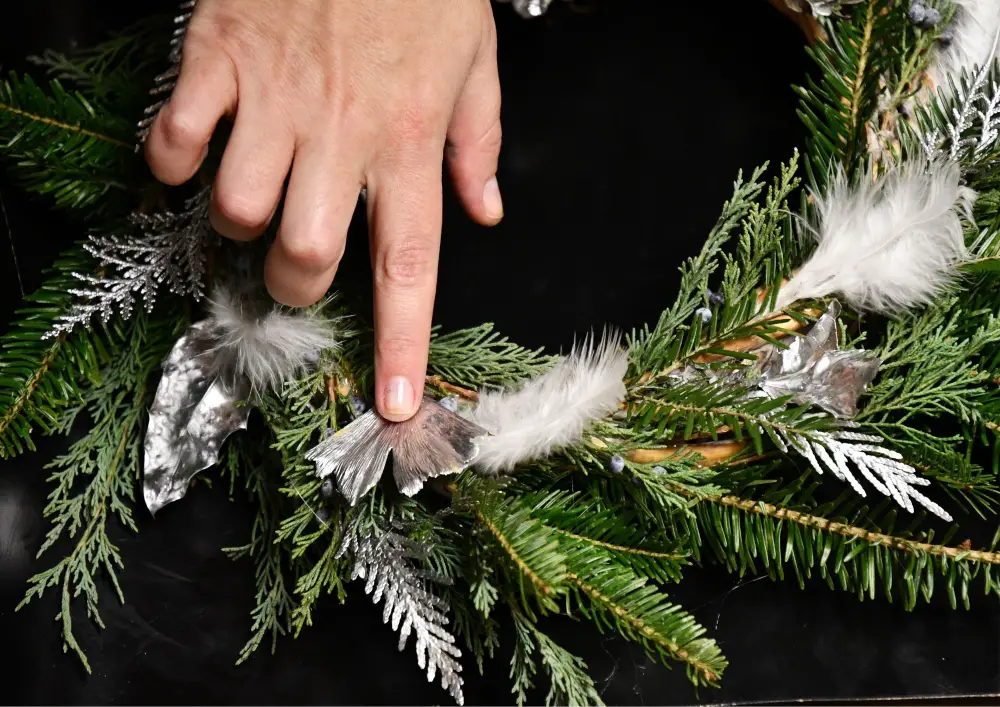
1. Securing Decorations
- Use hot glue strategically to secure all elements, ensuring they withstand the winter elements.
- Double-check the placement of each item for symmetry and balance.
2. Imaginative Display
- Consider using a festive ribbon to hang your wreath, adding a touch of flair.
- Experiment with different hooks or wreath hangers for a unique presentation.
3. Upkeep Tips
- Spritz your wreath with water occasionally to maintain the freshness of natural elements.
- Swap out certain decorations for different seasons to give your wreath year-round appeal.
Congratulations! You’ve crafted a winter wreath that not only decorates your front door but tells a story of your creativity and style. Enjoy the satisfaction of a job well done as you welcome the winter season with your unique masterpiece.
Frequently Asked Questions
1. What materials do you need for a winter wreath DIY project?
For a stunning winter wreath DIY, gather a wreath form (grapevine, foam, or wire), winter foliage (such as pine branches, eucalyptus, and holly), decorative elements like pinecones and berries, a hot glue gun, floral wire, and wire cutters.
2. Can you use artificial foliage for your winter wreath DIY project?
Absolutely! Artificial foliage is a fantastic choice for a lasting and low-upkeep winter wreath. Opt for high-quality materials for your winter wreath DIY project to ensure a realistic appearance.
3. How do you secure the wreath form?
Secure a grapevine wreath by intertwining the branches tightly. For foam or wire forms, use floral wire to fasten any loose ends, ensuring a stable foundation for your winter wreath.
Q4: What are some unique elements I can add to personalize my winter wreath DIY?
A: Elevate your winter wreath by incorporating a monogram or family initial for a personalized touch. Integrate sentimental trinkets like vacation charms or family heirlooms to add a personal narrative.


