
We’ve always been able to bring a little bit of nature into our offices or homes with flower arrangements. Flowers add vibrancy and variety to any space with their vivid colors and forms.
What about plastic bottles, though? They’re viewed mostly as pollutants, is I correct? Hold onto your hats, for we have an innovative concept that will change the game: why not transform those annoying bottles into something beautiful and useful? Discover the world of flower designs from plastic bottles! Let’s breathe fresh life into garbage and create something truly magnificent from it.
Contents
Crafting 5 Different Flower Designs From Plastic Bottles
This blog post will look at a few inventive and imaginative flower designs from plastic bottles. These various floral patterns made from plastic bottles are not only inexpensive substitutes for pricey flower arrangements, but they are also environmentally beneficial.
To achieve the right look, we’ll discuss various methods for cutting, sculpting, and coloring the bottles. We’ll also demonstrate how to incorporate additional materials like twine, buttons, and beads into the designs to give them an extra special touch of charm.
Are you prepared to begin the rewarding and valuable task of crafting various flower designs from plastic bottles?
A unique and environmentally friendly method to give gifts or add a personal touch to your home décor is to create floral arrangements from plastic bottles. You may create a variety of floral arrangements using plastic bottles, such as rose bouquets, wall art for gardens, and arrangements with wildflowers.
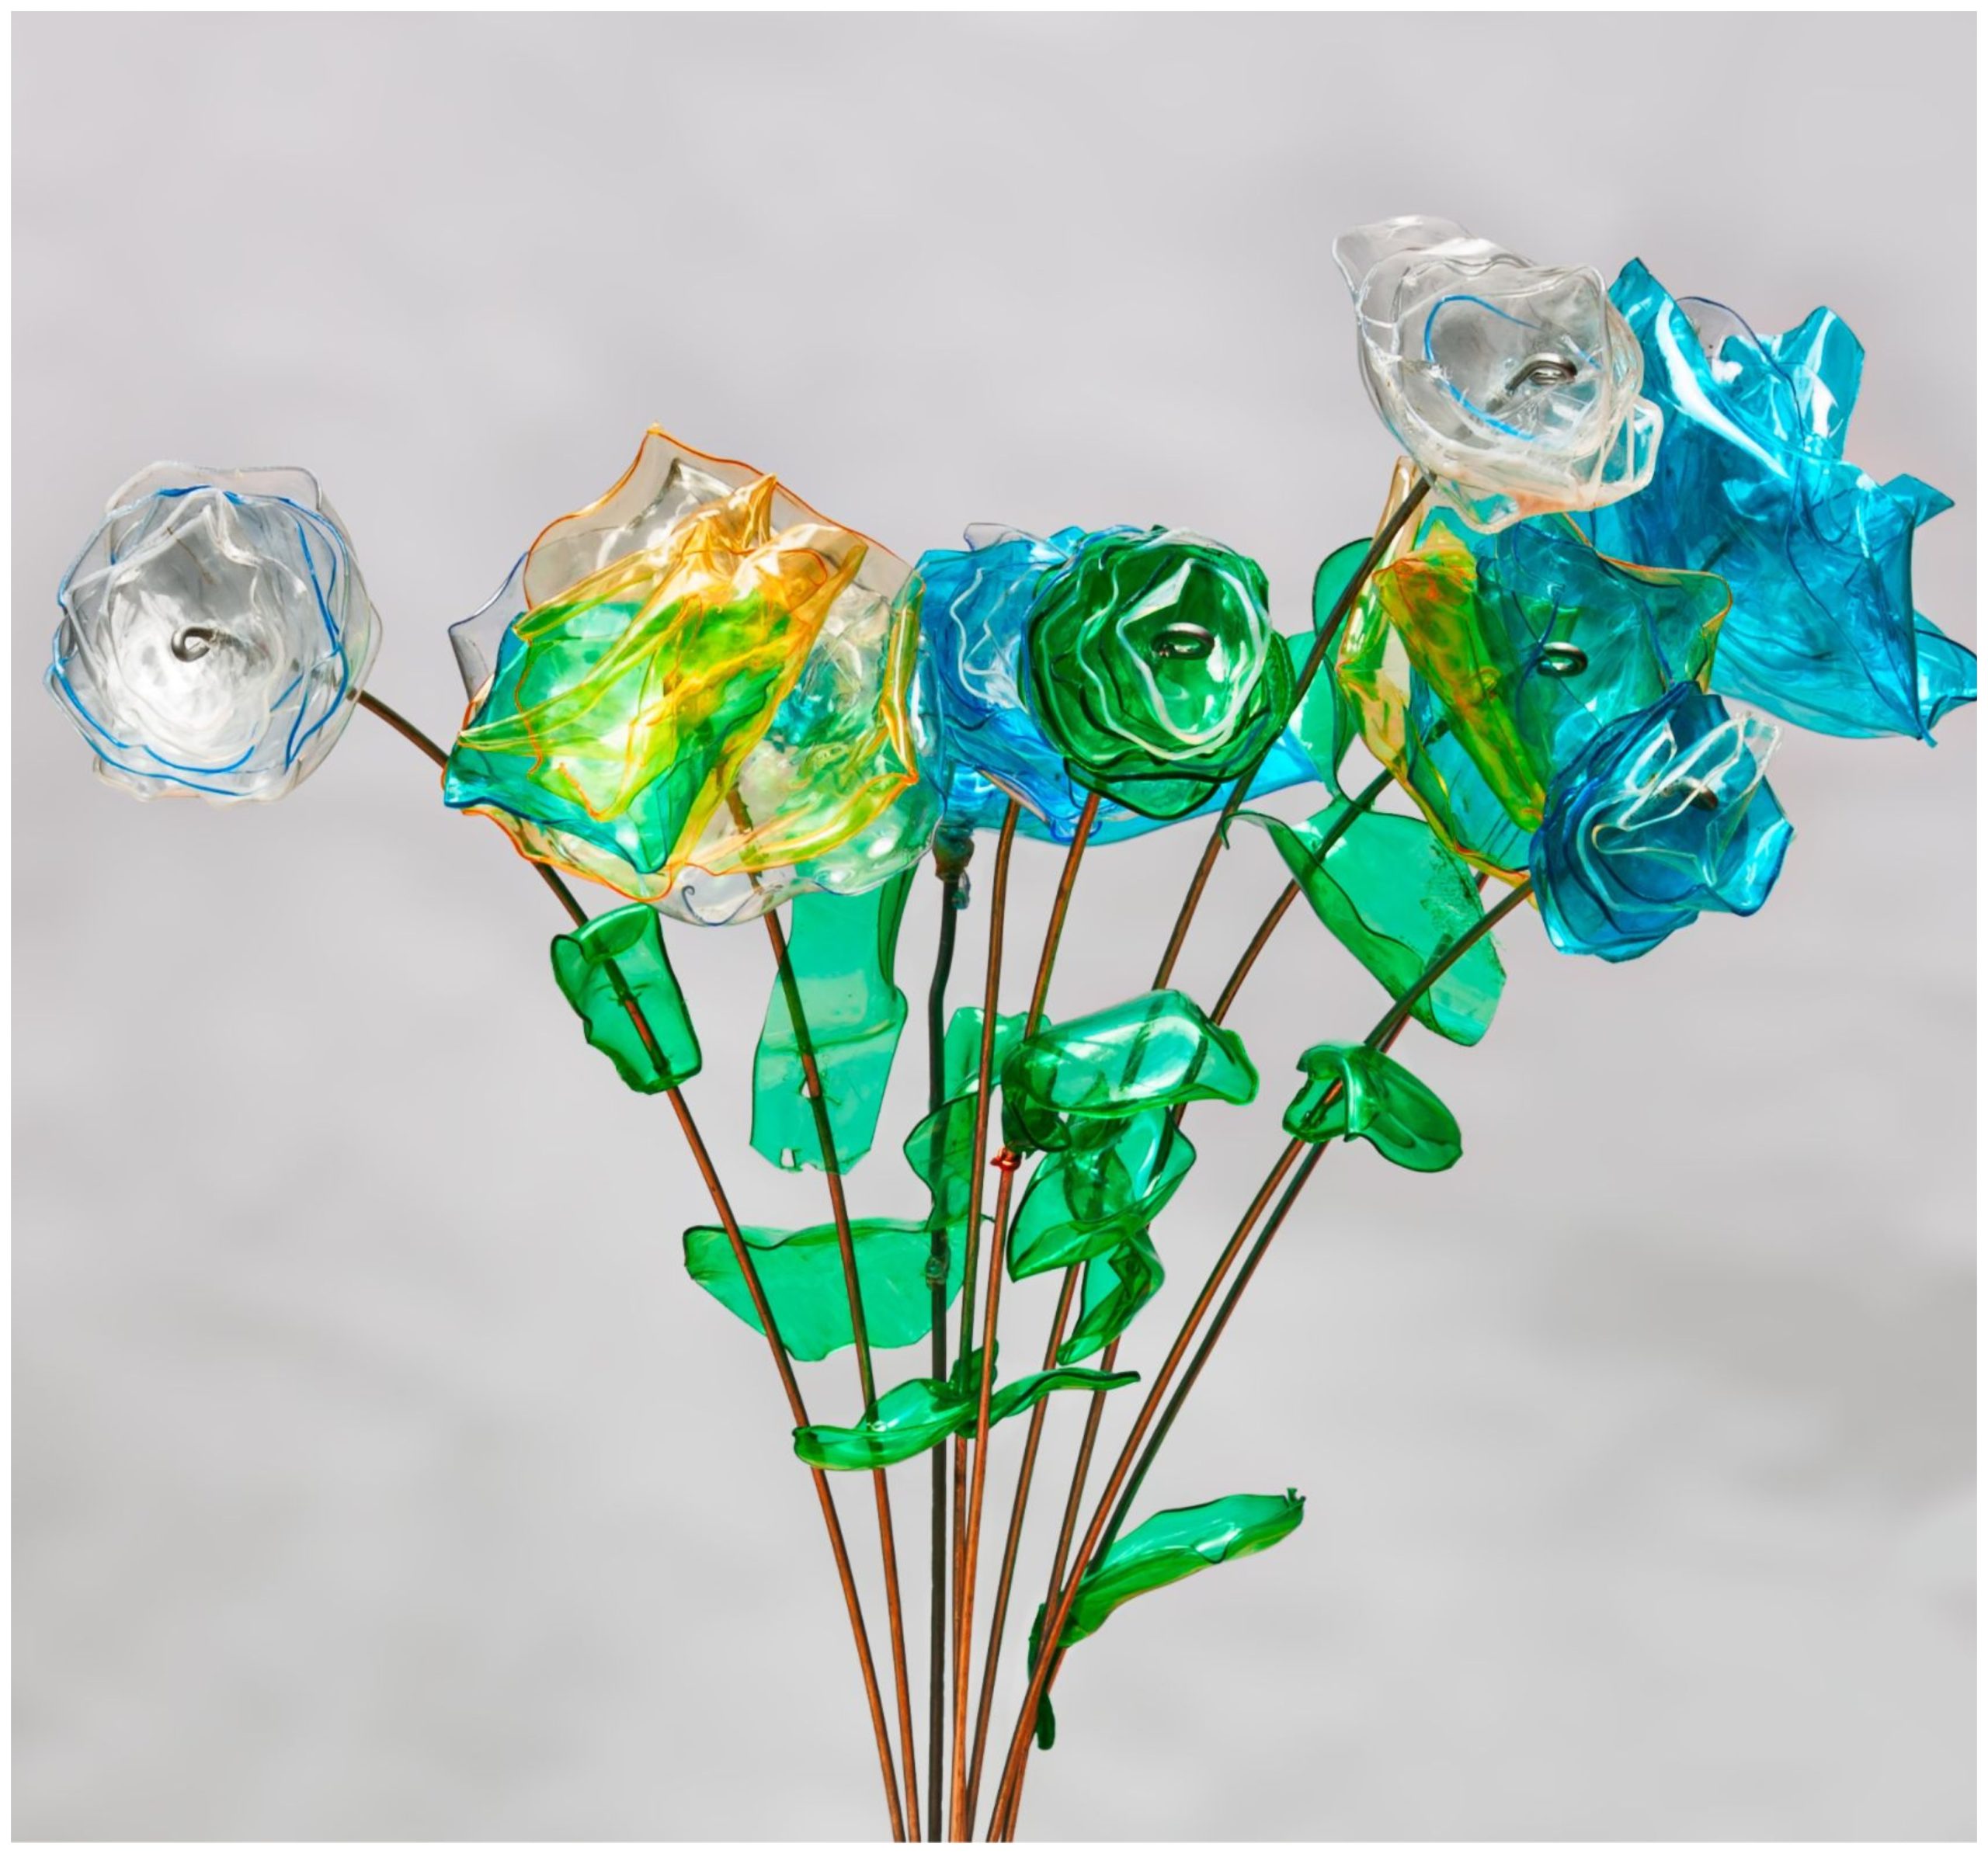
1. Bouquet of Roses
Create different flower designs from plastic bottles using petal-cutting and heat-curling techniques. Arrange them in a vase with some green leaves and stems to create a beautiful bouquet of roses.
Crafting a bouquet of roses from plastic bottles is a great DIY project that can be made with a few simple materials and some creativity.
Materials needed:
- Plastic bottles
- Scissors
- Heat source (candle or heat gun)
- Pliers or tweezers
- Glue gun
- Green leaves and stems
- Vase
Steps:
1. Prepare the plastic bottles
- Remove the labels and caps from the plastic bottles.
- Cut off the top and bottom parts of the bottle with scissors, leaving only the middle part which will be used for making the petals.
- Cut the bottle into a strip, about 2 inches wide and as long as possible.
2. Cut the petals
- Draw the petal shape on the plastic strip with a marker. The petal shape should be similar to that of a rose petal.
- Cut out the petal shape with scissors.
- Make sure that the edges of the petal are even and smooth.
3. Heat-curl the petals
- Hold the petal with a pair of pliers or tweezers.
- Heat the petal over a candle flame or a heat gun until it starts to curl.
- Move the petal back and forth over the heat source until the edges are completely curled.
- Repeat the process with all the petals.
4. Assemble the petals
- Take one petal and apply a small amount of hot glue to one end.
- Overlap the opposite end of the petal to form a cone shape, and hold it in place until the glue sets.
- Repeat the process with all the petals, creating a cone shape with each one.
- Glue the cones together, starting with the smallest one at the centre, and adding the larger ones around it.
5. Create the flower
- Cut the bottle into a spiral shape. Start from the bottom of the bottle and cut a continuous spiral until you reach the top.
- Roll the spiral from the outer edge towards the centre. This will create a rose shape.
- Secure the rose by wrapping floral wire around the base of the flower.
- Curl the edges of the outer petals outward to create a more natural look.
- Once all the petals have been added, trim the excess plastic from the bottom of the flower with scissors.
- Apply hot glue to the base of the flower and attach it to the stem.
6. Arrange the flowers in a vase
- Arrange the flowers in a vase, along with some green leaves and stems.
- You can also add some decorative elements such as ribbon or beads to enhance the look of the bouquet.
And there you have it – one of the most beautiful flower designs from plastic bottles! With these simple steps, you can create a beautiful bouquet of roses from plastic bottles that looks just as good as the real thing!
2. Wildflower Arrangement
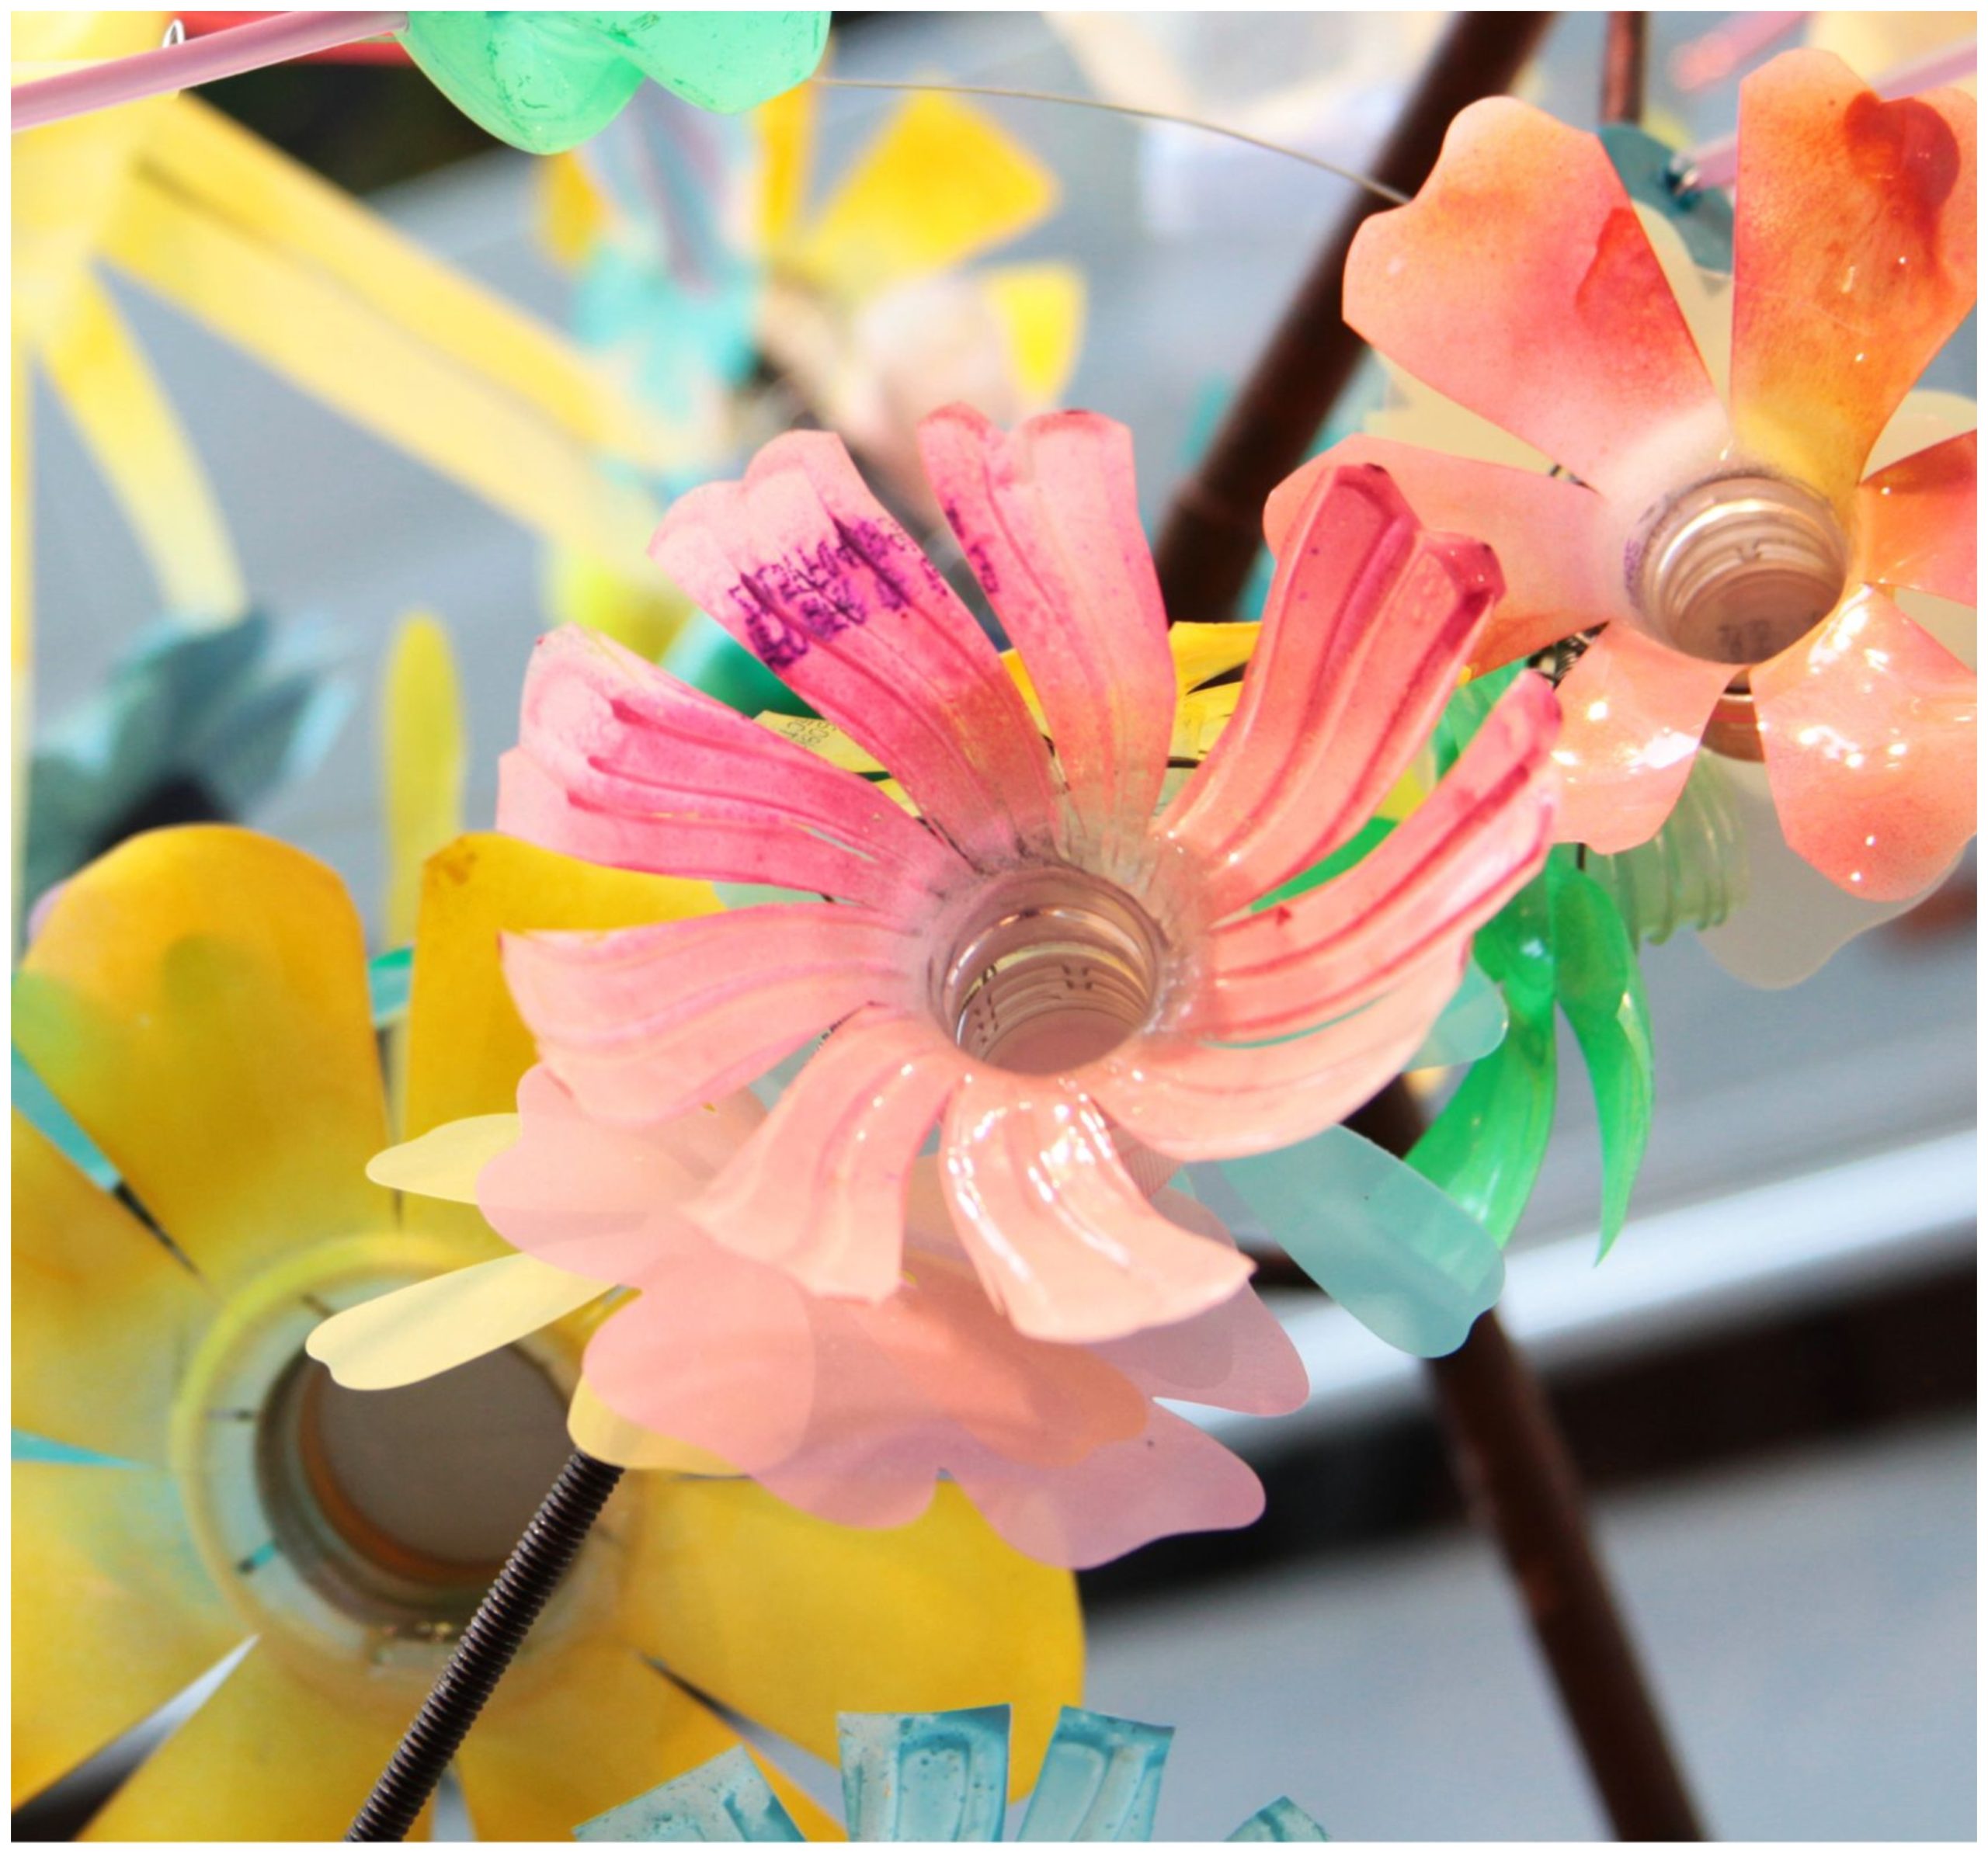
Arrange different flower designs from plastic bottles in a vase or a basket for a beautiful and unique wildflower arrangement. To get started making different flower designs from plastic bottles, gather the materials and supplies.
Materials:
- Plastic bottles (various sizes)
- Acrylic or spray paint (different colours)
- Scissors or a craft knife
- Hot glue gun
- Pipe cleaners
- Vase or basket
Steps:
- Use scissors or a craft knife to cut plastic bottles into different petal shapes and sizes, depending on the type of wildflower you want to create. You can cut pointed petals for daisies or rounded petals for sunflowers.
- Paint the petals using acrylic or spray paint in different colours to create a more natural look. You can paint them solid colours or add detail and shading to create a more realistic effect.
- Once the paint is dry, use a hot glue gun or strong adhesive to attach the petals together, starting with the larger petals at the bottom and working your way up to the smaller ones at the top. You can also use pipe cleaners or if unavailable use green plastic bottles to create stems and leaves for your flowers.
- Once you have created several wildflowers, arrange them in a vase or basket to create a beautiful and unique wildflower arrangement. Mix and match different types of flowers to create a diverse arrangement or use one type of flower for a more cohesive look.
You can creatively create different flower designs from plastic bottles like a wildflower arrangement that you can proudly display in your home.
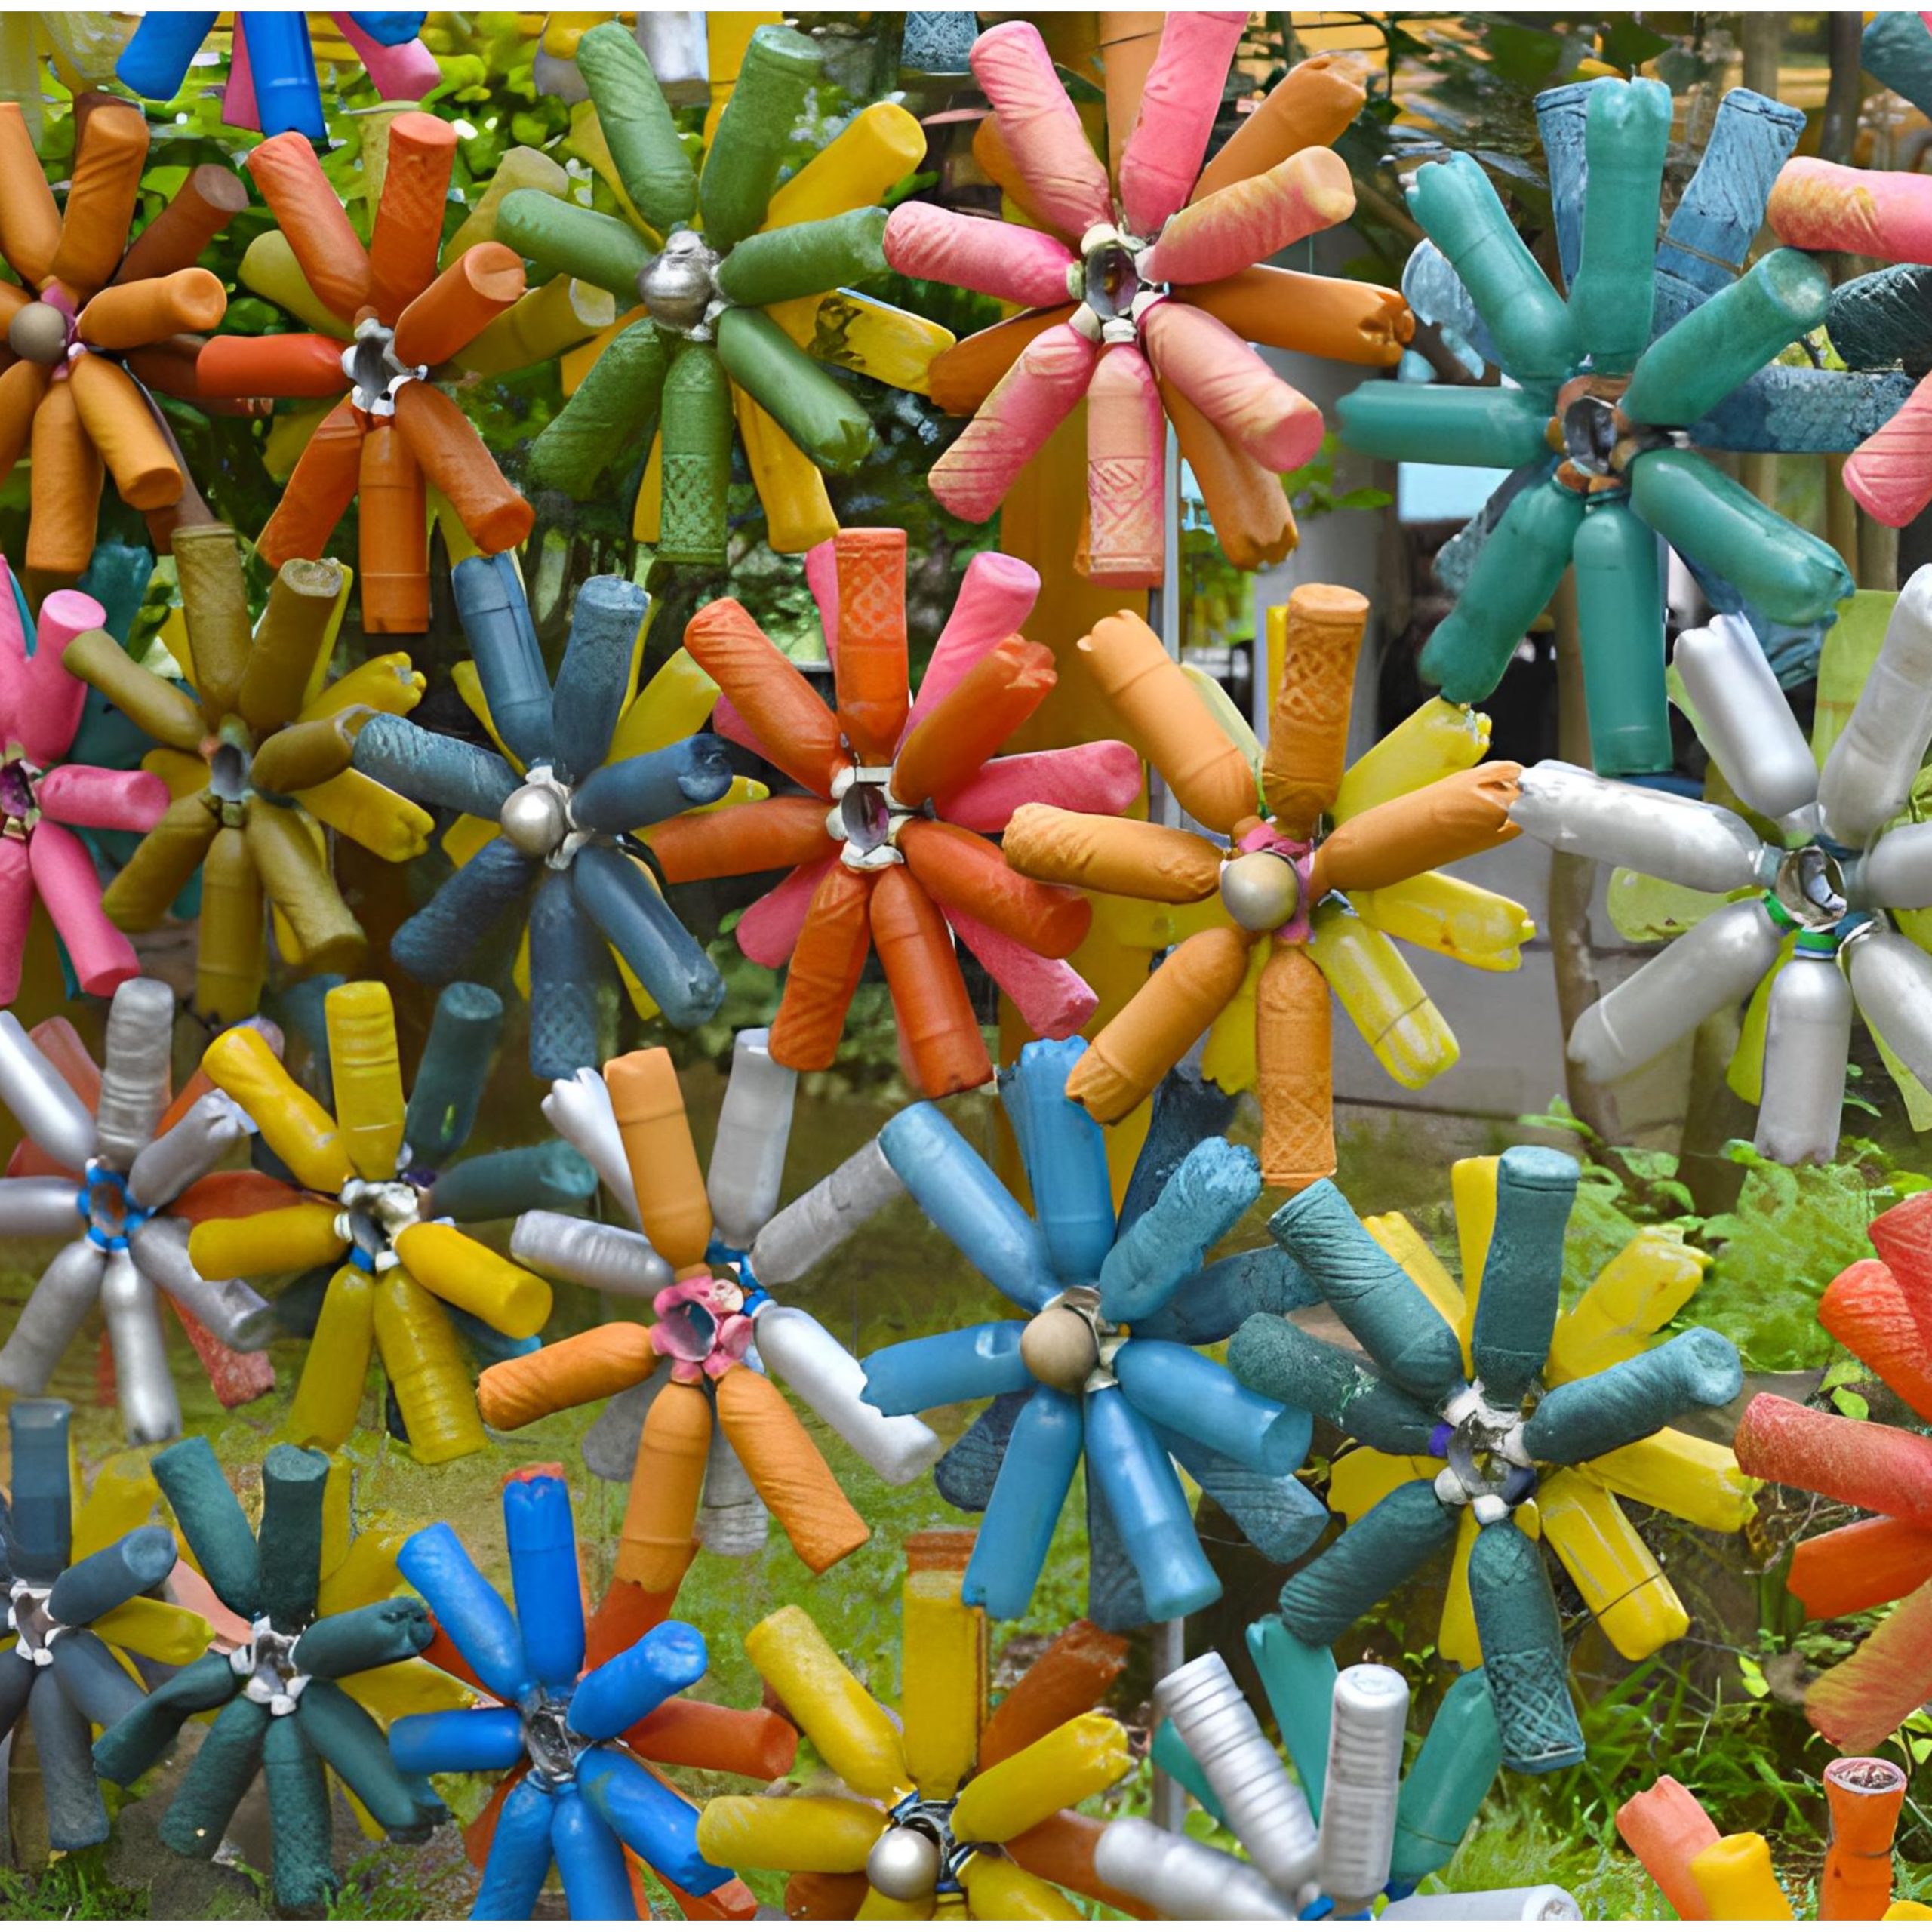
3. Garden Wall Art
Make different flower designs from plastic bottles and attach them to a wooden frame to create beautiful garden wall art. You can paint the flowers in different colours and sizes for a vibrant and eye-catching decorative piece.
The materials and steps for making garden wall art are all simple. Why not get started with different flower designs from plastic bottles?
Materials:
- Plastic bottles (various sizes and colours)
- Christmas balls
- Acrylic or spray paint
- A hot glue gun
- String or wire
Steps:
- Clean and prepare the plastic bottles. Take off any labels or stickers from the bottles, and clean them thoroughly with soap and water. Allow them to dry.
- Arrange the plastic bottles in a circular pattern around the Christmas ball.
- Attach the plastic bottles to the ball using hot glue or tape, and secure them in place. No need to fuss with cutting them up – keep them whole to form the petals.
- And voila! You have yourself a colourful and charming garden wall art that’s sure to impress your friends and family.
Optional: You can paint your flower designs from plastic bottles with acrylic or spray paint. Add detail and shading effects for a more natural effect. To hang the garden wall art, attach a string or wire to the back of the design using the hot glue gun.
4. Flower Garland
You can turn beautiful flower designs from plastic bottles into varieties of shapes and colours. Use string or ribbon to thread the flowers together, creating a garland that you can hang across a window or a room for a fun and colourful decoration.
One of the easiest to make is a flower garland from plastic bottles. The materials and steps for making different flower designs from plastic bottles are so basic.
Materials:
- Plastic bottles
- Scissors
- Paint
- Paintbrushes
- String
- Hot glue gun
Steps:
- Cut the plastic bottles into flower shapes. You can make various shapes and sizes to add variety to your garland.
- Use paint and paintbrushes to paint the flowers in different colours. You can choose any colour scheme you like or create a rainbow of colours for a fun and vibrant garland.
- Use the hot glue gun to attach the flowers to the string. Space the flowers evenly, allowing enough space between them to let the flowers hang.
- Hang the garland wherever you like, such as across a window, doorway, or along a wall. You can also add other decorations, such as beads or glitter, to make the garland more festive and eye-catching.
That’s it! With these easy steps, you can create different flower designs from plastic bottles. You can also try making a cute DIY zippered pencil case from soda bottles if you’re still feeling inventive. The steps and materials are pretty simple too!
5. Bottle Topiary
A flower bottle topiary can be designed to resemble a flowering plant or tree. It’s a creative way to repurpose plastic bottles, as you add a unique and colourful decor item to your home or garden.
Gather the materials to start making different flower designs from plastic bottles.
Materials:
- Plastic bottles
- Scissors
- Acrylic paint
- Paintbrush
- Wooden dowel or stick
- Foam ball
- Hot glue gun
- Pot or container
- Decorative moss or rocks
Steps:
- Cut the plastic bottles into flower shapes using scissors. You can create different flower shapes and sizes to add variety to your topiary.
- Paint the flowers in different colours using acrylic paint and a paintbrush. You can choose any colour scheme you like, or create a rainbow of colours for a fun and colourful topiary.
- Using a hot glue gun, attach the flowers to the foam ball. Place them close together, covering the entire ball.
- Insert the wooden dowel or stick into the foam ball, ensuring it is secure. Glue it in place.
- Place the foam ball with the dowel into a container or pot. Fill the container with decorative moss or rocks to cover the foam ball and add stability.
- Adding any additional decorative elements, such as ribbon or beads, to the dowel or stick.
That’s it! With these simple steps, you can create a beautiful and eco-friendly flower bottle topiary from plastic bottles that you can display in your favourite room or spot.
Summarize
To summarize, creating different flower designs from plastic bottles is a creative and eco-friendly way to enhance the beauty of our living spaces. From simple and elegant to vibrant and intricate, there are a lot of ways to bring a touch of nature into your home using recycled materials.
There are many different flower designs from plastic bottles that you can make. Be creative and experiment with different shapes and colours and you’ll make your unique pieces.
Consider giving plastic bottles a second life by transforming them into beautiful flower decor! In this blog post, you’ve discovered 5 different flower designs from plastic bottles. So getting into such a fulfilling recycling project will be easy!


