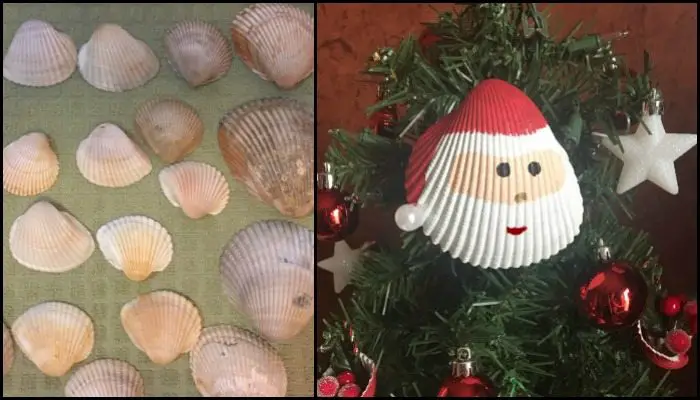
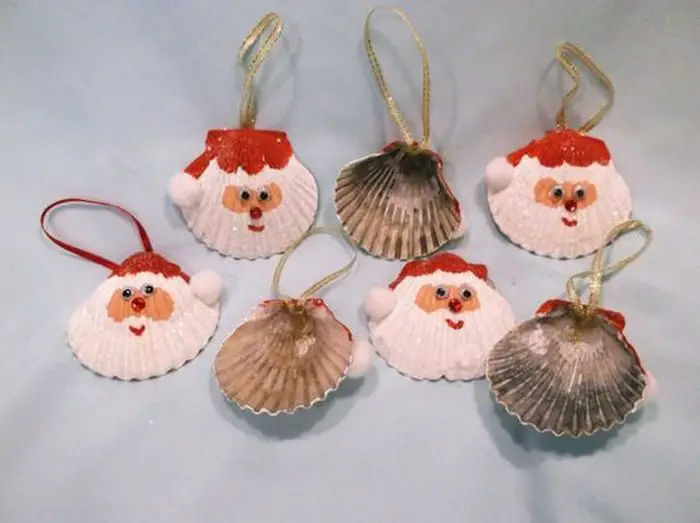
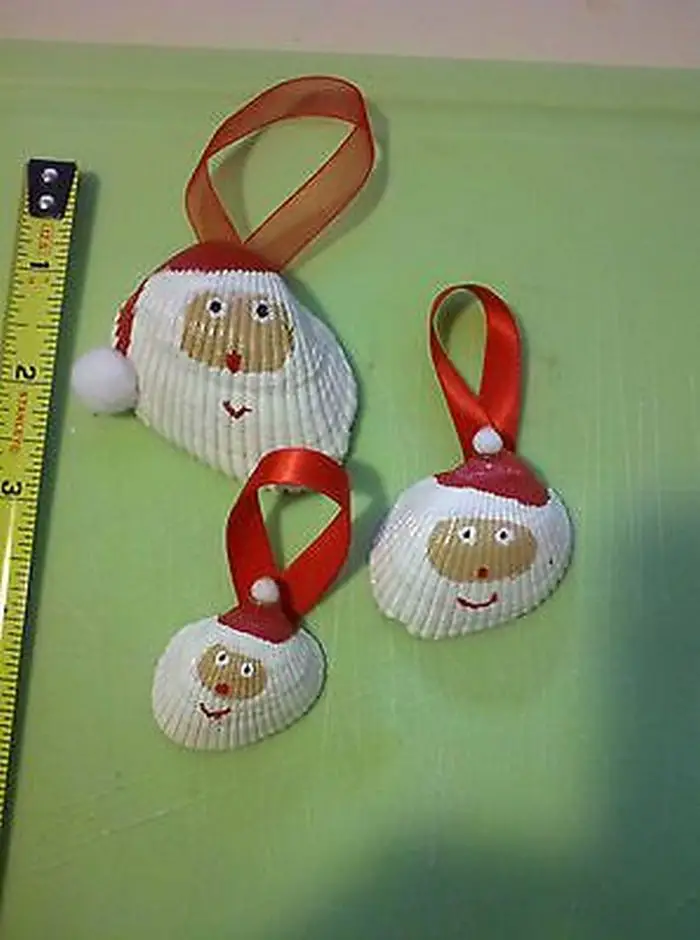
Want new Christmas tree ornaments? If you live in a coastal city then this seashell craft is the perfect idea for you!
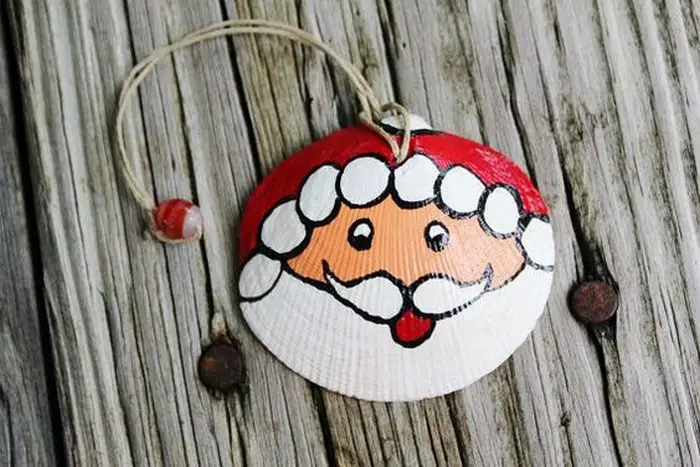
You can make unique Christmas tree ornaments by painting your own Santa Claus on seashells!
You don’t need a real talent in painting to make this DIY seashell decor. It’s so easy that even kids can paint their own seashell Santa.
This is really great for those who live near the beach since you only have to collect dead seashells.
Clean them by soaking them in 50/50 solution of bleach and water, then let them dry completely. Once your seashells are ready, you can proceed with painting! You can head over to the article linked below if you need a guide for this step.
Now this tutorial doesn’t show you how to make a hole on a seashell for inserting a ribbon for hanging, but it’s a very easy process. Just take a sharp tool like a pair of scissors and carefully puncture the shell until you’ve made a hole.
And that’s it, you now have your new and personalized Christmas tree ornaments!
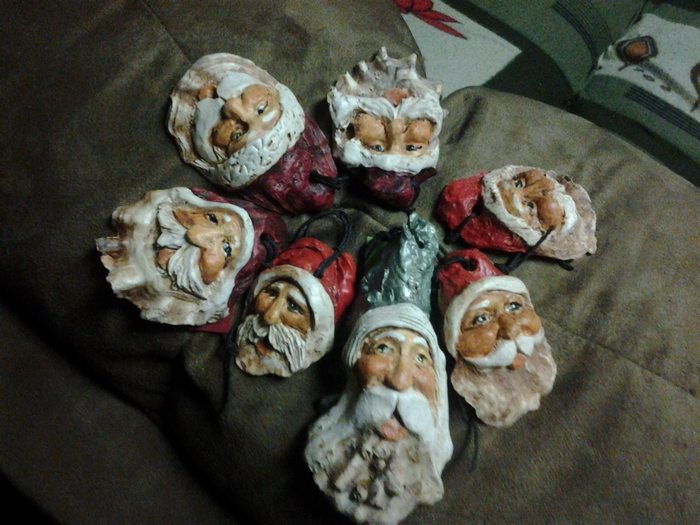
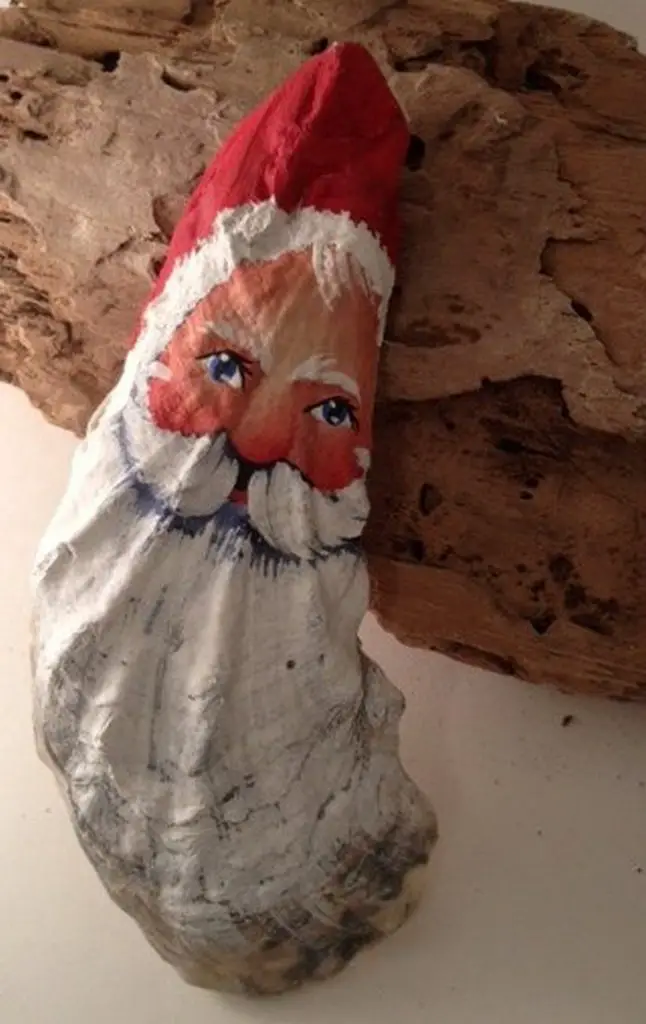
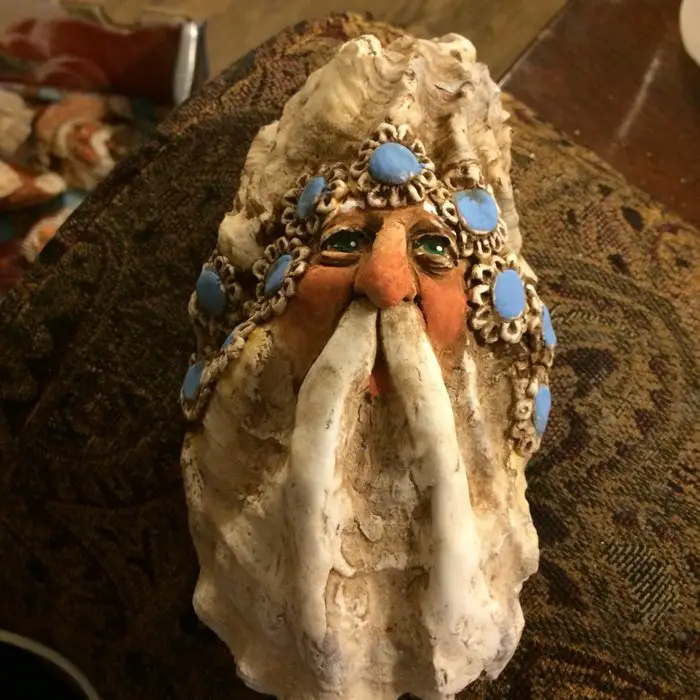
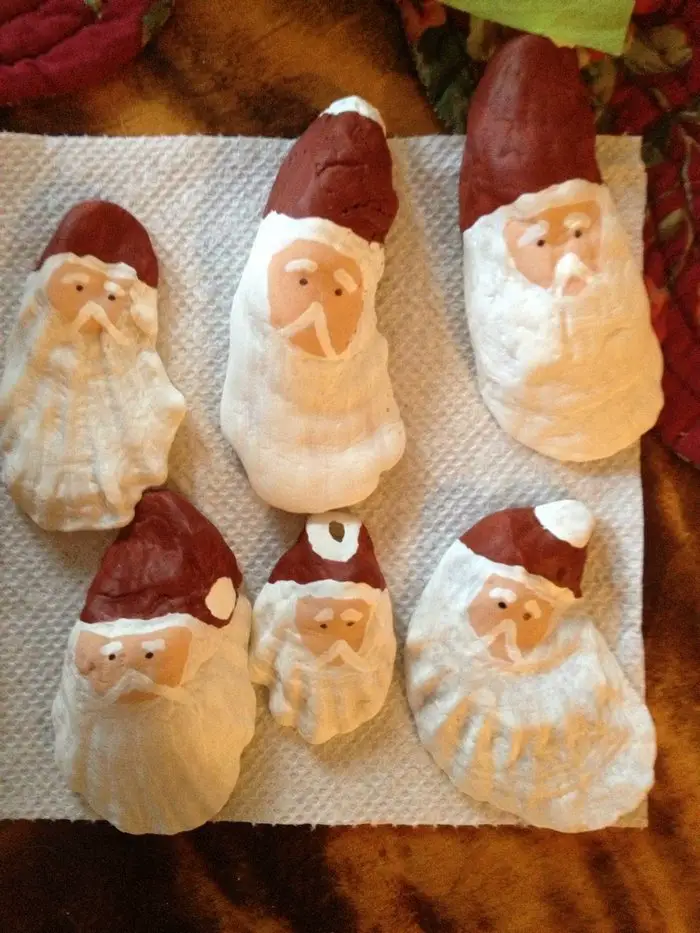
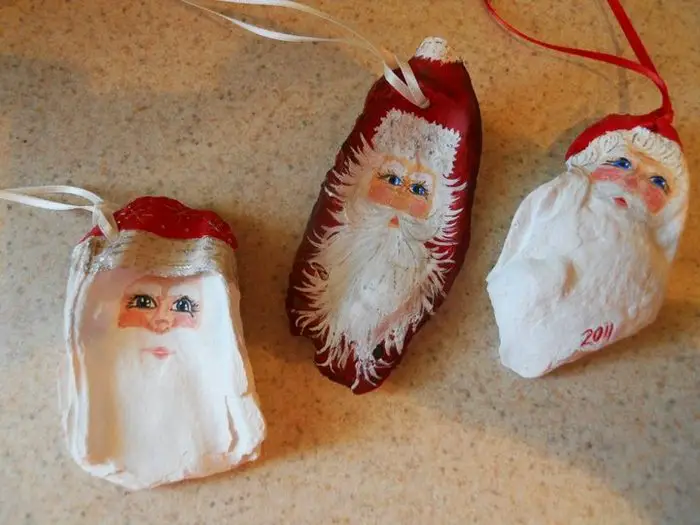
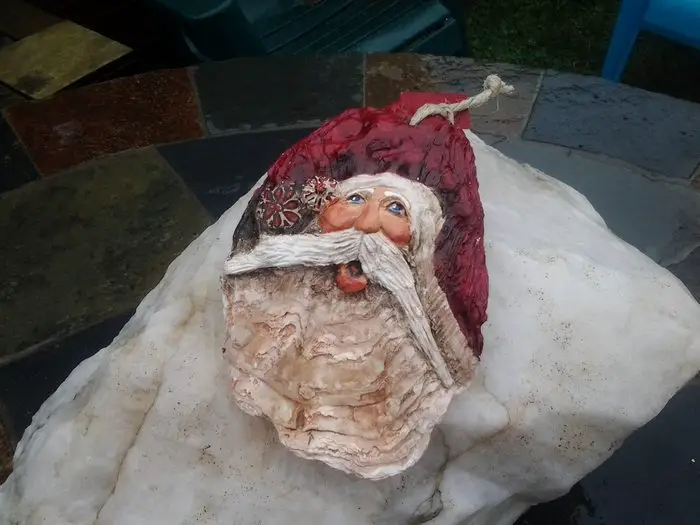
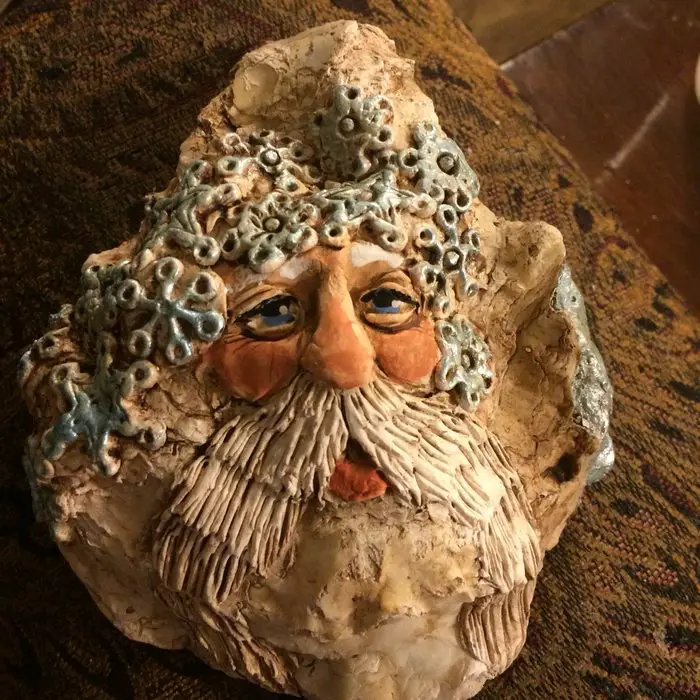
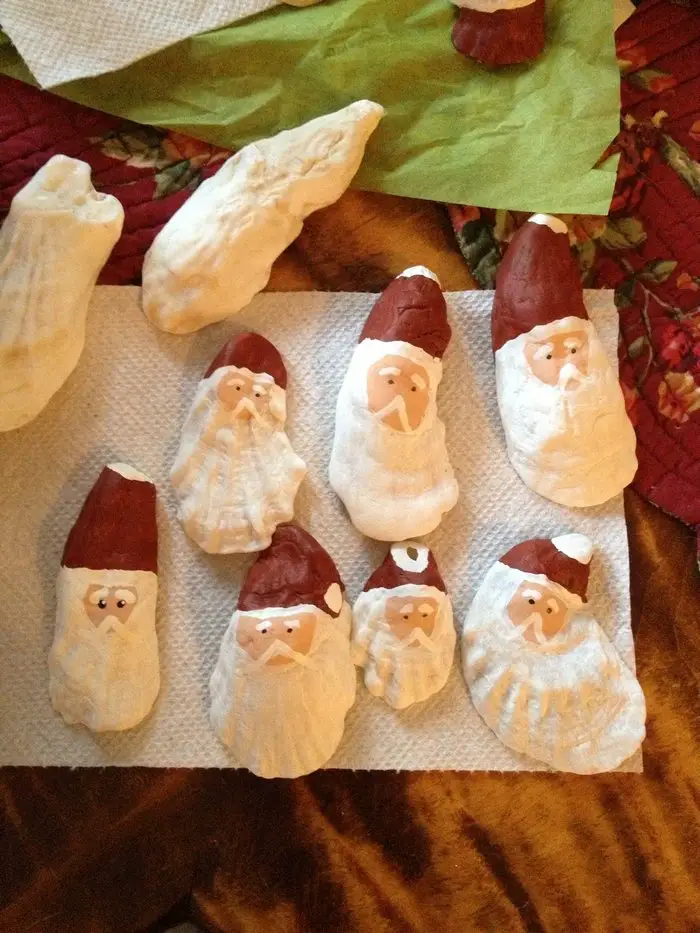
You can also do this craft project with oyster shells if that is what’s more accessible to you. Check out our album of seashell and oyster shell Santa below for inspiration!
Is this going to be your next Christmas project?
Contents
Making Christmas Tree Ornaments from Seashells
Materials
- Seashells
- Pearls/Beads
- Acrylic Paint (red, peach, white, black, gold)
- Ribbon (optional)
Tools
- Paintbrushes
- Hot Glue Gun
- Any sharp tool (for making a holes on the seashell to insert a loop into)
Instructions
Step 1: Clean Your Shells
First off, clean those seashells well. You don’t want any beachy grime messing up your paint job. Wash them with some soapy water or give them a quick soak in a bleach solution if they’re really gritty. Make sure they’re bone dry before you start painting.
Step 2: Painting Time
Now, decide what you want your seashells to look like. Are we going classic Santa, or maybe something funky like a gold and black geometric pattern? Whatever you choose, start with the lighter colors and add the details in darker shades. Take your time and let the paint dry before adding another layer—no smudges wanted here!
Step 3: Add Some Bling
After the paint dries, it’s time to jazz them up. Use your hot glue gun to stick on some pearls or beads. You can put them anywhere you like—make them Santa’s buttons or just add some random sparkle. It’s all up to you!
Step 4: Make Them Hangable
Once your shells are looking fabulous, grab your sharp tool and carefully make a little hole at the top of each shell. This part’s a bit tricky, so take it slow. Then, thread a ribbon through the hole and tie a nice knot. Choose a ribbon color that complements your design.
Step 5: Seal the Deal
If you’re feeling extra, you can brush on some clear sealant to make your paint job last longer and look glossier. Just make sure it’s totally dry before you move on to the next step.
Step 6: Ready to Display
Voila! Your ornaments are ready. Hang them up on your tree or anywhere else that needs a touch of handmade holiday spirit. They’re sure to catch an eye or two.
Click on any image to start lightbox display. Use your Esc key to close the lightbox. 8-)
Seashell Santa Variations
Creating Christmas tree ornaments from seashells is a delightful way to add a personal touch to your holiday decor. Each seashell has its unique shape and texture, which means your Seashell Santa can take on a variety of creative interpretations.
Below, explore some fun variations to inspire your next batch of Christmas tree ornaments.
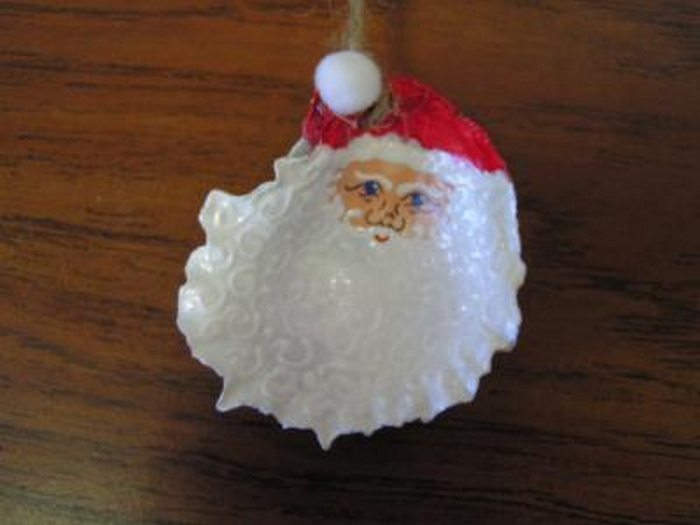
Vintage Seashell Santa
For a nostalgic flair, paint your Seashell Santas with a vintage-inspired palette. Use muted reds, off-whites, and soft peach tones to capture the essence of old-fashioned Christmas decor. Add tiny specks of gold to mimic the look of aged, worn-out costumes. These Christmas tree ornaments can evoke memories of past holidays, giving your tree a warm, timeless feel.
Modern Minimalist Seashell Santa
If your holiday decor leans towards the modern, consider minimalist Seashell Santas for your Christmas tree ornaments. Focus on simple designs with bold, solid colors and less detail. Black and white Santas can make a striking impact against the green backdrop of a Christmas tree, adding a chic, contemporary vibe to your festive decorations.
Tropical Seashell Santa
Perfect for those celebrating Christmas in warmer climates or for anyone who loves a bit of whimsy, the Tropical Seashell Santa is a colorful alternative. Use bright, vibrant colors like turquoise, pink, and bright yellow. Paint on sunglasses and maybe a Hawaiian shirt on your Santa. These Christmas tree ornaments will not only be unique but also a fun conversation starter at your holiday gatherings.
Glittery Glam Seashell Santa
For those who believe more is more during the holidays, a Glittery Glam Seashell Santa might be the perfect addition to your Christmas tree. After painting your Santa, add a generous amount of glitter while the paint is still wet. Choose traditional red and green glitters or go bold with silver and gold. These sparkling Christmas tree ornaments will catch the light beautifully and add a touch of glamour to your festive display.
Eco-Friendly Seashell Santa
Emphasize sustainability with Eco-Friendly Seashell Santa ornaments. Use natural pigments for painting and adorn your Santas with small bits of recycled materials that glitter or shine. These Christmas tree ornaments not only look beautiful but also align with eco-friendly practices, making your holiday decor both attractive and conscientious.
Each of these variations allows you to express your personal style and creativity through your Christmas tree ornaments. Whether you choose a vintage look, a modern twist, or something entirely out of the ordinary, your Seashell Santas will surely enhance your holiday cheer.
Personalizing Seashell Ornaments
It will be extra special if you give your Christmas tree ornaments a personal touch. Seashell decorations provide a special blank canvas on which to customize each piece with your own sense of style and recollections.
The following are some suggestions for customizing your seashell ornaments:
Names and Initials
Painting initials or complete names on the seashells is a quick and meaningful way to add personalization to your Christmas tree ornaments. For accuracy, use a paint pen or a fine brush. If you’re presenting the ornament as a gift, this can have even more significance and turn it into a treasured memento for years to come.
Important Events and Dates
Add dates to your seashell Christmas tree ornaments to mark important occasions. These ornaments can be lovely mementos for every season, be it the year, a noteworthy anniversary, or a beloved holiday. To make the dates stand out against the seashell background, use contrasting colors.
Decorations with a theme
Make your seashell decorations according to several themes that align with the hobbies of you and your family. You may paint sporting goods or team emblems to make ornaments with a sports theme, or you could use similar artwork to honor hobbies like gardening or music. These personalized Christmas tree ornaments with themes highlight the interests and pastimes of your family while also adding personality to your tree.
Your seashell Christmas tree ornaments will not only brighten your holiday décor but also act as significant reminders of your life and experiences by including these unique touches. Every ornament, tastefully decorated, will occupy a particular spot on your tree and in your heart.
Advanced Crafting Techniques
Getting Your Seashell Up Advanced craftsmanship skills can be applied to Christmas tree ornaments to create exquisite works of art. For those who want to step up their DIY game or give their holiday decorations a more polished look, these techniques are ideal.
Here are a few advanced methods to think about:
Preserving Painted Seashells with Resin
- Step 1: Get Your Seashells Ready Ensure that the painted seashells have dried fully. Eliminate any oil or dust that could impede the application of resin.
- Phase 2: Blend the Resin To precisely mix the resin and hardener, according to the directions included with your resin kit. Appropriate proportions are essential for a clean, sturdy finish.
- Step 3: Put Resin in Place Apply resin on the painted seashell surface using a drip tool or small brush. Ensure that the edges are covered for a rounded, smooth finish.
- Step 4: Allow Resin to Dry Give the resin time to cure in a dust-free atmosphere. Depending on the type of resin, this could take anywhere from a few hours to a day.
Including LED Lighting
- Step 1: Choose Tiny LEDs Select tiny LED lights that are not overly noticeable and can be easily tucked beneath or inside seashells.
- Step2: Put the LEDs in place Apply transparent adhesive or a hot glue gun to the back of the seashell to attach the LEDs. Make sure the wire is concealed and placed correctly.
- Step 3: Turn on the Lighting As a power supply, use a tiny battery pack. This can be put at the base of the Christmas tree or fastened to the rear of the ornament.
How to Seal and Preserve Painted Seashells
- Step 1: Select the Appropriate Sealant To keep the colors vibrant, choose a sealer with UV protection. An even coat can be achieved with a spray-on sealer without affecting the paint.
- Step 2: Let the sealant dry. Make sure to treat every painted surface of the painted seashell with a thin layer of sealant by spraying it evenly. As directed by the manufacturer, allow it to dry.
- Step 3: Apply Extra Layers After the first layer has completely dried, apply a second coat for further protection. This will strengthen your Christmas tree ornament’s durability.
These cutting-edge crafting methods give your handmade Christmas tree decorations a polished appearance in addition to improving the longevity and beauty of your seashells. This Christmas season, your decorations can really stand out if you work with resin, add lighting, or use protective sealants. All of these techniques offer a special touch.
Conclusion
Making Christmas tree ornaments from seashells allows you to create unique and personal decorations that reflect your style and creativity. Each ornament becomes a special piece of holiday art, adding a natural and bespoke element to your festive decor. This DIY project is not only a fun activity for all ages but also a wonderful way to bring a touch of the sea into your Christmas celebrations.
We have more Christmas ornament projects. Check out our Christmas wood craft guide!


