
Here’s a nice table centerpiece idea you can do for Christmas Eve dinner, and it’s easy to make… wine glass snow globes!
This creative idea is one clever way of recycling/repurposing some of the unused items in your house. It’s a DIY Christmas decoration where you can make use of empty cereal boxes, or excess cardboard materials and gift wraps and ribbons that are too small for other projects. You can even use small plastic toys kids aren’t playing with anymore, like small animals or tiny dolls from Polly pockets or even a Lego man. :)

Some of us have stemware that we never got the chance to use, so this is a nice idea to give them a different purpose! But for those who don’t have any wine glass to spare, you can always purchase stemmed glasses at thrift stores. Usually wine glasses from these stores cost less than a dollar apiece!
This craft idea is definitely an inexpensive and fun project for anyone. And what’s great is that it’s not just a table centerpiece — you can also use it as Christmas decor anywhere at home oe the office. :)
Are you making some for this season?
Contents
Making Wine Glass Snow Globes
Materials
- Wine Glass
- Small Plastic Decorations (Christmas trees, reindeer, etc.)
- Cardboard (use cracker or cereal boxes)
- Artificial Snow or Glitter
- Decorative Paper for covering the back of Cardboard (use excess gift wraps)
- White Glue
- Candle (optional)
- Ribbons/ (optional)
Tools
- Hot Glue Gun
- Scissors
- Pencil/Marker
Instructions
Step 1: Prepare the Base
- Cut the Cardboard: Use scissors to cut a circle from your cracker or cereal boxes. This circle should be slightly smaller than the rim of your wine glass, as it will serve as the base where the decorations are mounted.
- Decorate the Base: Cover the cardboard circle with decorative paper. Use white glue to adhere the paper, smoothing out any bubbles or wrinkles for a neat finish.
Step 2: Arrange the Decorations
- Plan Your Scene: Arrange the small plastic decorations (like Christmas trees and reindeer) on the cardboard base. Experiment with different layouts until you find a visually pleasing arrangement.
- Attach Decorations: Once you’re happy with your layout, use the hot glue gun to securely attach each decoration to the cardboard base. Ensure they’re firmly glued down to prevent them from moving once enclosed.
Step 3: Add Snow
- Apply Artificial Snow or Glitter: Sprinkle a generous amount of artificial snow or glitter over the base and decorations. You can use white glue to create small patches where the snow can stick, ensuring a more realistic snowfall appearance.
Step 4: Seal the Globe
- Prepare the Glass: If desired, place a candle inside the wine glass. This step is optional but can add a warm light to your snow globe if the candle is lit.
- Attach the Base to the Glass: Apply a bead of hot glue along the rim of the wine glass. Carefully place the decorated cardboard base onto the glass rim, with the decorations facing inward. Press down gently but firmly to create a tight seal, making sure the glue does not spill into the globe.
Step 5: Add Finishing Touches
- Decorate the Rim: Use ribbons or additional decorative paper to embellish the rim of the glass where the cardboard is glued. This not only enhances the visual appeal but also helps conceal any visible glue.
- Final Touches: Add a ribbon bow or other small decorations to the stem or base of the wine glass for extra festivity.
Step 6: Display Your Snow Globe
- Choose a Spot: Place your wine glass snow globe on a stable surface away from high traffic areas. If you’ve used a candle, be cautious about where you display the globe, avoiding any flammable materials.
Click on any image to start lightbox display. Use your Esc key to close the lightbox.![]()
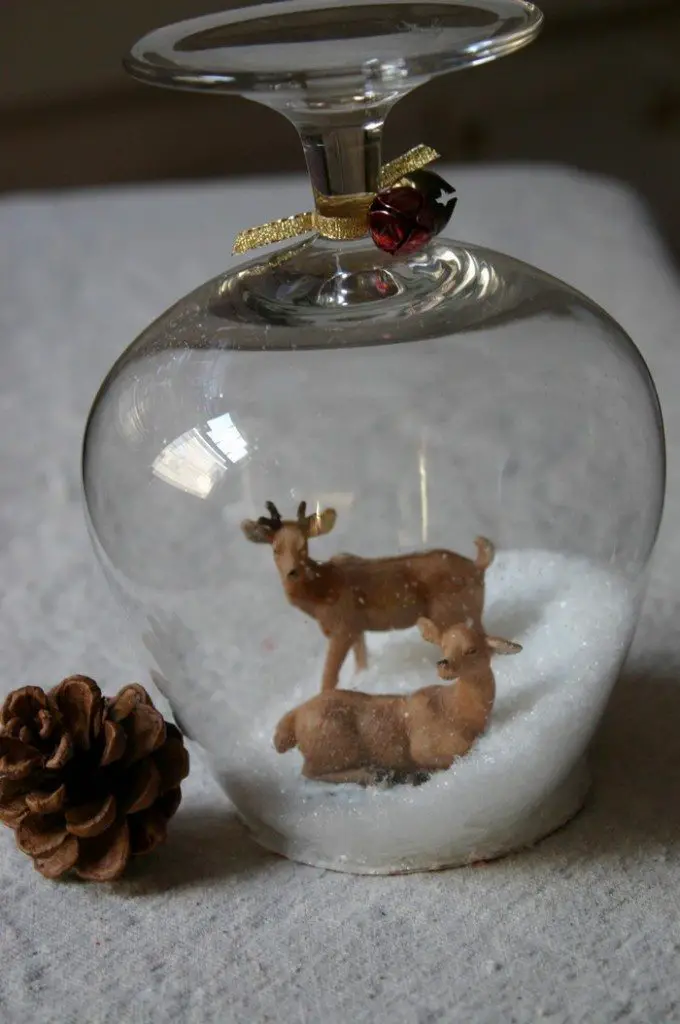
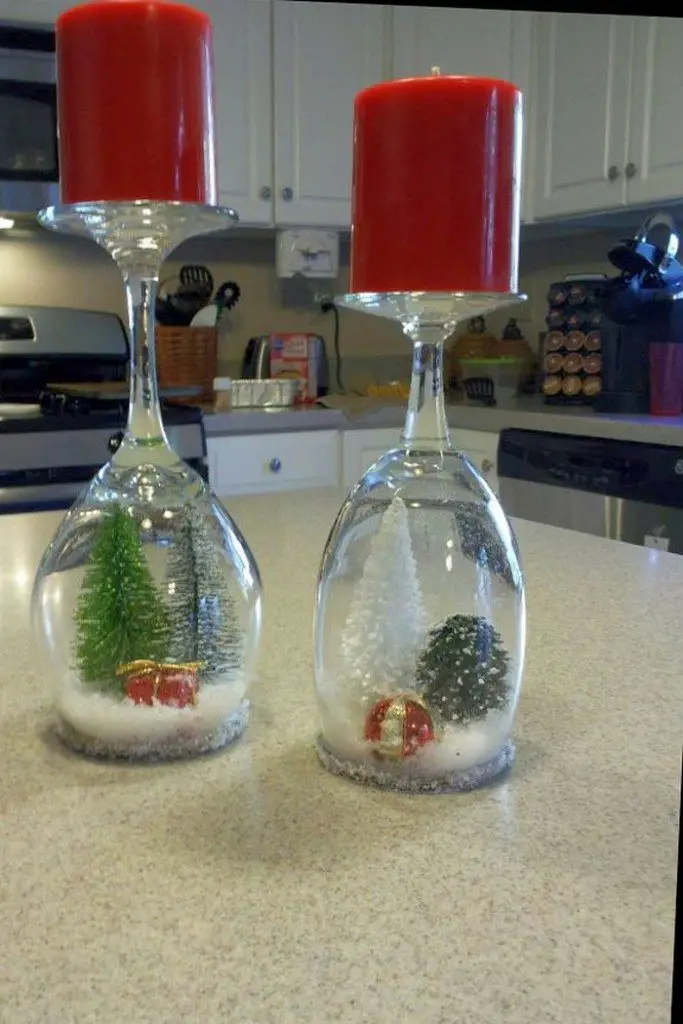
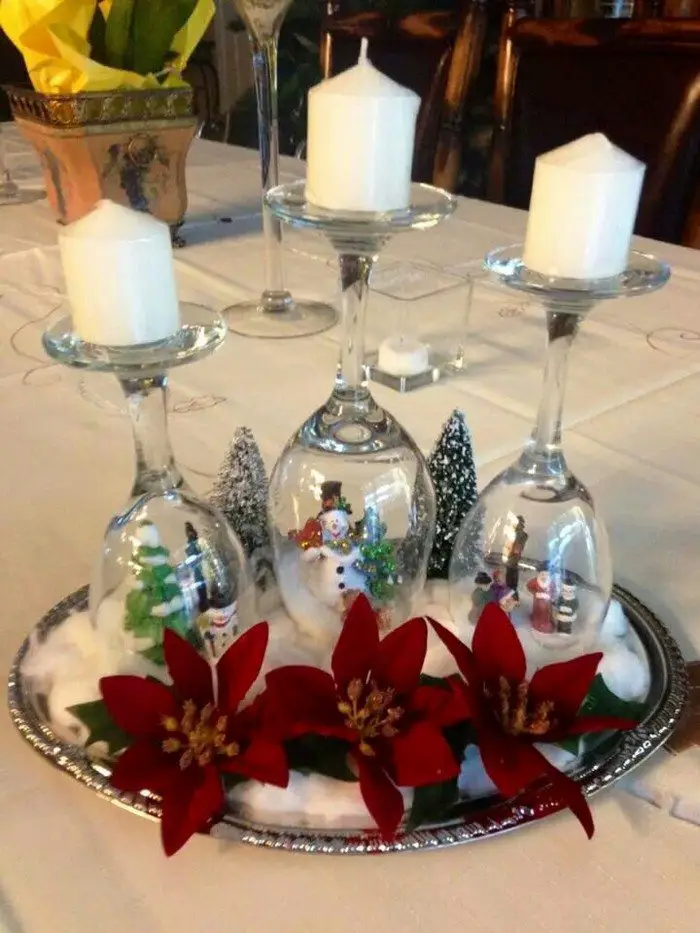
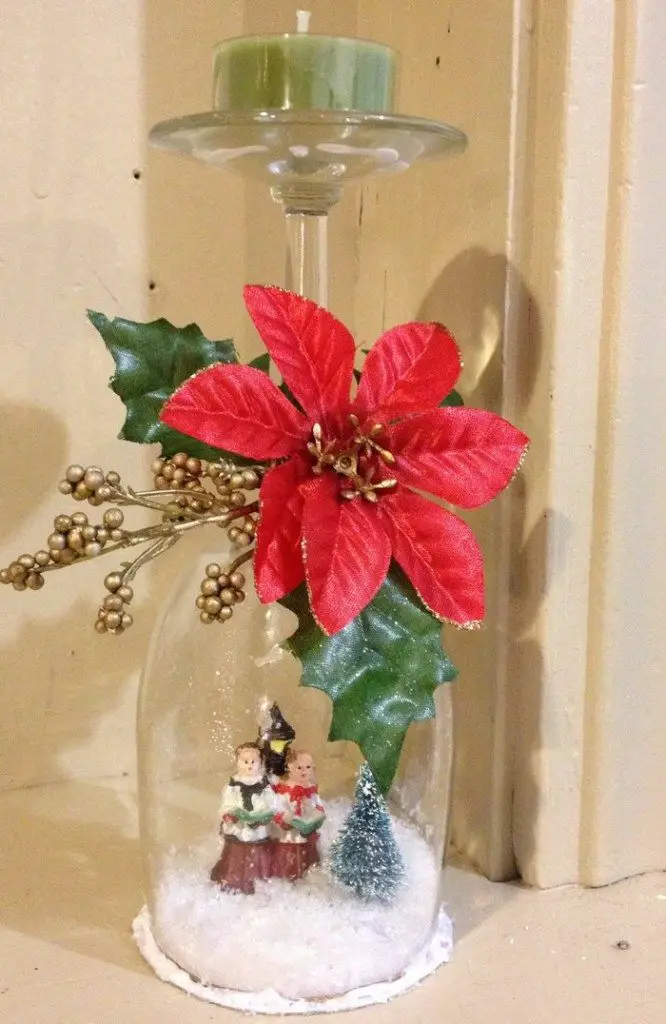
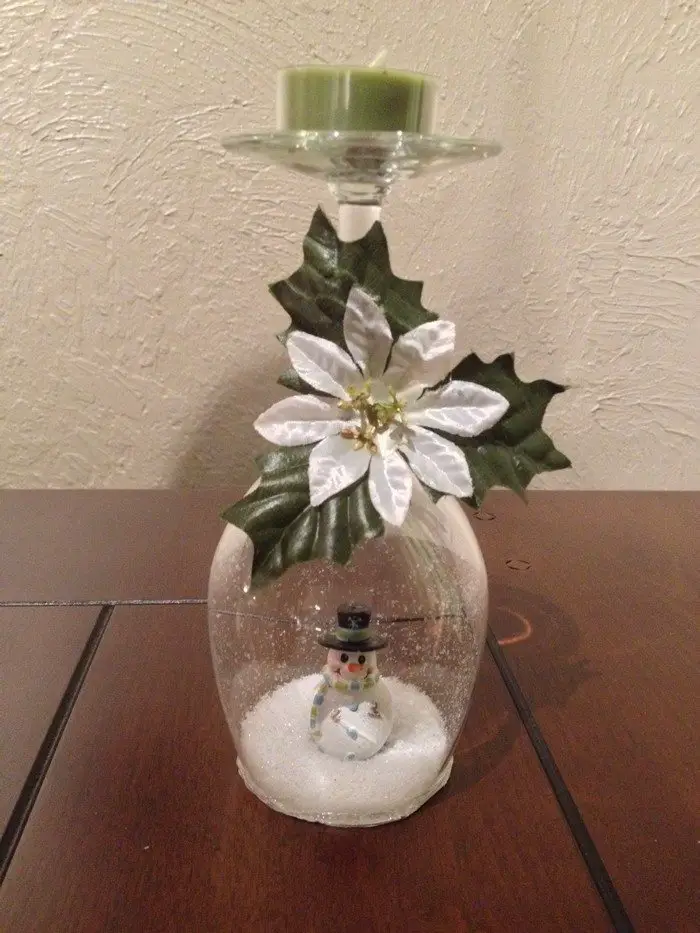
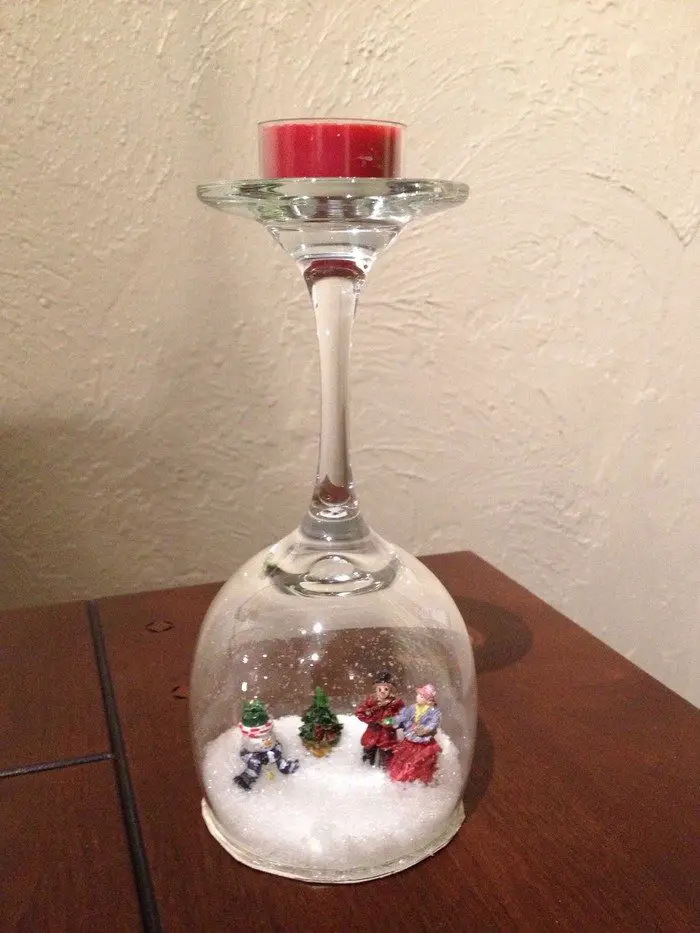
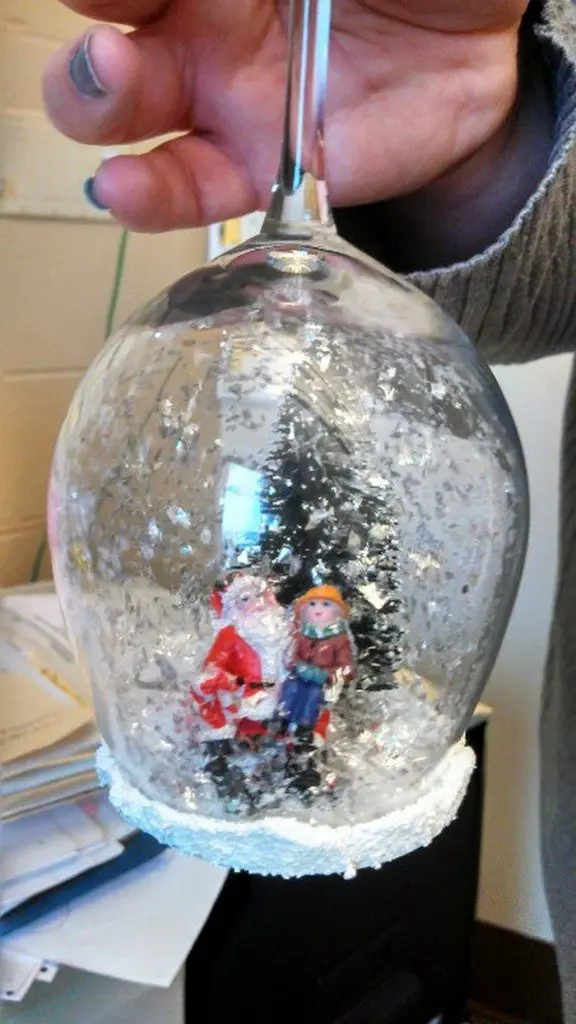
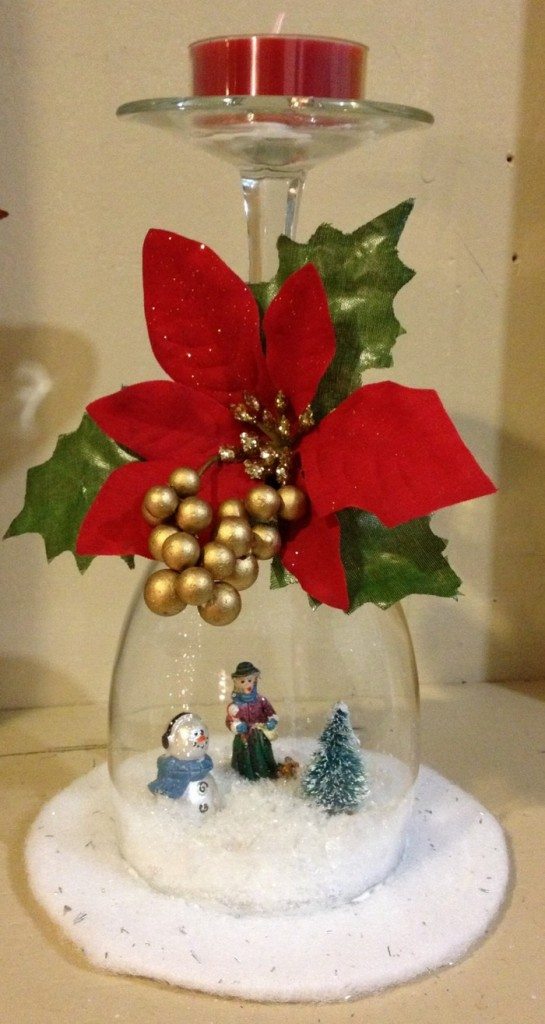
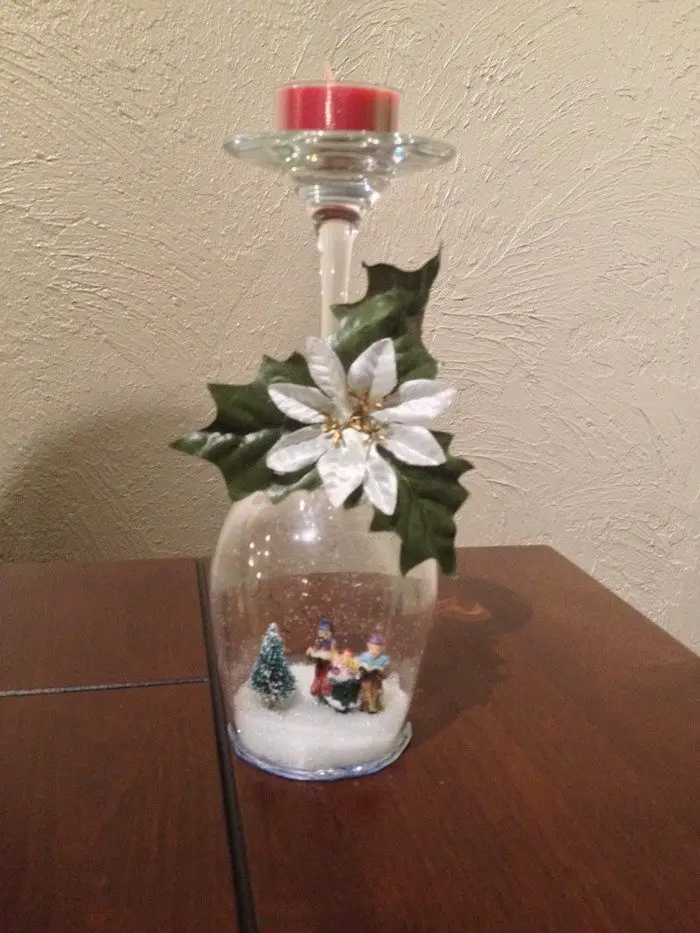
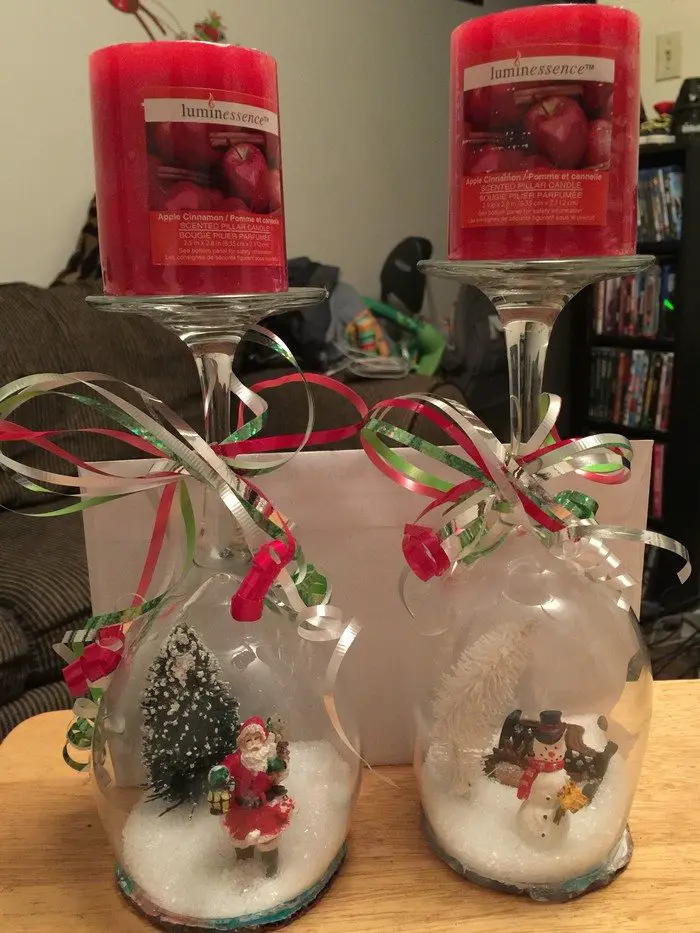
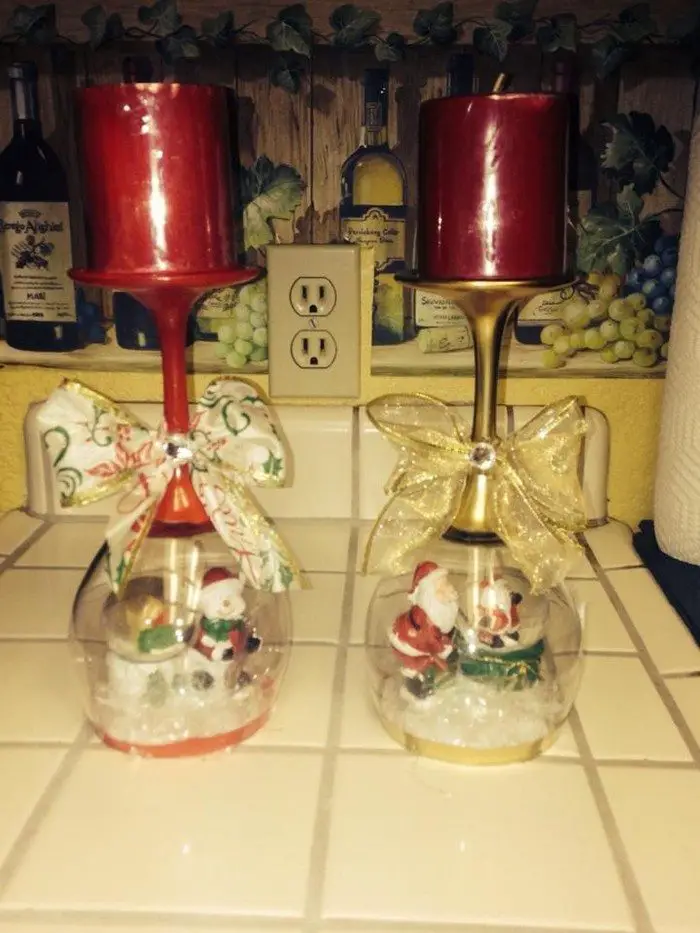

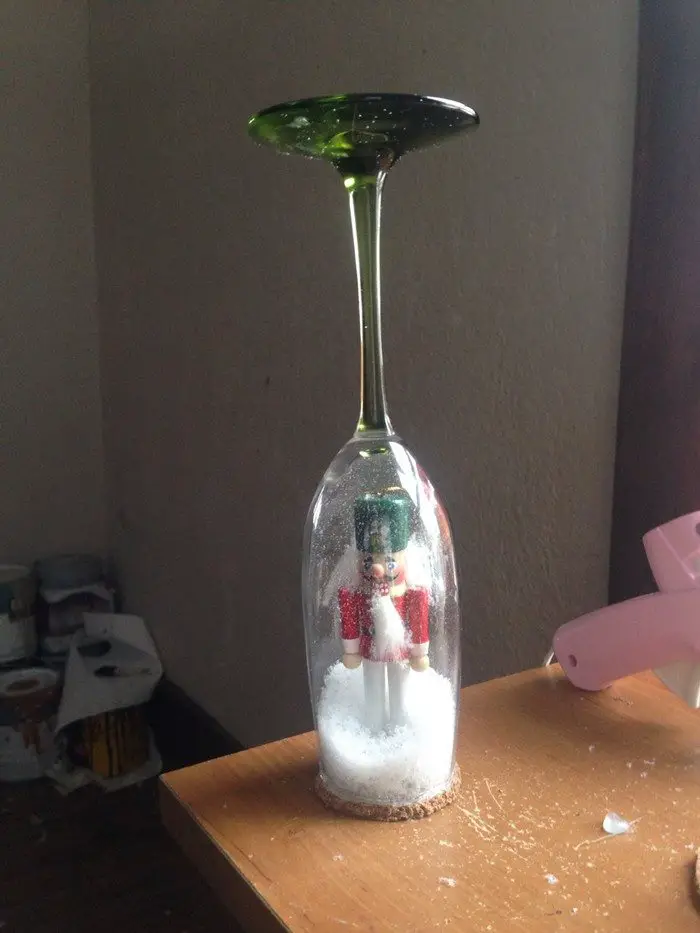

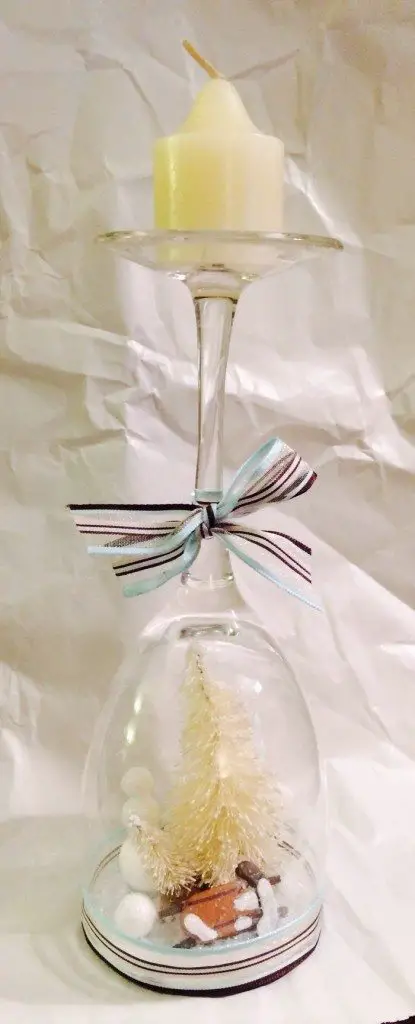
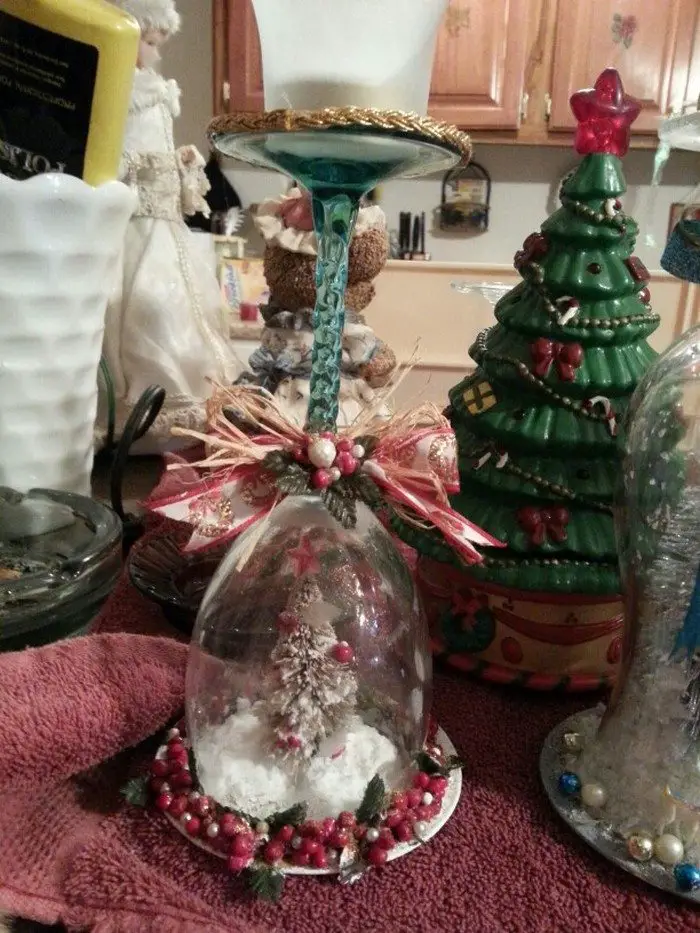

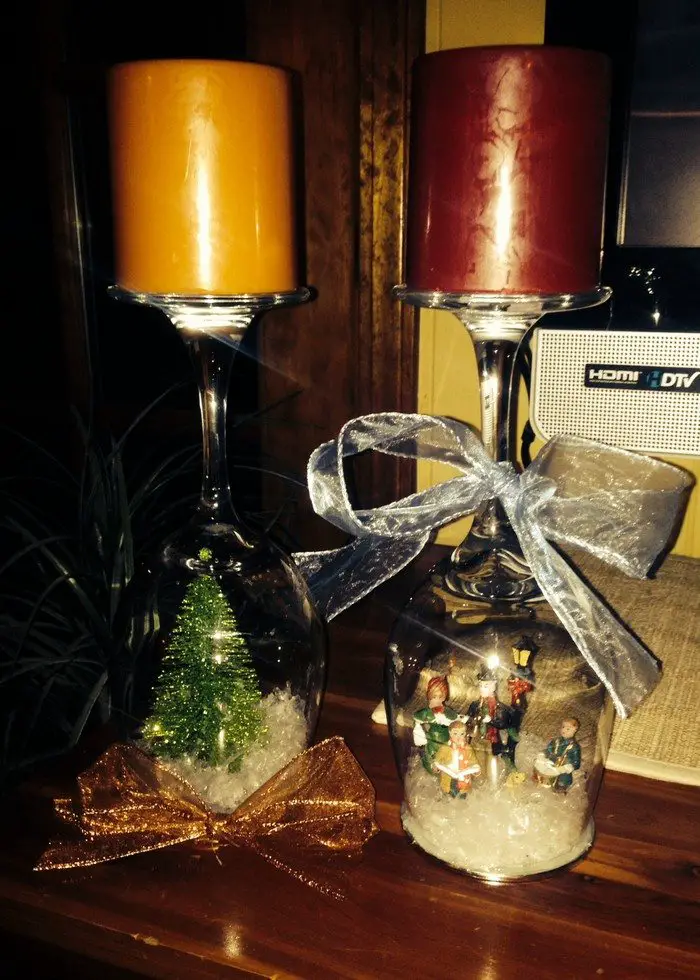
You can get more step-by-step instructions here…
Advanced Decoration Techniques
Elevating the appearance of your wine glass snow globes with advanced decoration techniques can transform these charming crafts into true pieces of art. Whether you’re looking to add a personal touch or create a dazzling display item, these methods will help you achieve a more refined and unique look. Here are some sophisticated decoration techniques to enhance your wine glass snow globes.
Incorporating Painted Designs
Hand-Painting Glass: Use glass paints to add delicate designs directly onto your wine glass. Floral patterns, winter scenes, or abstract art can bring color and life to your wine glass snow globes. For a festive touch, consider painting holly leaves, snowflakes, or stars around the base or rim of the glass.
Adding Frosted Effects
Frosting the Glass: Achieve a wintry, frosted look by using a glass frosting spray. This effect not only adds to the snowy theme but also creates a beautiful contrast with clear sections, enhancing the illusion of a cold winter landscape within your wine glass snow globes. Mask parts of the glass with tape if you want to maintain some clear windows to peek through.
Embedding LED Lights
Lighting Up Your Snow Globes: Integrate small LED lights inside your globe to illuminate the scene. You can place tiny lights around the perimeter of the cardboard base or hide them amongst the decorations to mimic a starry night or glowing lanterns. This technique brings your wine glass snow globes to life, especially in dim lighting.
Layering with Textured Backgrounds
Dimensional Backdrops: Create depth inside your wine glass snow globes by using textured or layered backgrounds. Apply techniques like decoupage to attach patterned paper or fabric inside the base or around the interior walls of the glass. This provides a rich, multi-dimensional scene that complements your figurines and thematic decorations.
Embellishing with Fine Details
Intricate Beadwork: Adorn your snow globes with fine beads or crystals to mimic ice crystals or sparkling snow. You can glue these around the rim of the glass or sprinkle them around the figures inside to catch the light beautifully. This touch of sparkle adds an element of luxury and festivity to your snow globes.
Using Natural Elements
Incorporate Nature: For a rustic or autumnal theme, consider incorporating small branches, leaves, or stones. These natural elements can be painted with metallic or frost-like finishes for an enchanting look. Adding these items can give your wine glass snow globes an organic, earthy feel while still being elegant.
Applying Metallic Foils
Gold Leaf and Metallic Accents: Use metallic foils or gold leaf to add shimmering touches to the exterior of the wine glass or to some elements inside the globe. This technique is perfect for festive occasions or to add a touch of glamour. The reflective properties of the metal enhance the visual impact of your snow globes.
Crafting Miniature Garlands
Tiny Garlands and Banners: Craft miniature garlands or banners to string across the inside of the globe or around the rim. These can be made from paper, tiny pom-poms, or micro beads. Custom messages or festive symbols on these garlands can personalize the snow globes further, making them special for events or recipients.
By applying these advanced decoration techniques, your wine glass snow globes can become standout pieces during the holidays or at any themed event. These enhancements not only add visual appeal but also give a professional touch to your DIY project.
Theme Variations for Different Occasions
Wine glass snow globes offer a versatile and charming way to decorate for various occasions. By changing the theme inside the glass, you can tailor them to fit any event, making them a delightful addition to your décor or as thoughtful gifts. Explore these theme variations for your wine glass snow globes to celebrate different special events and holidays throughout the year.
Halloween Haunts
Create eerie wine glass snow globes with miniature haunted houses, ghosts, or skeleton figurines. Use dark glitter or black artificial snow to add to the spooky effect. These can serve as perfect table centerpieces for a Halloween party or eerie decorations around your home.
Easter Celebrations
Fill your wine glass snow globes with small pastel eggs, tiny bunnies, or artificial flowers to celebrate Easter. Use bright and cheerful colors like yellow, pink, and baby blue to reflect the season’s vibrant hues. These globes can brighten up any brunch table or serve as lovely gifts during the Easter season.
Romantic Valentines
For Valentine’s Day, design wine glass snow globes with romantic elements such as hearts, red roses, or figures of couples. Choose red or pink glitter to simulate falling petals or hearts. These romantic globes can be a beautiful surprise for a loved one or a decorative highlight for a romantic dinner.
Wedding Decor
Customize wine glass snow globes with elements that match the wedding theme, like miniature bridal gowns, wedding rings, or tiny champagne flutes. Use these as unique favors or table centerpieces that guests can take home as a memento of the special day.
Christmas Cheer
Traditional wine glass snow globes with Christmas trees, reindeer, or Santa Claus figurines are perfect for the holiday season. Use white or silver glitter to mimic snow and add miniature lights for a festive glow. These globes can enhance the holiday spirit in any room or make great gifts for friends and family.
By adapting the themes inside your wine glass snow globes, you can create unique and fitting decorations for any occasion, adding a personalized touch to your celebrations and home décor.
Conclusion
Creating wine glass snow globes for the holiday season adds a personal and artistic touch to your festive decorations. These handcrafted globes can serve as captivating centerpieces or thoughtful gifts, infusing a magical winter charm into your celebrations. Embrace this creative project to make your holiday gatherings more memorable and visually enchanting.


