
Do you ever wonder if your empty wine bottles are good for anything other than the rubbish bin? Well, we’ve got you covered right here. This DIY wine bottle project will not only inspire your creativity but will also upgrade the look of any outdoor space in an instant.
Contents
Transform Your Backyard with a DIY Glass Bottle Torch
Why not utilize those old wine bottles that would otherwise end up in the trash and turn them into stunning tiki torches right in the comfort of your own home? By repurposing these bottles, you not only contribute to reducing waste but also unleash your creativity and add a unique touch to your outdoor space.
Transforming discarded wine bottles into stylish tiki glass bottle torches allows you to showcase your DIY skills and create a captivating ambiance. With just a few materials and a little bit of effort, you can bring a touch of elegance and charm to your garden or patio.
So, instead of letting those empty wine bottles gather dust, embark on this exciting project and witness how simple objects can be transformed into functional and visually appealing torches.

Materials to make a glass bottle torch
You’ll be needing these materials and tools to make your own glass bottle torch.
- Empty Wine Bottle (or any beautiful glass bottles which have necks 1 inch in diameter)
- Look for empty wine bottles or any other glass bottles that have an appealing design and a neck diameter of 1 inch. These bottles will serve as the main body of your torch.
- Teflon Tape 1/2 inch
- Teflon tape is necessary for creating a secure and leak-proof connection between the different components of the torch. This tape helps to ensure a tight fit and prevent any fuel leakage.
- Copper Top Plate Connector (threaded for 3/8”-16 thread rod)
- The copper top plate connector acts as the mounting point for the torch. It is threaded to fit a 3/8”-16 thread rod, allowing you to securely attach the torch to a desired surface.
- 1” Split Ring Hanger (threaded for 3/8”-16 thread rod)
- The split ring hanger is threaded to fit a 3/8”-16 thread rod and serves as the holder for the glass bottle. It provides stability and allows you to easily position the bottle in place.
- 1/2” x 3/8” Copper Coupling
- The copper coupling is an essential component that connects the wick to the bottle. It should have a diameter of 1/2 inch on one end and 3/8 inch on the other end to ensure a proper fit.
- 1/2” Copper Cap
- The copper cap is used to keep the wick dry when the torch is not in use. It fits over the coupling and provides protection from moisture and debris.
- Two Hex Nuts (threaded for 3/8”-16 thread rod)
- Hex nuts are used to secure the split ring hanger in place. They are threaded to fit the 3/8”-16 thread rod and help to ensure stability and a secure attachment.
- Two #10 x 1” Zinc Plated Wood Screws (if you’re mounting it to wood)
- If you plan to mount the torch on a wooden surface, you will need these wood screws to secure the top plate connector and ensure a strong and stable attachment.
- 3/8”-16 Zinc Plated Threaded Rod
- The threaded rod is used to connect various components of the torch. It should have a 3/8”-16 thread size to match the fittings.
- Tiki Replacement Wick
- The replacement wick is the key element that absorbs and carries the fuel to create the flame. Use a tiki replacement wick or make your own using materials like cotton.
- Torch Fuel (use ONLY fuel made specifically for outdoor torches to be safe. i.e. Tiki brand)
- It is crucial to use the correct fuel for your glass bottle torch to ensure safe and efficient burning. Use torch fuel specifically designed for outdoor torches, such as the Tiki brand, to achieve optimal results.
Tools Needed
- Scissors
- Drill/Screwdriver
How to Create a Glass Bottle Torch?
With the supplies on hand, this can be made on the spot.
Determine the Location of Your Glass Bottle Torch
When determining the perfect location for your glass bottle torch, it’s essential to consider both aesthetics and functionality. Take a moment to visualize where you want to place your torch and how it will enhance the overall ambiance of your outdoor space.
Preferably a Wooden Wall
While there are various options available, we highly recommend considering a wooden wall as the ideal spot. Placing your tiki torch on a wooden wall offers several advantages. First and foremost, it provides a sturdy and secure surface to mount the torch.
Ensure Strength and Durability
The natural strength and durability of wood ensure that your torch will be firmly anchored, providing stability and minimizing the risk of accidental dislodgment. A wooden wall not only serves a practical purpose but also provides an aesthetically pleasing backdrop for your tiki torch.
The warm and earthy tones of the wood harmonize with the flame’s natural beauty, introducing a touch of rustic charm to your outdoor environment. The interplay between the torch’s gentle, flickering light and the wood’s innate textures generate a mesmerizing and snug ambiance. It is also highly adaptable when it comes to customization.
Easy Integration
A wooden wall allows for easy integration of various design elements around the torch, such as hanging plants, artwork, or decorative accents, to create a cohesive and inviting outdoor area. Additionally, the wood’s inherent warmth complements a variety of design styles, ranging from modern, minimalist aesthetics to more traditional and rustic themes.
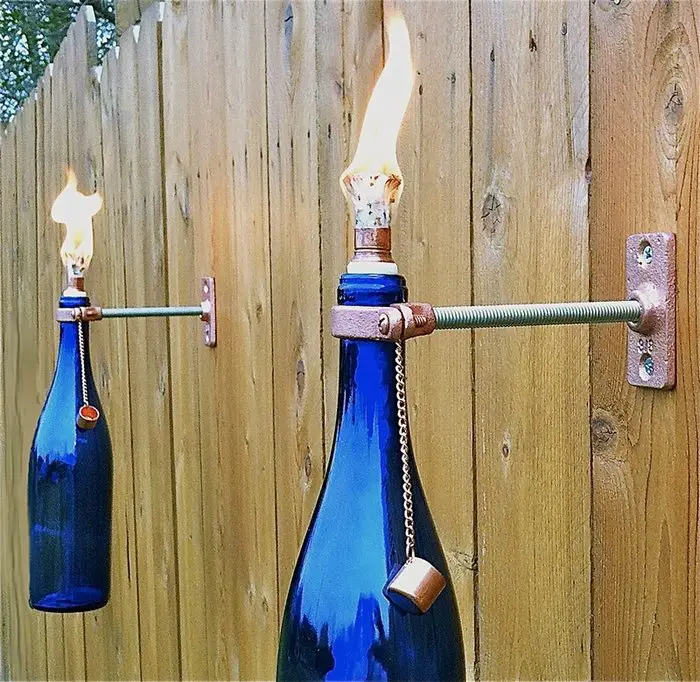
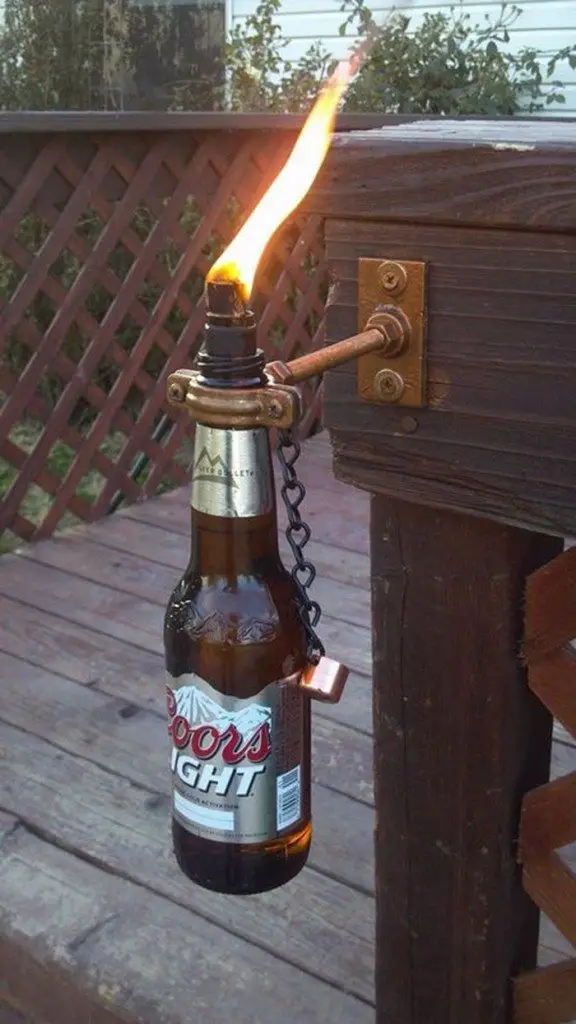
Mount the Bottle Hanger
After determining where to place your glass bottle torch, screw the Top Plate connector in place.
Screw in the 3/8”-16 Rod on the mounting plate until it stops.
Thread the two Hex Nuts onto the Rod and tighten one down at the point where the Rod meets the Top Connector Plate. Leave the other Hex Nut at the front end so it can be used to secure the Split Ring Hanger.
Thread on the Split Ring Hanger just enough so that the Rod is flush with the inside of the ring. Turn the 2nd Hex Nut counter-clockwise to snug it up against the Split Ring Hanger.

Make the Torch
Carefully and tightly wrap the 1/2-inch end of the Coupling with your Teflon Tape. Wrap it nice and clean for an even surface. Build up the tape until it fits well in the opening of the bottle and you are sure that it will not fall inside.
Insert the Wick in the Coupling until it sticks out about 1/4-inch or less. The Tiki brand replacement wicks are about 3/8-inch in diameter so they fit well.
Wicks can be made from old t-shirts by cutting them into strips and braiding them.
It is unnecessary to have an excessively long wick. A plentiful supply of oil and a thick wick are the key factors in achieving a prolonged burn time. When using thin wicks, braiding three pieces together can extend their lifespan. Additionally, fanning the wick and using a longer one can result in a brighter light, however, this will also use up your oil and wick at a faster rate.
So, strike a balance between brightness and efficiency when using an oil lamp.

Add your favorite torch oil to the bottle
Use a funnel to fill the bottle with your favorite torch oil.
Do not fill the neck all the way up with oil, since it can get hot from the pressure. Refilling them while it’s hot is not a good idea, so we make a lot before the trip so they can be set aside and a new one can be brought out. It takes less than 20 minutes to make twelve packs of them, so there is no need to worry about refilling them, and if you want to, you can just toss them in the trash.
Insert the coupling and wick into the bottle
Insert the coupling and wick at the top of the bottle and twist them into place. Let the wick absorb oil.
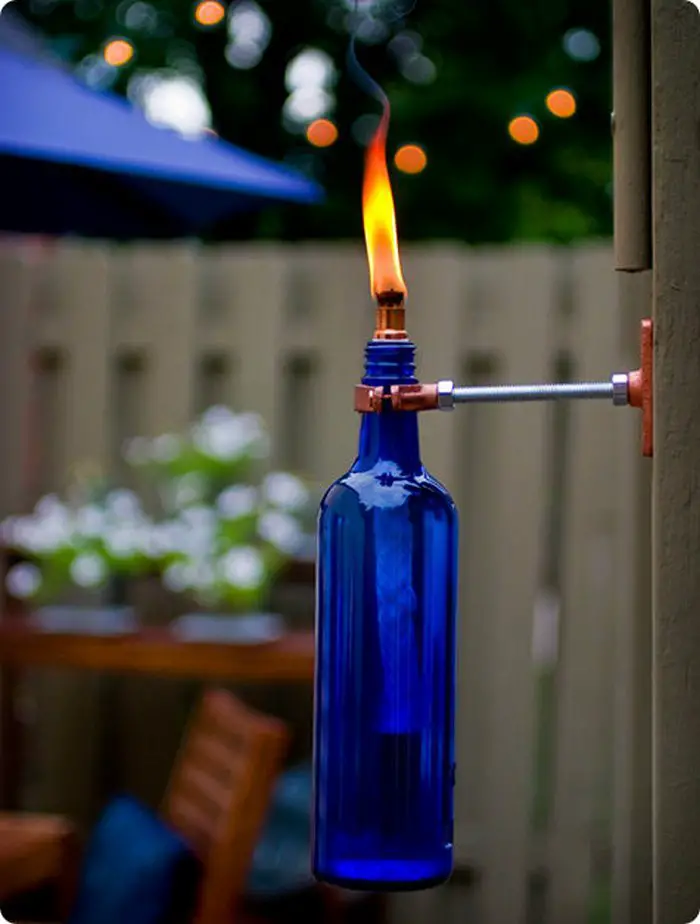
Position the bottleneck in the bottle hanger’s ring.
Loosen up the Split Ring Hanger on one side and position the neck of the glass bottle torch in the ring.
Flip the front half of the ring back into place and tighten down the Hanger evenly on both sides. You may need to loosen the other side to make sure both sides are even tight. Do not over-tighten the Hanger.

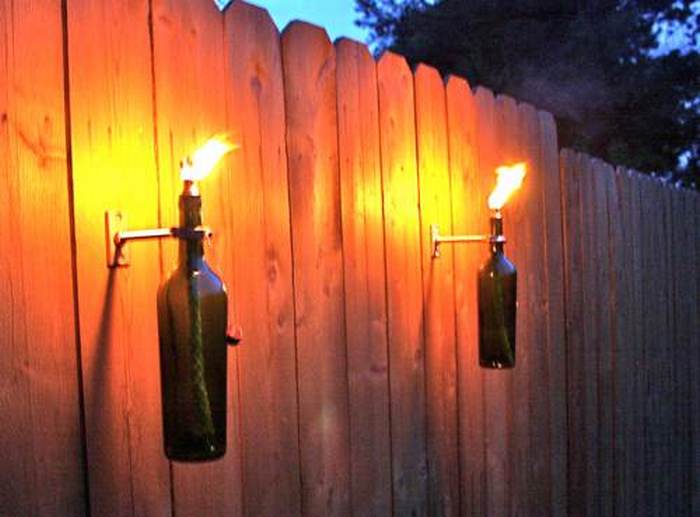
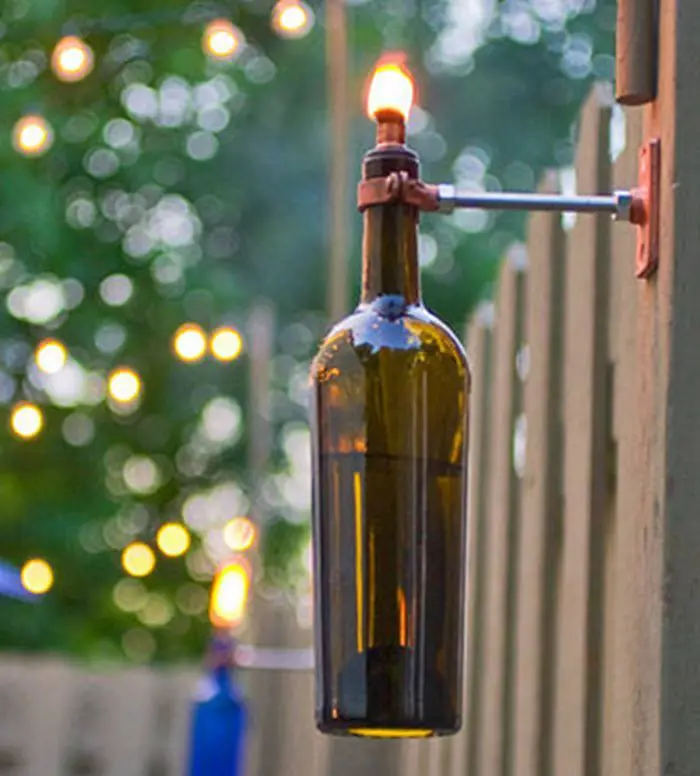
You can now light up your glass bottle torch! Place it in your garden or backyard to enjoy the light and create some amazing designs out of it.
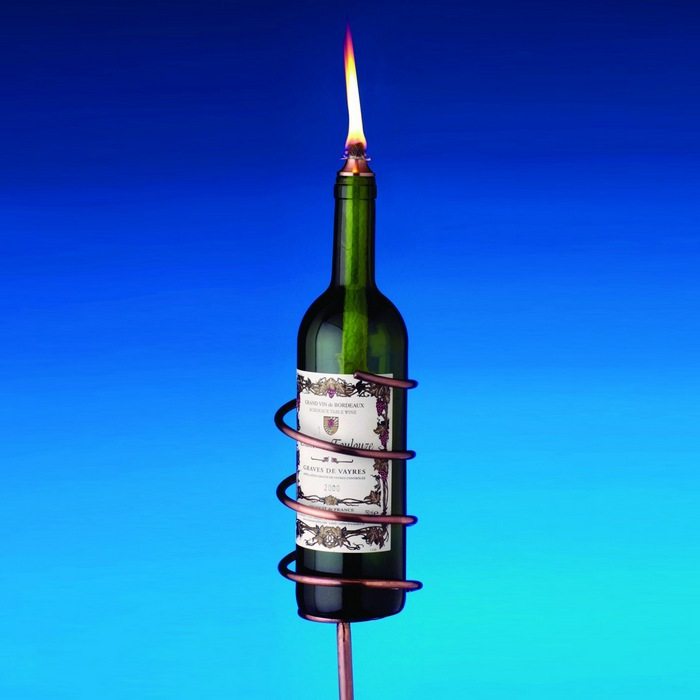
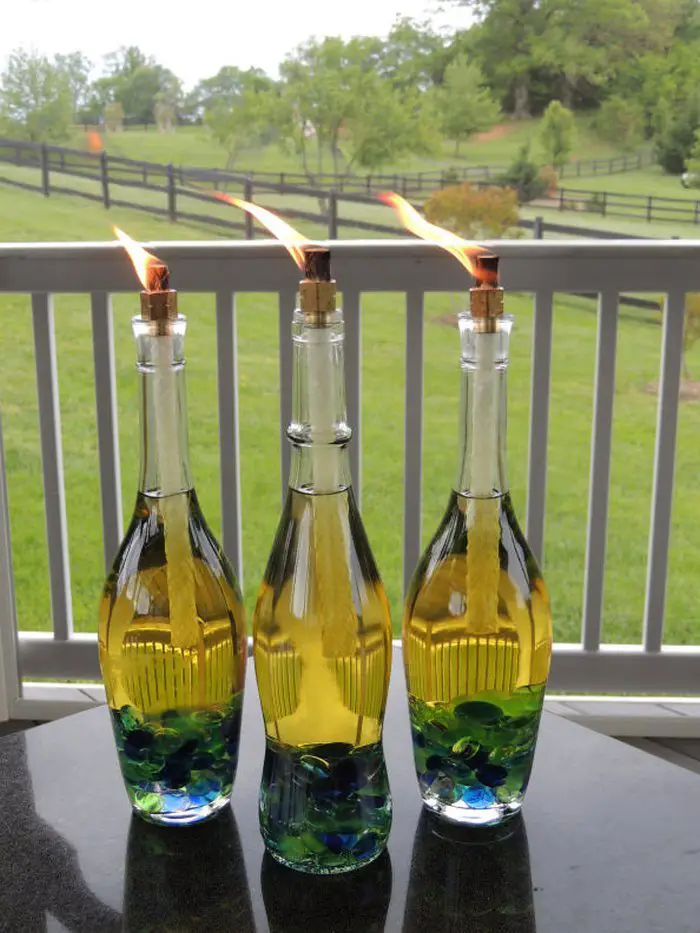
Not only does it provide light, but it also serves as a unique decorative element with endless design possibilities. Create a rustic feel by wrapping the bottle with twine, or add a touch of elegance by painting the bottle with metallic hues.
The glass bottle torch is a versatile and eco-friendly alternative to traditional torches. It can also be fueled with citronella oil to repel insects.
Just be sure to put your glass bottle torch in the perfect spot. Make sure it is not exposed to excessive moisture and extreme temperatures.
Exposure to excessive moisture can cause corrosion on the metal parts of your torch, which can lead to damage and malfunction. While, exposure to extreme temperatures can also cause the fuel inside the torch to evaporate or expand, causing damage to the torch. Similarly, awfully cold temperatures can cause the materials of the torch to become brittle and break.
Put your glass bottle torch in a dry spot, where it is also not subjected to extreme temperatures.
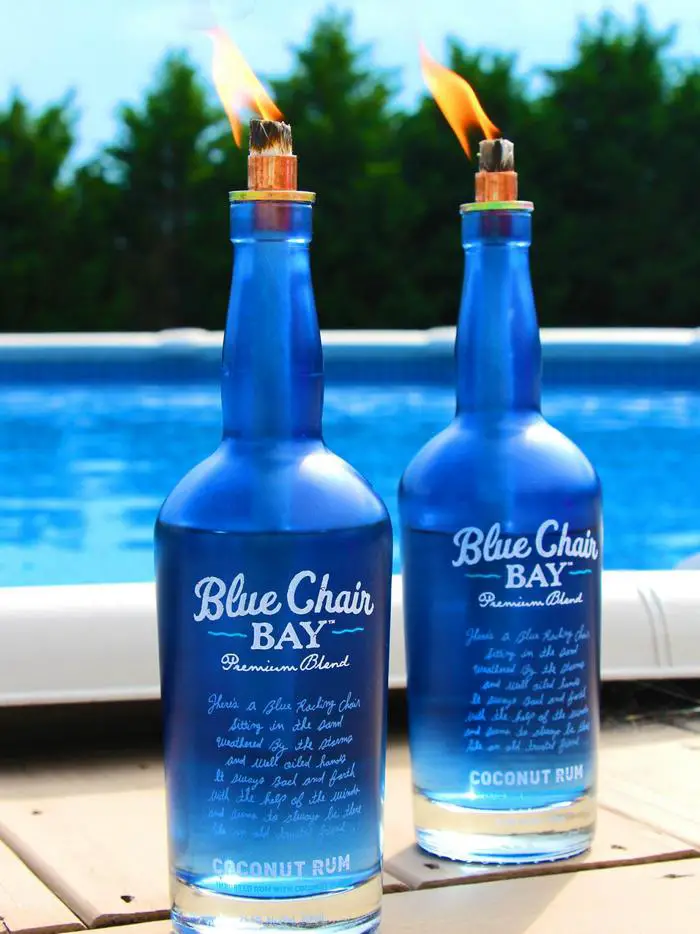
Below are a few glass bottle torch ideas you can create. You can follow these ideas or come up with your own unique spin on things.
You can simply blow out the fire of your glass bottle torch if you want to stop using it. Use the Copper Cap to keep the Wick dry when not in use.
Conclusion
In conclusion, repurposing your old wine bottles into stylish glass bottle torches is a fantastic way to add a touch of creativity and charm to your outdoor space. By utilizing materials like empty bottles, copper connectors, wicks, and torch fuel, you can create unique and visually appealing torches that not only enhance the ambiance but also contribute to reducing waste.
This DIY project allows you to showcase your craftsmanship and transform simple objects into functional and eye-catching decorative elements. Whether you choose to mount them on a wooden wall or display them in your garden, these glass bottle torches will instantly upgrade the look and feel of your outdoor area.
So, gather your materials, follow the steps, and enjoy the warm and inviting glow of your homemade glass bottle torches while adding a touch of elegance to your surroundings. Let your creativity shine and make a positive impact by repurposing those empty wine bottles into stunning tiki torches that will surely impress your guests and create a captivating atmosphere.
Click on any image to start the lightbox display. Use your Esc key to close the lightbox. 8-)

If you liked this project, you might also like to view DIY Mosquito-repelling Citronella Candles and Wine Bottle Craft ideas


