
Last Updated on May 3, 2024 by Team Ideas24
Do you like keeping special mementos of your kids? I have a friend who had her children’s hands cast in plaster when they were babies. She said that she wanted to immortalize them so that one day, she’ll look at the hands and remember them when they were so small.
I wanted to do that, too. I mean, I understood the sentiments, but I’m just not willing to pay the price. So I looked for an alternative and luckily, I found one that used clay. This is a DIY project for a handprint jewelry dish. When I told my five-year-old daughter about it, she got excited.

We went to work on the project one weekend. I let her paint on them, too. We made two jewelry dishes using her right and left hands. It was truly a weekend to remember. She couldn’t get the smile off her face!
If you’re looking for a worthwhile project for you and the kids, I highly recommend this one. Try it and you’ll see what I mean.
Contents [show]
Crafting Your Handprint Jewelry Dish
Materials
- Polyform clay
- Cardstock or paper
Tools
- Rolling pin
- Precision glass cutting mat
- X-acto knife
- Paintbrush
- Bake safe bowl
- Pencil
- Cookie cutter
Instructions
Step 1: Prepare Your Workspace
- Place the cardstock or paper on the precision glass cutting mat. This will protect your surface and help in easy cleanup.
Step 2: Soften and Roll Out the Clay
- Take a sufficient amount of Polyform clay. Knead it in your hands until it’s soft and pliable.
- Using the rolling pin, roll out the clay on your prepared surface. Aim for an even thickness of about 1/4 inch.
Step 3: Make the Handprint
- Have your child press their hand firmly into the rolled-out clay. Ensure the hand is pressed deep enough to make a clear impression.
Step 4: Cut the Shape
- Use the X-acto knife to cut around the handprint. If you prefer a more uniform shape, use a cookie cutter to trim around the handprint.
Step 5: Smooth Edges
- Use your fingers or a small piece of spare clay to smooth out any rough edges around the handprint impression.
Step 6: Mold the Dish
- Carefully lift the clay handprint and place it in a bake-safe bowl. The bowl will act as a mold, giving the clay a dish shape. Adjust the fingers gently to create a more natural dish shape.
Step 7: Bake the Clay
- Follow the baking instructions specific to the Polyform clay brand. Typically, this involves baking in an oven preheated to 275°F for about 15 to 30 minutes per 1/4 inch thickness.
- Allow the dish to cool completely after baking.
Step 8: Painting and Decorating
- Once cooled, you can paint the handprint jewelry dish. Use acrylic paints and a paintbrush to decorate as desired.
- Allow the paint to dry completely.
Step 9: Seal the Dish
- Optionally, apply a clear sealer to protect the paint and enhance the clay’s durability. Let it dry according to the sealer instructions.
Step 10: Finishing Touches
- Once everything is dry, your handprint jewelry dish is ready to use! It can hold jewelry, keys, or other small items.
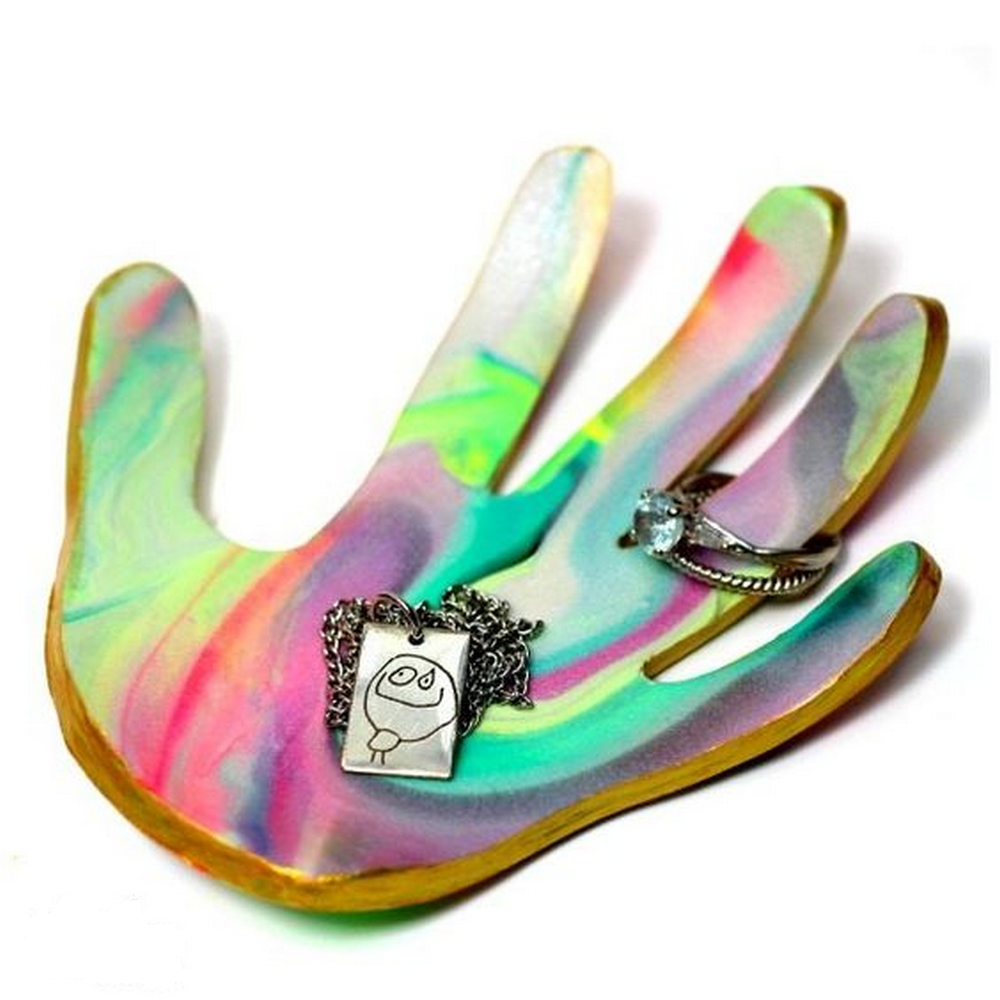
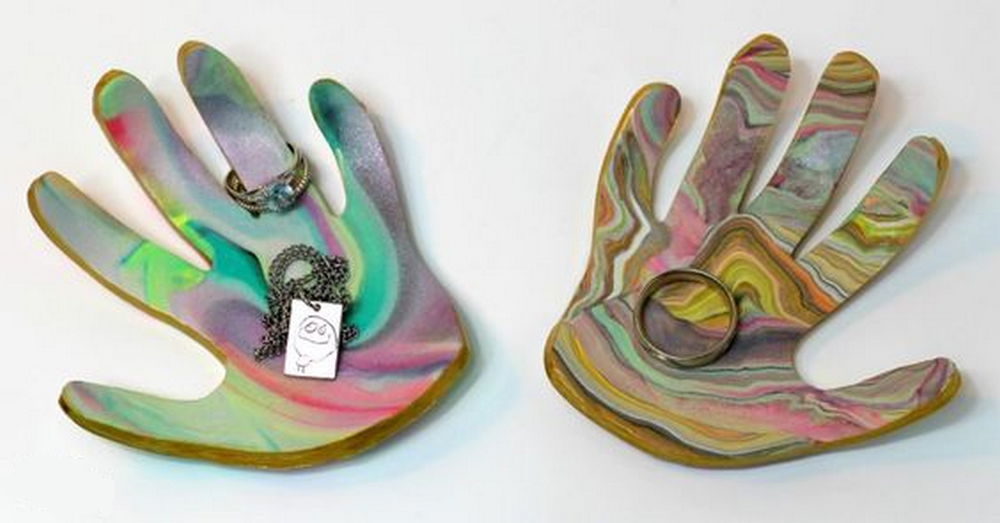
Handprint Jewelry Dish Design Ideas
Click on any image to start the lightbox display. Use your Esc key to close the lightbox.


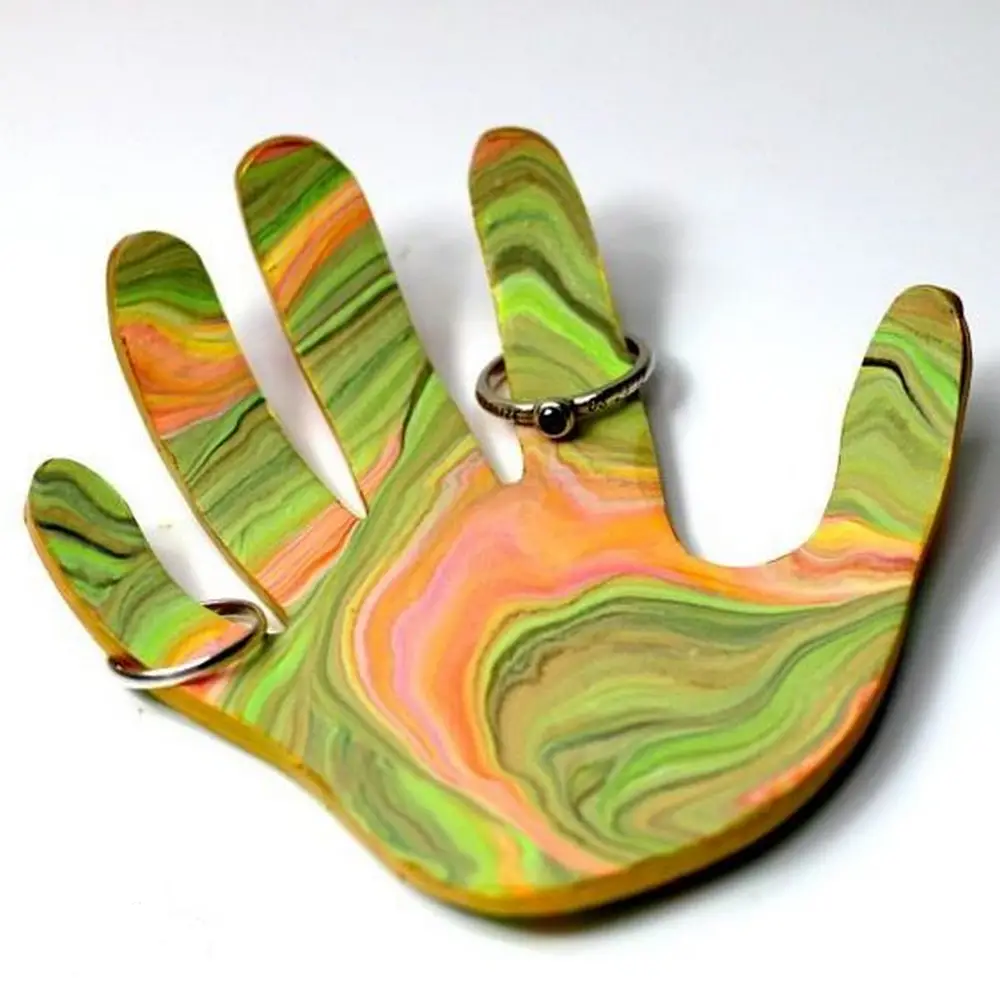
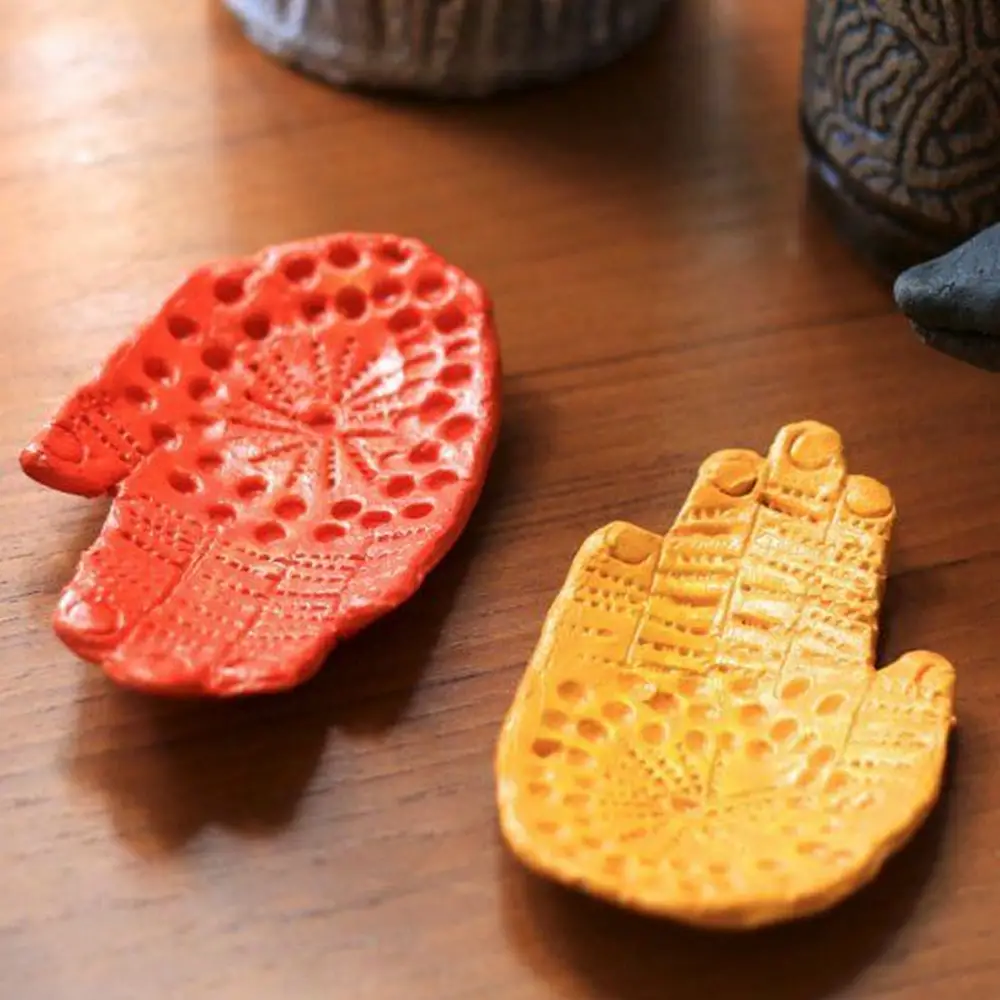
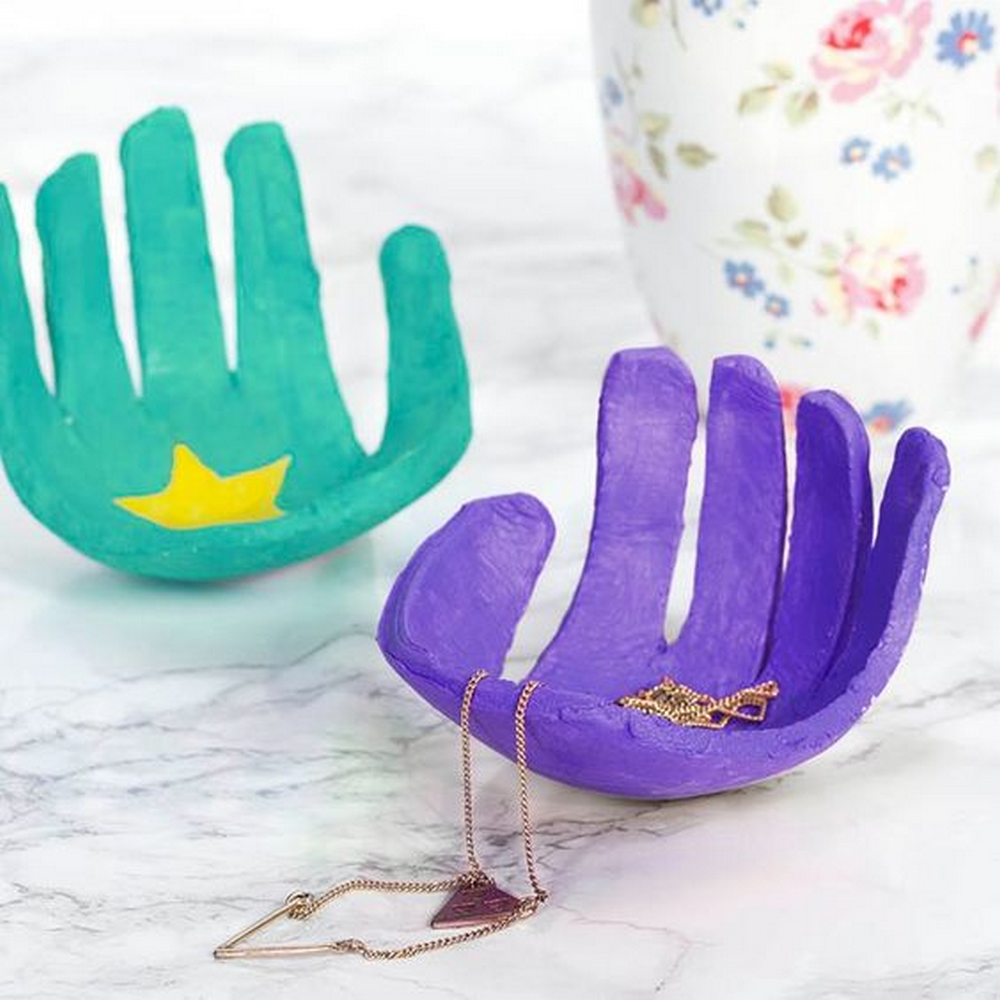

Planning on making this handprint jewelry dish? Here’s how.
Choosing the Right Clay for Your Handprint Jewelry Dish
Creating a handprint jewelry dish is an enjoyable and meaningful craft. The choice of clay can significantly impact the outcome of your project in terms of durability, ease of use, and final appearance.
Here are some options to consider when selecting the right clay for your handprint jewelry dish.
Air-Dry Clay
Air-dry clay is a convenient choice for making a handprint jewelry dish because it does not require baking. Once your child makes their handprint, the clay will naturally harden over time. This type of clay is easy to use and safe for children, making it a great option for family craft activities. However, air-dry clay may not be as durable as other types, and the final product can be somewhat brittle.
Polymer Clay
Polymer clay is a popular choice for crafting a handprint jewelry dish due to its strength and durability once baked. Available in a variety of colors, it allows for creative designs without the need for painting. Polymer clay needs to be baked in an oven to set, which solidifies the handprint into a hard, durable dish. This type of clay provides a professional finish, making it ideal for those looking to create a high-quality handprint jewelry dish.
Oven-Bake Clay
Oven-bake clay, such as Polyform clay, is excellent for projects like the handprint jewelry dish. It offers a fine, smooth finish and comes in many colors, which can be mixed to create custom hues. After pressing the handprint and shaping the dish, baking the clay in your home oven will make it hard and permanent. This type of clay is perfect for a handprint jewelry dish that needs to withstand handling and use.
Choosing the Best Option
When deciding which clay to use for your handprint jewelry dish, consider the age of the participants, the desired durability of the final product, and whether you prefer painting the dish or using colored clay. Each type has its advantages, so select the one that best suits your project needs and personal preferences.
By selecting the right clay, your handprint jewelry dish will not only be a fun craft to make but also a cherished keepsake that lasts for years.
Creative Uses for the Handprint Jewelry Dish
A handprint jewelry dish is not only a charming craft project but also a versatile addition to your home decor. Beyond its primary function of holding jewelry, this personalized dish can serve multiple purposes, adding both functionality and sentimental value to everyday life.
Here are some creative ways to utilize your handprint jewelry dish:
Key Holder
Place your handprint jewelry dish by the front door or on a hallway table to create a convenient spot for dropping off keys when you come home. Its unique shape and personal touch make it an attractive alternative to traditional key bowls.
Office Desk Organizer
Use the handprint jewelry dish on your office desk to keep small stationery items like paper clips, rubber bands, or push pins organized. Its distinct design can also serve as a conversation starter or a piece of personal decor in your workspace.
Nightstand Catch-All
Keep a handprint jewelry dish on your nightstand to hold essential items like your watch, hair ties, or glasses. It’s a practical way to keep small items within reach and off the surface of your furniture, preventing scratches and clutter.
Decorative Accent
Incorporate the handprint jewelry dish into your home decor as a decorative accent. Place it on a bookshelf, coffee table, or mantlepiece, perhaps with potpourri or decorative stones. It can serve as a beautiful reminder of the craft’s significance and the memories associated with it.
Gift Tray
Use the handprint jewelry dish as a unique gift tray for presenting small gifts like earrings, bracelets, or homemade cookies. It adds a personal touch to gift-giving and can be a delightful surprise for the recipient.
Each of these uses demonstrates the versatility of the handprint jewelry dish, making it more than just a container for jewelry but a multi-functional piece that enhances the beauty and utility of your living spaces.
Decoration and Customization Tips
Decorating and customizing your clay creation adds a personal touch that transforms it from a simple craft into a piece of art. Whether you’re making a gift or something for your home, these tips will help you enhance its aesthetic appeal and uniqueness.
Choose Your Colors Wisely
Select colors that complement where you plan to use the item. For a children’s room, bright and playful colors are perfect, while more subdued tones might be better for living areas. You can also use metallic paints to add a touch of elegance.
Experiment with Textures
Textures can add depth and interest. Use tools like stamps, lace, or leaves to imprint patterns into the clay before it dries or bakes. This technique is particularly effective for creating visually striking surfaces.
Add Names, Dates, or Messages
Using letter stamps or carving tools, you can add names, special dates, or short messages to the clay. This is perfect for personalized gifts or commemorative items.
Use Finishes for a Professional Look
Apply a glaze or varnish after painting to protect your work and give it a glossy finish. Matte varnishes are available if you prefer a subtler look.
Attach Embellishments
After the item is baked and cooled, you can glue on embellishments such as beads, crystals, or fabric flowers. These should be appropriate for the item’s use and handling.
Mixing Media
Don’t be afraid to mix paint types or incorporate other media like chalk or oil pastels for detailing. These can enhance the overall effect with highlights, shadows, and added texture.
Decorating and customizing your project not only enhances its appearance but also makes the crafting process more enjoyable. These personal touches make your creation truly one of a kind.
Conclusion
Creating a handprint jewelry dish is a delightful way to capture a moment in time and cherish the memories associated with it. This project not only offers a functional piece for your home but also provides a unique opportunity for creative expression through decoration and customization. Each dish, personalized and adorned, becomes a keepsake that holds more than just jewelry—it holds stories and sentiment.
We have more ways to organize your jewelry. Check out our jewelry organizer project!


