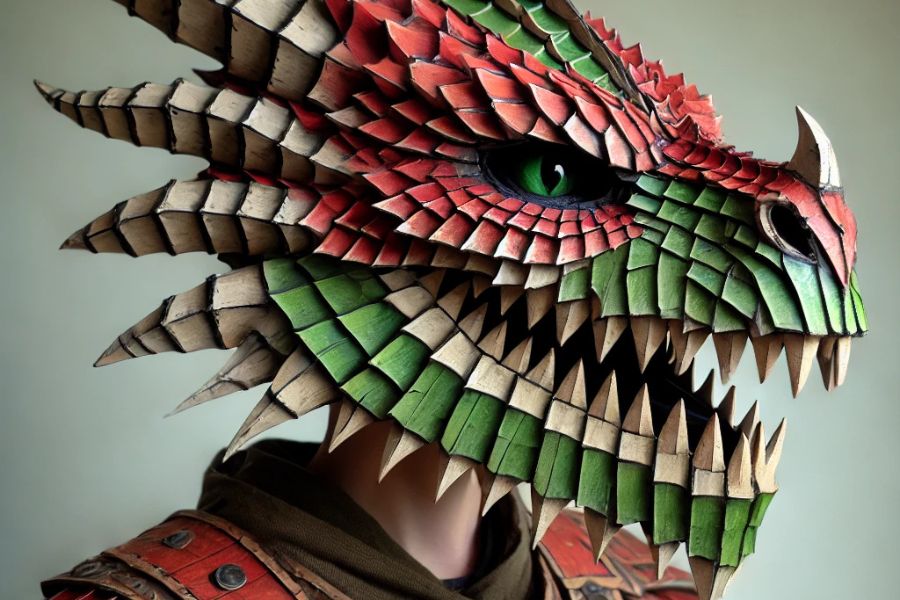
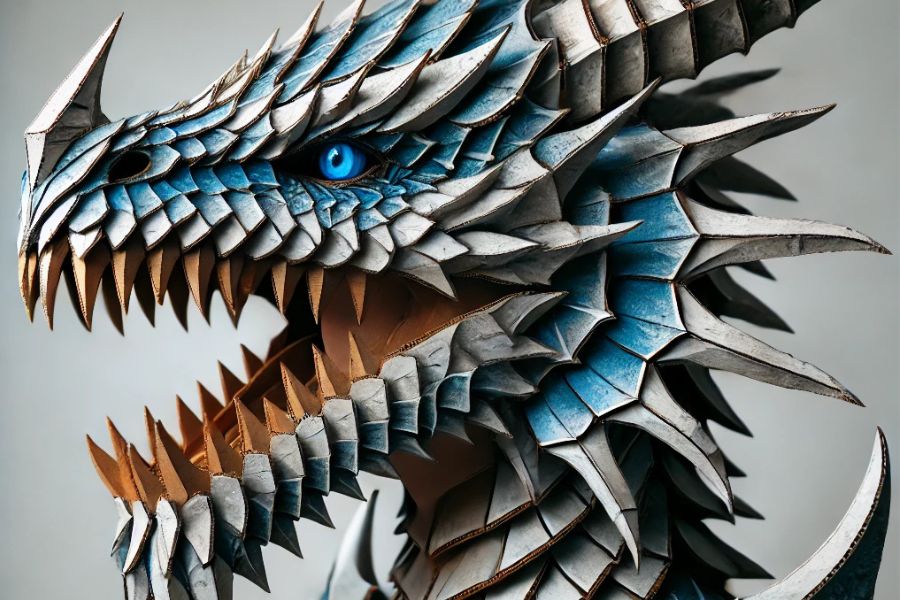
Creating a giant dragon head costume is an engaging project that combines creativity and craftsmanship. This endeavor allows you to bring mythical creatures to life, making it perfect for events like Halloween, cosplay, or themed parties. By utilizing accessible materials such as cardboard, foam, and paint, you can construct an impressive dragon head that stands out.
Contents [show]
Crafting Your Dragon Head Costume
Creating a giant dragon head costume is a thrilling project that lets you bring fantasy to life. With some basic materials and a bit of artistic flair, you can make a dragon head that will surely turn heads at any event. This guide will take you step-by-step through the process of how to make a dragon head for costume, from building the frame to adding details that give your dragon character and presence.
Materials:
- Cardboard (for structure)
- Foam sheets (for details)
- Hot glue sticks
- Acrylic paints (choose colors based on your dragon’s theme)
- Elastic bands or adjustable straps (for securing the head)
- Decorative materials (sequins, fabric scraps, and other accents)
- Black mesh or fabric (for eye cutouts)
Tools:
- Hot glue gun
- Scissors or utility knife
- Ruler and measuring tape
- Paintbrushes
- Pencil or marker (for sketching)

Step 1: Planning and Designing
Before you dive into construction, spend some time planning the look of your dragon head. Decide on key features like the expression, color scheme, and special details like horns, scales, or frills.
- Sketch Your Design: Draw out your dragon head on paper. Identify where the eyes, nostrils, horns, and jawline will go.
- Determine Size and Scale: Measure your head to determine the size of the costume and ensure comfort.
- Visualize Layers: Think about how you’ll layer cardboard and foam to create depth, especially around the nose, eyes, and mouth.
Step 2: Building the Frame
The frame serves as the base structure, giving the dragon head its shape. Cardboard is ideal because it’s sturdy but flexible, allowing you to mold it to the dragon’s contours.
- Cut the Cardboard Base: Start with a large piece of cardboard that can be rolled into a half-sphere shape. Cut out two pieces for the front and back of the head.
- Assemble the Shape: Bend and glue the cardboard pieces together, creating a 3D base for the head. Reinforce the structure with extra cardboard strips to add stability.
- Create Openings for Eyes and Mouth: Use a marker to outline the eye sockets and mouth, then cut out these areas for visibility and ventilation.
Step 3: Shaping the Dragon’s Features
With the frame ready, it’s time to add character with foam. Foam sheets are perfect for giving dimension and texture to your dragon’s face.
- Add Nostrils and Cheeks: Cut foam pieces for the dragon’s nostrils, cheeks, and other facial features. Attach these with hot glue to give the head more shape.
- Create Horns and Spikes: Cut larger foam pieces for horns or spikes, depending on your dragon’s look. Attach these to the top and sides of the head.
- Add Texture for Scales: For scales, cut small oval shapes from foam or cardboard and glue them in rows. Work from the bottom up to layer them like natural scales.
Step 4: Painting the Dragon Head
Painting brings your dragon head to life. Use your chosen colors to create a striking look that matches your dragon’s personality.
- Apply a Base Coat: Start with a base color that covers the entire head. Use darker shades for a fierce dragon, or go with bright, fantasy-inspired hues for a magical vibe.
- Add Details and Highlights: Use a fine brush to add shading around the eyes, nostrils, and mouth. Highlight edges and scales to make them pop.
- Add Final Touches: For a realistic touch, add texture with a dry-brush technique or dab paint to create the look of rough skin.

Step 5: Creating and Attaching the Eyes
The eyes give your dragon its expression, whether that’s fierce or friendly. You can make eyes from mesh or create painted eye sockets.
- Cut and Shape the Eyes: Use black mesh or sheer fabric for the eye cutouts. Cut two pieces slightly larger than the eye openings.
- Paint Details (Optional): If you prefer realistic eyes, paint details like pupils and irises on the fabric or foam backing.
- Secure in Place: Glue the fabric eyes behind the eye cutouts in the head. This setup gives you visibility while keeping the dragon’s look intact.
Step 6: Adding Decorative Accents
Make your dragon head stand out by adding unique touches. Sequins, fabric, or even faux gems can make the head costume sparkle.
- Add Shine and Color: Glue sequins or small gems along the edges of scales or horns for a magical effect.
- Attach Fabric for Fins or Frills: If your dragon has frills or fins, add strips of fabric along the edges of the head or jawline.
- Finish with Final Details: Add any final touches like teeth, nostrils, or a tongue using foam or cardboard painted to match.
Step 7: Securing the Head with Straps
Now that your dragon head looks fantastic, you’ll want to ensure it’s comfortable to wear. Straps or an interior helmet will help keep it secure.
- Measure for Comfort: Fit elastic bands or adjustable straps around your head and secure them inside the dragon head.
- Test and Adjust: Try on the head to ensure it fits comfortably and stays balanced. Make any necessary adjustments to keep it in place.

Step 8: Inspect and Finalize
Take a moment to check the entire dragon head for loose parts, unfinished areas, or comfort adjustments.
- Inspect for Stability: Ensure that all glued areas are secure and the structure is stable.
- Make Last Adjustments: Make any last adjustments to improve fit or visual impact.
- Do a Test Run: Try on the dragon head and see if there’s enough ventilation and visibility. Adjust as needed for the best experience.
By following these steps, you’ll have a custom dragon head costume that’s ready to make a dramatic entrance.
Customization Techniques For Your Dragon Head Costume
Customizing a dragon head costume allows you to create a truly unique piece that showcases your creativity and skill. With a few additional techniques and thoughtful details, you can elevate your costume from simple to show-stopping. This guide provides tips and ideas on how to personalize your dragon head with creative touches that make it stand out.
Painting Techniques for Realistic Effects
Base Coating for Even Coverage Start with a solid base coat that covers the entire dragon head. This step sets the stage for all other details. Use acrylic paints, which are durable and easy to work with. Choose a base color that fits the theme of your dragon, such as deep green, fiery red, or metallic silver.
Layering and Shading To add depth, apply a second layer of paint using a slightly darker or lighter shade. Focus on areas around the eyes, nostrils, and the edges of the scales to create shadows and highlights. Dry brushing is an excellent technique for this; it involves dipping a dry brush in a small amount of paint and sweeping it lightly over raised surfaces to make them pop.
Detailing with Fine Brushes For intricate details like veins on the skin, fine lines, and highlights on scales, use a thin brush. This technique can make the dragon head appear more lifelike. Add details such as cracks in the scales or a gradient effect on the horns for a dramatic touch.

Adding LED Lights for a Magical Glow
Incorporating LED Strips or Bulbs Adding LED lights can make your dragon head appear mystical and enhance its overall impact. LED strips or small LED bulbs are easy to find and simple to install. Choose colors like red, green, or blue to create a magical effect.
Placing the Lights Strategically Install the lights behind the eye cutouts or inside the mouth to give the appearance of glowing eyes or fiery breath. Use a battery pack to power the LEDs, and make sure it is securely fastened and hidden inside the head. Ensure that wires are taped down to avoid discomfort while wearing the costume.
Safety and Comfort When working with lights, make sure all wiring is secure and insulated to prevent short circuits. Test the lighting before finalizing the costume to ensure it functions correctly and does not create any heat issues.
Creating Movable Parts for Realism
Designing a Movable Jaw A movable jaw can add a level of realism that makes your costume more interactive. To do this, create a separate piece for the jaw and attach it with hinges or elastic bands. Ensure the jaw moves smoothly when you speak or move your own jaw. This can make your dragon head come alive, especially when paired with roaring sound effects.
Animating the Eyes For an even more dynamic effect, consider adding mechanisms to make the eyes move or blink. This can be done using simple lever mechanisms or small servos if you are experienced with electronics. Moving eyes can give your dragon a more intimidating or whimsical expression.
Using Flexible Materials for Wings or Frills If your dragon head costume includes frills or wings, use flexible materials like lightweight fabric or foam to add motion. Attach these elements with hinges or elastic so they sway as you move, creating an illusion of a living creature.
Adding Textured Scales and Details

Using Foam or Fabric for 3D Scales For a more textured look, add 3D scales to your dragon head. Cut small, scale-shaped pieces from foam sheets or thick fabric and glue them onto the head in an overlapping pattern. This layering technique creates a realistic texture and adds depth to the costume.
Incorporating Metallic and Iridescent Paints After attaching the scales, paint them with metallic or iridescent paints for a shimmering effect. These paints reflect light differently, making the scales appear to change color as you move. This technique can add a touch of magic and fantasy to your costume.
Adding Spikes and Horns Spikes and horns can be made from foam or lightweight plastic. Shape them as desired and attach them securely to the head. To make them more realistic, paint them with a gradient effect that fades from dark at the base to light at the tips.
Applying Fabric for Special Effects
Creating Membranes for Ears or Frills For dragon ears or frills, use sheer fabric such as organza or tulle. Stretch the fabric over a frame made from thin wire and glue it in place. This effect adds an ethereal quality to your dragon, making it look delicate and fierce at the same time.
Attaching a Cloak or Mane To add even more drama, consider attaching a fabric cloak or a mane behind the head. This can be made from strips of fabric, faux fur, or even feathers. A flowing cloak or mane can create an illusion of movement and add grandeur to your dragon’s appearance.
Adding Fabric Scales for Contrast Incorporate fabric scales in contrasting colors or textures to break up the visual pattern and create a more complex look. Attach these fabric pieces in between the foam scales for added dimension.
Personalizing with Unique Features
Customized Eyes Customize the eyes with unique designs to make your dragon truly your own. Use colored contact lenses for the costume wearer, or create detailed eye patterns using paint or printed designs on transparent paper glued to the mesh.
Adding Teeth and a Tongue For a final touch, add foam or plastic teeth and a tongue inside the mouth. Paint these details with realistic shading to make them appear lifelike. For a tongue, use flexible foam painted with a glossy finish to simulate wetness.
Creating Battle Scars or Patterns Add battle scars or special patterns to tell a story through your dragon. Use a utility knife to create shallow cuts in the foam or add dark paint streaks for an aged, battle-worn look. You can also stencil on unique patterns, such as tribal designs or runes, to give your dragon an air of mystery.
Incorporating these customization techniques lets you turn your dragon head costume into a masterpiece that is not only visually striking but also uniquely yours.
Dragon Head Costume Maintenance and Storage
Proper maintenance and storage of your dragon head costume are essential to ensure it stays in top condition for future events. A well-maintained costume not only looks better but also lasts longer, preserving your hard work. This guide will provide you with practical tips on cleaning, maintenance, and storage for your dragon head costume.
Cleaning Your Costume
Spot Cleaning for Minor Stains For minor stains or spots, use a soft cloth or sponge dampened with warm water and mild soap. Gently dab the affected areas without soaking the material, as excessive moisture can damage cardboard or foam components. Avoid using harsh chemicals that could strip paint or weaken glued parts.
Deep Cleaning for Fabric Parts If your costume includes fabric elements, such as a mane or cloak, carefully hand wash these pieces using mild detergent. Allow them to air dry completely before reattaching to the main structure. For non-detachable fabric sections, use a fabric cleaner spray and a soft brush to lift any dirt.
Keeping Painted Surfaces Intact To protect painted surfaces, avoid scrubbing them directly. Instead, use a soft, dry cloth to dust off any debris. If a touch-up is necessary, reapply paint sparingly with a small brush and allow it to dry fully before storing.
Routine Maintenance
Checking for Loose Parts Inspect your dragon head costume regularly for loose or detached parts, especially after wearing it to an event. Reinforce any weak spots with hot glue or a stronger adhesive if needed. Pay special attention to areas that experience frequent movement, like the jaw or horns.
Repairing Damage Promptly Address any damage as soon as you notice it. Small tears in foam or fabric should be repaired with craft glue or stitched to prevent further ripping. For more significant damage, consider using lightweight fillers or patch materials to reinforce structural integrity.
Protecting Decorative Features If your costume includes delicate features like LED lights or sequins, handle them with care during maintenance. Ensure that electronic components are secure, and replace any batteries if necessary before storing the costume for extended periods.
Proper Storage Techniques
Finding the Right Storage Space Store your dragon head costume in a cool, dry place to prevent any warping or degradation. High humidity or extreme temperatures can weaken materials like cardboard and foam, causing them to bend or deteriorate over time.
Using a Protective Cover Wrap your costume in a breathable fabric cover or large plastic storage bag to keep dust and dirt away. Avoid sealing it in airtight plastic containers, as this can trap moisture and cause mold or mildew. Ensure that the cover is loose enough to prevent compression of any delicate details.
Positioning for Stability Store the costume upright or on a supportive base to maintain its shape. Placing it on a flat, stable surface can help avoid crushing any protruding parts, like horns or spikes. If space allows, keep it on a mannequin or stand to ensure it retains its form and readiness for display.
Avoiding Heavy Stacking Do not stack heavy items on top of your dragon head costume, as this can lead to irreversible damage or bending. If you need to store other items nearby, keep them on separate shelves or away from direct contact with the costume.
Final Tips
Regular Airing Take your costume out of storage periodically to air it out and inspect for any issues. This prevents potential mold buildup and ensures that the materials remain in good condition.
Label and Note Maintenance If you store multiple costumes or costume parts, label storage containers for easy identification. Keeping a small note or checklist of any maintenance done will help you track repairs and ensure your dragon head is ready when needed.
Following these cleaning, maintenance, and storage practices will keep your dragon head costume looking impressive and well-maintained for years to come.
Conclusion
Creating a dragon head costume is a rewarding project that lets your creativity shine. With attention to detail and personalization, your costume will become a show-stopping piece. Proper maintenance ensures your masterpiece stays in excellent condition for future events.
We have more fun costumes to make. Check out our lego man costume guide!


