
Last Updated on April 29, 2025 by Team Ideas24
I once attended a beach-themed wedding and I fell in love with how beautiful the decors were. Everything was so on point – from the beach grass aisle to the hanging starfish ornaments. Much to my surprise, I learned later on that the bride completely DIY-ed them.

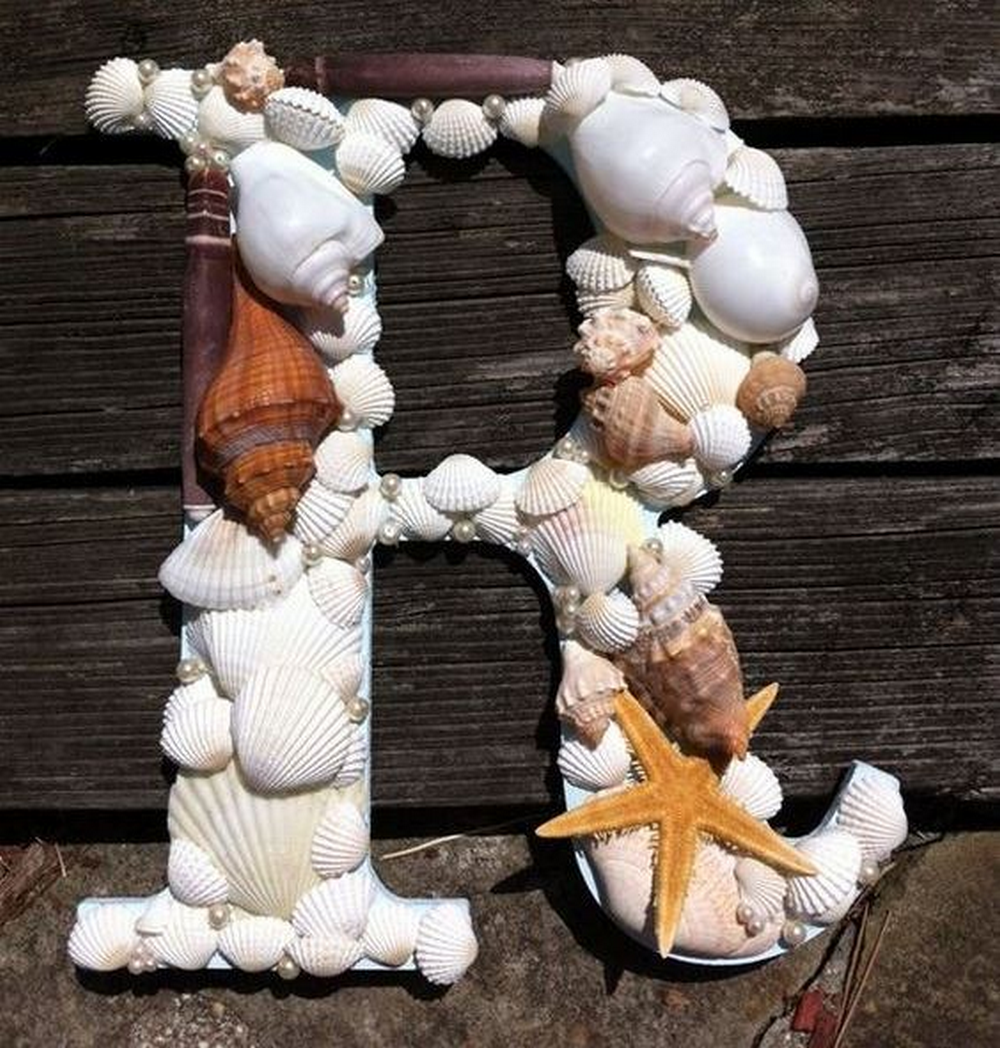
Out of all the beautiful things at that wedding, what stood out for my daughter were the seashell-covered letters. Being a beach lover, she wanted the same for her room. So we set out one weekend, went to the beach, and collected lots of seashells for her seashell wall letter.
Making the seashell-covered letters was a great bonding activity for us. We had so much fun making them. I highly recommend you make them with your kids, too. Not only do you get beautiful house decor, but you also spend quality time with the family.
Contents [show]
Making Seashell Wall Letters
Materials:
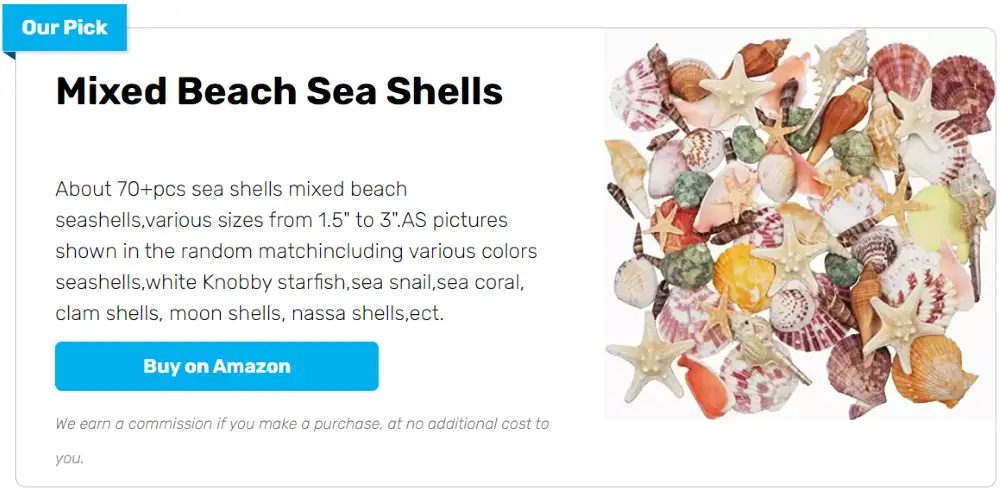
- Seashells
- Tacky glue
- E6000 glue
- Wooden letter(s)
- Vintage Jewelry
Tools:
- Paintbrush
Steps:
Step 1: Prepare Your Workspace
Lay down some newspaper or a disposable tablecloth. This keeps your surface clean and protects it from glue spills.
Step 2: Select and Arrange Your Seashells
Sort your seashells by size and shape. Larger shells will act as anchors while smaller ones fill the gaps. Place a few shells loosely on the wooden letter first to test different layouts before gluing anything down.
Step 3: Apply the Base Layer of Glue
Use your paintbrush to spread a thin layer of tacky glue over a small section of the letter. Work in sections to prevent the glue from drying before you place the shells.
Step 4: Start Adding Seashells
Press each seashell gently onto the glued area. Begin with larger shells at the center or edges, depending on your preferred style. Fill in the spaces with smaller shells, creating a balanced and natural look.
Step 5: Secure with E6000 for Heavy Shells
If any shells are heavier or more textured, use a small amount of E6000 glue. It provides a stronger, long-lasting hold. Apply the E6000 sparingly to avoid visible glue marks.
Step 6: Incorporate Vintage Jewelry
Add pieces of vintage jewelry to give your seashell wall letters a touch of sparkle. Brooches, earrings, or small decorative pieces can be tucked between the shells. Use tacky glue for lighter jewelry pieces and E6000 for anything heavier.
Step 7: Fill and Touch Up
Once the main shells and jewelry are attached, inspect the letter for any empty spots. Fill gaps with tiny shells, beads, or smaller bits of jewelry to complete the design.
Step 8: Let It Dry Completely
Allow the glued letter to dry undisturbed for at least 24 hours. E6000 glue needs this time to fully cure and hold the heavier elements securely.
Step 9: Optional Finishing Touch
If you want extra protection, you can lightly brush on a clear, non-yellowing sealant once everything is dry. This helps keep your seashell wall letters looking beautiful for years.
Step 10: Display Your Work
Attach a hanger to the back of the letter or lean it against a shelf or wall. Your unique seashell wall letters are now ready to show off.
Best Types of Seashells to Use for Wall Letters
Choosing the right seashells makes a big difference when creating beautiful seashell wall letters. The size, texture, and durability of each shell affect how easy it is to work with and how your final design will look. Not all seashells are equally suited for this kind of project, so it’s worth knowing which types will give you the best results.
Scallop Shells
Scallop shells are one of the most popular choices for seashell wall letters. Their fan-like shape and textured ridges add beautiful dimension without overwhelming the surface of the letter. Scallop shells come in a variety of colors, from soft whites to pinks and purples, which makes them perfect for adding visual interest. Because they are relatively flat, scallop shells are also easier to glue securely compared to thicker or rounder shells.
Cockle Shells
Cockle shells are another excellent option. They have a rounded, heart-like shape that brings a natural softness to seashell wall letters. Their curved form can be used to frame the edges of the letter or add volume in the center areas. Cockle shells are sturdy but lightweight, which makes them less likely to fall off once glued. Their natural cream, tan, and light orange tones blend well with most coastal color themes.
Clam Shells
Clam shells offer versatility because they can be broken into smaller pieces without losing their beauty. Whole clam shells are good for covering larger sections, while smaller pieces fill in tight spaces. Their smooth surface and gentle color make them ideal for balancing the more textured or patterned shells. In seashell wall letters, clam shells provide a clean and classic base that ties the entire piece together.
Auger Shells and Spiral Shells
To add height and movement to your seashell wall letters, include a few auger shells or other spiral varieties. Their tall, twisting shapes create a dynamic look that draws the eye across the design. Because these shells are narrow, they work well when you want to highlight specific areas, such as the tips of letters or the inside curves. Use them sparingly so they do not overpower the flat shells.
Mini Shells and Shell Chips
Tiny shells or shell chips are essential for finishing touches. These small pieces are perfect for filling gaps between larger shells and ensuring that no wood is visible on your letter. When working on detailed parts of seashell wall letters, like the edges or corners, mini shells help maintain a full, cohesive look without adding extra weight.
Avoid Fragile or Heavy Shells
Delicate shells like sand dollars or super-heavy shells can create problems. Fragile shells often break during handling or gluing. Oversized, heavy shells may not stay attached securely, even with strong glue like E6000. It’s better to save these shells for other display projects rather than risk them falling off your wall letters.
Choosing the right combination of shells is part of what makes seashell wall letters such a fun and creative project. By selecting sturdy, colorful, and easy-to-glue shells, you can create wall art that feels both lively and refined.
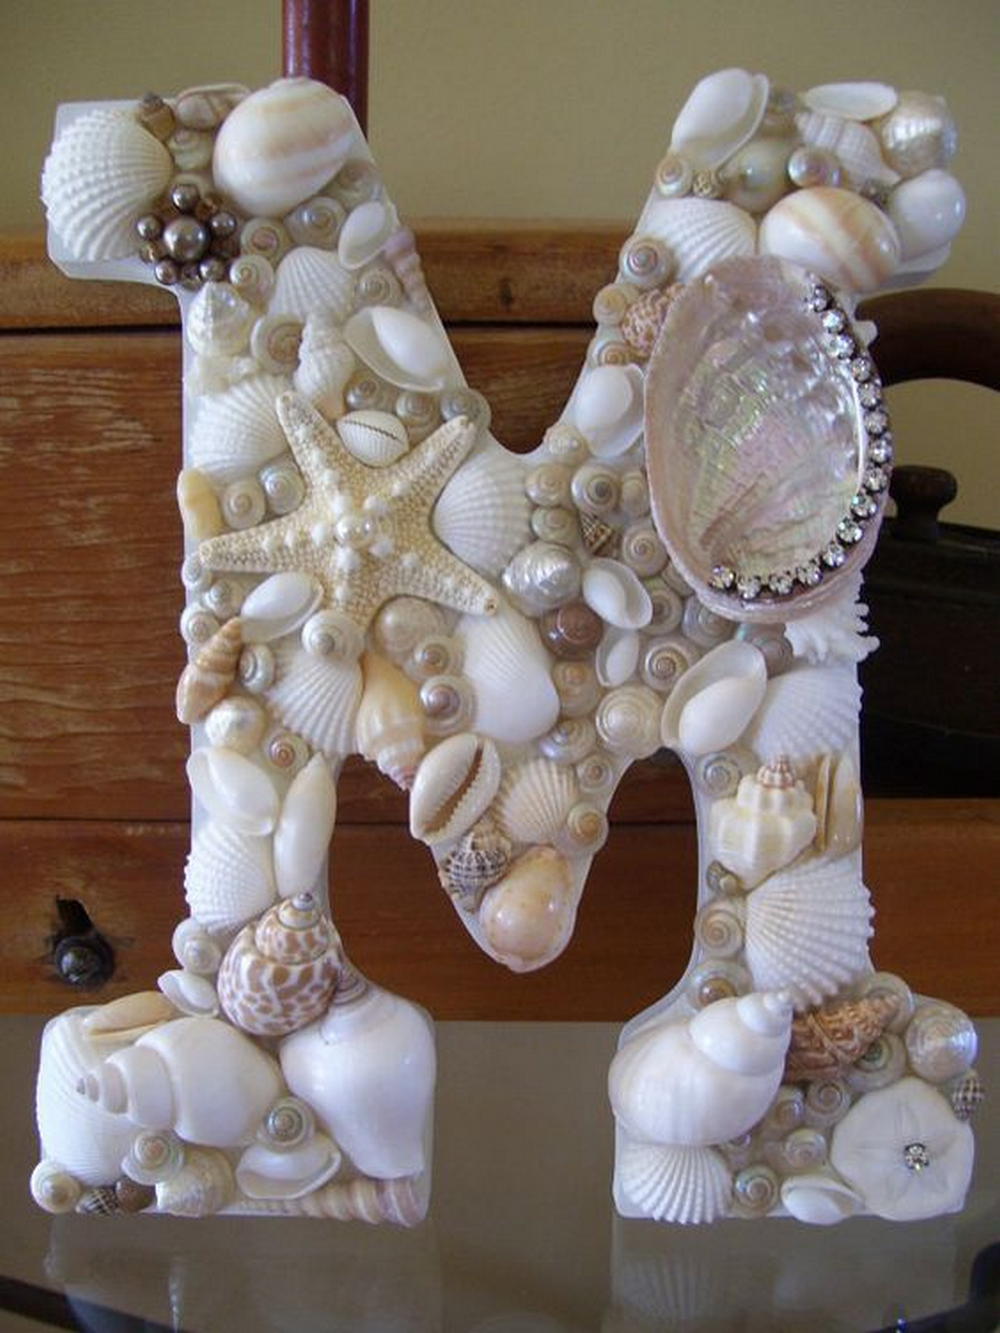
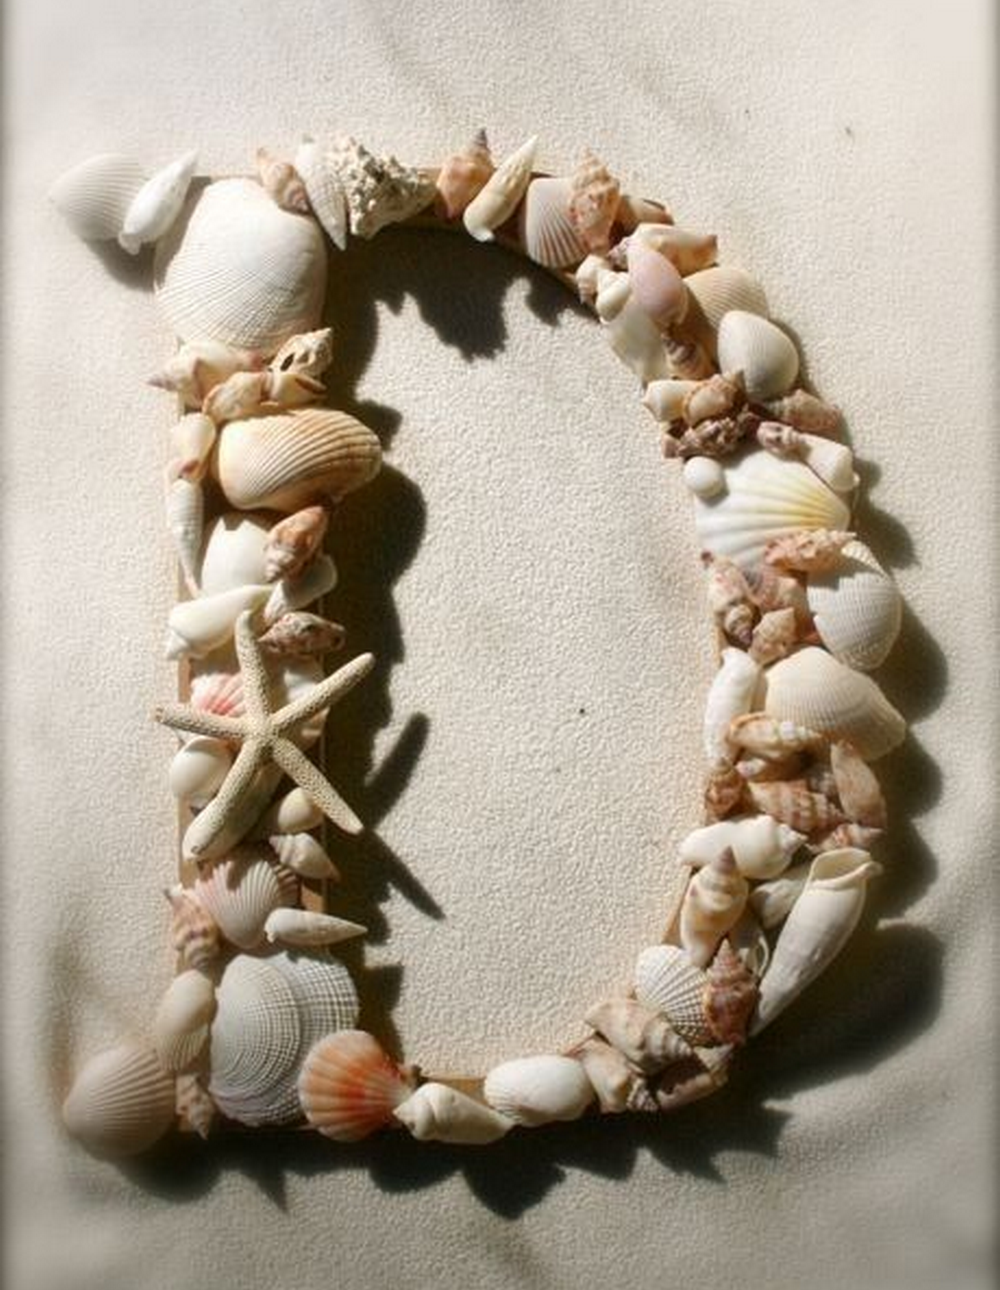
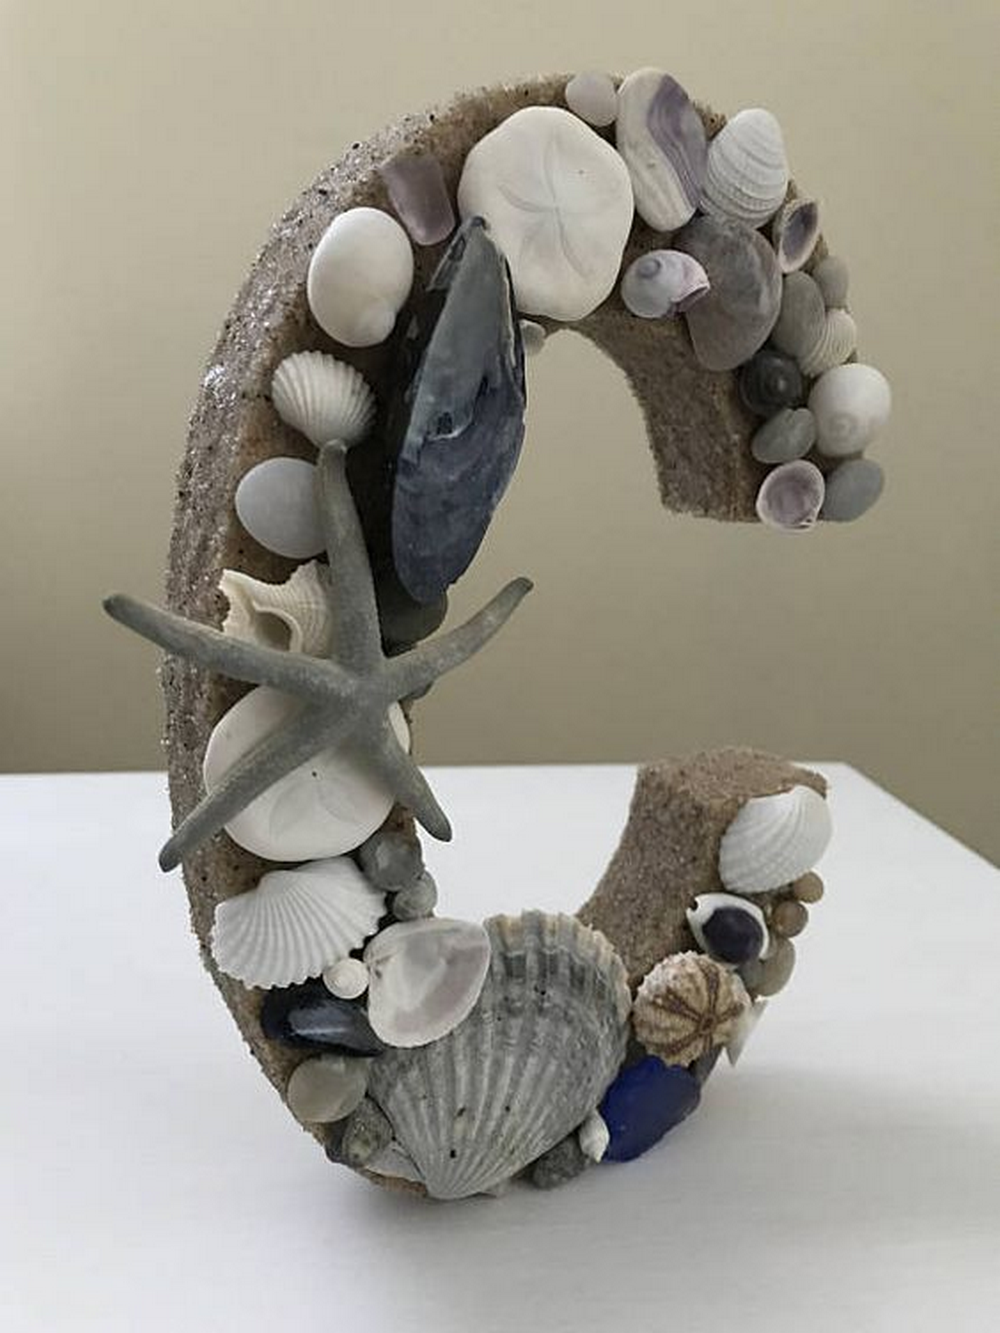
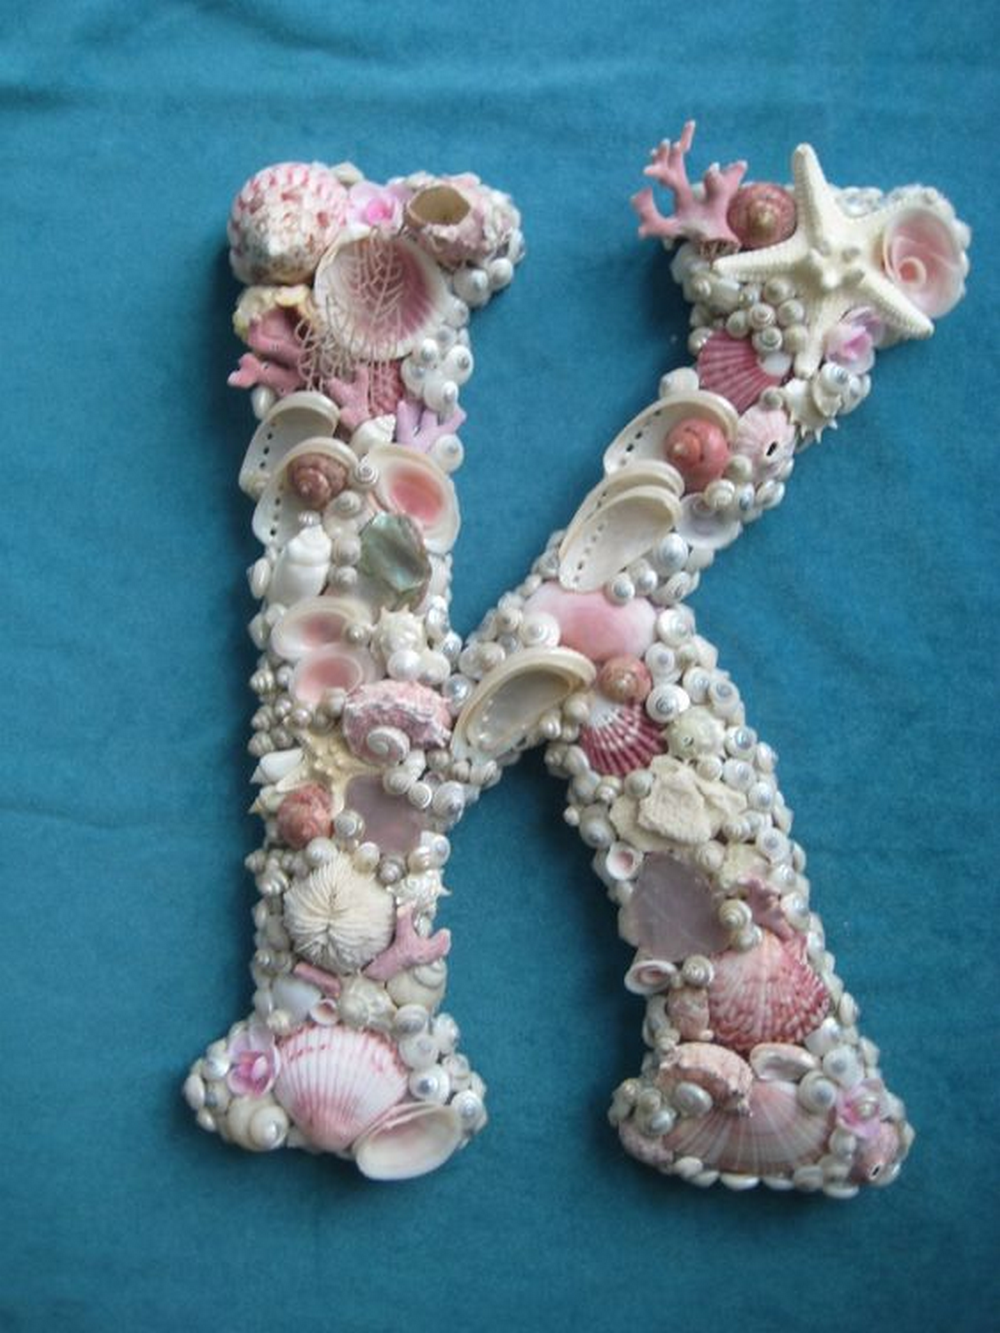
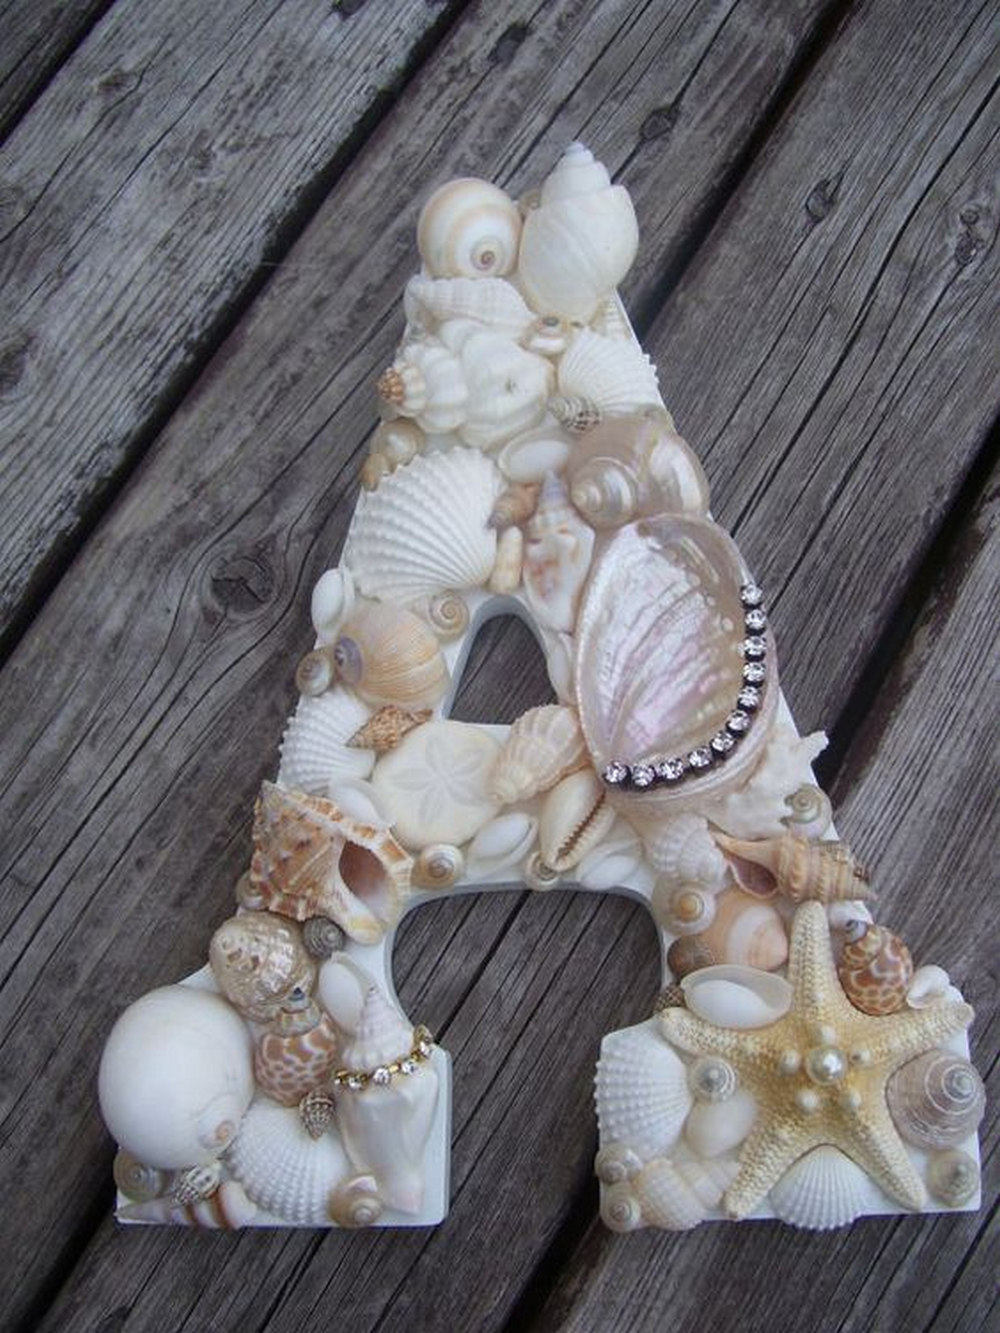
Seashell Wall Letter Gallery
Click on any image to start the lightbox display. Use your Esc key to close the lightbox.


Creative Variations: Adding Sand, Driftwood, or Pearls
Seashell wall letters are already eye-catching, but adding extra coastal elements can make them even more stunning. Incorporating natural materials like sand, driftwood, and pearls adds more texture, color, and character to your design. These small touches help transform simple seashell wall letters into true pieces of beach-inspired art.
Enhancing with Sand
Adding sand is one of the easiest ways to give seashell wall letters an authentic beach vibe. You can sprinkle fine sand across the surface of the letter before the glue dries. For a more textured finish, brush a layer of tacky glue onto exposed areas and lightly press sand into the glue.
Sand can also be used as a background base before you start placing the shells. It creates a soft, neutral foundation that lets colorful or patterned seashells stand out even more. Using sand not only adds texture but also strengthens the bond between the shells and the wooden letter, making the entire piece more durable.
Incorporating Driftwood Pieces
Small driftwood fragments add a rustic, weathered look that pairs perfectly with seashell wall letters. Choose thin, lightweight pieces that won’t overwhelm the design. Driftwood can be used to create borders around the letter or tucked among clusters of shells to add contrast.
The natural grays and browns of driftwood complement the soft tones of seashells beautifully. You can even break driftwood into small shards to fit tighter spaces or to give the surface a more layered appearance. Including driftwood makes your project feel like a true piece of coastal treasure.
Adding Pearls for Elegance
If you want to bring a touch of elegance to your seashell wall letters, adding faux pearls is a wonderful option. Pearls add a subtle shine that catches the light without being too flashy.
Scatter small pearls between shells to fill in gaps or use larger pearls as focal points within the design. They pair especially well with scallop shells, cockle shells, and any vintage jewelry you might also be using. A few pearls placed thoughtfully around the letter can instantly make your project look more polished and luxurious. Choose flat-back pearls if possible, as they are easier to glue securely.
Combining Materials Thoughtfully
When blending sand, driftwood, and pearls into your seashell wall letters, keep balance in mind. You want each material to complement the others without overpowering the design. Start by laying out the elements loosely before committing with glue.
This allows you to see how everything fits together and make small adjustments as needed. A balanced mix of textures and finishes brings depth and interest, turning simple wall letters into a showcase of beach artistry.
Creative touches like sand, driftwood, and pearls offer endless ways to customize your seashell wall letters. By mixing these natural and decorative elements, you can create designs that are personal, stylish, and full of coastal charm.
Conclusion
Making seashell wall letters is a fun and rewarding way to bring coastal charm into your home. With the right shells and a few creative touches, you can craft a beautiful, personalized piece. It’s a simple project that creates lasting memories and stunning decor.
We have more fun times with seashells. Check out our seashell crafts guide next!


