
Last Updated on June 21, 2024 by Team Ideas24
Bored of your shower curtains? Here’s an idea – instead of replacing it with a regular one, why not repurpose old vintage bed sheets into your own custom shower curtains. :)

If you still have your favorite vintage bed sheets stacked somewhere, take them out and use them for this easy DIY project.
This project is a great way to give your bathroom a personalised and fresh look. You can also revive an old childhood favourite with a new purpose!
Now although this is about using your old bed sheets, the idea is also a great option for when you can’t find a good design in the shower curtains department. For instance if you are looking for a certain character or TV show print, bed sheets usually have them! You can look at thrift stores or garage sales if you want to save some money ;)
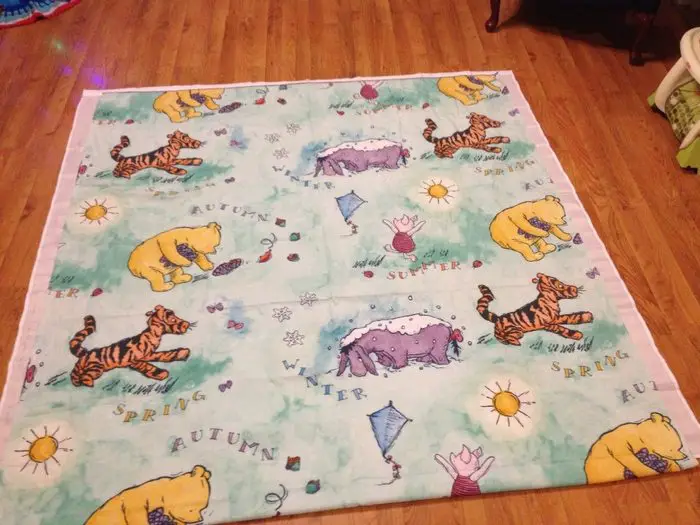
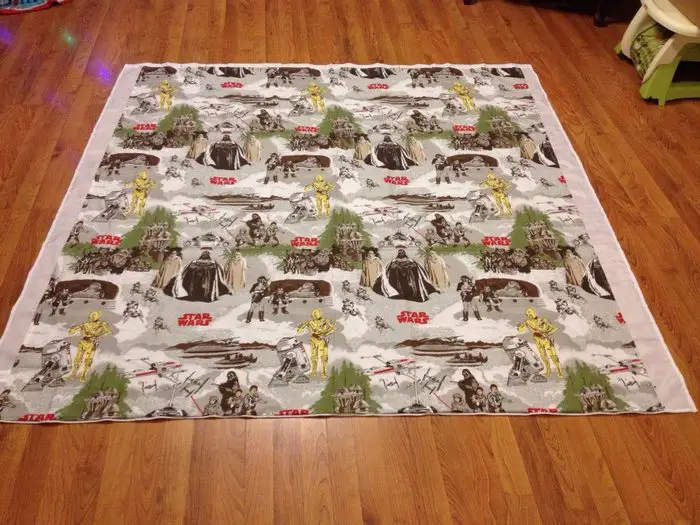
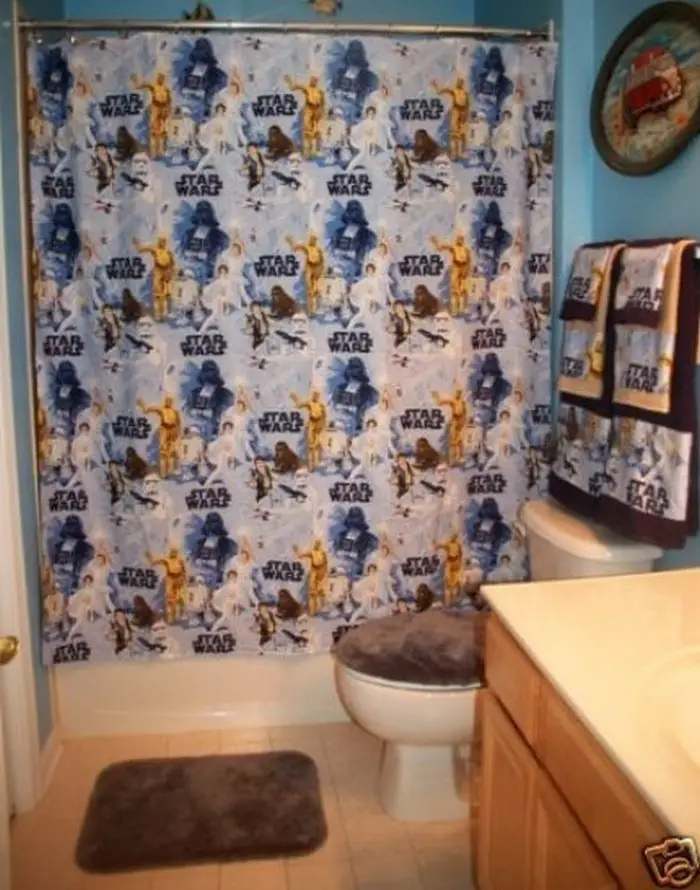
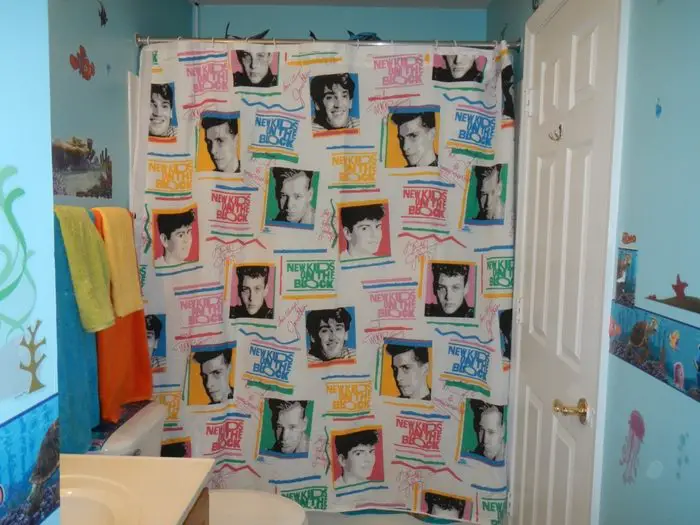
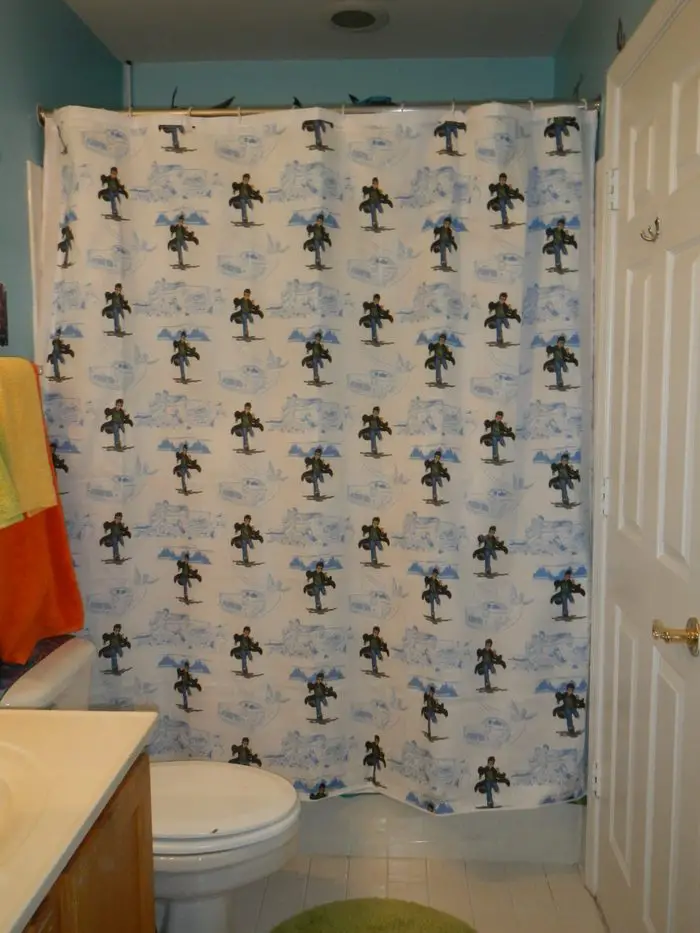
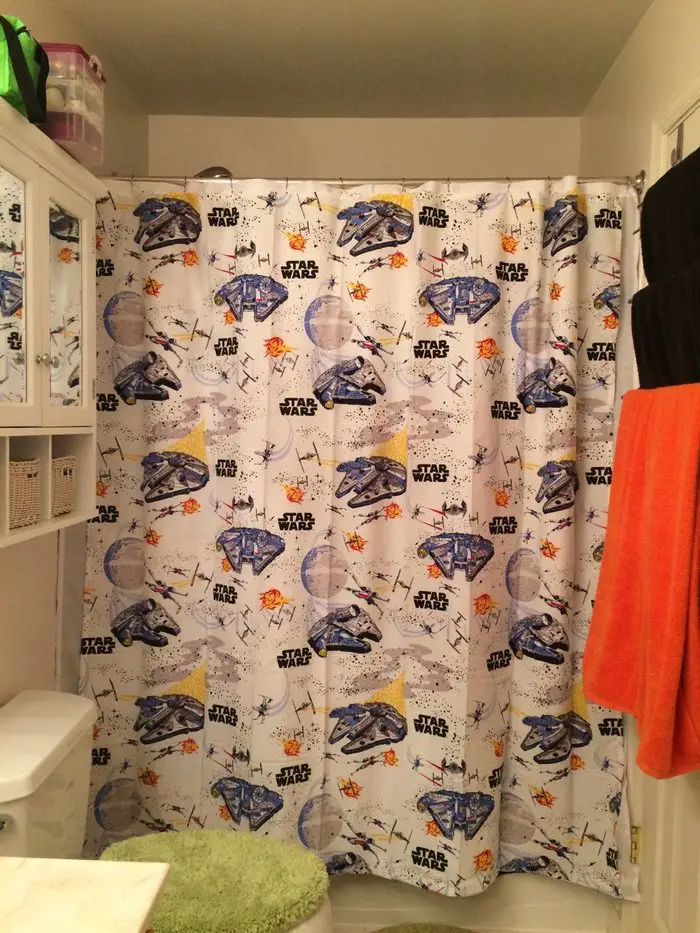
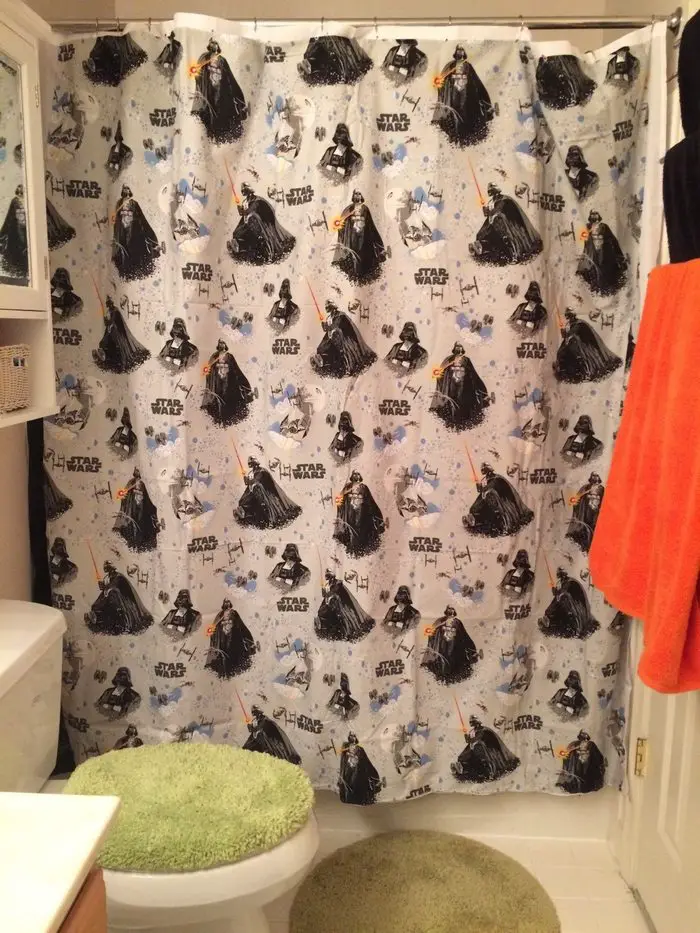
Have a look at some awesome shower curtain examples from Etsy shop owner Carrie Torman from our album below, and learn how to DIY by heading over to the tutorial linked below the gallery!
Contents [show]
Crafting a Shower Curtain from an Old Bed Sheet
Materials
- Old Bed Sheet
- Existing Shower Curtain
- Plastic Liner
Tools
- Scissors
- Pins
- Straight Edge
- Sewing Machine
- Fabric Pencil
- Buttonhole Cutter
Instructions
Prepare Your Workspace
- Clear a large, flat surface to lay out your materials. Ensure you have enough room to spread out the bed sheet and work comfortably.
Measure and Cut the Bed Sheet
- Lay the vintage bed sheet flat on your workspace.
- Place the existing shower curtain on top of the bed sheet. Align the top edges and ensure it’s centered.
- Use the fabric pencil to trace around the existing shower curtain, marking the outline on the bed sheet.
- Remove the shower curtain and use scissors to cut along the traced line. This will be the size of your new shower curtain.
Mark and Cut the Buttonholes
- Lay the cut bed sheet flat and use the straight edge to measure the spacing for the buttonholes along the top edge.
- Typically, shower curtains have 12 holes spaced evenly. Measure the distance between the holes on the existing curtain to use as a reference.
- Mark the positions of the buttonholes on the bed sheet with the fabric pencil.
- Use the buttonhole cutter to create the holes. If you don’t have a buttonhole cutter, you can carefully use scissors to cut small, vertical slits.
Hem the Edges
- Fold the edges of the bed sheet over twice (about 1 inch for each fold) to create a neat hem.
- Pin the folded edges to hold them in place.
- Sew along the pinned edges using the sewing machine, removing the pins as you go. This will give your curtain a finished look and prevent fraying.
Reinforce the Buttonholes
- Fold the top edge of the curtain over about 2 inches to reinforce it.
- Pin the fold in place and sew along the bottom edge of the fold, leaving space for the shower hooks to go through the buttonholes.
- Sew around each buttonhole to strengthen them. You can use a zigzag stitch for extra durability.
Attach the Plastic Liner
- Lay the plastic liner flat and place the finished bed sheet curtain on top.
- Align the top edges and buttonholes of both the bed sheet curtain and the plastic liner.
- Use pins to hold them together temporarily.
Hang Your New Shower Curtain
- Remove the pins from the plastic liner and bed sheet curtain.
- Insert the shower hooks through the buttonholes and hang the combined curtain and liner on your shower rod.
Final Touches
- Step back and adjust the curtain as needed to ensure it hangs evenly.
- Enjoy your new, personalized shower curtain!
Click on any image to start lightbox display. Use your Esc key to close the lightbox.

You can get step-by-step instructions from Sarah over at Sadie Seasongoods!
Benefits of DIY Shower Curtains
Transforming your bathroom decor with a DIY project can be a rewarding experience. Crafting your own curtain offers numerous advantages beyond just aesthetics.
Here’s a look at the key benefits.
Cost Savings
Making your own bathroom decor item can be significantly cheaper than purchasing a new one. Vintage bed sheets or other fabric you already own can be repurposed, eliminating the need to buy new materials. This project is not only budget-friendly but also provides a high level of satisfaction knowing you’ve created something unique without breaking the bank.
Personalization
One of the greatest benefits of DIY is the ability to customize to your exact taste and needs. Whether you prefer vibrant patterns or subtle, elegant designs, creating your own allows you to choose the perfect fabric and style that reflects your personality. You can mix and match different textiles, add trims, or even incorporate favorite themes from old bed sheets.
Eco-Friendly Choice
Repurposing items like old bed linens promotes sustainable living and helps cut waste. You help to reduce the environmental effect of throwing away textiles by recycling and reusing fabric. It advances upcycling and is a little step in the direction of a more environmentally friendly way of life.
Enhanced Creativity
Taking up a do-it-yourself project increases creativity and gives you a feeling of success. Sewing and designing your own décor item lets you express your creative side and learn new techniques. It’s a great approach to turn your imagination into a useful addition to your house.
Perfect Fit
Perfect Fit Store-bought solutions might not always have the measurements or design you have in mind for your area. Making your own guarantees it fits exactly and satisfies your needs. To suit your particular tastes, you can change the length and breadth and even include pockets or other decorative aspects.
Quality Control
Making your own allows you total control over the building and material quality. You can choose robust fabrics and make sure the sewing is solid and dependable. This implies that you can design a good-looking product that outlasts a lot of commercially available alternatives.
Unique Decor
A do-it-yourself project ensures unique bathroom décor. Your unique work, in contrast to mass-produced goods, will be noticeable and give your house a unique touch. It turns into a talking topic and demonstrates your own style in a manner that things from the store cannot.
Making your own bathroom décor item is a rewarding and enjoyable endeavor with several advantages. Savings and individualization abound, making it the ideal approach to improve your house and indulge in a creative project.
Customizing Your Shower Curtain
Adding personal touches to your home decor can elevate your space and reflect your style. When it comes to bathroom decor, the possibilities for customization are endless. Here are some creative ways to make your curtain uniquely yours.
Add Decorative Trims
Enhance the look of your shower curtain fabric by adding decorative trims. Options like lace, fringe, or ribbon can be sewn along the edges or across the surface. These embellishments can give your decor item a touch of elegance or a playful vibe, depending on the trim you choose.
Incorporate Fabric Paint
Use fabric paint to create custom designs or patterns. Whether you’re painting stripes, polka dots, or intricate designs, fabric paint allows you to transform plain material into a piece of art. You can also stencil your favorite motifs or quotes for a personal touch.
Sew on Pockets
Functional and stylish, pockets can be a great addition. Sew a few pockets along the bottom or sides to hold small items like bath toys or toiletries. This not only adds convenience but also gives a unique look that you won’t find in store-bought options.
Mix and Match Fabrics
Combine different fabrics to create a patchwork design. This technique allows you to blend various colors, textures, and patterns for a vibrant and eclectic appearance. Use coordinating fabrics or go bold with contrasting ones to make a statement.
Embroider Personal Designs
Embroidery adds a handcrafted element that’s both beautiful and personal. You can stitch initials, monograms, or even simple decorative elements like flowers or geometric shapes. Embroidery provides a textured and detailed look that enhances the overall aesthetic.
Attach Fabric Appliqués
Appliqués are another way to add dimension and interest. You can cut shapes from other fabrics and sew them onto your main fabric. This is a great way to incorporate favorite themes or motifs, like flowers, animals, or abstract shapes.
Use Custom Hooks
Pair your customized creation with unique hooks. Look for hooks in fun shapes or designs that complement your fabric. Whether you choose hooks shaped like animals, stars, or classic metal styles, the right hooks can complete the look and tie everything together.
Create a Double Layer
For a luxurious feel, consider making a double-layered curtain. Use a sheer or lightweight fabric for the top layer and a heavier one underneath. This not only adds depth and texture but also can be practical for extra privacy and light filtering.
Add Monograms or Names
Personalize your decor item by adding monograms or names. This can be done through fabric paint, embroidery, or iron-on letters. It’s a great way to mark the space as uniquely yours or to create a special piece for a child’s bathroom.
Experiment with Tiebacks
Finish your customized project with decorative tiebacks. Use matching or contrasting fabric to make tiebacks that can be looped around the curtain when it’s pulled back. You can also use ribbons or ropes for a nautical touch.
By incorporating these creative touches, you can transform a simple fabric into a standout feature of your bathroom decor. Customizing not only enhances its aesthetic appeal but also makes it a true reflection of your personal style.
Conclusion
One enjoyable and original approach to customize your bathroom is to turn an old bed sheet into a shower curtain. By repurposing items, this project gives your room a distinctive character. Your house decor can be stylishly and environmentally updated with a few easy steps.


