
Last Updated on March 31, 2025 by Team Ideas24
Tired of the old Halloween pumpkin decorating ideas you usually make every year? Here’s a cute DIY project you can do for a change, cat pumpkin carving decors.

It’s a little different yet still very much in keeping with Halloween. Black cats are associated with scary themes, Halloween included!
There’s definitely a lot less carving involved in this black cat pumpkin idea. So it’s also a great starting project for those who have no experience with pumpkin carving. It’s really easy to put together!
With the candle lights flickering through their eyes, these black cat pumpkins will surely be a front porch decor hit to passers-by. You can’t miss with this one. ;)
Is this going to be your Halloween pumpkin decor idea for this year?
You’ll need these materials:
- Long or Pear-Shaped Pumpkin (for body)
- Small Round Pumpkin (for head)
- Mini Pumpkins (for paws)
- Black Floral Spray
- Wood Floral Picks
- Pen
- Stiff Black Felt or Paper
- Newspaper
- Carved Cucumber or Skinny Gourd (for tail)
- Realistic LED Tea Light Candle
- Small Flat Dish or Jar Lid
- Clay Polymer or Poster Putty
And these tools:
- Knife or Carving Kit
- Scissors
- Mallet or Hammer
Step 1: Set Up Your Workspace
Spread newspaper over your work surface to catch any mess. Make sure your tools and materials are all within easy reach.
Step 2: Prep the Pumpkins
Clean the pumpkins with a damp cloth. Use the long or pear-shaped one for the body, a small round pumpkin for the head, and two mini pumpkins for the front paws.
Step 3: Hollow Out the Body Pumpkin
Use a knife or pumpkin carving kit to carefully cut a hole in the back or bottom of the large pumpkin. Scoop out the insides. This will allow space for the LED candle later.
Step 4: Carve the Face on the Head Pumpkin
Draw a simple cat face using a pen. Focus on the eyes—they’ll be the light source. Carve them out carefully. If you’d like, you can also cut small slits for the nose or mouth, but keep it minimal for a sleek cat look.
Step 5: Spray Paint All Pumpkins Black
Take your pumpkins outside or into a well-ventilated area. Spray paint each one with the black floral spray. Let them dry fully before moving to the next step.
Step 6: Attach the Head to the Body
Use wood floral picks to connect the small pumpkin head to the top of the large body pumpkin. Insert the picks halfway into the body first, then gently press the head pumpkin down onto them. Use a mallet or hammer gently if needed for a snug fit.
Step 7: Add the Paws
Position the mini pumpkins in front of the body to serve as the cat’s paws. Use poster putty or clay polymer underneath each paw to keep them in place.
Step 8: Make and Attach the Ears
Cut out two triangular ears from stiff black felt or paper. Stick them into the top of the head pumpkin using poster putty or secure them with toothpicks or short floral picks.
Step 9: Add the Tail
Take a carved cucumber or skinny gourd and spray it black. Let it dry. Curve it slightly if needed and attach it to the back or side of the cat body with poster putty. Prop it up with floral picks if it needs extra support.
Step 10: Add Lighting
Place the LED tea light on a small flat dish or jar lid inside the body pumpkin. Align it so the light shines through the carved eyes of the head pumpkin. You can adjust the angle slightly if needed.
Step 11: Final Touches
Check that everything is stable and properly positioned. Make small adjustments to the tail or paws if they shift. Add any extra decor like a tiny bow tie or collar if you want a playful touch.
Creative Cat Pumpkin Carving Templates
Looking for a fun twist on your Halloween decor this year? Cat pumpkin carving is a playful way to bring personality to your pumpkins while keeping the spooky spirit alive. Whether you want a mysterious black cat glowing on your porch or a cute kitten greeting trick-or-treaters, the right template makes it easy to get professional-looking results at home. Below are some creative design ideas you can use as inspiration—or turn into your own printable stencils.
Classic Black Cat Silhouette
This is a timeless option for those who want something bold and simple. The silhouette features a seated cat with an arched back, upright tail, and alert ears. When lit from the inside, the shape casts a dramatic shadow that pops against your pumpkin. This template works well on medium to large pumpkins and doesn’t require intricate cuts, so it’s great for beginners trying cat pumpkin carving for the first time.
Crescent Moon Cat
Pair a lounging or curled-up cat with a crescent moon behind it. This design adds a little magic and works especially well if you’re setting your pumpkin in a moonlit outdoor space or along a garden path. Add a few tiny stars or twinkles around the scene to give it extra charm. For a unique effect, try layering carving depths—cut all the way through the moon and stars, but only etch the cat’s outline.
Playful Kitten Face
If you’re carving with kids or just want something more whimsical, go for a kitten face. Big round eyes, button nose, and whiskers can be carved out or just outlined with a fine tool. Add some pointy ears with a bit of felt or cardboard for dimension. This design doesn’t need to be perfect—its charm lies in the expression. This also makes a great choice for no-carve pumpkin decorating if you want to avoid sharp tools altogether.
Scary Cat with Glowing Eyes
Want something more intense? Try a spooky cat with narrowed eyes and a sinister smile. The trick here is to keep the features sharp and angular. Place a small LED light inside the pumpkin, making sure it shines right through the eye holes. This works best on darker nights when you want a strong glow. If you paint the pumpkin black before carving, it adds even more drama to the finished look.
Cartoon-Inspired Cat
Take inspiration from your favorite animated cats—think of characters like Salem from Sabrina, the Cheshire Cat from Alice in Wonderland, or even Luna from Sailor Moon. Their playful shapes and exaggerated features translate well into stencil designs. You can either trace outlines from printed images or freehand sketch them for a personalized touch.
Custom Pet Cat Design
For a more personal project, try turning your own cat into a carved design. Take a side-profile photo of your pet, print it in black and white, then trace the outline onto your pumpkin. Focus on their most recognizable features—the shape of the ears, tail, or posture. This is one of the more meaningful ways to celebrate both Halloween and your furry friend.
No matter which template you choose, cat pumpkin carving adds charm, personality, and a little bit of mystery to your seasonal display. Use these ideas to carve your own designs or mix and match elements for something unique. The only limit is your imagination—and the size of your pumpkin.
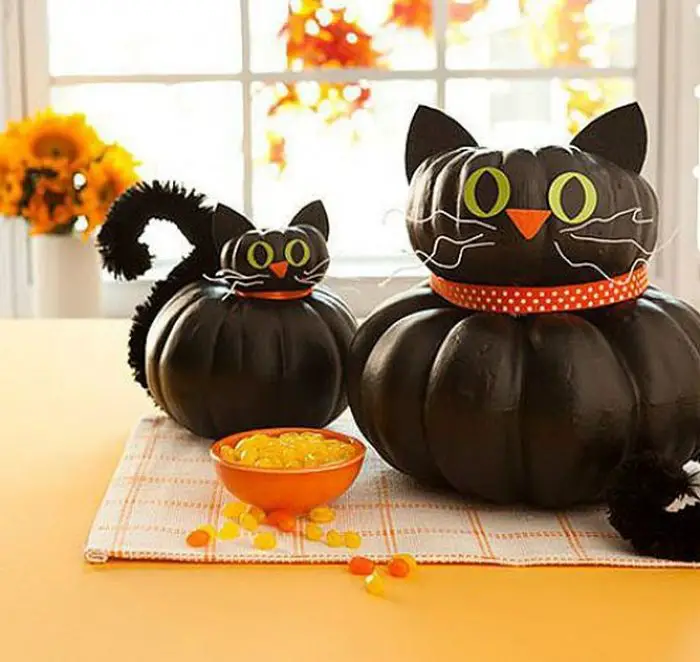
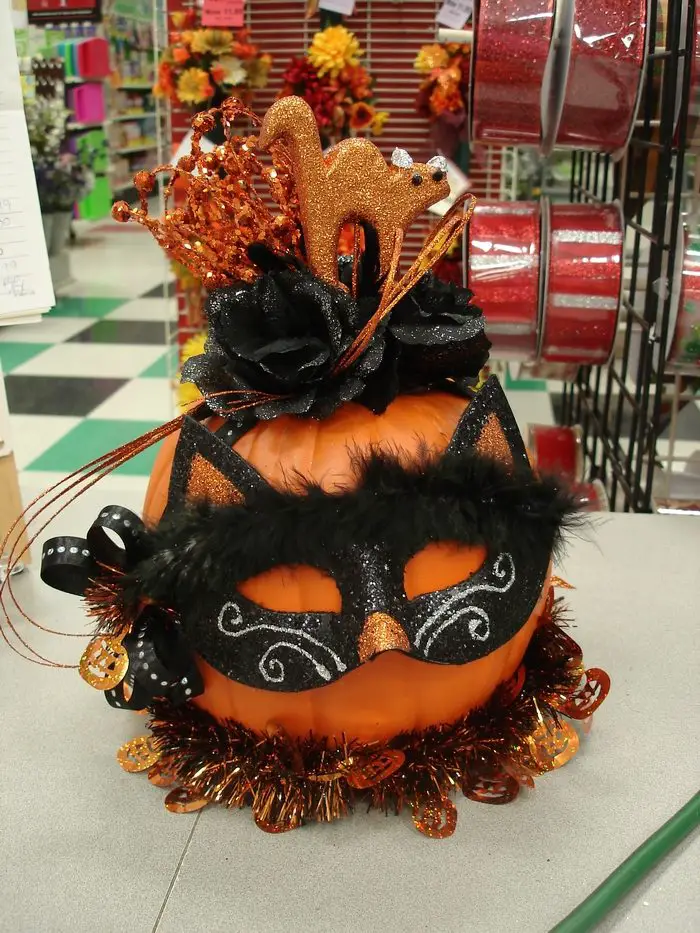
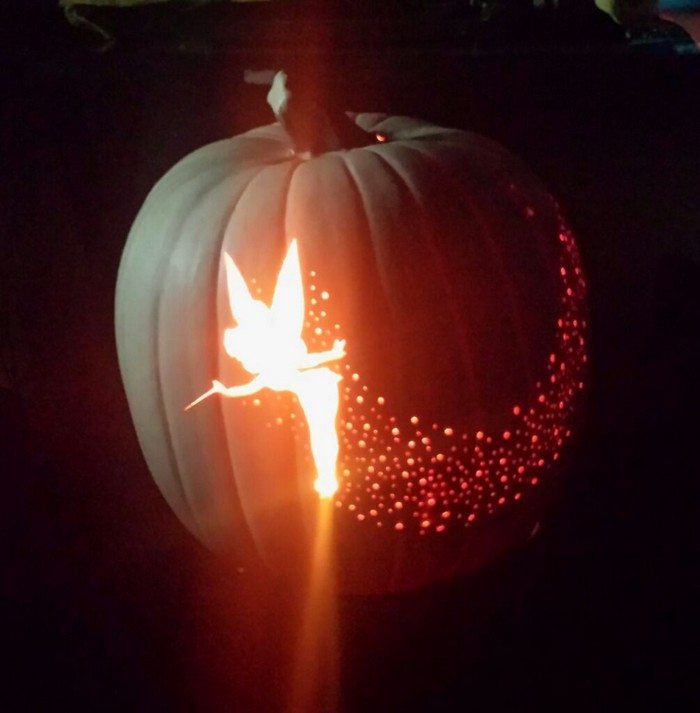
Cat Pumpkin Carving Decor Gallery
Click on any image to start lightbox display. Use your Esc key to close the lightbox. ![]()
Other Cat Pumpkin Decor Ideas


Carved vs. No-Carve Cat Pumpkins: Which One Should You Try?
Cat pumpkin carving comes in two main styles: traditional carving or creative no-carve decorating. Both options bring charm to your Halloween display, but they offer very different experiences in terms of effort, mess, and end result. If you’re deciding which one to try this season, here’s what you should know before choosing your approach.
The Case for Carved Cat Pumpkins
Carving offers that classic glowing look that feels instantly nostalgic. A well-carved cat design, with glowing eyes or a detailed silhouette, can make a bold statement on your porch. The light shines through the cutouts, creating a spooky effect that’s perfect for Halloween night.
This method gives you more creative control over facial expressions, pose, and detailing. If you have experience with a carving kit, or want to try advanced patterns, the possibilities are wide open. Cat pumpkin carving also gives a sense of accomplishment, especially if you’ve taken time to follow a detailed stencil or sketched your own design.
On the downside, carving is messy and time-sensitive. You’ll need to scoop out the inside of the pumpkin, which can get slimy. Once carved, the pumpkin has a shorter shelf life—it may start to collapse within a few days, especially in warmer weather.
The Perks of No-Carve Cat Pumpkins
No-carve decorating skips the mess and opens up all kinds of creative options. You can spray paint your pumpkin black, attach felt ears, add paper whiskers, or glue on googly eyes. For tails and paws, items like mini pumpkins or a curved gourd can complete the look.
This style is safer for kids and quicker to complete. It also lasts longer since the pumpkin isn’t cut open. That means you can decorate it days or even weeks ahead of Halloween without worrying about it going bad.
No-carve cat pumpkins are great if you’re short on time or want to make multiple designs for a themed display. You can also reuse many of the added materials like ribbons, felt, and paper cutouts next year.
That said, the glow factor is limited unless you add battery-operated lights around or behind the pumpkin. You won’t get the same candlelit effect that a carved version delivers.
Which One is Right for You?
If you’re aiming for a traditional Halloween feel with glowing cat eyes and shadowy faces, carving is the way to go. If you prefer less mess, longer-lasting decor, or want to involve kids in the project, no-carve is the smarter option.
Of course, you don’t have to pick just one. Combine both methods—carve the eyes and mouth, then add felt ears and paint the pumpkin black. This hybrid style gives you the best of both worlds.
Whichever path you choose, cat pumpkin carving lets your creativity shine. It’s a fun way to add personality to your Halloween setup, whether it glows in the dark or stands out in the daylight.
Conclusion
Making a cat pumpkin carving is a fun and rewarding way to celebrate Halloween. You can go for a glowing carved design or a mess-free no-carve version. Either way, it’s a creative project that adds charm and personality to your holiday decor.


