
Last Updated on February 6, 2025 by Team Ideas24
When trying to find summer activities, most people consider keeping kids entertained. However, there are plenty of artistic activities for imaginative adults to explore their creative talents and produce something new and unique.
Contents [show]
Summer Crafts Projects Ideas
Summer crafts projects should be bright, bold, and full of life to reflect the feeling of the season. Here are seven fun summer crafts for creative adults to try this year.
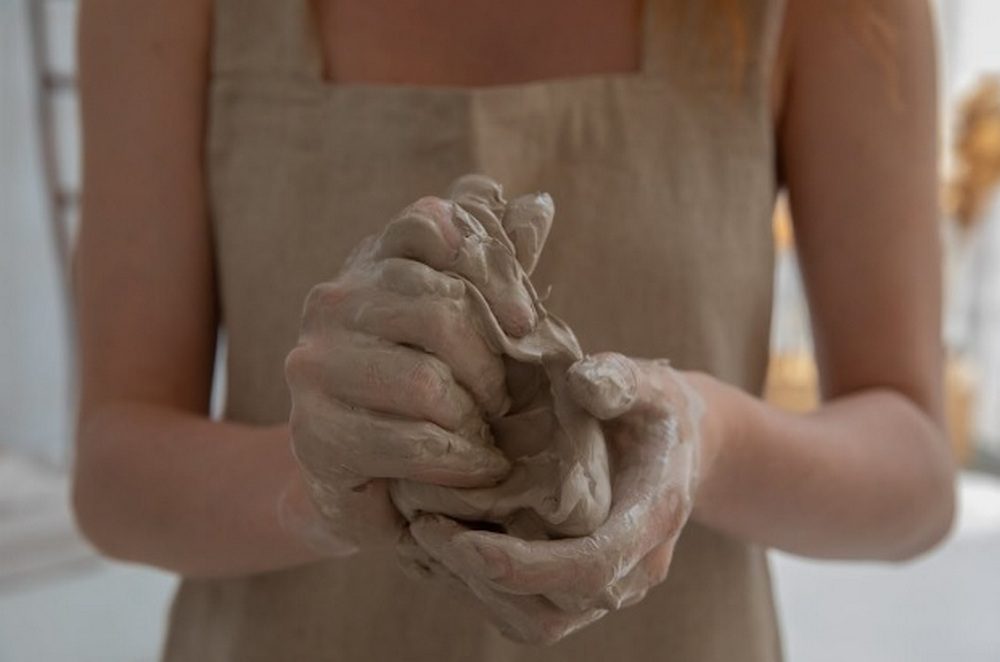
Clay Planters and Vases
Summer is the season of growth, color, and creativity, making it the perfect time to craft your own clay planters and vases. These handmade pieces not only add a personal touch to your garden or home decor but also allow you to experiment with different shapes, textures, and finishes. Whether you’re looking for a simple, rustic look or an intricate, decorative design, working with clay offers endless possibilities.
Choosing the Right Clay
When making oven bake clay ideas for adults, the type of clay you choose will determine durability and style. Air-dry clay is a great option for decorative indoor planters, while oven-bake polymer clay provides more stability. If you want waterproof and weather-resistant pieces, opt for kiln-fired clay or seal your finished pieces with a waterproof glaze.
Designing Unique Shapes and Patterns
Plain clay planters are beautiful summer crafts, but adding texture or unique patterns can make them even more special. Try braiding or weaving clay strands to create a basket-like effect. Roll out clay and use stamps, lace, or textured fabric to imprint patterns. You can also carve designs into the surface before baking or drying. For a more artistic approach, use multiple clay colors and swirl them together for a marbled effect.
Adding a Personal Touch
Once your clay planter or vase is dry, painting and sealing it can add vibrancy and longevity. Acrylic paints work well for indoor use, while outdoor sealers will help protect planters from moisture and sunlight. Try painting abstract designs, botanical prints, or even ombré effects to match your summer decor. If you prefer a natural look, leave the clay unpainted and add a light varnish for a subtle sheen.
Beach Glass Mosaic
Spending time near the ocean often leads to collecting little treasures—smooth beach glass, seashells, and colorful pebbles. These natural finds hold memories of sun-soaked days and crashing waves, making them the perfect materials for a personalized summer mosaic. Whether you turn your mosaic into a stepping stone, a decorative plaque, or a tabletop inlay, this craft is a wonderful way to preserve summer’s beauty in a lasting piece of art.
Planning Your Design
Since concrete dries quickly, it’s best to plan your design ahead of time. Trace the outline of your mold onto a piece of paper and arrange your beach glass, shells, and stones within that space. This step allows you to experiment with different layouts before committing to a final design.
For a cohesive look, consider creating a mandala-inspired pattern, geometric shapes, or even a simple wave design that reflects the ocean theme. If you want to incorporate words, use letter stamps or carve letters into the concrete before it fully sets.
Mixing and Pouring the Concrete
Once you’re satisfied with your layout, it’s time to mix your concrete. Choose a fast-setting concrete mix for a sturdy and durable mosaic. Follow the manufacturer’s instructions and stir until you reach a thick, pourable consistency. If desired, add a concrete colorant to tint the mix and enhance the beachy aesthetic.
Pour the concrete into your mold and tap it gently to remove air bubbles. Immediately begin placing your pre-arranged mosaic pieces into the surface, pressing them in slightly to ensure they adhere to the concrete sets.
Finishing Touches
After the concrete has dried, carefully remove the mosaic from the mold. If any pieces feel loose, reinforce them with a strong adhesive. For added protection, consider sealing your mosaic with a clear, weatherproof sealant, especially if it will be displayed outdoors.
A Dyed or Painted Picnic Set
Outdoor events are best suited for summer, hence nothing makes a picnic seem more unique than a customized picnic set. Making your own colored or painted picnic set gives your outdoor meals a personal touch, whether you’re lounging at the beach or on a sunny afternoon in the park. This easy, fun, totally customized project lets you select colors, patterns, and motifs that complement your style.
Choosing the Right Materials
Your picnic blanket will require a big piece of canvas drop cloth to start. Because it’s robust for outdoor usage, simple to paint or dye, and resilient, a canvas drop cloth is a great choice. Choose cotton or linen cloth if you would want a gentler feel.
For painting, consider acrylic paints or fabric paints blended with fabric medium. If you want an all-over color look rather than painted graphics, fabric dyes can do really nicely. To assist produce various effects, be sure you have sponges, stencils, and paint brushes on available.
Get matching cloth for napkins for the final touches, then think about tying the complete ensemble together with a picnic basket liner.
Designing Your Picnic Blanket
There are endless ways to decorate your picnic blanket, depending on your preferred style. Here are a few ideas to get inspired:
- Ombre Effect: Dip-dye the fabric into a bucket of fabric dye, allowing the color to fade gradually. This creates a soft, watercolor-like transition of color.
- Stripes and Polka Dots: Use painter’s tape to create clean lines or round sponges to stamp polka dots.
- Stencil Art: Create a beachy or floral theme using stencils and spray paint for quick and even designs.
- Abstract Brushstrokes: Let your creativity flow by painting bold, freehand brushstrokes for a modern and artistic look.
- Hand-Stamped Designs: Use potato stamps or carved rubber stamps to create repetitive patterns like leaves, waves, or summer fruits.
Once you’ve painted or dyed your fabric, let it dry completely before heat-setting the colors by ironing the reverse side or tossing it in the dryer on high heat. This ensures the design stays vibrant and doesn’t fade after washing.
Creating Matching Napkins and Accessories
To complete your picnic set, make matching cloth napkins by cutting squares of fabric and hemming the edges with fabric glue or a sewing machine. You can dye or paint them to coordinate with your picnic blanket.
For a fully customized experience, consider decorating a picnic basket liner using the same technique as your blanket. If you’re feeling extra crafty, paint wooden utensils or personalize plates and cups with non-toxic, food-safe paint.
Practical and Stylish Picnic Must-Haves
A customized picnic set isn’t just about aesthetics—it also adds comfort and convenience to your outdoor experience. For extra functionality, consider these additions:
- Carrying Straps: Add fabric handles or a ribbon tie so you can easily roll up and transport your picnic blanket.
- Waterproof Backing: Attach a waterproof fabric layer to the underside of your picnic blanket to keep it dry on damp grass.
- Tassels or Fringe: Sew or glue a decorative trim around the edges for a chic boho look.
Tin Punch Lanterns
Lighting can transform any outdoor space, and tin punch lanterns add a warm, rustic charm to summer evenings. These lanterns are not only beautiful but also a sustainable way to repurpose old tin cans into glowing works of art. Whether you’re setting the mood for a backyard gathering, lining a garden pathway, or adding ambiance to a porch, tin punch lanterns are an easy and rewarding craft.
Gathering Your Materials
To create tin punch lanterns, you’ll need a few simple supplies:
- Clean tin cans (soup cans, coffee cans, or any metal container)
- A marker or chalk to sketch your design
- A nail and hammer for punching holes
- Sandpaper or a metal file to smooth rough edges
- Spray paint or acrylic paint for decorating (optional)
- Wire or twine for hanging (optional)
- Candles or LED lights to illuminate your lantern
If the edges of your cans are sharp after removing the lid, use sandpaper or a metal file to smooth them down before starting your design.
Preparing Your Tin Cans
Before you begin punching holes, fill your tin cans with water and freeze them overnight. The ice prevents the cans from denting when you hammer the nail into them. Once frozen, place a towel underneath the can to keep it from slipping while you work.
Designing Your Pattern
There are endless ways to personalize your lanterns. Use a marker or chalk to sketch a design before punching the holes. Some creative ideas include:
- Starry night patterns – Scatter dots randomly to mimic constellations.
- Geometric shapes – Triangles, diamonds, and spirals create modern, stylish designs.
- Floral motifs – Try outlining flowers, leaves, or vines for a nature-inspired look.
- Words or initials – Spell out names, monograms, or short phrases like “SUMMER” or “LOVE.”
To ensure even spacing, wrap a piece of graph paper around the can and trace your design through it.
Punching the Holes
Using a hammer and a nail, carefully punch holes along your design. Work slowly, gently tapping the nail into the metal to avoid bending the can. Use different nail sizes or a drill for more precision if you want larger holes. Once your design is complete, let the ice melt and dry the cans thoroughly.
Decorating and Finishing Touches
To enhance your lantern’s appearance, paint the outside with spray paint or acrylic paint in bright summer colors or metallic shades like gold and silver. Lightly sand the paint once it dries for a distressed or vintage look.
If you’d like to hang your lanterns, drill two small holes near the top of the can and attach wire or twine. This makes them perfect for suspending from tree branches, pergolas, or porch hooks.
Resin Floral Suncatcher
Resin floral suncatchers are a beautiful way to preserve summer’s most vibrant blooms, turning delicate petals into long-lasting works of art. To start, gather fresh flowers and press them flat between heavy books or a flower press for a few days until fully dried. Choose a variety of colors and shapes to create a dynamic design.
Once your flowers are ready, prepare your clear epoxy resin by following the manufacturer’s instructions. Pour a thin layer into a round silicone mold, arrange your pressed flowers on top, and carefully add another layer of resin to encase them completely. Let the resin cure fully, which typically takes 24 to 48 hours.
Adding the Finishing Touches
After your resin pieces have hardened, gently remove them from the molds and sand any rough edges for a smooth finish. To turn them into hanging suncatchers, drill a small hole near the top of each disc and thread through twine, fishing line, or ribbon. You can also add beads or charms for an extra decorative touch. If you want to enhance the colors of the flowers, apply a thin coat of clear resin or glossy varnish to the surface.
Displaying Your Suncatchers
Find the perfect spot to display your suncatchers where they can catch the sunlight and bring a touch of summer into your home. Hang them near a sunny window, from tree branches, or along a patio railing to enjoy the way they filter light and cast colorful shadows. They also make thoughtful, handmade gifts for friends and family. With this simple craft, you can keep the essence of summer alive all year long.
A Molded Sand Bowl
If you grew up spending time at the beach, you probably feel nostalgic about building creations in the sand. You can capture the same feeling (with less mess) by creating a molded sand bowl to hold jewelry, seashells, and other keepsakes.
For this project, you’ll need sand, glue, a bucket, plastic wrap, and a bowl or container you want to emulate. Mix the glue with the sand until you have a thick-yet-pourable paste. It should feel like the wet sand you use to make a strong sand castle. Place the plastic wrap over your mold and apply the sand paste, packing it in and smoothing it out to perfect the shape.
Let the sand dry, then apply a thin layer of glue over top. Repeat this process twice, then let the bowl dry overnight. Alternatively, you can cover it with varnish or Mod Podge spray. With the latter, you can also add seashells to the sand mixture. For a unique look, use balloons instead of an existing bowl to create a dripping sand illusion.

Ombre Sunset Canvas
For a simple, eye-catching piece of decor, create a summer sunset on a canvas. For this project, you’ll need acrylic paints in shades of pink, orange, red, yellow, and purple. You’ll also need a canvas in the size of your choice and a paintbrush.
Add a dollop of each color along the side of the canvas, with your darkest shade on the top, working your way down to the lightest shade. Then, use your paintbrush to wipe the paint from side to side, covering the canvas as you work your way down. Try to get complete coverage from each color before moving downward, blending the shades as you go. Let the canvas dry completely.
You can finish the project here or add a fun summer quote in a contrasting shade using paint pens, a Cricut, or a small paintbrush with a steady hand.
Wrapping it up…
Summer crafts aren’t just for kids. They can also be a therapeutic, memorable experience for adults. Enjoy these fun, festive crafts as you add a personal touch to your summer decor. Don’t worry about perfection— it’s all about getting creative and having fun.
We have more crafting projects for adults. Check out our clay craft projects next!


