
Last Updated on May 23, 2024 by Team Ideas24
We have a lot of empty jars at home – and I mean dozens of them. I literally stumbled upon them while I was cleaning out our storage room. I must have collected them over the years because I don’t like throwing recyclable stuff away.
Because the jars were of different make and sizes, I engaged myself in a DIY project. I once saw a video tutorial on how to make mushroom fairy houses from jars. A quick search gave me what I needed. I then decided to give it a try.
These mushroom fairy houses are perfect as home décors or as gifts. You can also use them to store candy, jewelry, trinkets, and other stuff. With this DIY project, you can bring new life to old boring jars. You just have to turn them into mushroom fairy houses!
You can also ask the kids to join you. Let them have fun with the clay or ask them to color. It will be a great bonding activity for you and your kids.
Gather what you need and get to work…

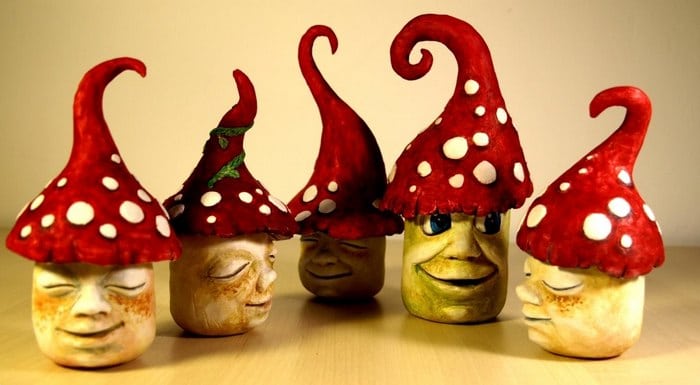
With a little bit of creativity, you can design and build a beautiful and magical home for your favorite fairies. Not sure where to start? Check out some of these amazing mushroom fairy house designs for inspiration.
Majestic DIY mushroom fairy house designs
Click on any image to start the lightbox display. Use your Esc key to close the lightbox.

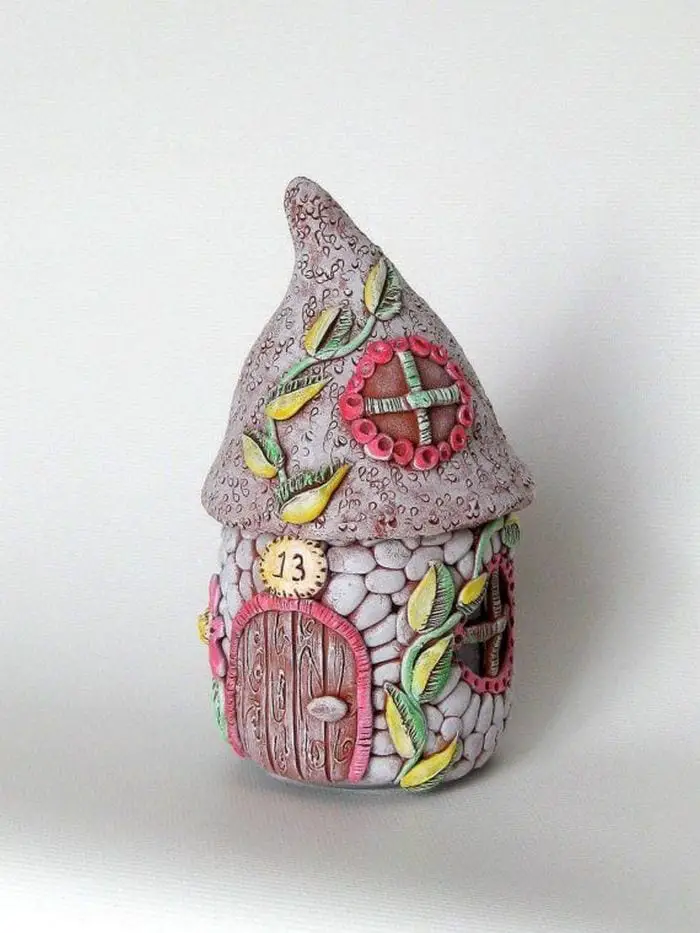
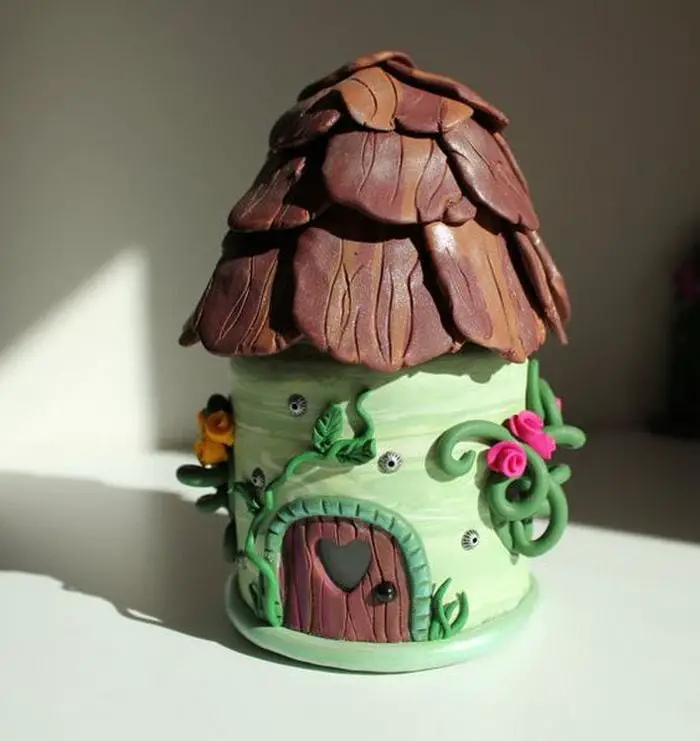
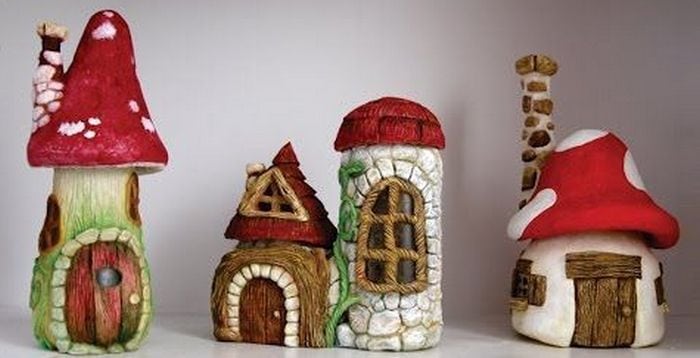
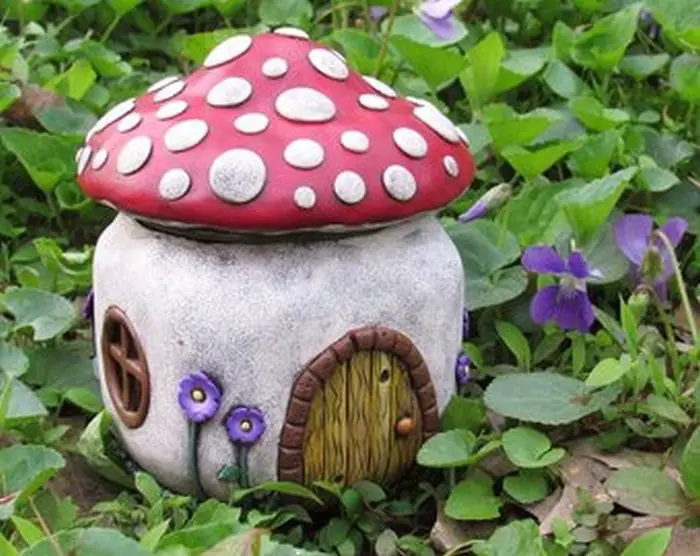
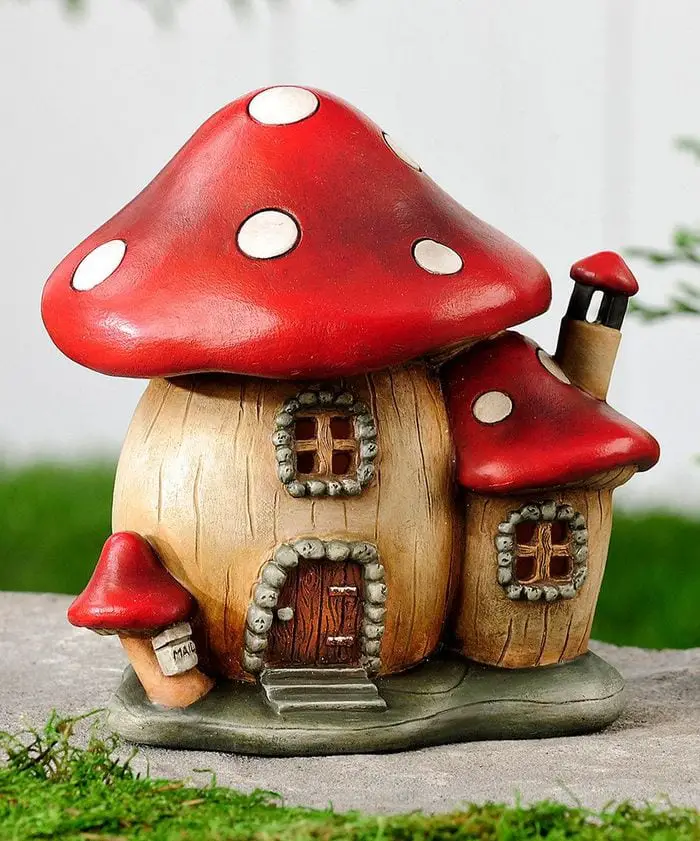

These Majestic DIY mushroom fairy house designs are sure to inspire you. Not only are these houses adorable, but they’re also surprisingly easy to make, plus it’s a good way to recycle your old jars. All you need is some basic crafting supplies and a little bit of imagination. So grab your glue gun and let’s get started!
Contents [show]
Crafting a Mushroom Fairy House
To get started, you’ll need some basic supplies. Here’s what you’ll need:
Materials
- empty jar
- tinfoil
- hot glue
- white air-dry clay
- watercolors
Tools
- glue gun
Instructions
Making a fairy house is a great way to bring some enchantment into your home and garden.
This DIY project is easy to do and only requires a few materials. Best of all, you can customize your fairy house to suit your own personal style.
Since your supplies are ready, then let’s get started!
1. Prepare the jar
Make sure to clean the jar thoroughly before using it. You can wash it with soap and water, or you can put it in the dishwasher. Either way, make sure the jar is clean before you use it.
2. Make the mushroom head
To create a mushroom head shape out of tin foil, start by covering the lid with the tin foil. Next, use your hands to mold the tin foil into the shape of a mushroom head. Then, seal it with hot glue. Just be sure to use good-quality glue to keep the foil in place.
3. Make the mushroom body
To make the body of the mushroom, cover the whole jar with clay, including the head. We recommend using white air-dry clay. Use your fingers to smooth out the clay and make it even. Make sure there are no gaps or cracks in the clay.
4. Create the carving design
Once the jar is covered, use a knife to make the details of the mushroom. Start at the top of the jar and make a downward cut. Then, use a stick to make the door and windows. Draw the rest of the details for the walls using your imagination. You can draw some rocks, stems and stairs. With a little bit of creativity, your mushroom house will be complete!
5. Finally, you can now paint your fairy house
Now that the building of your fairy house is complete, it’s time to add a little color! This is the fun part, where you get to make your house look however you want. You can use any colors you like, or even mix them together to create new shades. Just make sure to have fun and be creative!
Enjoy your new DIY fairy house display! We hope you enjoy it for years to come.
Here are a few tips to keep it looking its best:
- Dust it regularly with a soft cloth
- Keep it out of direct sunlight to prevent fading
- If you live in a humid climate, consider using a sealant to protect the materials from moisture damage
You can watch the video tutorial here…
Thanks to Creative Mother in Craft for this great project.
Lighting Your Mushroom Fairy House
Creating a mushroom fairy house from jars is a delightful project that adds a touch of magic to any room or garden. To enhance the enchantment of your crafted mushroom fairy houses, consider incorporating various lighting techniques. Proper lighting can bring your fairy house to life, making it a captivating feature both day and night.
Choose the Right Light
The first step in lighting your mushroom fairy house is selecting the appropriate light source. LED tea lights are an excellent choice for safety and longevity. They provide a soft glow that can mimic the enchanting light you might imagine in a fairy’s home. These lights are battery-operated and come in various colors, allowing you to customize the ambiance to your liking.
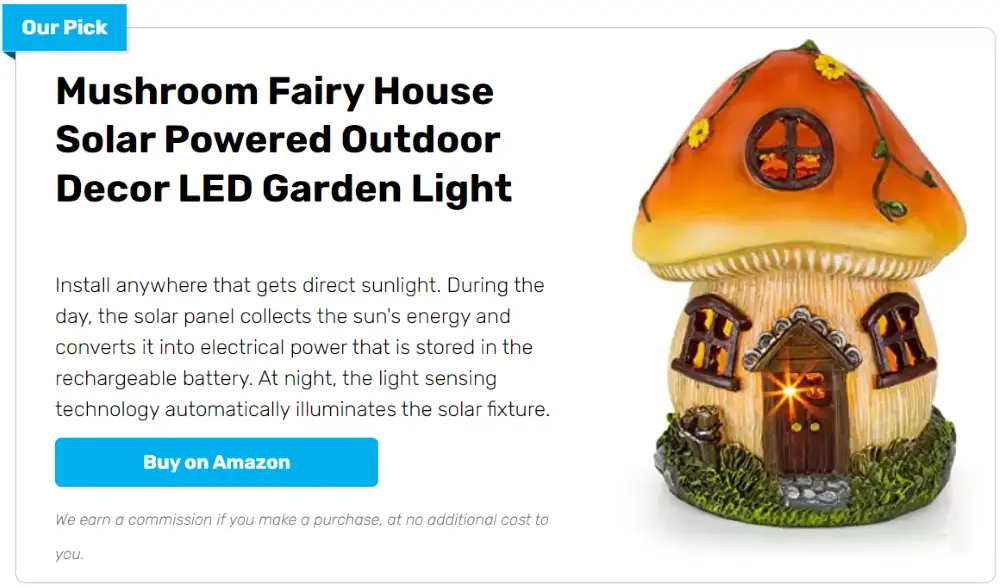
Solar-Powered Solutions
For outdoor mushroom fairy houses, solar-powered lights are a perfect option. These lights harness the power of the sun during the day and illuminate at night, providing a sustainable and automatic lighting solution. Place the solar panel in a spot where it can receive ample daylight, and enjoy how your fairy house comes to life each evening without any additional effort.
Magical Glow with Paint
Applying glow-in-the-dark paint to your mushroom fairy house is another inventive approach to make it illuminate. Use this paint on the exterior of your jar’s windows, doors, and other decorative designs, as well as the inside of the jar. After being charged by either artificial or natural light, your fairy house will have a captivating glow in the dark.
Each of these lighting techniques improves the overall experience of making and exhibiting a mushroom fairy palace in addition to adding visual flair to your creation. Your lit-up fairy house is guaranteed to be a showpiece, whether you choose the eco-friendliness of solar power, the functionality of LED lights, or the distinctive charm of glow-in-the-dark elements.
Incorporating Natural Elements
Crafting a mushroom fairy house from jars allows for a perfect blend of creativity and nature. By incorporating natural elements into your design, you can enhance the authenticity and aesthetic appeal of your fairy house, making it appear as if it has sprung from an enchanted forest floor.
Collecting Natural Materials
Begin your project by gathering small, natural items that can be used to decorate your mushroom fairy house. Look for materials such as pebbles, twigs, dried leaves, and small pine cones during a walk in the park or your garden. These elements will not only add texture and color but also help your fairy house blend seamlessly with its natural surroundings.
Creative Placement
Think about the placement of these natural elements to maximize their visual impact. Create a cobblestone pathway leading up to the door with small pebbles, or use twigs to frame the windows and doors of your mushroom fairy house. You can also create a thatched roof effect using dried grass or layer moss over the base to simulate a lush, green landscape.
Using Sand and Soil
Incorporate sand or soil to give your fairy house a grounded, earthy base. You can apply a thin layer of glue to the bottom of the jar and sprinkle sand over it to simulate a miniature desert or beach scene. Alternatively, using soil can help simulate a real garden look, especially if you’re integrating your fairy house into an outdoor setting.
Water Features with Resin
Create a small water feature by using clear resin. Pour resin into a shallow, crafted basin to simulate a tiny pond or stream near your mushroom fairy house. This can add a reflective and serene element, enhancing the magical feel of the setup. You can also embed small pebbles or shells into the resin for added natural detail.
Adding Seed Pods and Berries
Seed pods and dried berries can serve as additional decorative elements. Use them to create roof shingles, lamp posts, or simply as decorative accents around the doorways and windows. Their unique shapes and textures provide a rustic charm to your fairy house.
Leaf and Flower Details
Leaves and flowers can be used more extensively by pressing them into the clay before it dries or gluing them onto the finished house for a vibrant touch of color. Choose flowers and leaves that have dried well so they maintain their color and shape over time.
Integrating Fungi and Lichen
For a truly forest-themed look, incorporate small fungi and lichen into your design. These can be attached to the roof or around the base of your mushroom fairy house, mimicking the look of a woodland floor. Ensure that any natural fungi used are thoroughly dried and treated to prevent decay.
Secure Attachment Techniques
Securing these natural materials to your fairy house requires careful technique to ensure they stay in place. For heavier items like stones or large pieces of bark, use a strong adhesive like epoxy or a hot glue gun. For lighter and more delicate items such as leaves and petals, clear craft glue can be sufficient. Remember to apply these adhesives carefully to maintain the natural look of your materials.
Incorporating natural elements into your mushroom fairy house not only enriches the visual experience but also connects your creative project with the beauty of the natural world. This approach encourages an appreciation for the environment and enhances the magical and organic feel of your fairy house.
Conclusion
Creating a mushroom fairy house is a rewarding DIY project that transforms ordinary jars into magical homes for fairies. With the addition of lights, natural materials, and your own creative touches, each fairy house becomes a unique piece of art. Enjoy the process of bringing a little magic into your home or garden with this enchanting craft.
If you liked this project, you might also like to view the DIY Aquarium Jar…


