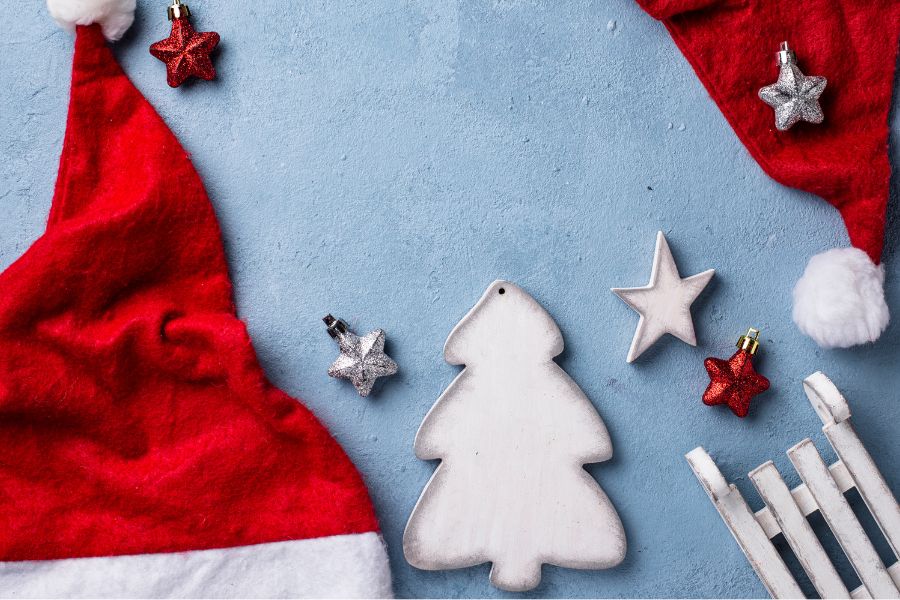
Making your own Santa hat is a delightful and simple holiday craft that brings a personal flair to your Christmas festivities. If you’re gearing up for this year’s holiday gathering, crafting a Santa hat at home is a fun and affordable idea Using just a few easy supplies, you can create a custom hat for the kids, parents, and grandparents. Just follow this easy guide, and you’ll have a lovely handmade Santa hat to enjoy this season!
Contents [show]
Step-by-Step Guide For Your DIY Santa Hat
Making your own Santa hat is a fun and festive project you can complete in just a few simple steps. Whether you’re crafting it for a costume, holiday decor, or just to add Christmas spirit to your outfit, this guide will help you easily create a classic Santa hat.
Materials and Tools:
- Red felt or fabric (about ½ yard)
- White faux fur or cotton
- Scissors
- Fabric glue or needle and thread
- Measuring tape
- Pom-pom or cotton ball for the tip
- Ruler or straight edge
- Pins (optional)
Step 1: Measure and Cut the Fabric
- Use the measuring tape to measure the circumference of your head where the hat will sit.
- Using this measurement, cut a triangle from the red felt. The triangle’s base should match your head’s circumference, and the height should be around 12 to 14 inches depending on how tall you want the hat.
Step 2: Form the Cone Shape
- Fold the red triangle in half with the good side facing in.
- Either stitch the long sides together using needle and thread, or use fabric glue along the edge to form a cone.
- Let the glue dry, or finish stitching, before turning the cone right-side out.
Step 3: Attach the White Trim
- Measure a strip of white faux fur or cotton to match the base of your cone. The width should be about 2-3 inches.
- Wrap the white strip around the base of the hat and secure it with fabric glue or stitching.
- Make sure the seam is neat to create a clean, finished look.
Step 4: Add the Pom-Pom
- Take a pom-pom or a cotton ball to create the iconic tip of the Santa hat.
- Use fabric glue to attach it to the top of the hat, or securely stitch it in place for extra durability.
Step 5: Customize Your Hat (Optional)
- Personalize your Santa hat by adding decorations like glitter, ribbons, or small holiday charms.
- For a special touch, you can add a name or festive phrase using fabric paint or markers.

No-Sew Holiday Hat: A Simple Eco-Friendly Option
If you’re looking for a no-sew Santa hat, this method allows you to create one without using a needle and thread. It’s perfect for a quick craft or for those who don’t have sewing supplies at home.
Use a recycled felt or old fabric from unwanted things. The base of the hat should fit your head, so cut a triangle from your cloth. Form a cone by attaching the sides with plant-based fabric adhesive instead of sewing. Cut and glue a white felt or fabric strip to the hat base for the trim. Finally, glue a cotton ball or yarn pom-pom.
This no-sew method is fast, easy, and sustainable because it uses leftover materials.
10 Creative Ways to Customize Your Santa Hat
Making your own Santa hat is a fun project, but what makes it truly special is adding a personal touch to it. Customizing a Santa hat not only makes it stand out but also reflects your unique holiday spirit. Whether you’re wearing it to a festive party, for family photos, or gifting it to someone special, these ten creative ways to customize your Santa hat will help you add a twist of personality and fun.
Add Glitter or Sequins for Extra Sparkle
Who doesn’t love a little sparkle during the holiday season? Adding glitter or sequins to your Santa hat can give it a festive shimmer that stands out in any crowd. Use fabric glue to attach glitter along the hat’s rim or randomly sprinkle it on the red felt. If you’re using sequins, create patterns like snowflakes, stars, or even your name to personalize it further. This idea works well for those who want to turn a traditional Santa hat into a statement piece.
Embroider Your Name or a Holiday Phrase
Personalizing your Santa hat with embroidery is a classy way to make it truly yours. You can stitch your name, initials, or even a short festive message like “Merry Christmas” or “Ho Ho Ho” onto the white fur trim or the body of the hat. If you’re handy with an embroidery hoop and thread, this is a great way to add a handmade touch. Don’t have an embroidery machine? Fabric paint pens or iron-on letters can also do the trick.

Attach Small Jingle Bells
To really get into the holiday spirit, why not add some jingle bells to your Santa hat? Attach small bells to the tip or around the white trim of the hat so they jingle softly with each movement. These can be sewn in place or glued for an easier option. This is not only a fun touch, but it also adds a bit of music to your festive attire, making you feel even more in the holiday mood.
Use Decorative Ribbons or Bows
Attach ribbons or bows to your hat for a playful and decorative look. You can weave a red or green ribbon through the white trim for a pop of color or tie a large bow at the tip of the hat. This gives the hat a more polished and finished look while being fun and festive. You can also coordinate the ribbon with other accessories for a cohesive holiday outfit.
Add a Faux Fur Pom-Pom
Swap out the traditional cotton or yarn pom-pom at the top of your Santa hat for something unique, like a large faux fur pom-pom. Faux fur adds a luxurious and cozy feel, perfect for winter celebrations. You can buy pre-made faux fur pom-poms at most craft stores or make your own by cutting and stitching faux fur fabric into a round shape. This small change can elevate the entire look of your hat.
Create a Light-Up Santa Hat with LEDs
Want to stand out even more? Add battery-operated LED lights to your Santa hat for a dazzling, light-up effect. You can wrap a string of mini LED lights around the hat or discreetly sew them into the fabric so they twinkle as you move. Just be sure to use lights with a small battery pack that you can tuck away inside the hat. This customization is perfect for holiday parties and festive outdoor events.
Incorporate Holiday-Themed Patches
You may also personalize your Santa hat by adding themed patches after the holidays. Santa Claus, snowflakes, candy canes, and reindeer are just a few of the holiday shapes available as patches to sew or iron on. By doing this, you can quickly and easily make your hat more colorful and entertaining. Various sizes and types of patches are available, allowing you to mix and combine them to create a one-of-a-kind, festive look.

Use Plaid or Patterned Fabric for a Rustic Look
You may try constructing your Santa hat out of patterned or checkered fabric as an alternative to the classic red cloth. Nothing beats a red-and-black buffalo plaid design for a warm and inviting Christmas party. For a more whimsical hat, you may also use seasonal designs like snowflakes or reindeer on the cloth.
Add a White Tinsel Trim
Scattered tinsel garland can accommodate or accentuate the standard white fur trim. Tinsel adorns the cap with a festive and attention-grabbing touch, dazzling as it reflects the Christmas lights. To sparkle the hat, you may wrap the tinsel around its base using adhesive or stitching. This is a great option for people who want their Santa hat to look more daring and whimsical.
Make a Santa Hat Headband
To spice things up a bit and avoid the traditional Santa hat, try your hand at sewing a headband instead. Take a tiny Santa hat and fasten it to a plain headband. Add glitter, ribbons, or bells; any of the aforementioned options would be perfect for decorating the little cap. Those who want a less cumbersome alternative to the traditional full-size hat may find this headband style more appealing, especially to children.
Try one of these ten inventive solutions to make a statement with a classic Santa hat. Customizing your hat, whether it’s with glitter, a name, or lights, is a great way to make your holiday celebrations unique. Take some liberty, combine a few elements, and make your unique Santa hat to show off your festive zeal!
Matching Family Hats: How to Create Holiday Memories
Matching family hats can be a fun and meaningful way to bond during the holiday season. Whether planning a family photo shoot, attending a holiday event, or simply lounging around the house, having coordinated accessories can make the festivities even more memorable. Here’s how to create matching hats that will bring holiday cheer and become a cherished family tradition.
Choose a Theme or Style
Before you begin, decide on a cohesive theme or style for your family’s hats. Are you aiming for a classic holiday look, something whimsical or a rustic vibe? Choosing a theme will help guide your material and design choices. For a timeless look, consider simple red and white designs. You could opt for bold patterns like plaid or even glittery accents for something a bit more modern.

Plan a Family Craft Day
Making matching hats together can be a fun family activity. Set aside a day to craft them as a group, where everyone can participate in designing and decorating their own. Not only does this create bonding time, but it also gives each family member ownership over their creation. Younger children can help glue pom-poms or stick on fabric decorations, while adults or older kids can handle the sewing or more detailed work.
Capture the Memories
Once your family hats are ready, don’t forget to capture the moment! Plan a festive photo shoot where everyone can show off their creations. You could use the photos for holiday cards, or simply frame them as a keepsake. These personalized accessories also make family gatherings more fun, especially when everyone’s wearing something they helped create.
Coordinate with Outfits
To take your matching theme even further, coordinate your hats with the rest of your family’s holiday outfits. Keeping the look cohesive will make the entire ensemble more memorable whether you’re all wearing matching pajamas or festive sweaters. Consider choosing a color scheme that ties the hats in with other holiday decorations or clothing.
Turn It Into a Tradition
Making matching family hats doesn’t have to be a one-time event. Turn it into a yearly tradition where everyone designs a new hat each holiday. As children grow and new members join the family, it can become a fun way to document the passage of time and create lasting memories. You could make each year’s design slightly different to reflect new trends or personal preferences.
Share the Holiday Spirit
Once your family has created your matching accessories, share the holiday spirit by gifting similar items to friends and extended family. You could make extra hats and give them away as thoughtful holiday gifts. It’s a wonderful way to spread the love and include others in your family’s joyful tradition.
Matching family hats is a fun and easy way to create holiday memories that will last a lifetime. You’ll craft beautiful accessories and build stronger bonds by choosing the right theme, adding personal touches, and making it a family activity. Creating new designs each year can be a special way to celebrate the holiday season for years to come.
Eco-Friendly Santa Hats: Sustainable Materials for Your DIY Holiday Craft
As we become more conscious of our environmental impact, even holiday crafts can benefit from eco-friendly choices. Making holiday-themed accessories with sustainable materials not only reduces waste but also creates a meaningful connection to nature. In this guide, we’ll explore various eco-friendly materials you can use for your DIY projects, ensuring that your craft is both festive and planet-friendly.
Use Organic or Recycled Fabrics
The foundation of your eco-friendly project should be made from sustainable materials like organic cotton, hemp, or linen. Organic fabrics are grown without harmful pesticides and use less water than conventional fabrics. Another great option is using recycled materials, such as fabric from recycled plastic bottles or scraps from other projects. You can often find recycled felt or upcycled wool, which makes for a sturdy yet environmentally friendly choice. Thrift stores are also great places to find fabric you can repurpose, which reduces waste even further.

Use Natural Dyes
Use natural dyes to add color to your fabric but avoid chemical-laden synthetic dyes. Many items in your kitchen can be used to create beautiful, earth-friendly colors. For example, red can be achieved using beetroot or madder root, while turmeric gives a bright yellow. Avocado skins and pits produce a soft pink, and onion skins create shades of orange and brown. These natural dyes not only reduce the use of harmful chemicals but also give your fabric a unique, handcrafted look.
Choose Organic Cotton or Hemp Thread
When stitching your project, opt for organic cotton or hemp thread. Conventional thread often contains synthetic fibers or is treated with chemicals during production. Organic cotton or hemp thread ensures that your eco-friendly project stays green from start to finish. These threads are also strong, durable, and break down more easily when discarded, leaving less environmental impact.

Upcycle Fabric Scraps
Avoid throwing away fabric scraps by finding a new use for them. You may add distinctive aspects to your project while minimizing fabric waste by upcycling leftovers. Use smaller scraps for decorations and trim or stitch together several fabrics to make a patchwork motif. Making do with what you have on hand is a great way to show off your ingenuity and creativity while also cutting down on waste.
Avoid Synthetic Embellishments
Pick natural decorations like pom-poms, beads, and glitter instead of synthetic ones. You may construct ornamental pieces from recycled paper, organic wool, or cotton. For instance, make a pom-pom out of felted wool or scraps of yarn. If you want to glam up your project without negatively impacting the environment, try utilizing biodegradable glitter derived from eucalyptus trees. Pinecones, acorns, or little twigs are other natural components that can give your creation a more rustic look.
Opt for Plant-Based Glue or Stitching Instead of Glue
If you’re using adhesives, look for plant-based glues that are non-toxic and biodegradable. Traditional craft glues often contain chemicals that can be harmful to the environment. Alternatively, you can sew pieces together to avoid using glue altogether. Stitching not only makes your project more durable but also eliminates the need for chemical adhesives.
Make It Reusable
One of the best ways to make your Santa hat project eco-friendly is to ensure it’s reusable for years. Opt for high-quality, sustainable materials that will last through many holiday seasons. By making your creations durable and well-crafted, you’ll reduce the need to buy new ones each year, reducing waste and consumerism.
Decorate with Recycled Materials
For decorations, think about using items you already have. Old buttons, fabric scraps, or even pieces of ribbon from gifts can be repurposed. You can also cut up old clothes or blankets for extra fabric. This gives your project a vintage, eclectic feel and reduces the need to purchase new materials.
Creating holiday accessories with sustainable materials is a wonderful way to reduce waste and practice mindful crafting. By choosing organic, upcycled, and natural materials, you can make eco-friendly accessories that reflect your love for the environment and the holiday season. Whether crafting with family or making gifts for friends, you’ll feel good knowing your project is kind to the planet.
Conclusion
Making your own Santa hats is a fun and creative family activity that brings everyone together during the holiday season. Using eco-friendly materials adds more meaning to the project, allowing your family to celebrate while caring for the environment. This tradition of crafting hats creates lasting holiday memories and encourages creativity and sustainability for years to come.
We have more holiday-themed projects for gift-giving or as a side business. Check out our candy sleigh project next!


