
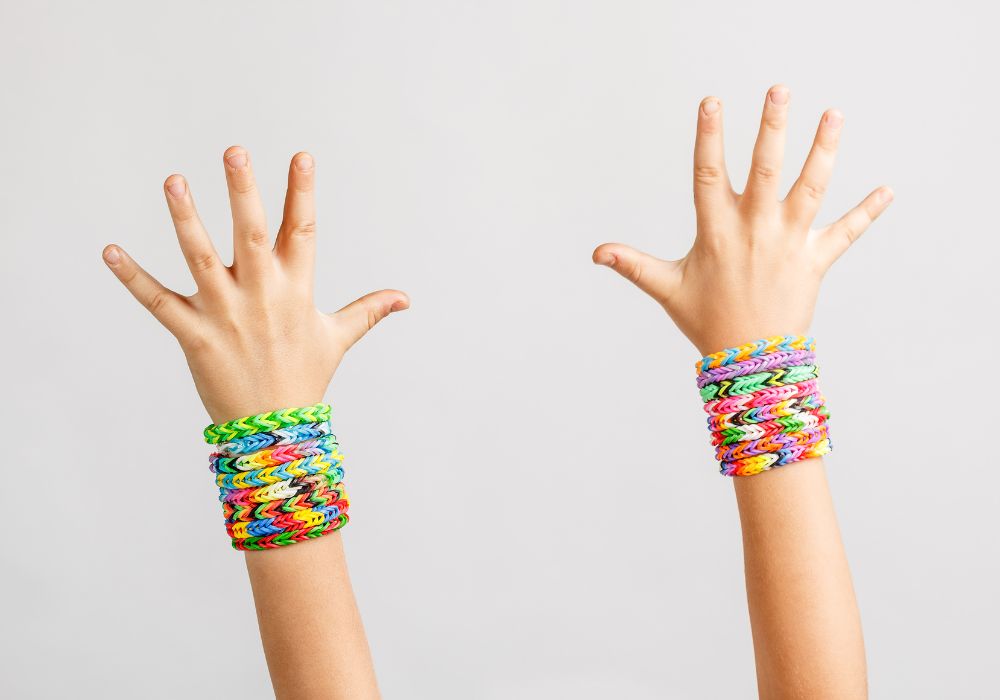
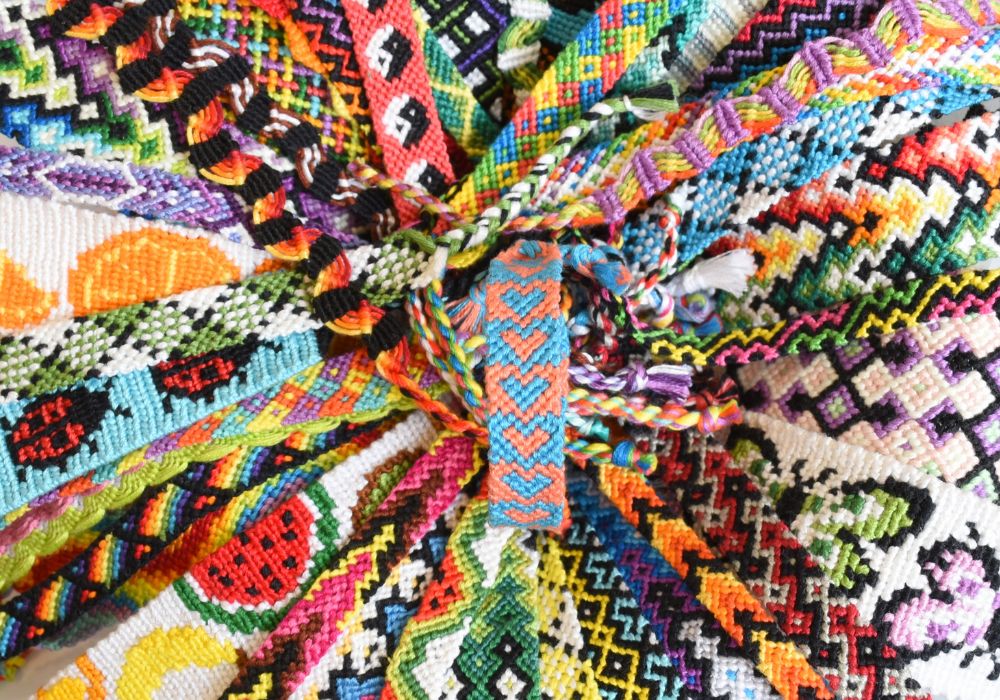
Making friendship bracelets is a wonderful and artistic approach to show love and strengthen ties with friends. These vibrant, woven accessories represent the strength and lifetime of friendships, so they have great meaning in addition to being fun to make.
This guide will walk you through the process of making your own friendship bracelets. We will go through ideas and tools to help you produce something unique.
Contents [show]
Crafting Friendship Bracelets
Step-By Step Guide
Creating friendship bracelets is a rewarding craft that allows you to produce unique, handmade gifts that carry a personal touch. Here’s a straightforward guide to crafting a simple braided bracelet, with an alternative technique for those who want to try something a bit different.
Materials and Tools Needed:
- Embroidery floss or craft thread in various colors
- Scissors
- Tape or a clipboard to secure the bracelet as you work
- Measuring tape or a ruler
- A small bead or button for closure (optional)
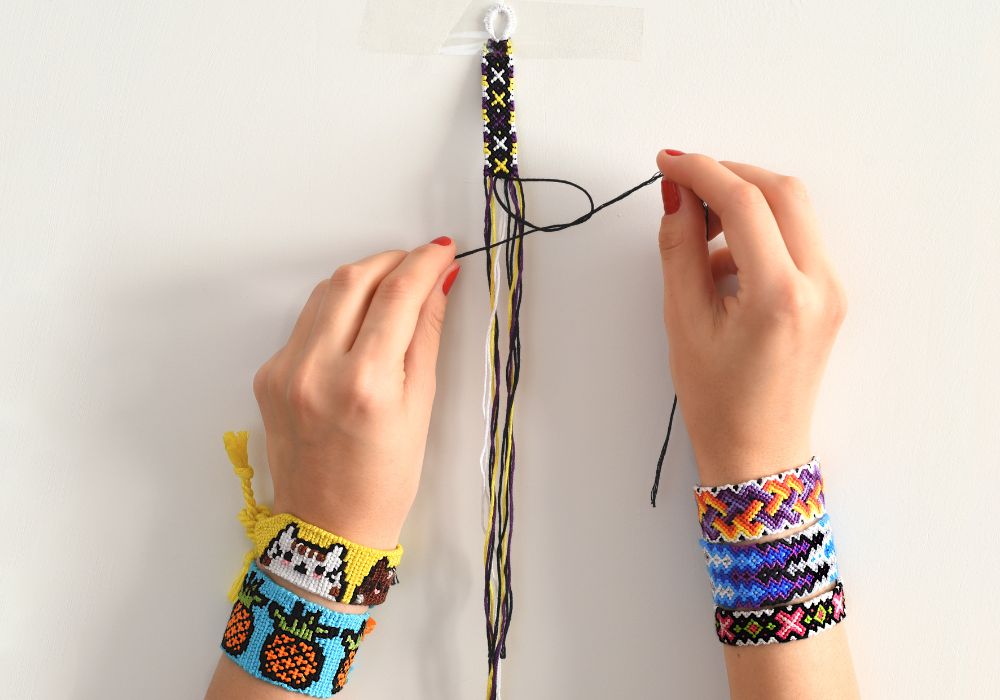
Step 1: Choose Your Colors and Cut Your Threads Decide first the colors you wish to use for your bracelet. Although you can use three to six threads, three strands work best for a basic braid. To guarantee you enough length to work with and tie knots, cut each strand roughly 24 inches long.
Step 2: Knotting and Securing the Threads Collect your cut threads and fasten them at one end with an easy overhand knot. Form the loop you will need to fasten the bracelet later by leaving about an inch of slack above the knot. As you braid, tape the knotted end to a table or clip it to a clipboard to keep it steady.
Step 3: Braiding the Bracelet Three equal sections should separate your strands. Starting braiding by crossing the right strand across the middle, then the left strand across the new middle, keep this pattern going. Keep your tension constant but not too strong; this will help the bracelet to curl rather naturally.
Step 4: Finishing the Braid Tie another overhand knot to fastener the braid’s end once you have the intended length. Now is the time to add any beads or buttons you are using for closing. Thread the bead onto the end; then, tie another knot to hold it in place.
Step 5: Closing the Bracelet All you have to wear the bracelet is slide the bead or button through the loop you left at top. If you skipped using a bead, you could tie the ends together straight-forwardly.
Alternative Technique: The Chevron Pattern For those who want to try a more decorative technique, the chevron pattern is a great choice. It involves more strands and more intricate knotting.
- Start with at least four strands of different colors, with each color cut in duplicate strands about 24 inches long.
- Knot the strands together at the top and secure them as before.
- Arrange the strands in a symmetrical pattern from the outside to the center (e.g., blue, green, red, red, green, blue).
- Start on the left side, take the outermost strand and make a forward knot by creating a ‘4’ over the next strand, pulling it under and through the loop. Tighten to the top.
- Repeat this knot on the same strand until it reaches the middle.
- Do the same on the right side with a backward knot, creating a backward ‘4’.
- When both outer strands meet in the middle, knot them together to start the next row.
- Continue this pattern, and you’ll see a ‘V’ chevron pattern forming.
Both techniques allow you to create beautiful, personalized friendship bracelets. Whether you stick with the simple braid or venture into more complex patterns like the chevron, you’re crafting not just a piece of jewelry but a token of friendship.
Advanced Techniques to Crafting Your Friendship Bracelets
Growing more at ease with simple friendship bracelet patterns, you might find yourself eager to investigate more intricate designs and techniques. These cutting-edge techniques will enable you to design complex patterns and incorporate distinctive elements that would really personalize your works. We explore several advanced methods below that will improve your bracelet-making ability.
Incorporating Beads into Your Designs
Adding beads to friendship bracelets will turn a basic braid into a magnificent work of jewelry. Here’s how you do it:
- Materials Needed: Embroidery floss, small beads (with holes large enough for the thread), and a beading needle.
- Step 1: Prepare your threads as you would for a basic bracelet, choosing colors that complement your beads.
- Step 2: Begin your bracelet with a few rows of your chosen knotting technique to establish the base.
- Step 3: Thread a bead onto the middle string every time it becomes the central strand in your knotting pattern. Slide the bead up to the last knot before continuing the pattern.
- Step 4: Continue adding beads at intervals or in patterns until you achieve the desired design.
- Step 5: Finish with several rows of knotting to secure the beads in place, and then complete the bracelet as usual.
Creating a Loop and Button Closure
A professional-looking loop and button closure not only secures the friendship bracelets but also adds a decorative touch:
- Materials Needed: Embroidery floss, a button with 4 holes, scissors.
- Step 1: Start your bracelet with an initial loop big enough to fit your chosen button.
- Step 2: Craft your bracelet as desired. When you reach the desired length, stop knotting about 1.5 inches from the end.
- Step 3: Split your threads into two groups and braid each group separately to create two tails.
- Step 4: Thread each braid through opposite holes in the button, securing it in place with a knot.
- Step 5: Trim any excess thread after the knots, ensuring the button is secure.

Switchback Pattern
The switchback pattern, also known as the zigzag or arrow pattern, is ideal for those looking to create dynamic, eye-catching designs.
- Materials Needed: At least three colors of embroidery floss.
- Step 1: Cut and set up your threads in a mirror image pattern (e.g., blue, pink, yellow, yellow, pink, blue).
- Step 2: Start from the outer strands and work toward the center with forward and backward knots to create diagonal stripes.
- Step 3: Once you reach the center, switch the direction of your knots to create the opposite diagonal, forming a “V” shape.
- Step 4: Repeat these steps to extend the zigzag pattern along the entire length of the bracelet.
- Step 5: Finish with a secure knot and a closure of your choice.
Macramé Knots for Texture
Your friendship bracelets will have a distinctive finish and texture from macramé knots, which also add complexity.
- Materials Needed: Embroidery floss, a clipboard or tape for securing threads.
- Step 1: Choose your threads then tie them together at one end.
- Step 2: Secure the knot to your work surface. Group your threads in pairs.
- Step 3: Use a square knot to tie each pair of threads together, repeating down the length of the bracelet.
- Step 4: Adjust the spacing between knots to create different textural effects.
- Step 5: Finish the bracelet with a standard knot and add a closure as needed.
Gradient Color Switching
Creating a gradient effect in your friendship bracelets can add a stunning visual transition between colors, mimicking natural elements like sunsets or ocean waves.
- Materials Needed: Several shades of embroidery floss transitioning from one color to another.
- Step 1: Arrange your threads in order from lightest to darkest to plan the gradient.
- Step 2: Start with the lightest color, knotting a few rows before gradually introducing the next shade by mixing strands of the two colors.
- Step 3: Continue blending by increasing the proportion of the darker shade while decreasing the lighter until fully switched.
- Step 4: Repeat this blending technique for each color change throughout the bracelet.
- Step 5: Secure the ends with a knot and choose a closure that complements the design.
Alpha Patterns
Alpha patterns allow you to incorporate letters or numbers into your bracelets, perfect for personalization or special occasions.
- Materials Needed: Embroidery floss in base and contrasting colors for the letters or designs, graph paper for pattern planning.
- Step 1: Sketch your design or letters on graph paper, planning each knot’s color to form the desired shapes.
- Step 2: Set up your threads in a row, using a base color for the background and a contrasting color for the letters or designs.
- Step 3: Use forward and backward knots to follow the pattern you designed, ensuring each knot aligns with the graph paper.
- Step 4: Pay careful attention to tension to keep the letters or designs consistent and legible.
- Step 5: Finish with secure knots and add a button or loop closure to match the bracelet’s aesthetic.
Interwoven Bead Patterns
Incorporating beads within the knots of the friendship bracelets rather than just along the strands can create depth and texture.
- Materials Needed: Embroidery floss, small beads, and a beading needle.
- Step 1: Plan your pattern, deciding where beads will be interwoven throughout the design.
- Step 2: Start knotting your bracelet, and where a bead is designated, thread the bead onto one of the strings and knot around it, securing it between knots.
- Step 3: Continue the pattern, adding beads as planned to create an interwoven effect.
- Step 4: Ensure each bead is tightly secured by the surrounding knots to prevent movement.
- Step 5: Finish with a neat closure that keeps the bracelet’s flow and design intact.
Using Sliding Knots for Adjustable Bracelets
Sliding knots are practical and stylish, providing an adjustable closure that makes friendship bracelets more versatile.
- Materials Needed: Embroidery floss or leather cords, if preferred for a rustic look.
- Step 1: Finish your bracelet with long tails on either end.
- Step 2: Choose a piece of thread or cord to create the sliding knots. Make a loop around the tails and then thread the end through the loop to create a standard overhand knot.
- Step 3: Tighten the knot close to the end of the bracelet but ensure it slides along the tails.
- Step 4: Repeat on the other side, ensuring both knots slide symmetrically for adjustment.
- Step 5: Trim any excess after the sliding knots and ensure they hold securely.
Mastery of these advanced techniques will greatly increase the range and complexity of your friendship bracelet designs, so transforming each piece into a work of art and evidence of your creative ability. These techniques improve the bracelets’ appearance as well as provide a more interesting and satisfying working environment.
Common Mistakes and Troubleshooting
Even experienced crafters can encounter issues when creating friendship bracelets. Recognizing and correcting these common mistakes can help you refine your skills and ensure your bracelets turn out beautifully every time. Here are some typical challenges you might face and how to troubleshoot them.
Uneven Tension
Maintaining consistent tension is crucial when making friendship bracelets. Uneven tension can lead to a bracelet that curls, buckles, or looks inconsistent.
- Symptoms: The bracelet twists or curls; some knots are tighter than others.
- Solution: Practice maintaining a consistent firmness in your knots. You can pin the bracelet down on a pillow or use a clipboard to help keep tension even as you work. Start slowly, focusing on the feel of each knot as you tie it.
Misaligned Patterns
When intricate patterns in friendship bracelets don’t align, it can disrupt the design, making it look messy or unclear.
- Symptoms: The design shifts to one side, or the rows are not straight.
- Solution: This usually occurs when the knots are not consistently forward or backward. Be sure to follow your pattern closely and count each row. Using a pattern grid can help keep track of which threads should be knotted together.
Color Bleeding
Using low-quality threads can lead to color bleeding, especially in friendship bracelets where vibrant colors are key.
- Symptoms: Colors run into each other, especially after getting wet.
- Solution: Invest in high-quality embroidery floss that is colorfast. Before starting your bracelet, you can wash the threads in mild soapy water to test for color fastness.
Knotting Errors
Incorrect knots can ruin the aesthetics of friendship bracelets and weaken their structure.
- Symptoms: The bracelet pattern looks inconsistent, or knots are coming loose.
- Solution: Double-check that you are using the correct knotting technique for your pattern (forward vs. backward knots). If you’re unsure, practice on a scrap piece of thread until you feel confident. Undo any incorrect knots as soon as you notice them to prevent further errors.
Finishing and Closure Problems
The way you finish and secure friendship bracelets can affect how they wear and how long they last.
- Symptoms: Bracelet ends untie easily, or the closure doesn’t hold.
- Solution: Ensure you leave enough thread at the end of your bracelet to securely tie off the final knots. Consider using a bead or button closure for a more secure finish. Additionally, applying a small amount of clear nail polish or fabric glue to the knot can help prevent it from coming undone.
Troubleshooting these common issues will enhance the durability and appearance of your friendship bracelets. Each correction you learn not only improves your current project but also enriches your overall crafting technique, leading to more successful and satisfying bracelet-making sessions.
Caring for Your Friendship Bracelets
Proper care and maintenance of your friendship bracelets can significantly extend their lifespan and preserve their vibrant colors and intricate patterns. Whether you’re keeping them for yourself or giving them as gifts, here’s how to ensure your friendship bracelets stay beautiful for years to come.
Storage Solutions
Proper storage is essential to protect friendship bracelets from dust, moisture, and tangling.
- Avoid Direct Sunlight: Store your friendship bracelets in a cool, dry place away from direct sunlight, which can fade the colors over time.
- Separate Storage: Keep bracelets in individual pouches or compartments in a jewelry box to prevent tangling and friction, which can wear down the threads.
Cleaning Methods
Keeping your friendship bracelets clean is crucial, especially if they are worn frequently.
- Gentle Cleaning: Hand wash your friendship bracelets in cold water with a mild soap. Avoid harsh detergents, which can damage the fibers or cause colors to bleed.
- Air Dry: Lay the bracelets flat to air dry completely before storing them. Never use a dryer, as the heat can shrink or warp the materials.
Handling Wear and Tear
Regular wear can stress the materials used in friendship bracelets, leading to breakage or fraying over time.
- Regular Inspections: Periodically inspect your friendship bracelets for signs of wear, such as loose threads or weakened knots.
- Minor Repairs: If you notice a loose knot or frayed end, address it promptly. A small drop of clear nail polish or fabric glue can secure loose ends and prevent further unraveling.
Preventative Measures
Taking preventative measures can help maintain the integrity and appearance of your friendship bracelets.
- Avoid Water: Whenever possible, remove your friendship bracelets before bathing, swimming, or engaging in activities that involve water or excessive sweat.
- Chemical Exposure: Keep bracelets away from lotions, perfumes, and cleaning products, which can alter the color and texture of the materials.
By following these care guidelines, you can ensure that your friendship bracelets remain a vibrant and cherished symbol of connection and creativity. Proper care not only preserves their aesthetic appeal but also reinforces the bonds they symbolize.
Conclusion
Crafting friendship bracelets is a rewarding experience that allows for creative expression and the strengthening of bonds with others. With each knot and color choice, these handmade accessories carry personal meaning and can last for years when properly cared for. Ultimately, friendship bracelets serve as a timeless token of friendship and cherished memories.
Still looking for more bracelet ideas? Check out our next post!


