
Have you ever looked at a beautifully crafted leather wallet or a stylish bracelet and thought, “I wish I could make that”? Well, you can! DIY leather crafting is an amazing hobby that allows you to create unique, personalized items that you can use yourself or give as cherished gifts.
Imagine the pride of carrying a wallet you made with your own hands or wearing a bracelet that perfectly matches your style. The best part? You don’t need to be an expert to get started.
Contents [show]
Creative DIY Leather Crafting Ideas and Techniques
DIY leather crafting might seem intimidating at first, but it’s much easier than you think. With a few basic tools and a bit of patience, you can create stunning pieces that look like they came from a high-end boutique.
Plus, working with leather is incredibly satisfying. The smell of fresh leather, the feel of it under your fingers, and the joy of seeing your project come together are all part of the experience.

In this guide, we’ll walk you through everything you need to know to dive into the world of DIY leather crafting. Whether you’re a complete beginner or looking to hone your skills, we’ve got you covered.
We’ll explore essential tools, share some beginner-friendly project ideas, and provide tips to make your crafting journey smooth and enjoyable.
So, why should you try DIY leather crafting? For starters, it’s a great way to relax and unwind. Crafting can be a meditative process that helps you focus and forget about the stresses of daily life.
Plus, it’s a fantastic way to express your creativity. There’s something truly special about making something with your own hands, and DIY leather crafting offers endless possibilities.
Ready to get started? Let’s dive into the wonderful world of DIY leather crafting and see what amazing creations you can make!
Materials Needed:
Before you begin your DIY leather crafting journey, it’s important to gather all the necessary materials. Here’s a detailed look at what you’ll need and why each item is essential:
- Leather Pieces
- Leather is available in different types and thicknesses. For beginners, vegetable-tanned leather is ideal because it’s versatile and easy to work with.
- This type of leather can be dyed, stamped, or left natural. When selecting leather, consider the project you’re planning.
- Thicker leather is great for items like belts, while thinner leather works well for wallets and small accessories.
- Leather Cutting Mat
- A self-healing cutting mat is crucial for protecting your work surface and ensuring clean cuts.
- These mats are designed to withstand repeated cutting without damage.
- Rotary Cutter or Sharp Scissors
- Precision is key in DIY leather crafting. A rotary cutter allows for smooth, straight cuts, especially for long pieces.
- If you prefer, sharp scissors can also do the job, but make sure they are specifically for cutting leather to avoid dulling the blades.
- Ruler or Measuring Tape
- Accurate measurements are essential to ensure your pieces fit together perfectly. A metal ruler is durable and provides a straight edge for cutting.
- Measuring tapes are flexible, making them useful for measuring curved pieces.
- Leathercraft Glue
- This glue is specially formulated for leather, providing a strong bond without damaging the material. It’s useful for attaching pieces that don’t require stitching.
- Needles for Leather
- Leather needles are thicker and have a triangular point to pierce through the material without tearing. Make sure you have the right size needle for your project.
- Waxed Thread
- Waxed thread is strong and durable, ensuring your stitches hold up over time. The wax coating also helps the thread glide through the leather more easily.
- Mallet
- A wooden or rawhide mallet is used to set rivets, punches, and other hardware without damaging the leather. It’s also useful for stamping designs.
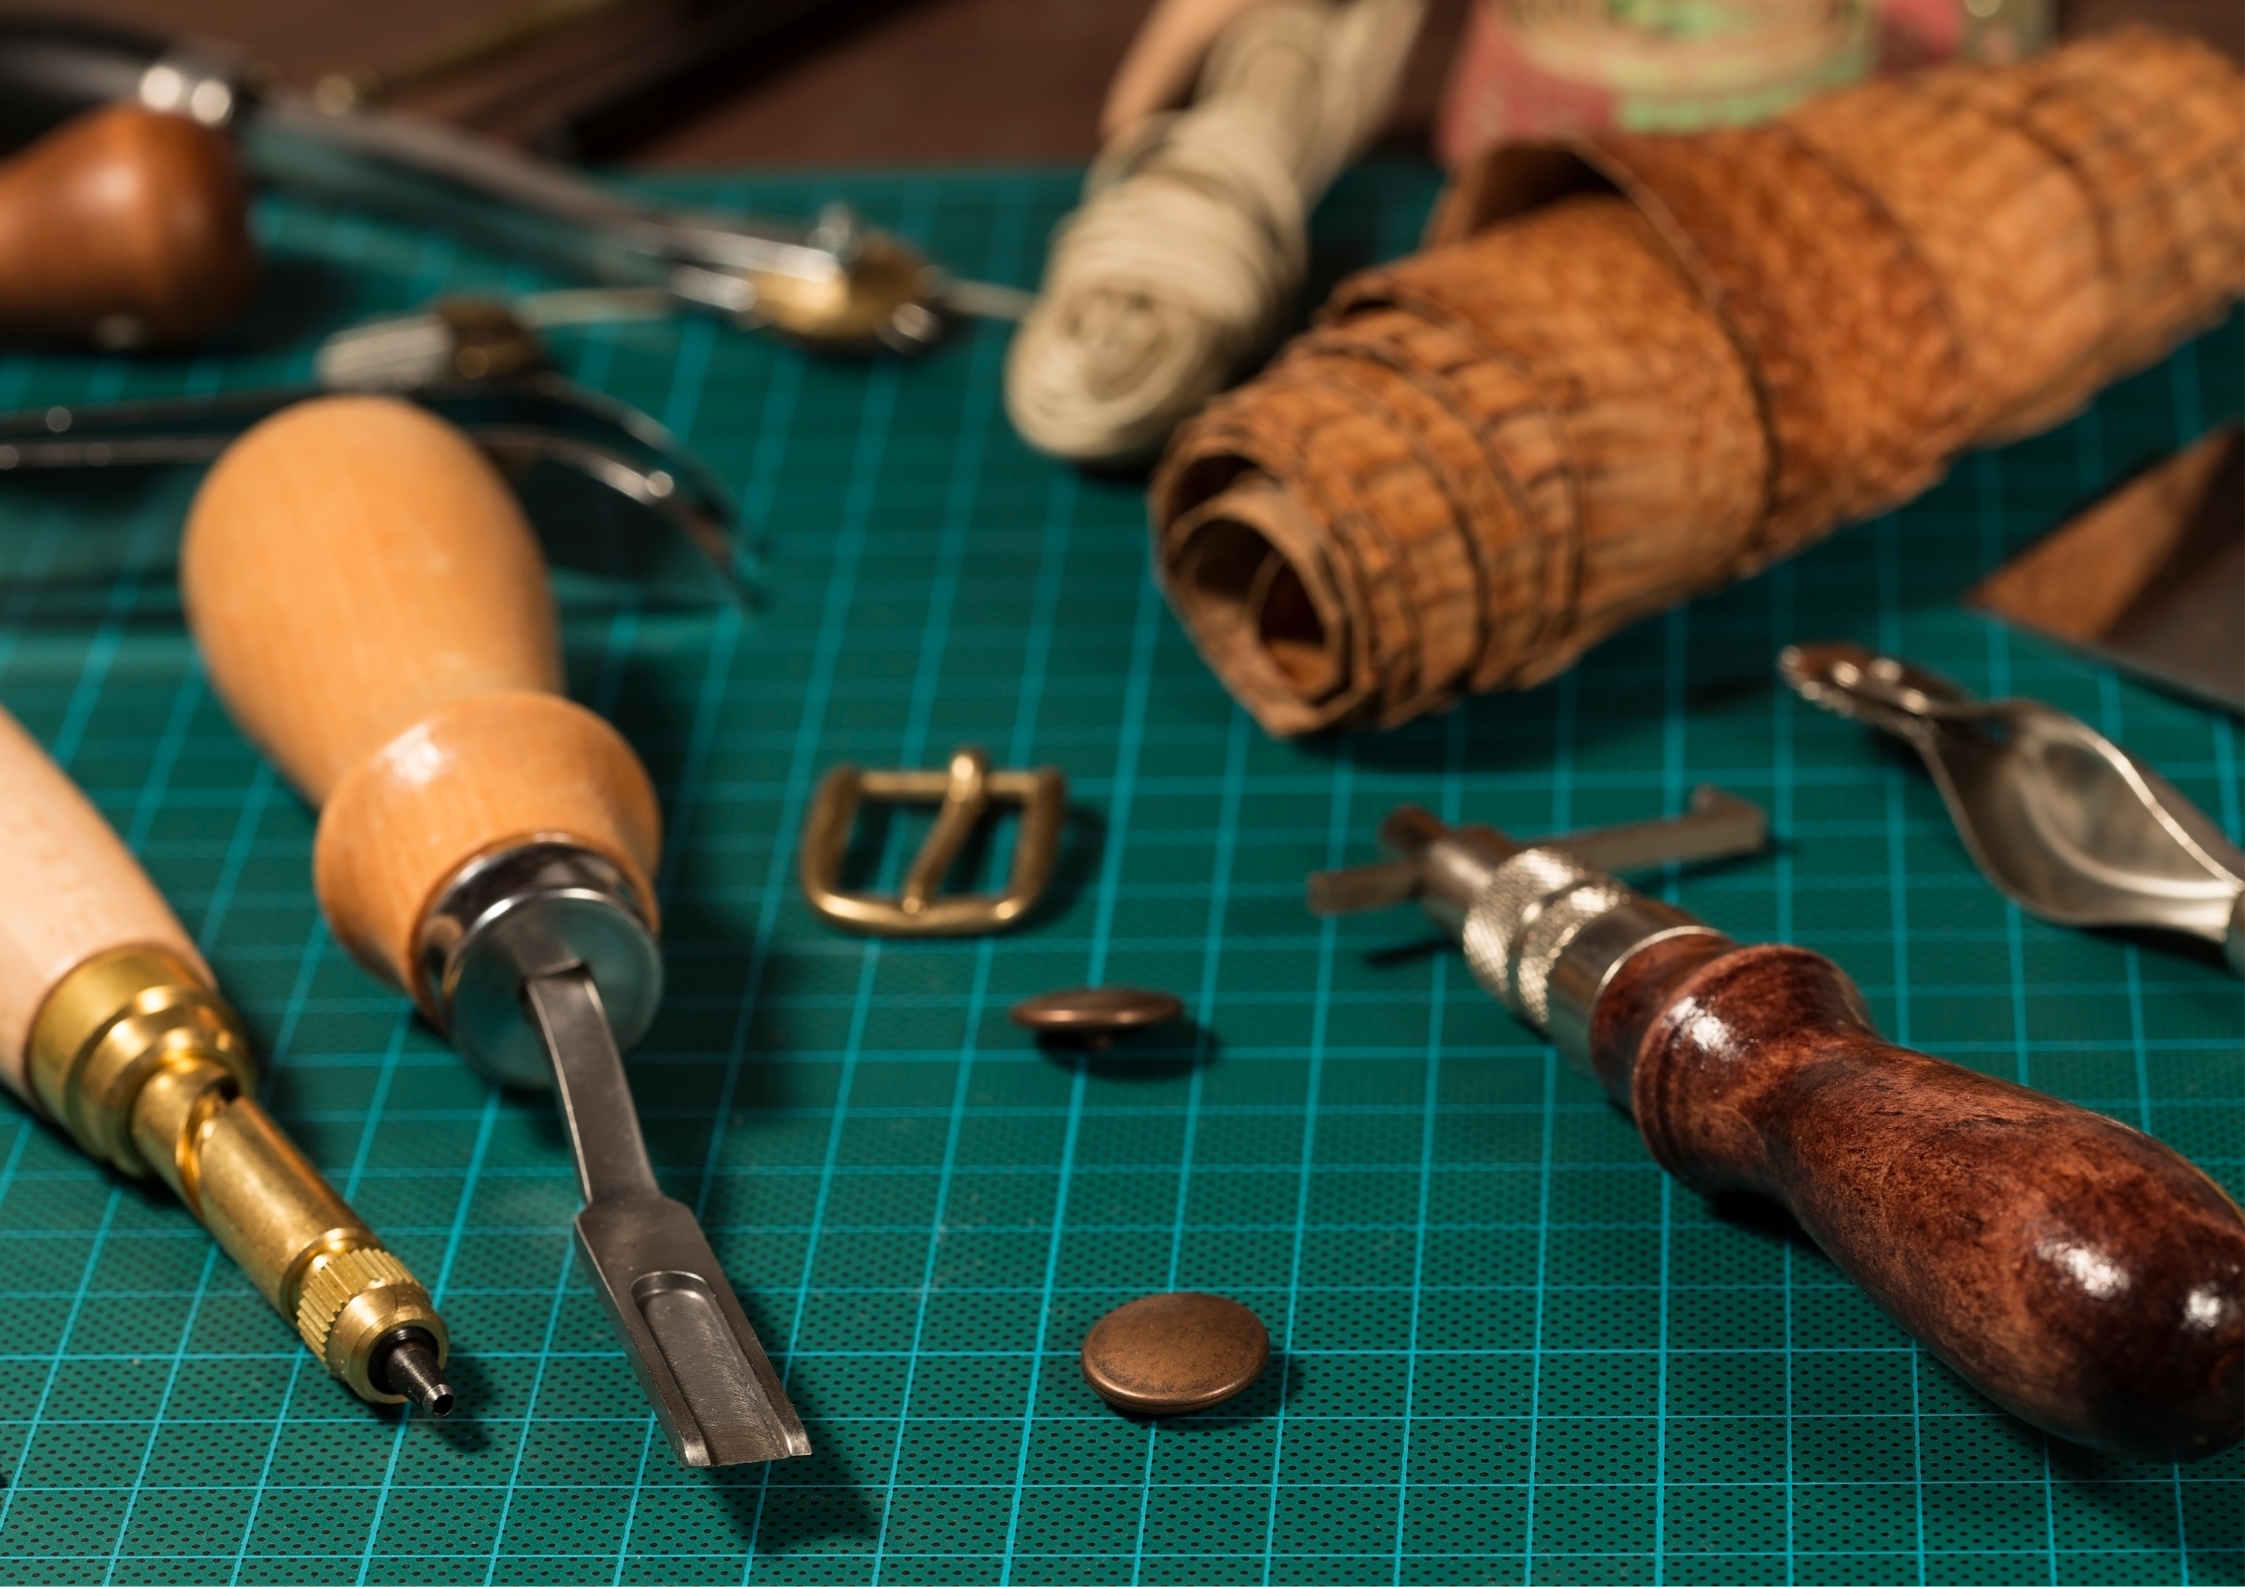
- Hole Punch Set
- This set includes various sizes of punches for creating holes for stitching, rivets, and snaps. A rotary punch allows for easy hole-making with adjustable sizes.
- Edge Slicker
- An edge slicker is a tool used to burnish the edges of leather, making them smooth and shiny. This is a crucial step for giving your project a professional finish.
- Sandpaper
- Sandpaper is used to smooth rough edges before burnishing. It’s also handy for distressing the leather if you want a more rugged look.
- Leather Dye (Optional)
- Leather dye allows you to customize the color of your project. It’s available in a variety of colors and finishes. Always test the dye on a scrap piece first to ensure you get the desired shade.
- Stamps and Stamping Tools (Optional)
- Stamping tools allow you to add decorative patterns and designs to your leather projects. These tools come in various shapes and sizes, letting you personalize your creations with unique details.
- Buckles, Snaps, or Other Fasteners (Optional)
- Depending on your project, you may need additional hardware like buckles for belts, snaps for wallets, or other closures. These items help add functionality and style to your leather goods.
With these materials and tools, you’ll be well-equipped to start your DIY leather crafting journey. Now, let’s dive into the detailed steps of creating your leather projects.
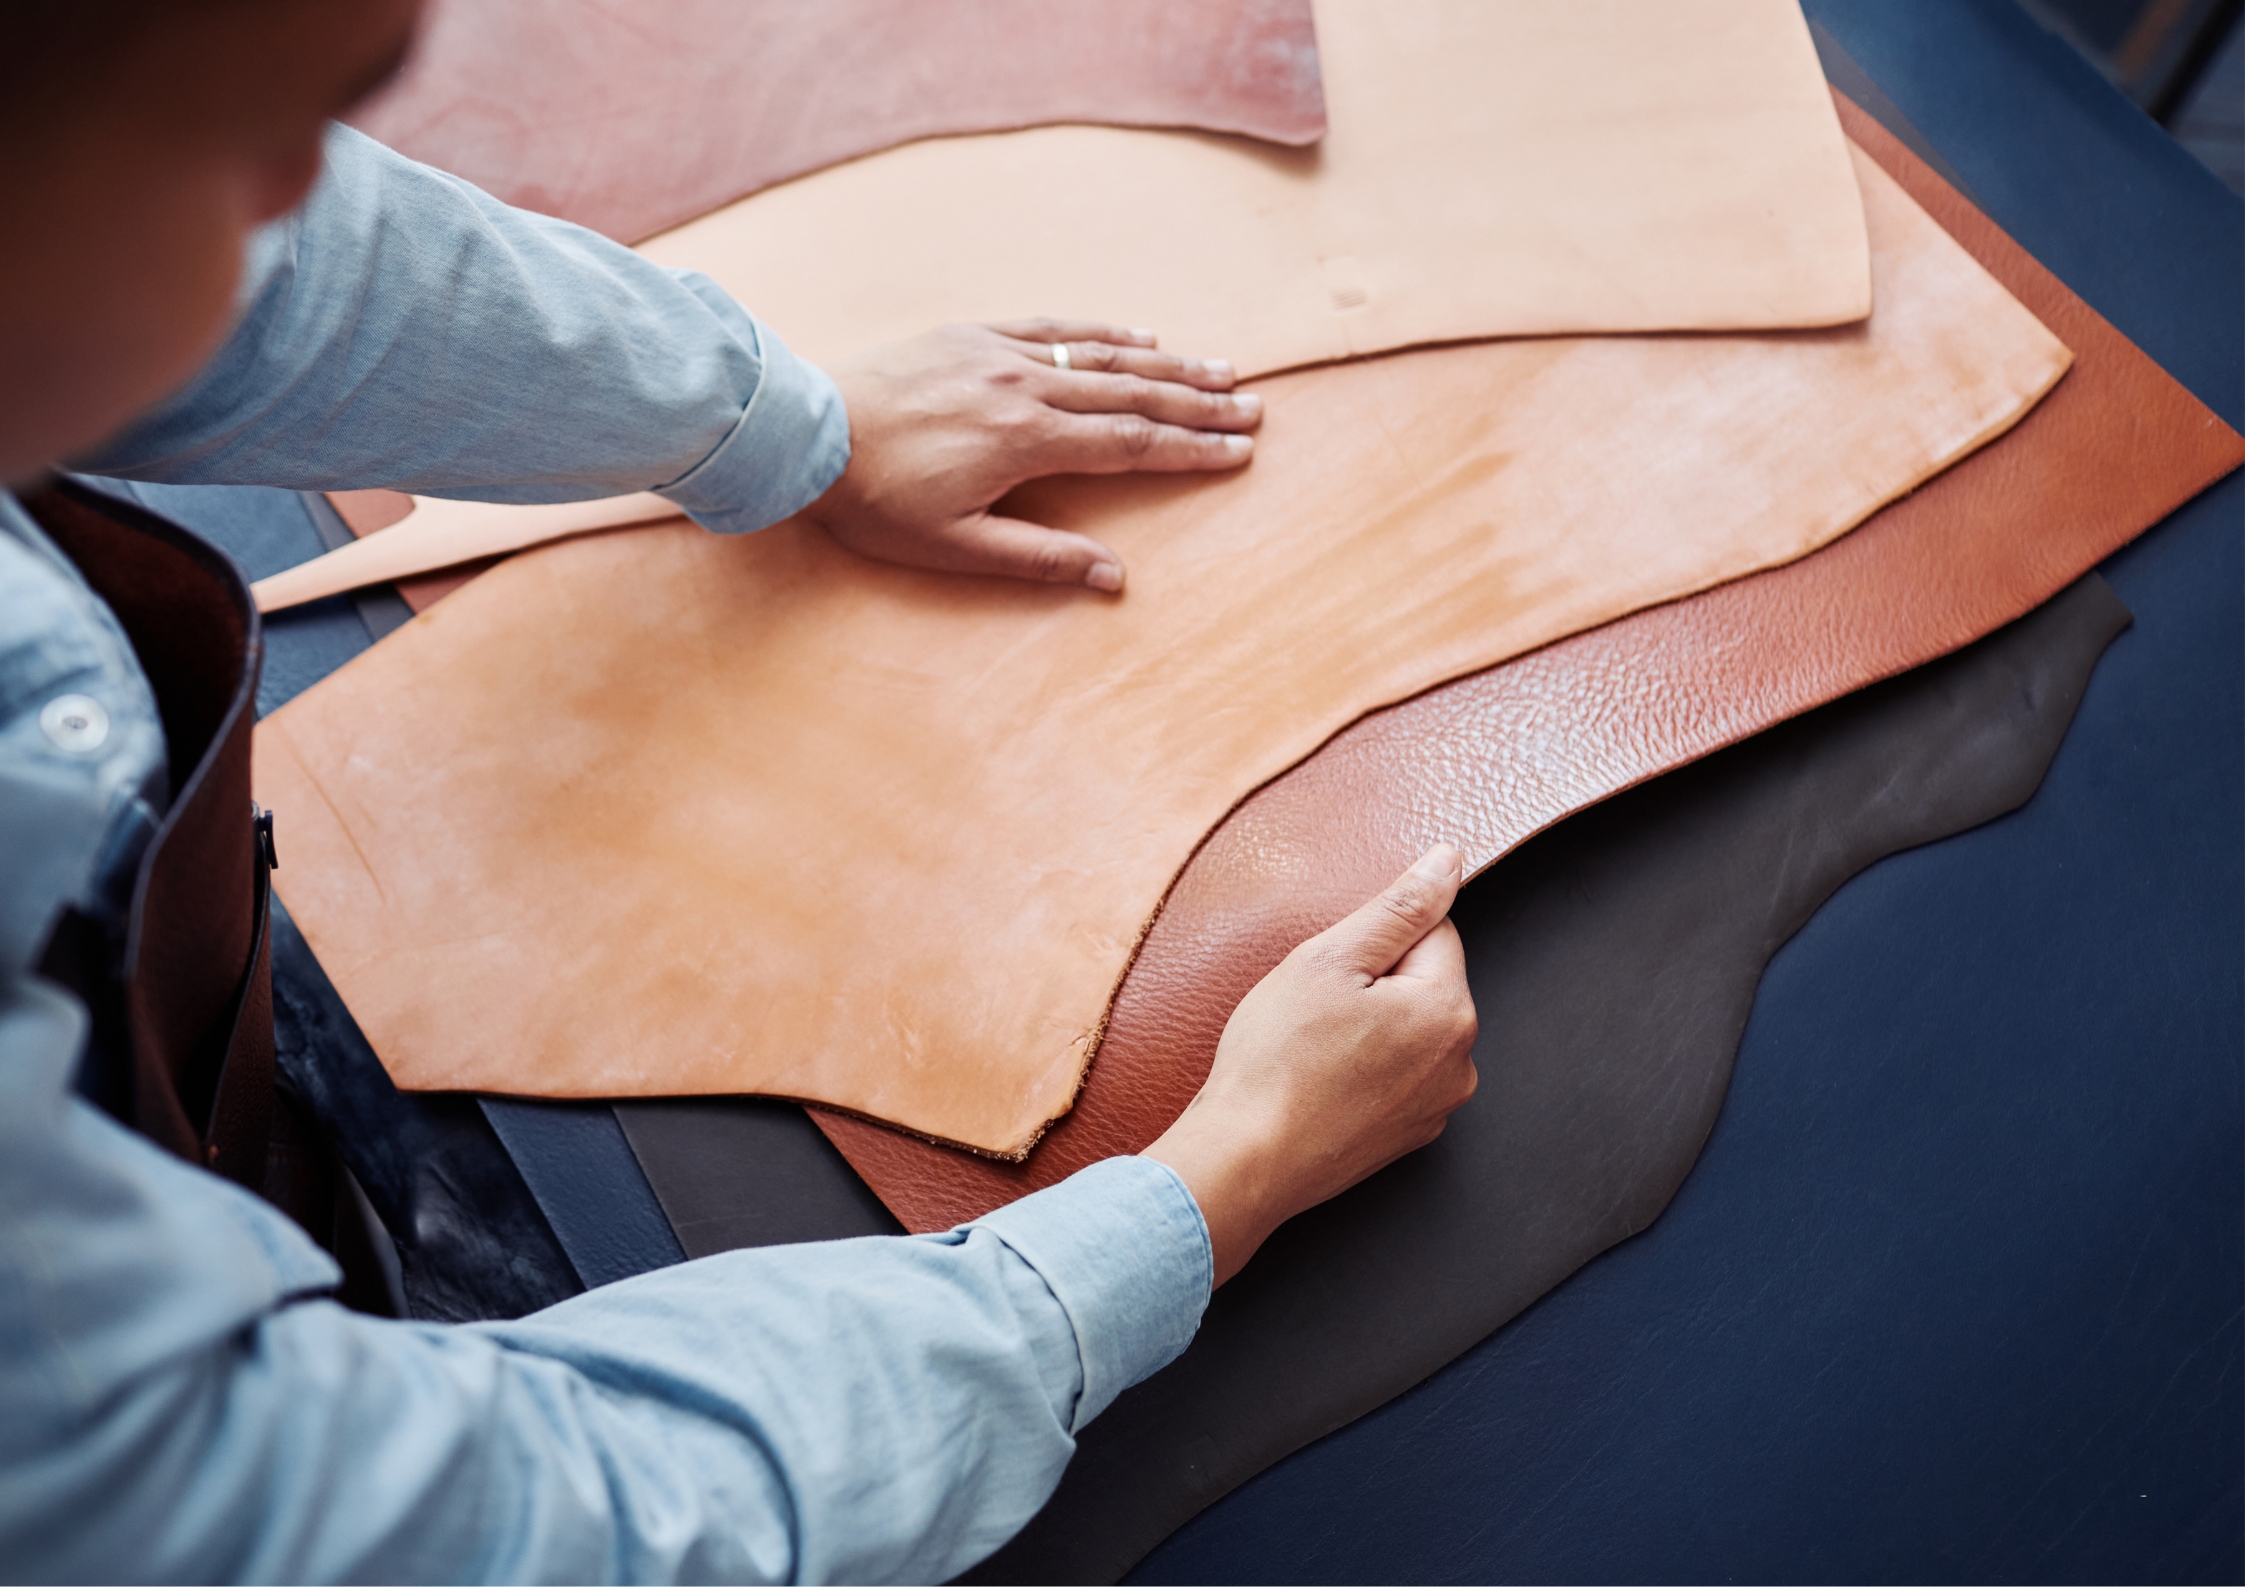
Choose Your Leather
Choosing the right type of leather is the foundation of any successful DIY leather crafting project. The type of leather you select will influence the appearance, durability, and overall quality of your finished product.
Here’s a comprehensive guide on how to select the best leather for your needs:
Choosing the Right Thickness:
Leather thickness is measured in ounces, with each ounce representing 1/64th of an inch. The thickness you need depends on the type of project you’re working on:
- 2-3 oz (0.8-1.2 mm): This thickness is ideal for small items like wallets, card holders, and accessories. It is thin enough to be flexible yet durable enough to hold up well with regular use.
- 4-5 oz (1.6-2.0 mm): This is a versatile thickness suitable for medium-sized projects like bags, pouches, and phone cases. It offers a good balance of strength and flexibility.
- 6-7 oz (2.4-2.8 mm): This thickness is perfect for heavy-duty items like belts, straps, and durable bags. It is thick enough to provide substantial strength and durability.
Buying Leather:
You can purchase leather from various sources, including craft stores, specialty leather suppliers, and online retailers. Here are some tips for buying leather:
- Craft Stores: Many craft stores carry a selection of leather pieces, typically in smaller sizes suitable for beginner projects. This is a convenient option if you want to see and feel the leather before purchasing.
- Specialty Leather Suppliers: For a wider selection and higher quality, consider buying from specialty leather suppliers. These stores offer a range of leathers in different types, thicknesses, and finishes.
- Online Retailers: There are numerous online retailers that specialize in leather. Shopping online gives you access to a broader range of products, but make sure to read reviews and check the retailer’s return policy in case the leather doesn’t meet your expectations.
Inspecting Leather:
When you receive your leather, whether from a store or online, it’s important to inspect it for quality. Here’s what to look for:
- Even Thickness: Check that the leather has an even thickness throughout. Inconsistent thickness can make cutting and stitching more challenging.
- Smooth Grain: Look for a smooth grain surface without major blemishes, scars, or holes. While small imperfections can add character, large defects can weaken the leather and affect the appearance of your finished project.
- Supple Feel: The leather should feel supple and flexible, not dry or brittle. High-quality leather will have a consistent texture and feel.
Selecting the correct leather is essential for DIY leather crafting. Understand the types, thickness, and quality before gathering the necessary tools to begin crafting.
Cut Your Leather
Cutting leather accurately is crucial for achieving a professional and polished look in your DIY leather crafting projects.
Here’s a detailed guide on how to measure, mark, and cut your leather pieces effectively:
Preparing Your Workspace:
Before you start cutting for you DIY leather crafting project, it’s important to set up a clean and organized workspace. Follow these steps to ensure your area is ready:
- Clean Surface: Clear your workspace of any debris or clutter to prevent your leather from getting dirty or damaged.
- Cutting Mat: Place a self-healing cutting mat on your work surface. This mat protects your table from cuts and provides a stable surface for cutting.
- Good Lighting: Ensure your workspace is well-lit. Good lighting helps you see your measurements and cutting lines clearly, reducing the chance of mistakes.
Measuring and Marking:
Accurate measurements are essential for cutting your leather pieces to the correct size. Here’s how to measure and mark your leather:
- Select a Ruler or Measuring Tape: Use a metal ruler or a measuring tape to ensure straight and precise measurements. Metal rulers are preferred because they provide a sturdy edge for cutting.
- Marking Tools: Use a pencil or a scratch awl to mark your measurements on the leather. A pencil is easy to see and erase, while an awl leaves a fine indentation that won’t smudge.
- Measure Twice, Mark Once: Carefully measure the dimensions you need for your project. Double-check your measurements before marking to ensure accuracy.
- Mark the Leather: Place the ruler along the measured lines and mark the leather lightly. For straight cuts, draw a continuous line. For curved or intricate shapes, use a template or stencil to trace the design.
Cutting the Leather
Once your leather is measured and marked, it’s time to cut. Here’s how to do it precisely:
- Using a Rotary Cutter:
- Align the Ruler: Place the ruler along the marked line to guide your cut.
- Firm Grip: Hold the rotary cutter firmly in your dominant hand. Position the blade at the edge of the leather.
- Smooth Motion: Roll the cutter along the ruler’s edge in a smooth, continuous motion. Apply even pressure to ensure a clean cut.
- Reposition if Needed: If you need to reposition the ruler, do so carefully to maintain alignment and continue cutting.
- Using Sharp Scissors:
- Sharp Blades: Ensure your scissors are sharp and designed for cutting leather. Dull scissors can create jagged edges.
- Steady Hand: Hold the leather firmly with one hand and cut along the marked line with the other. Use long, smooth strokes for a clean edge.
- Curves and Intricate Shapes: For curves or detailed cuts, use smaller scissors or a craft knife for better control.
- Checking Your Cuts:
- Inspect the Edges: After cutting, check the edges for smoothness. If there are any rough spots, use fine-grit sandpaper to gently smooth them out.
- Consistency: Ensure that all pieces are cut to the correct size and shape, especially if your project requires multiple pieces to fit together precisely.
Tips for Cutting Leather:
- Practice First: If you’re new to cutting leather, practice on scrap pieces to get a feel for the tools and techniques.
- Sharp Blades: Always use sharp blades in your rotary cutter or scissors. Dull blades can cause frayed edges and uneven cuts.
- Cut Slowly: Take your time when cutting. Rushing can lead to mistakes and uneven edges.
- Secure the Leather: Use weights or clamps to hold the leather in place while you cut. This prevents the leather from shifting and ensures accurate cuts.
Example: Cutting Pieces for a Wallet:
For a DIY leather wallet project, you might need several pieces in different sizes:
- Wallet Body: One large piece for the main body of the wallet.
- Card Slots: Several smaller pieces for the card slots.
- Coin Pocket: An additional piece for a coin pocket, if desired.
Measure and mark each piece carefully, ensuring that all pieces align correctly when assembled. Cut each piece according to your markings, and check the fit by placing them together before moving on to the next step.
Punch Holes
Punching holes in your leather is an essential step if your project requires sewing. These holes guide your needle and thread, making the stitching process smoother and more precise. Here’s how to do it:
- Choose a Hole Punch Set: Select a set that includes various punch sizes to match your thread thickness. A rotary punch is versatile and allows you to switch between sizes easily.
- Mark the Hole Positions: Use a ruler and a pencil or scratch awl to mark where the holes will go. Ensure they are evenly spaced along the edges of your leather pieces for uniform stitching.
- Punch the Holes: Place the punch over each mark and strike it with a mallet to create clean holes. Use a cutting mat or a piece of scrap leather underneath to protect your work surface.
Evenly spaced holes ensure your stitches are neat and secure, giving your leather project a professional finish.

Stitching
Stitching is a critical part of DIY leather crafting, as it not only holds your pieces together but also adds a decorative element to your project. Here’s how to stitch your leather pieces together effectively:
Threading the Needle:
Start by threading a needle with waxed thread. Waxed thread is ideal because it’s strong and glides smoothly through the leather. Cut a length of thread about four times the length of the seam you’ll be stitching.
Beginning the Stitch:
Pass the needle through the first hole from the inside of the leather piece, pulling it through until the thread’s end is almost through. Tie a knot at the end to secure it. This ensures the thread stays in place as you stitch.
Saddle Stitch:
Use a simple saddle stitch, which is both strong and easy to learn. Here’s how to do it:
- First Hole: Pass the needle through the first hole, then through the corresponding hole on the other piece of leather.
- Second Needle: If using two needles, pass the second needle through the same hole from the opposite side, crossing the threads inside the hole.
- Next Hole: Move to the next hole, repeating the process.
- Tighten Stitches: Pull the thread tight after each stitch to keep the stitches neat and secure.
Finishing the Stitch:
When you reach the end of the seam, tie off the thread with a secure knot and trim any excess. This method ensures your leather pieces are firmly joined and gives your project a professional finish.
Edge Finishing
To give your project a polished look, smooth the edges with sandpaper. Then, use an edge slicker to burnish the edges. This will make them shiny and smooth.
Adding Details
If you want to add some personal touches, now is the time! You can dye your leather in different colors, stamp designs onto it, or attach buckles and snaps. Be creative and make your DIY leather crafting project truly unique.
Gluing
Gluing is an essential technique for parts of your DIY leather crafting project that don’t require stitching. Here’s a more detailed guide on how to use leathercraft glue effectively:
- Choosing the Right Glue: Use a high-quality leathercraft glue that is specifically formulated for bonding leather. This type of glue provides a strong, flexible bond without damaging the leather.
- Preparing the Surfaces: Ensure both surfaces to be glued are clean and free from dust and oils. Wipe them with a damp cloth and let them dry completely.
- Applying the Glue: Using a brush or applicator, apply a thin, even layer of glue to both surfaces you wish to join. Avoid applying too much glue, as excess can squeeze out and create a mess.
- Joining the Pieces: Press the glued surfaces together firmly, ensuring proper alignment. Apply pressure evenly across the surfaces to achieve a strong bond.
- Drying Time: Allow the glue to dry completely according to the manufacturer’s instructions. This usually takes several hours. Using clamps can help hold the pieces together while drying, ensuring a secure bond.
By following these steps, you can effectively use glue to join leather pieces without stitching, enhancing the strength and appearance of your project.
Final Touches
Once everything is assembled, check for any loose threads or rough spots. Trim any excess thread and smooth out any rough edges. Your project is now complete!

Tips for Beginners:
- Start with simple DIY leather crafting projects like keychains or bracelets.
- Practice makes perfect, so don’t be discouraged by mistakes.
- Use scrap pieces of leather to practice cutting and stitching.
- Watch online tutorials for additional techniques and inspiration.
Conclusion
DIY leather crafting is a fun and rewarding hobby that anyone can try. With the right tools and a bit of practice, you’ll be able to create amazing leather items that you can be proud of.
So, grab your tools, choose your leather, and start crafting today!


