
Last Updated on April 22, 2025 by Team Ideas24
Proper home organizing is the key to a clutter-free home. I grew up with things having their proper places. My mother would always remind us which goes where and to return things where we got them. I’ve carried these lessons to adulthood and now I pass them on to my children.
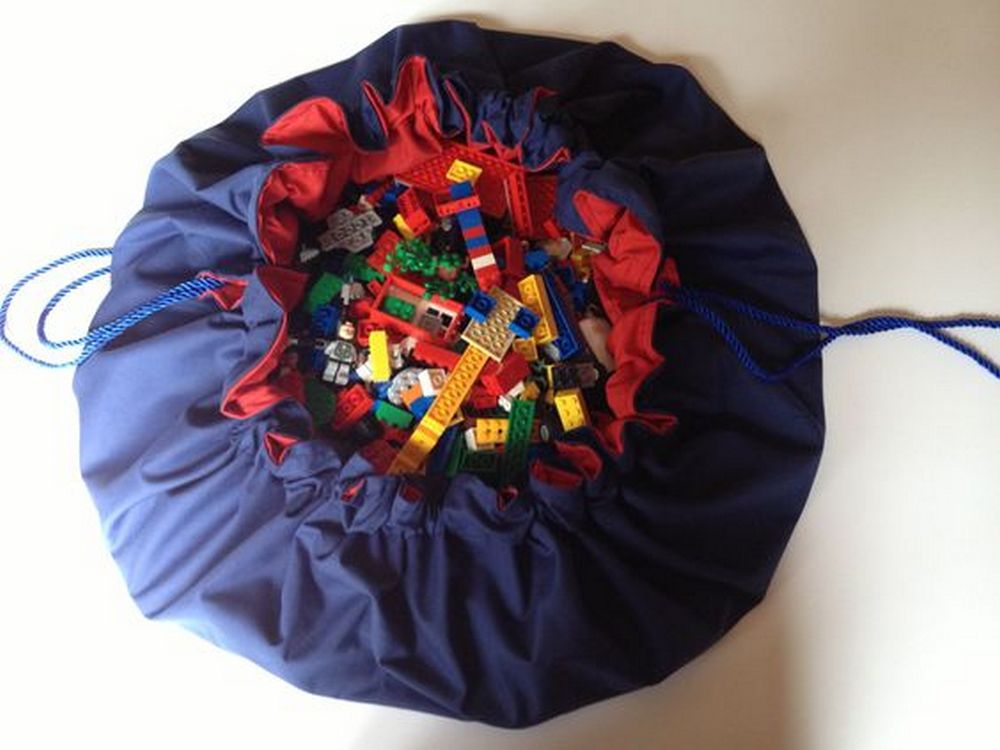
Having two toddlers mean constantly picking up after them – clothes, toys, and other things. I’ve slowly introduced them to the hamper but toys are a different case. We have no proper storage for them. So I went on to search for DIY storage projects and I found something I really liked – a toy cinch sack that I can easily sew.

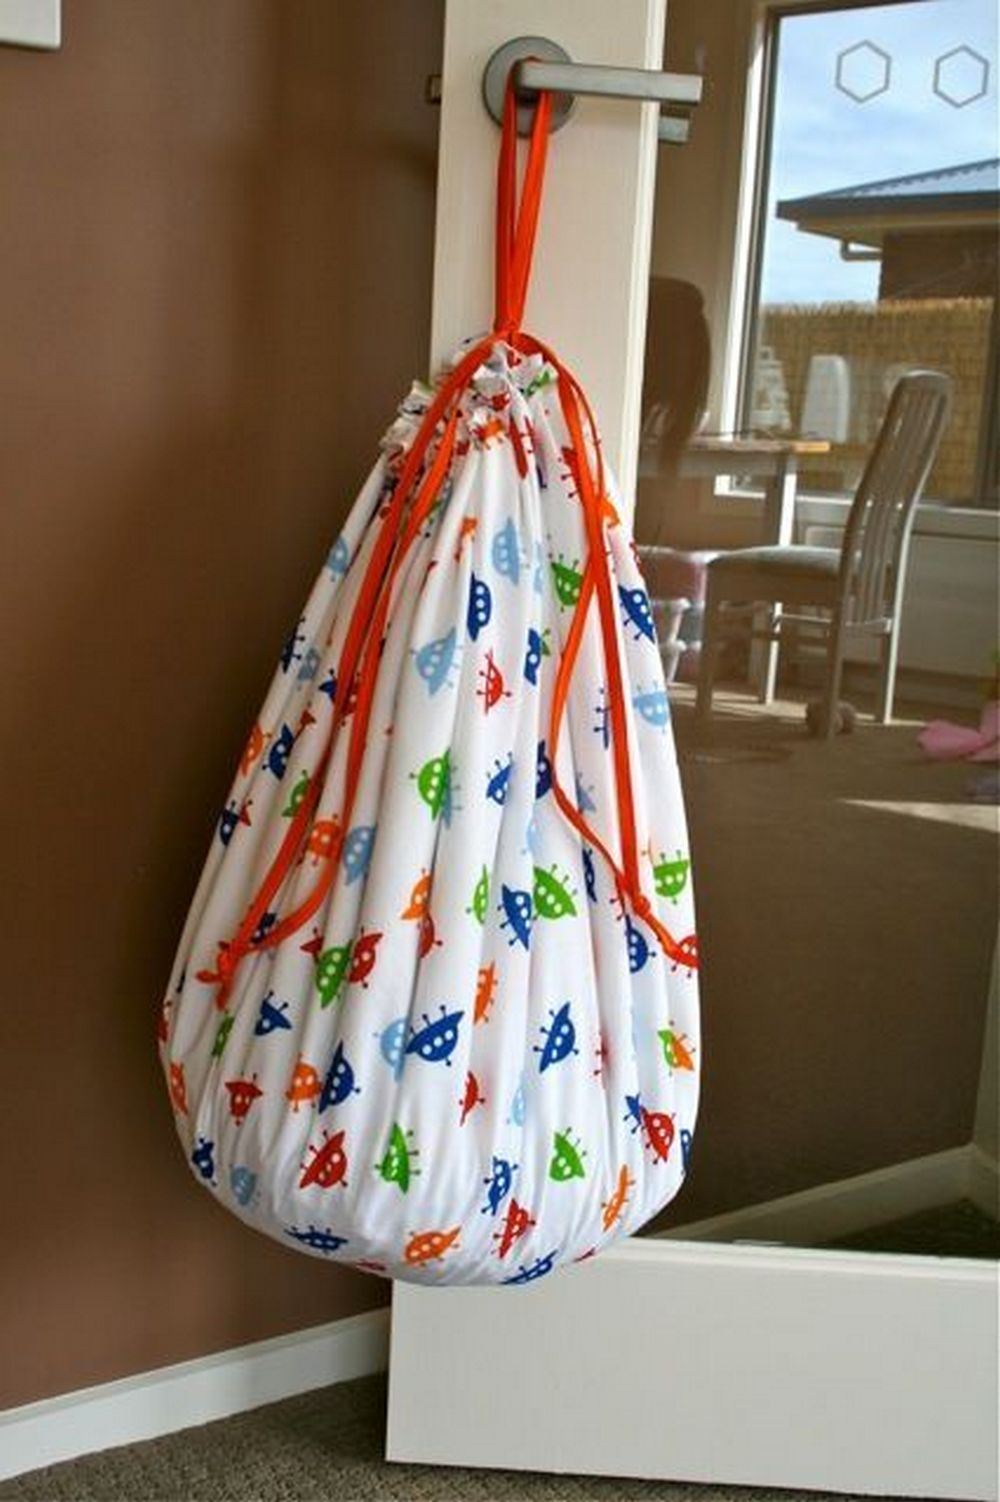
I loved making the sack! I chose bright colorful fabrics to make it fun. Now we don’t have to worry about stepping on toys anymore. They’re inside these beautiful toy cinch sacks that hang on a wall.
Contents [show]
Sewing a Toy Cinch Sack
Materials:
- Fabric
- Rope
Tools:
- Sewing Machine
- Measuring tape
- Marker
- Fabric scissors
- Fabric cutting board
Steps:
Making your own toy cinch sack is a fun and practical project. It’s simple enough for beginner sewists and creates a solution you’ll use every day. With just fabric, rope, and a few basic tools, you can craft a cinch sack that keeps the playroom neat and tidy.
Measure and Cut Your Fabric
Lay your fabric flat on the cutting board. Use the measuring tape to mark a rectangle of your desired size. A common size for toy cinch sacks is 24×30 inches. Mark the measurements using your marker, then cut along the lines with fabric scissors. You’ll need two identical rectangles—one for the front and one for the back.
Hem the Top Edges
Fold the top edge of each fabric rectangle down about an inch toward the wrong side of the fabric. Press the fold flat and stitch across using your sewing machine. This creates a clean edge and prepares the space for inserting the rope later.
Create the Rope Channel
Fold the top edge again, this time creating a casing that’s wide enough for your rope to slide through—about 1.5 inches. Pin the fold in place and stitch along the bottom edge of the fold, leaving both ends open. Do this for both fabric pieces. These will form the top channels where the rope will go.
Sew the Sack Together
Place the two fabric pieces right sides together, aligning all edges. Starting just below the rope channels, sew down one side, across the bottom, and up the other side. Leave the channel ends open so you can thread the rope through. Backstitch at the beginning and end to secure your seams.
Turn the Sack Right Side Out
Flip the sack right side out and gently push out the corners so they’re crisp. You should now see the rope channels neatly positioned at the top.
Insert the Rope
Cut two lengths of rope—each about 1.5 times the width of your sack. Thread one rope through both channels starting from the left side, creating a loop. Repeat with the second rope from the right side. Tie the ends of each rope together at the bottom corners of the sack. These loops will act as both drawstrings and backpack straps.
Finish the Bottom Corners (Optional)
For added strength, reinforce the bottom corners with a few extra stitches where the rope knots meet the fabric. This will keep the sack sturdy when filled with toys.
Your toy cinch sack is now ready to use. It’s colorful, portable, and easy for kids to manage on their own. Want a second one for art supplies or books? Just repeat the steps with a smaller cut of fabric.
Benefits of Using a Toy Cinch Sack for Organizing Kids’ Rooms
Keeping a child’s room tidy can feel like an endless task. Toys scatter across the floor just minutes after cleaning up. A cinch sack for toys offers a smart, stress-free way to cut down on clutter while helping kids take part in their own organization. It’s simple, portable, and surprisingly effective.
Teaches Kids Responsibility
One of the biggest benefits of using a cinch sack for toys is how it helps children build good habits. Giving them a designated spot for their playthings makes cleanup time easier and more manageable. The sack’s drawstring design is easy for small hands to open and close, encouraging independence without needing constant reminders. Over time, kids learn that picking up after themselves is just part of playtime.
Makes Cleanup Quick and Easy
The cinch sack saves parents time and effort. Instead of gathering toys into separate bins, everything goes into one bag. Once full, the sack can be cinched shut and hung on a wall hook or placed in a corner. No need for shelves or complicated storage systems. It’s especially useful when guests are coming over and you need to tidy up in a hurry.
Saves Space in Small Rooms
Toy storage doesn’t have to take up floor space. A cinch sack for toys can hang behind a door or on a wall, clearing up valuable square footage. This makes it a great choice for small bedrooms, shared spaces, or play areas that double as living rooms. The sack is soft and flexible, so it molds to tight corners and odd spaces where traditional bins won’t fit.
Easy to Bring Anywhere
A cinch sack isn’t just for home use. It’s perfect for road trips, sleepovers, and visits to the grandparents. Kids can bring a selection of their favorite toys with them and keep everything contained. The drawstring doubles as a handle or shoulder strap, which makes carrying it easy and fun for little ones.
Adds a Pop of Personality
A cinch sack for toys isn’t just functional. It can also be a fun and stylish addition to the room. With endless options for fabric colors, themes, and personalization, you can match the sack to your child’s interests. From dinosaurs to fairies, there’s a design that fits every personality.
Small solution, big impact—that’s the cinch sack. It’s a simple DIY storage item that brings order, teaches responsibility, and makes daily life a little easier.
Customizing Your Toy Cinch Sack: Personalization Tips for Kids
A toy cinch sack doesn’t have to be plain or boring. In fact, personalizing it is one of the best parts of the project. Custom details turn a simple storage bag into something your child will love to use. With just a few creative touches, you can make each sack feel like it was made just for them.
Add Their Name or Initials
One of the easiest ways to personalize a toy cinch sack is by adding your child’s name or initials. You can use iron-on letters, fabric paint, or even embroidery if you have the skills and tools. This not only makes the sack feel special, but it also helps avoid mix-ups if you have more than one child. Personalized names are a favorite for kids and help them feel a sense of ownership.
Pick a Fun Fabric Theme
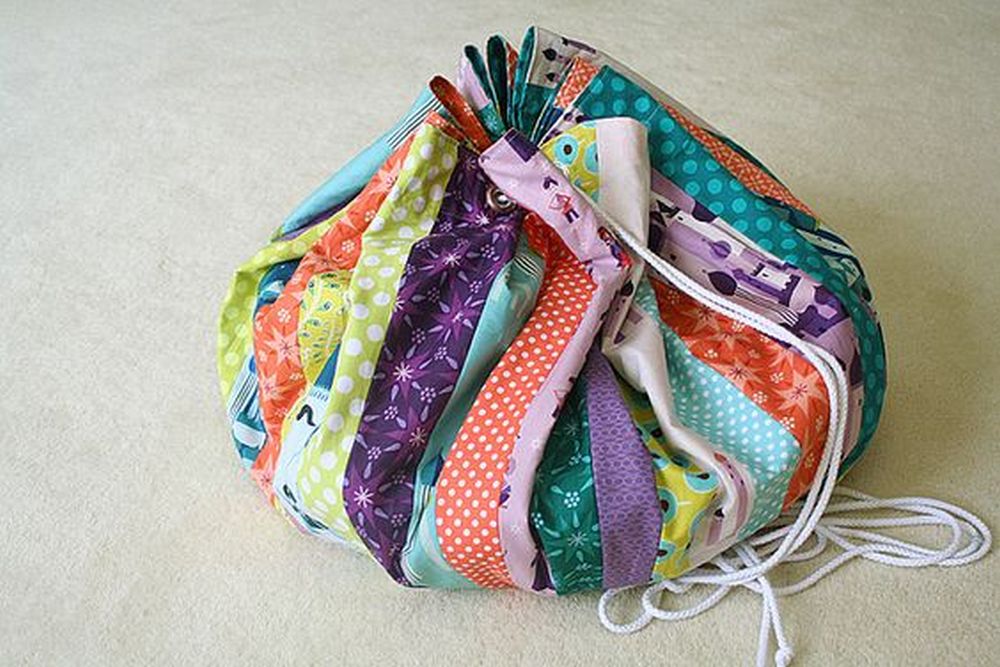
Let your child choose the fabric. Whether they love dinosaurs, unicorns, race cars, or outer space, themed fabric is an easy way to reflect their interests. You can also use two different fabrics for the inside and outside to give the toy cinch sack a colorful twist. If you’re using leftover fabric from other DIY projects, try patchworking pieces together to create a playful look.
Use Decorative Patches or Appliqué
Iron-on patches and appliqué designs are a fast way to add flair. Stars, hearts, animals, or cartoon characters can all give the sack a lively personality. You can even create your own shapes using felt and sew or glue them on. It’s a fun way to involve kids in the design process, especially if they want to pick out their favorite characters or symbols.
Decorate with Buttons, Tassels, or Ribbons
Details like colorful buttons or tassels at the drawstring ends add charm and texture. You can stitch ribbon along the seams or around the edge for an extra pop of color. These small touches make the sack more visually appealing and let kids feel like they’re using something made just for them.
Draw or Paint on It
Fabric markers and paints give you total freedom to create a design from scratch. Kids can decorate their toy cinch sack with their own drawings, handprints, or doodles. It becomes both a storage solution and a mini art project.
Personalizing a toy cinch sack makes it more than just a bag—it becomes part of your child’s daily routine and something they’re proud to use.
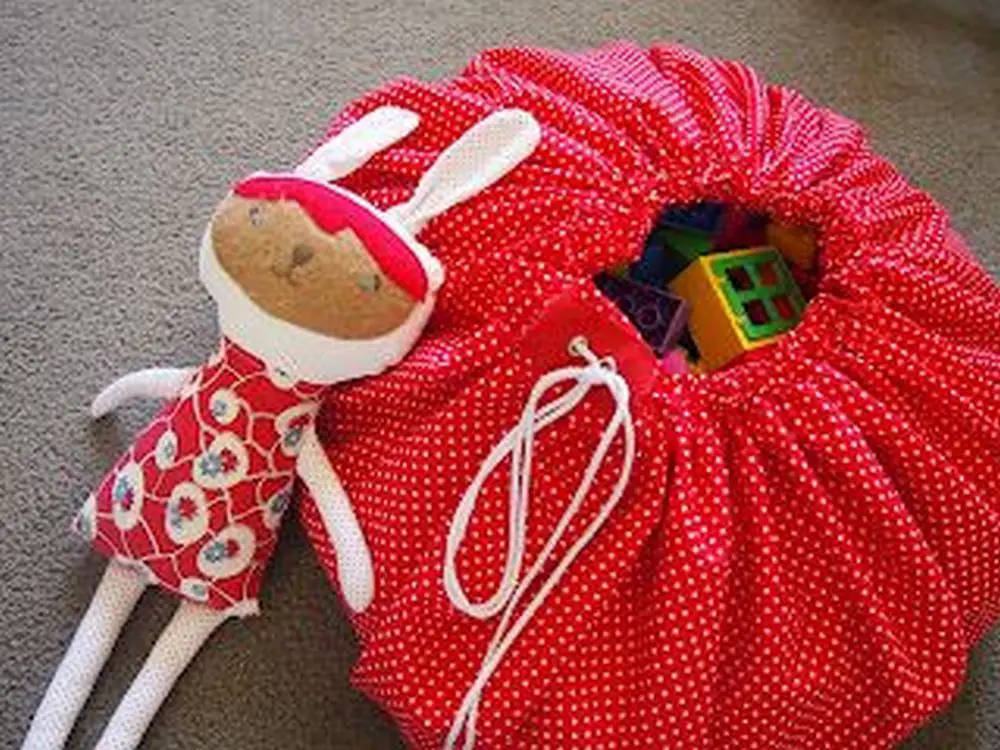
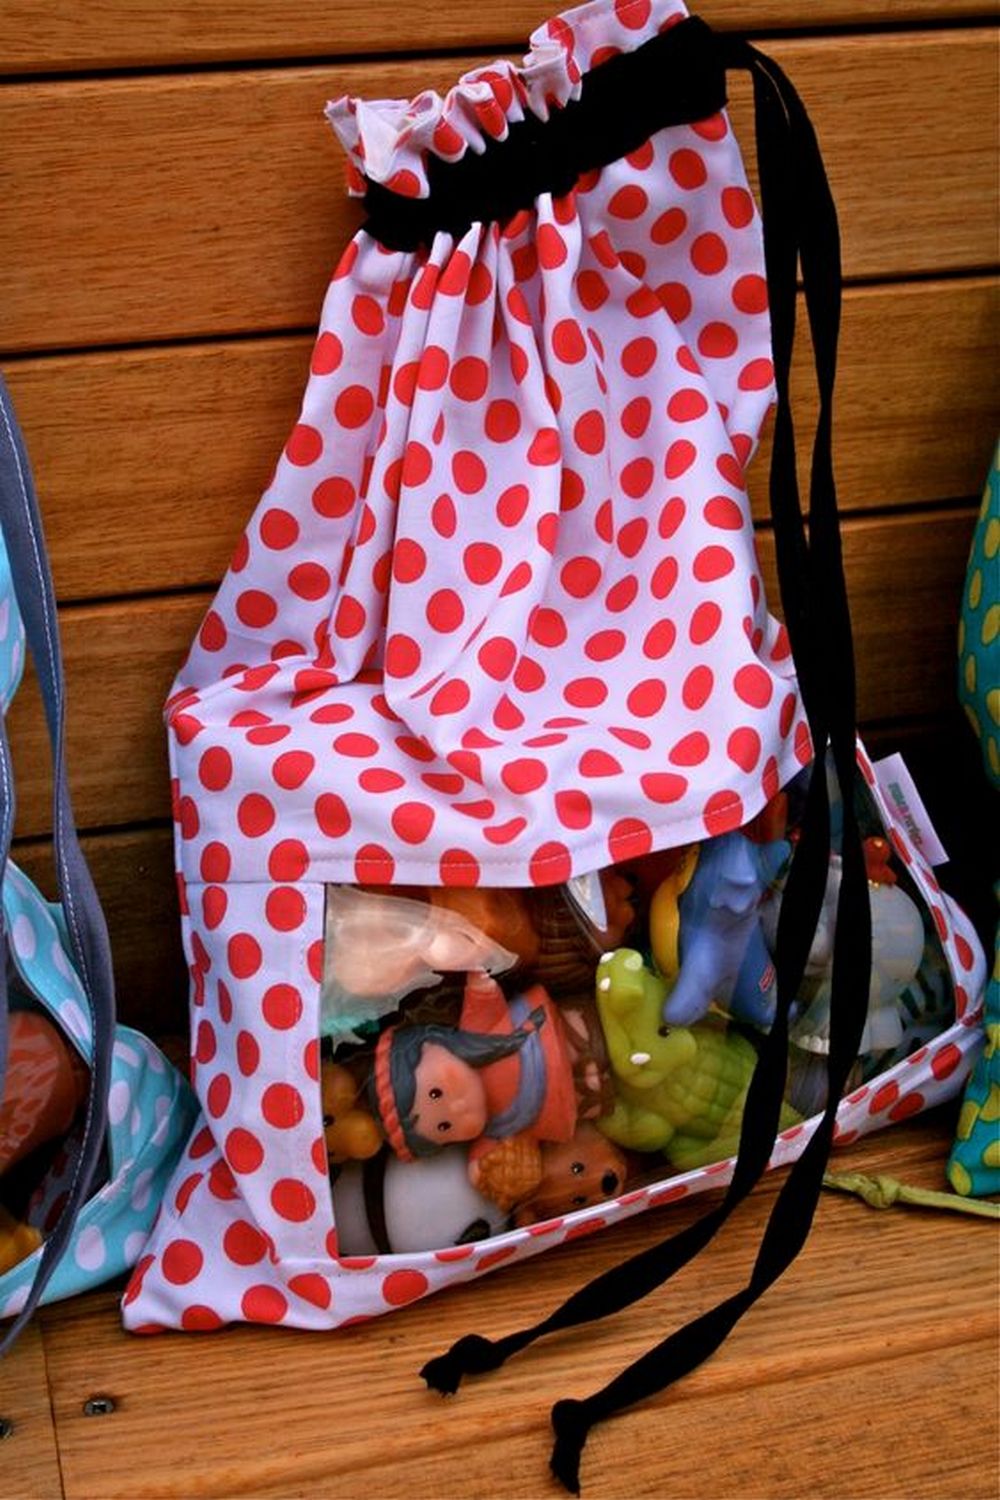
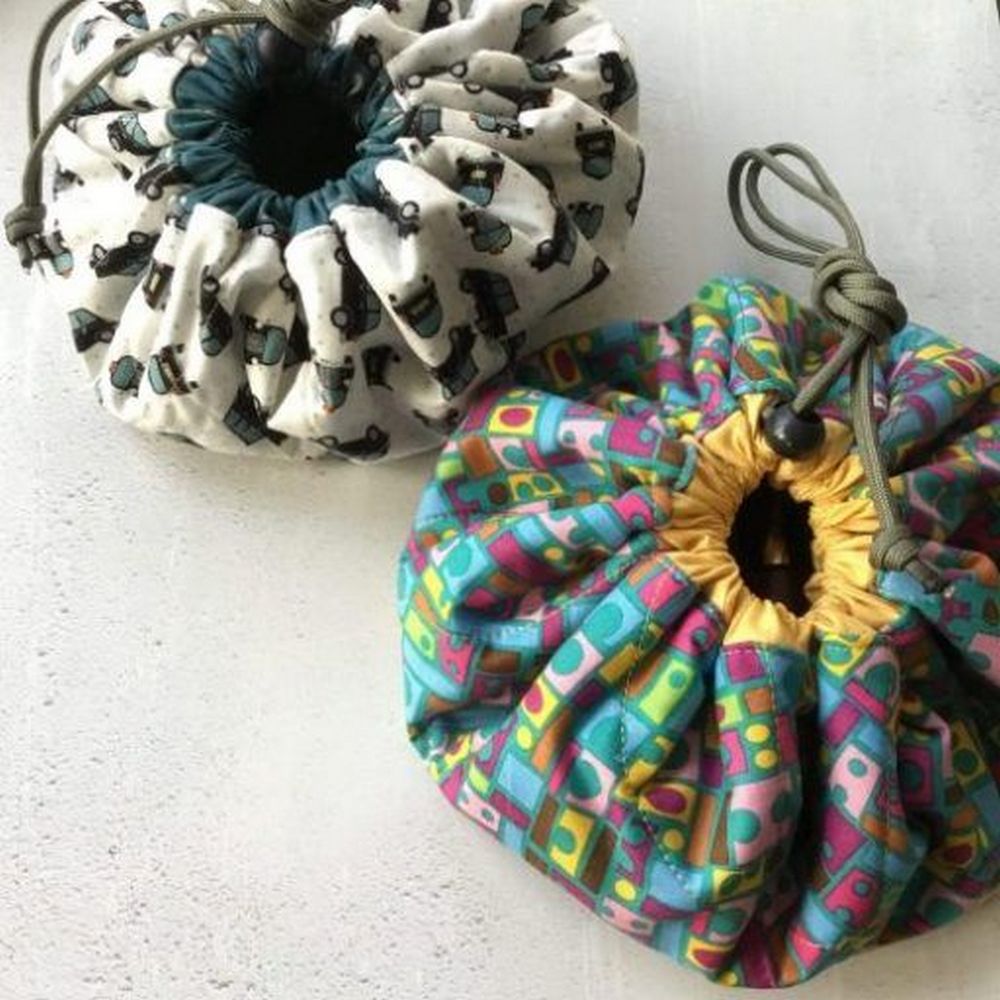
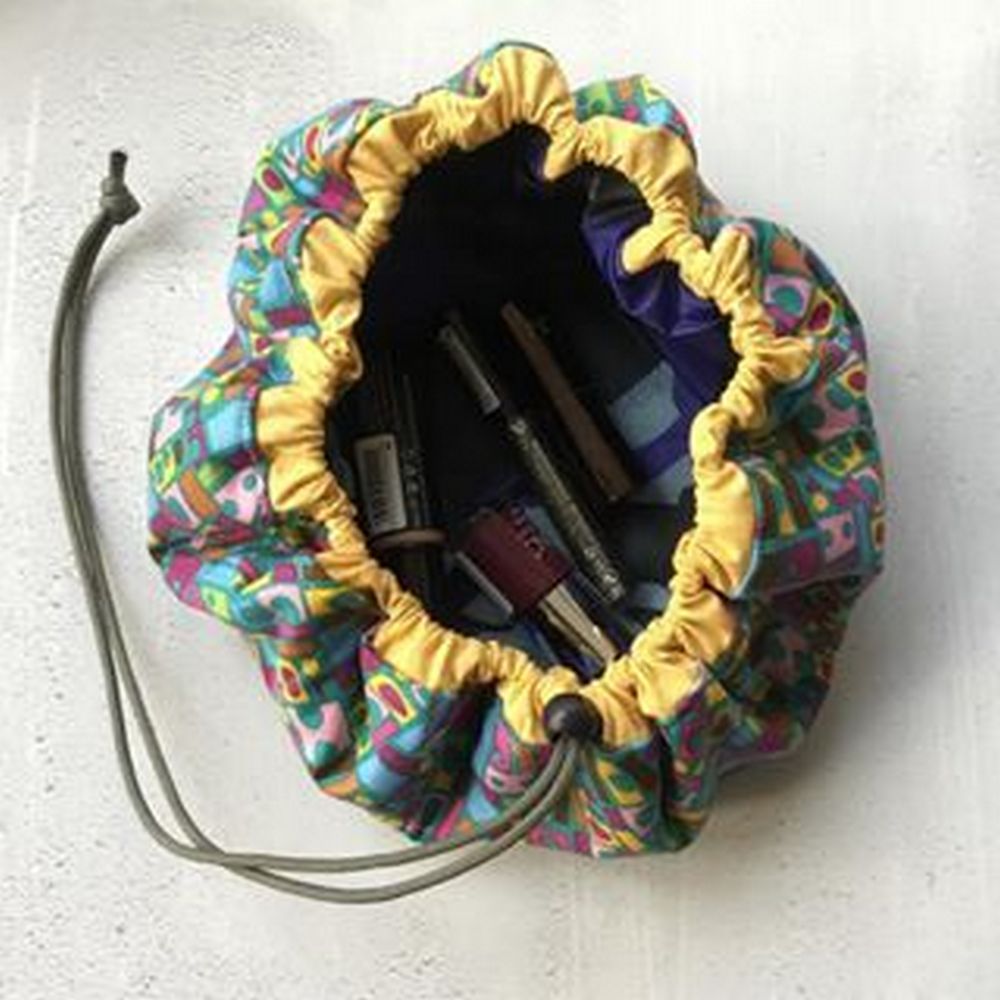
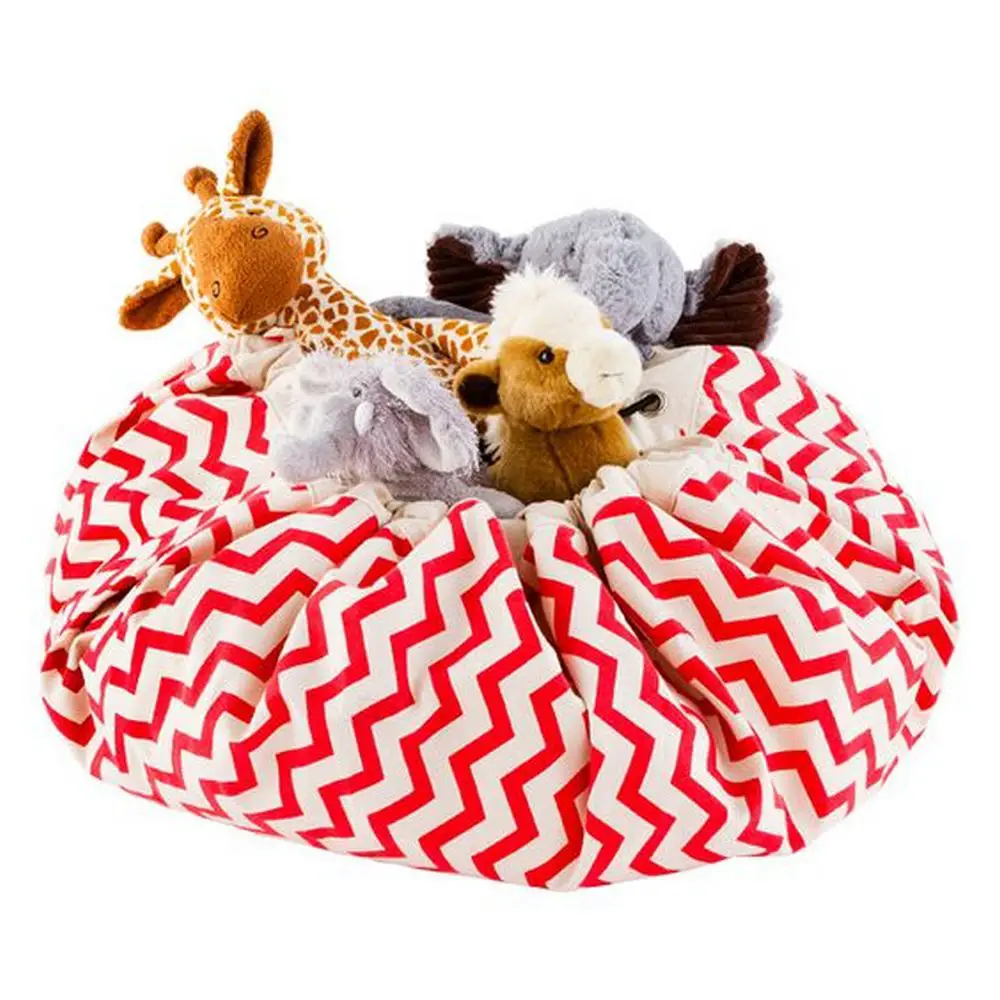
Cute Toy Cinch Sack Design Ideas
Click on any image to start the lightbox display. Use your Esc key to close the lightbox.

Best Fabrics and Materials for a Durable Toy Cinch Sack
If you’re making a cinch sack for toys, choosing the right materials is just as important as how you sew it. The sack needs to handle daily wear and tear, frequent washes, and the weight of various toys. Durable materials will keep it looking good and functioning well over time. Here’s what to look for when picking fabric and rope for your project.
Cotton Canvas for Strength
Cotton canvas is one of the best choices for a toy cinch sack. It’s thick, sturdy, and holds its shape well even when filled with toys. Canvas can withstand rough handling and frequent use, which is ideal for busy households with young kids. You can also find canvas in many colors and prints to match your child’s style.
Denim for Extra Durability
Old jeans or denim fabric scraps can make a surprisingly tough and stylish cinch sack for toys. Denim resists tearing and has a rugged look that works well for older kids. It’s also easy to clean and holds up in the wash. If you’re upcycling, it’s a great way to reuse materials while making something useful.
Quilting Cotton for Style and Lightness
Quilting cotton is softer and lighter, making it a great choice for smaller sacks or lightweight toys. It’s easy to sew and comes in thousands of patterns, which makes it perfect for personalizing. However, it’s best to line quilting cotton with a stronger fabric if you’re planning to store heavy items.
Ripstop Nylon for Portability
If you want a lightweight, waterproof option, ripstop nylon is a smart pick. It’s often used in outdoor gear and can handle moisture or spills without soaking through. This fabric is ideal for cinch sacks that will be used outside or taken on trips. It folds easily and doesn’t add much weight.
Cotton Cord or Nylon Rope for the Drawstring
The drawstring is just as important as the fabric. Cotton cord is soft, easy for kids to grip, and ties well. Nylon rope is more durable and resistant to fraying. Make sure the rope you choose is thick enough to handle repeated use without wearing out or digging into little hands.
Choosing the right fabric and rope means your cinch sack for toys won’t just be cute—it’ll be tough enough to last. A good sack can become part of the daily routine and stand up to years of use.
Conclusion
Making a toy cinch sack is a simple DIY project that brings instant organization to your child’s room. It’s durable, practical, and easy to customize. With the right materials and a few basic tools, you can create a storage solution your kids will enjoy using. It’s a fun way to combine creativity with functionality.


