
Last Updated on December 4, 2024 by Team Ideas24
Who says cookie cutters are only for baking? They are not only tools for making delicious cookies, they can also be used to create cute upcycled sweater Christmas ornaments!
Making these little Christmas tree ornaments is easy but the cookie cutters make the project even easier and more fun! Even if you are not into sewing projects, you’ll definitely enjoy this project.
Aside from old sweaters, you can also use other old clothes. Just don’t forget to add old buttons, small ribbons, beads, and pearls to make each piece really adorable and unique.
Do you want new ornaments for you Christmas tree? Why not make some using old sweaters and cookie cutters!
Contents [show]
Crafting DIY Christmas Ornaments From Old Sweaters
You’ll need these materials:
- Old Sweaters
- Fiber Fill
- Old Buttons
- Twine String
And these tools:
- Scissors
- Cookie Cutters
- Sewing Kit (needle, thread, fabric marker)
Steps:
Choose a Sweater and Design: Select an old sweater with colors or patterns that match your holiday theme. Lay the sweater flat on a work surface.
Trace Shapes Using Cookie Cutters: Place cookie cutters on the sweater as stencils for your ornaments. Trace the shapes using a fabric marker. Popular choices include stars, hearts, and trees.
Cut Out the Shapes: Use scissors to carefully cut out the traced shapes. Cut two identical pieces for each ornament to create a front and back.
Add Decorative Details: Sew old buttons onto one of the cut-out pieces to add character. For example, buttons can represent ornaments on a tree or the eyes of a snowman.
Sew the Ornament Edges: Place the two cut-out pieces together with the outer sides facing out. Stitch along the edges using a simple running stitch. Leave a small gap to insert the filling.
Stuff the Ornament: Gently fill the ornament with fiber fill until it is plush and evenly shaped. Don’t overfill, as this might distort the shape.
Close the Opening: Stitch the gap closed to secure the fiber fill inside. Make sure the stitches are tight to prevent the filling from spilling out.
Attach the Hanging Loop: Cut a piece of twine string to your desired length for hanging. Form a loop, and stitch or tie it securely to the top of the ornament.
Finish and Inspect: Trim any loose threads and ensure all stitches are tight. Your upcycled ornament is now ready to hang.
Decorate Your Tree: Hang your unique ornaments on the Christmas tree or gift them to loved ones for a personalized holiday touch.
Here are some other DIY Christmas ornaments you and the kids can make:
Click on any image to start lightbox display. Use your Esc key to close the lightbox. 8-)
Smart DIY Christmas Ornaments
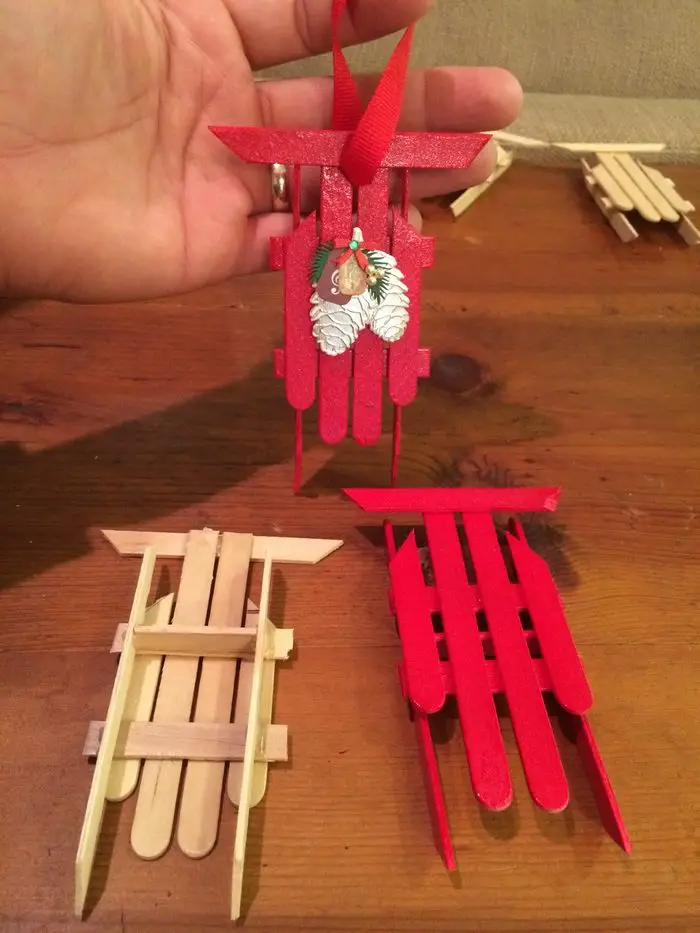
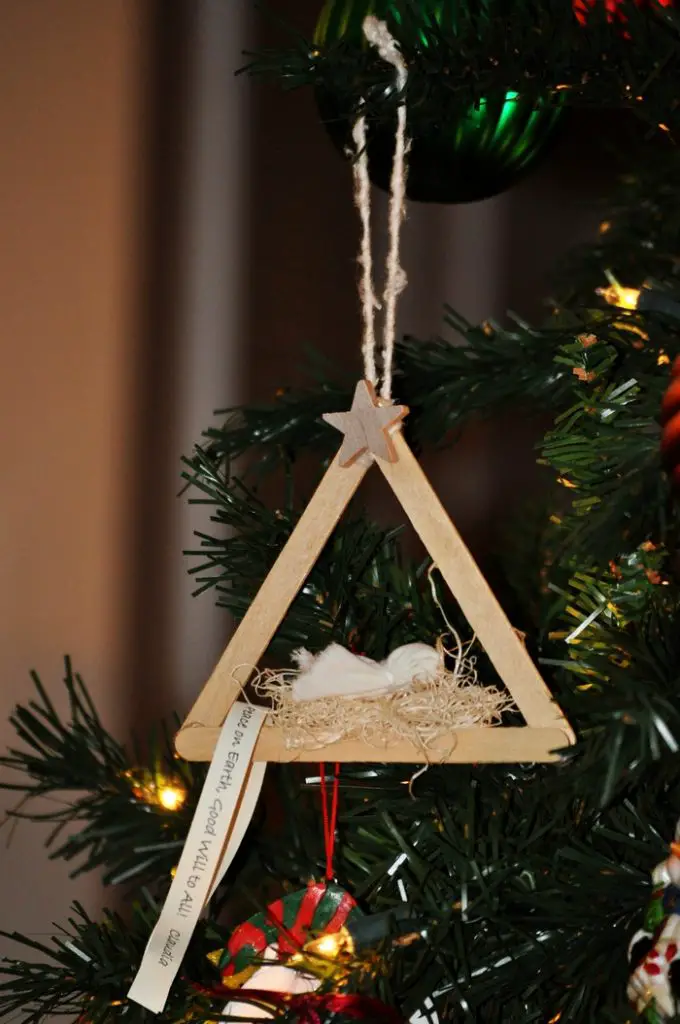
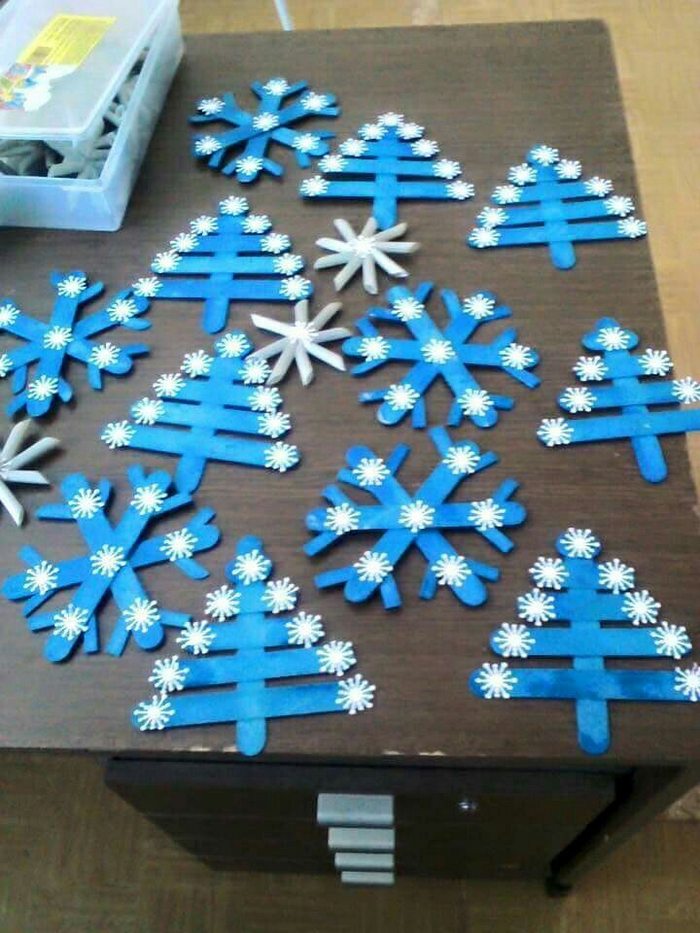
Popsicle Stick Christmas Ornaments
Create festive decorations using popsicle sticks to craft snowflakes, stars, or miniature Christmas trees. Paint the sticks in holiday colors and embellish them with glitter, buttons, or sequins. These lightweight ornaments are perfect for kids’ crafting and add a rustic charm to your tree.
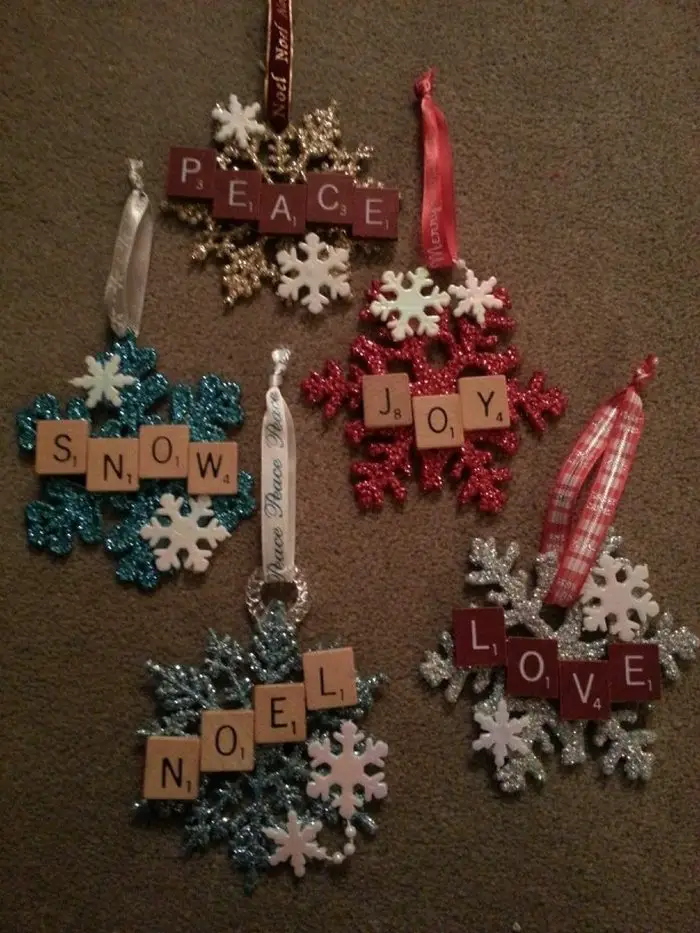
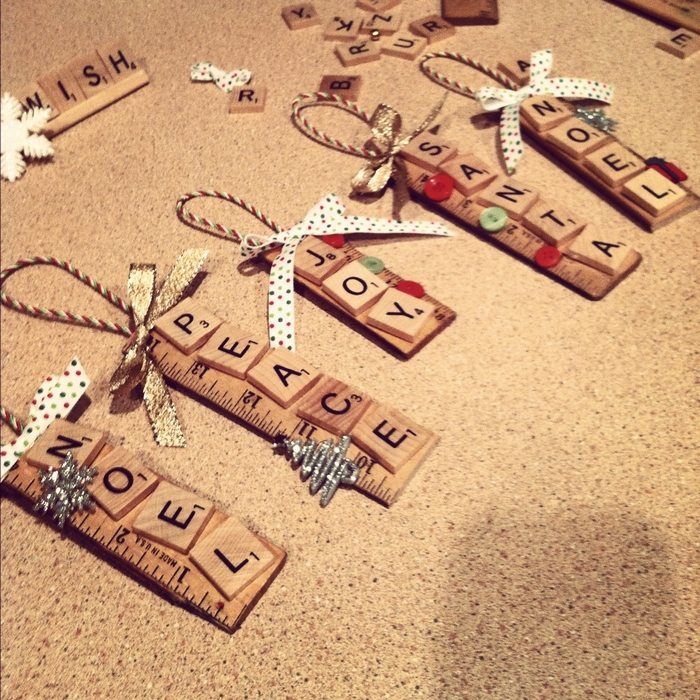
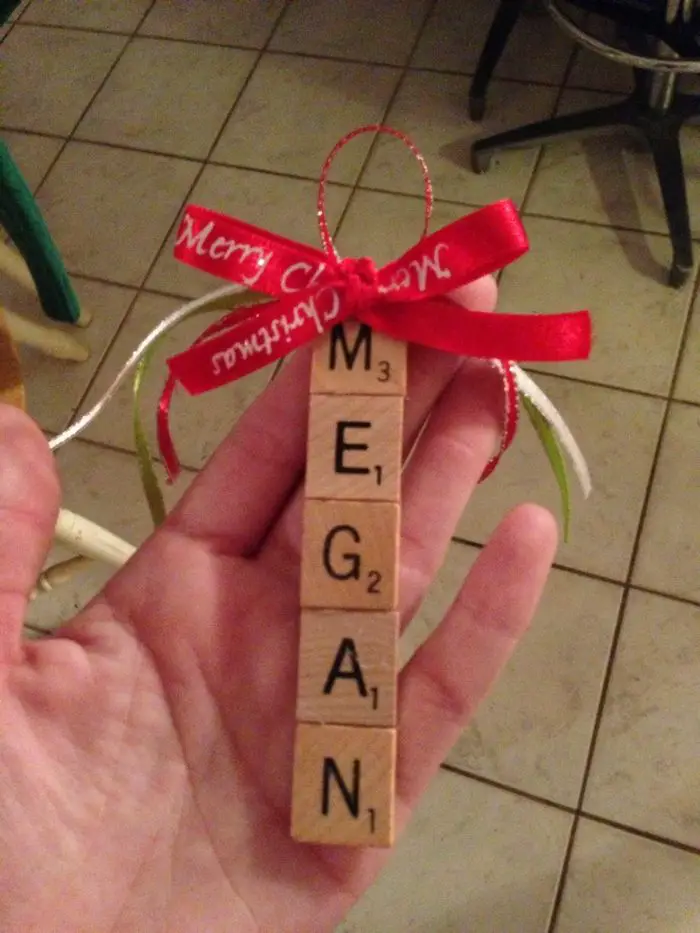
Scrabble Tile Christmas Ornaments
Spell out festive words like “Joy,” “Noel,” or “Peace” using Scrabble tiles and glue them to twine or small wooden bases. Add ribbons or greenery for extra flair. These ornaments are an easy and creative way to personalize your holiday decorations.
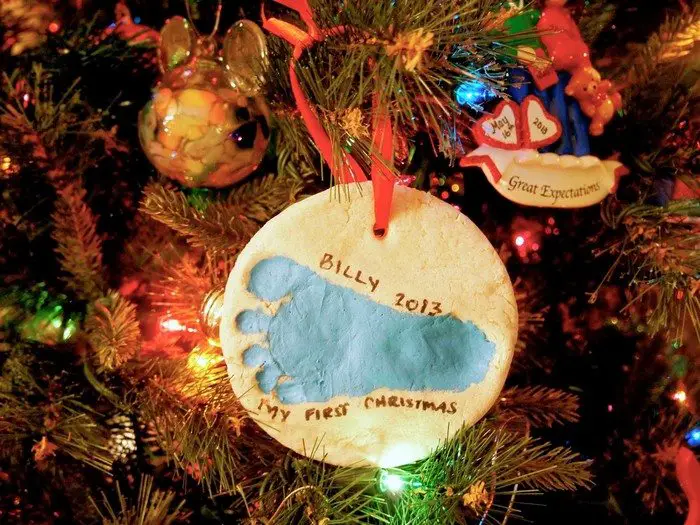
Capture a child’s footprint in salt dough shaped into a heart, then bake and paint it for a keepsake ornament. Add the year or a special message for a sentimental touch. These ornaments make heartfelt gifts for parents or grandparents.


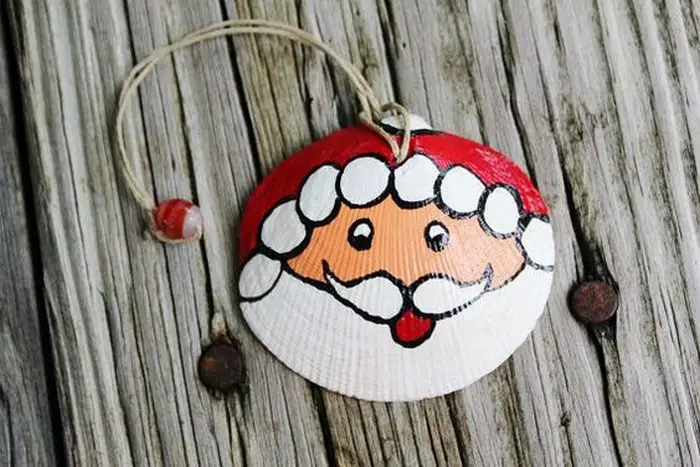
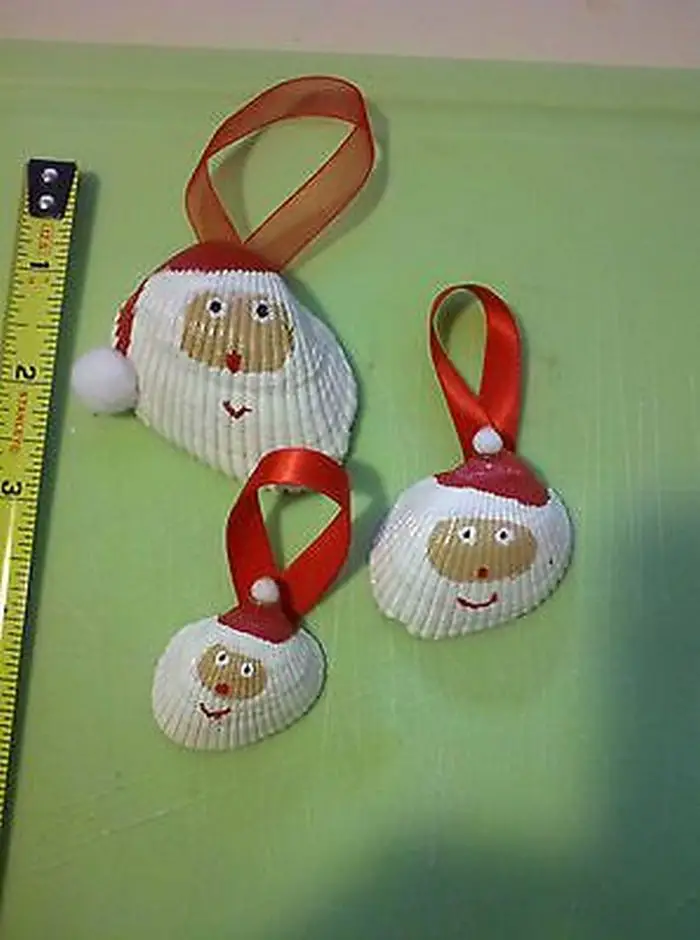
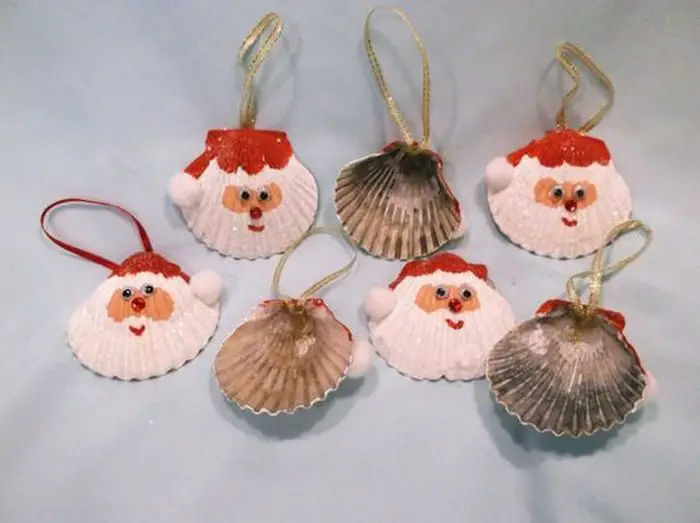
Transform seashells and oyster shells into Santa Claus faces with paint and small embellishments. Use red paint for the hat and white for the beard, adding googly eyes or tiny pom-poms for detail. These ornaments bring a coastal vibe to your holiday decor.
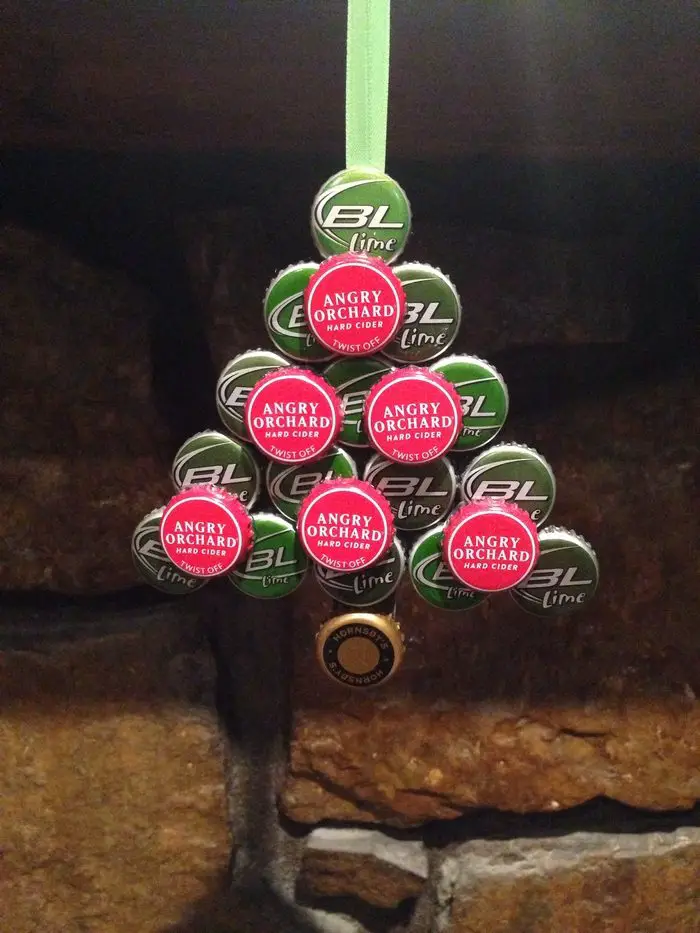
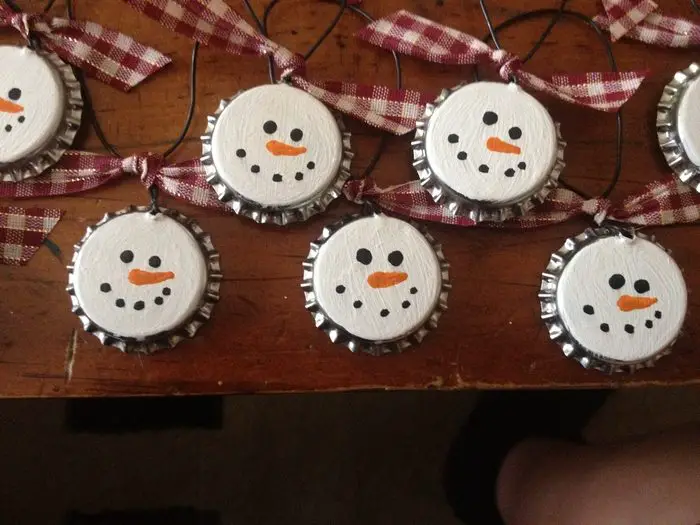
Bottle Cap Christmas Ornaments
Repurpose bottle caps into quirky ornaments by painting them to resemble snowmen, reindeer, or other festive characters. Stack them into a design or glue them onto ribbons for hanging. These ornaments are an eco-friendly way to add charm to your tree.
How to Incorporate Snowflake Designs into DIY Christmas Ornaments
Creating snowflake-themed ornaments is a charming way to embrace the winter season and add a frosty touch to your décor. Whether you prefer a minimalist approach or a more elaborate design, there are numerous ways to weave snowflake patterns into your ornaments.
Crafting Techniques
- Paper Cutting: Use sturdy decorative paper or cardstock to cut intricate snowflake patterns. These layered designs can be affixed to glass or plastic baubles for a delicate touch.
- Wooden Cutouts: Purchase pre-cut wooden snowflakes or craft your own using thin plywood and a small scroll saw. These can be painted in traditional white or a variety of festive colors to match any holiday theme.
- Embroidery and Sewing: Utilize fabric ornaments by stitching snowflake patterns with metallic or contrasting threads. This method adds texture and a handmade feel to your holiday decorations.
Materials and Embellishments
- Glitter and Gems: To replicate the glistening nature of real snowflakes, add sparkle to your ornaments with glitter or small adhesive gems. These embellishments can be carefully applied to highlight certain areas of your snowflake design.
- Metallic and Iridescent Paints: Use paints that catch the light to enhance your snowflake designs. Silver, gold, and iridescent hues can transform simple ornaments into eye-catching pieces.
- Mixed Media: Combine different materials like felt, metal, and glass to create unique, multi-dimensional snowflake ornaments. Incorporate beads, sequins, or small mirrors for added depth and visual interest.
Creative Variations
- Layered Stencils: Use stencils to layer different snowflake patterns over each other, creating a dynamic and intricate design. Try using varying shades of the same color for a cohesive yet detailed look.
- Personalized Touches: Add personal touches like initials or dates within the snowflake design. This transforms each ornament into a special keepsake.
By exploring these techniques and materials, you can produce beautiful, customized snowflake ornaments that shine during the holiday season—and perhaps all year round.
Sparkling DIY Christmas Ornaments with Glitter and Washi Tape
Transforming simple materials into dazzling Christmas decorations is easier than you might think. With just a few supplies, you can craft stunning, customized ornaments that shine. Here’s how you can use glitter and washi tape to make your holiday season sparkle.
Materials You’ll Need:
- Clear or solid-colored ornaments
- Assorted washi tape
- Fine glitter (various colors)
- Mod Podge or a similar crafting adhesive
- Scissors
- A small paintbrush
- Ribbon or twine for hanging
Steps to Craft Your Ornaments
1. Prepare Your Work Area
Ensure your workspace is covered and that you have all your materials on hand. This will keep things tidy and organized, making the process enjoyable.
2. Apply the Washi Tape
Start by wrapping washi tape around the ornament:
- Choose patterns and colors that suit your theme.
- Use different widths and overlap them slightly for a layered effect.
- Cut and trim any excess tape for a clean finish.
3. Add a Touch of Glitter
Now it’s time to make your ornament shine:
- Using a small brush, apply a thin layer of Mod Podge to areas where you want glitter.
- Sprinkle fine glitter over the adhesive, ensuring even coverage.
- Shake off the excess glitter and let it dry completely.
4. Design Variations
Consider these creative twists for your ornaments:
- Stripes and Spots: Alternate stripes of washi tape and glitter to create a fun pattern.
- Ombre Effect: Blend two or more glitter colors for a gradient appearance.
- Geometric Patterns: Use washi tape to create distinct shapes, filling them with glitter for contrast.
5. Finish and Hang
Once the ornament is dry:
- Attach a ribbon or twine to the ornament’s top, creating a loop for hanging.
- Ensure the top is securely fastened to prevent drops.
With these simple steps, your Christmas ornaments will gleam with unique charm, making your holiday decor truly one-of-a-kind. The beauty of this project lies in its adaptability, allowing you to experiment with different colors and patterns. Decorate your tree, give them as gifts, or adorn your home with your handcrafted creations!
Turning Maps Into DIY Christmas Ornaments
Maps hold a unique charm, with every line and color narrating a story. Incorporating them into Christmas ornaments adds a personal and adventurous touch to your holiday decor. Here’s how you can use maps creatively for your festive ornament crafting:
Personalized Keepsakes
- Highlight Special Places: Select maps that showcase significant locations like hometowns, honeymoon destinations, or dream travel spots. Cut out these sections and incorporate them into ornaments to spark joyful memories every time you decorate the tree.
- Customizing Shapes: Use cookie cutters or templates to create map shapes relevant to your personal stories. Consider stars, hearts, or even the silhouette of a country or state.
Artistic Displays
- Origami and Folding: Create intricate paper ornaments using origami techniques. Whether it’s a simple star or a complex geometric design, the map’s patterns will enhance the visual appeal.
- Decoupage Techniques: Apply maps to the surface of glass or plastic baubles using decoupage glue. This method gives simple ornaments an elegant, vintage look.
Interactive Ornaments
- Map Puzzles: Turn maps into puzzles that can be hung from a tree. Cut a small map into pieces and hang or place them on a magnetic surface. This adds a playful aspect to your tree and a fun conversation starter.
- Theme-Based Trees: Dedicate a whole tree to places you’ve visited or wish to travel. Use different maps for each ornament, creating a unique travel theme that’s both informative and decorative.
Incorporating Textures and Colors
- Using Various Map Types: Explore different map styles—like topographic or nautical charts. These maps bring varied textures and color palettes, adding depth and interest to your decorations.
- Layering Materials: Mix map sections with other materials like twine, ribbon, or glitter for a more dynamic appearance. This layering approach can create contrast, making the map features stand out.
With creativity as your guide, maps can be transformed from navigational tools into cherished pieces of holiday decor, weaving stories and memories into the heart of your Christmas celebrations.
Conclusion
DIY Christmas ornaments are a creative and meaningful way to celebrate the holiday season. They allow you to personalize your decor while enjoying the process of crafting something unique. These handmade ornaments add charm to your tree and make wonderful gifts for loved ones.
FAQ: DIY Christmas Ornaments
How can wood slices be used to create DIY Christmas ornaments?
Wood slices are versatile and can be transformed into stunning ornaments using techniques like painting, wood burning, or decoupage. Start by selecting smooth, even slices, sanding them if needed, and decorating them with stencils, stamps, or personalized designs. Seal the finished pieces with varnish, add a hanging loop, and enhance them with glitter or natural accents for a festive, rustic charm.
What are Christmas decoupage baubles?
Christmas decoupage baubles are personalized ornaments made by decorating round baubles with paper cut-outs and sealing them for a polished finish. Designs can range from vintage holiday prints to modern patterns, and the technique involves adhering the paper with decoupage glue, followed by a protective topcoat. These DIY ornaments allow for creativity, customization, and the addition of embellishments like glitter or ribbons, making them a versatile and charming choice for holiday décor.
What are some examples of ornaments that can be made using faux concrete?
Faux concrete ornaments offer a stylish, modern aesthetic and can be shaped into various designs. Geometric shapes like cubes, spheres, or pyramids create a sleek, minimalist look, while celestial designs like stars and moons add whimsy. For a festive touch, traditional Christmas icons like trees and bells, or personalized name tags and animal figures, bring charm and individuality to your tree.
What is the emotional or sentimental value of homemade Christmas decorations?
Homemade decorations hold a special place in holiday traditions, as they are filled with personal stories and memories. Each year, revisiting these handcrafted ornaments brings a sense of nostalgia and warmth to the holiday season.
How can children be involved in making Christmas decorations?
Children can take an active role in creating festive ornaments, making the experience fun and engaging for the whole family. Involving them in the process not only sparks creativity but also creates cherished memories.


