
Last Updated on December 5, 2024 by Team Ideas24

Keep the little kids’ creative minds running and let them have fun this holiday season with some paper plate crafts!
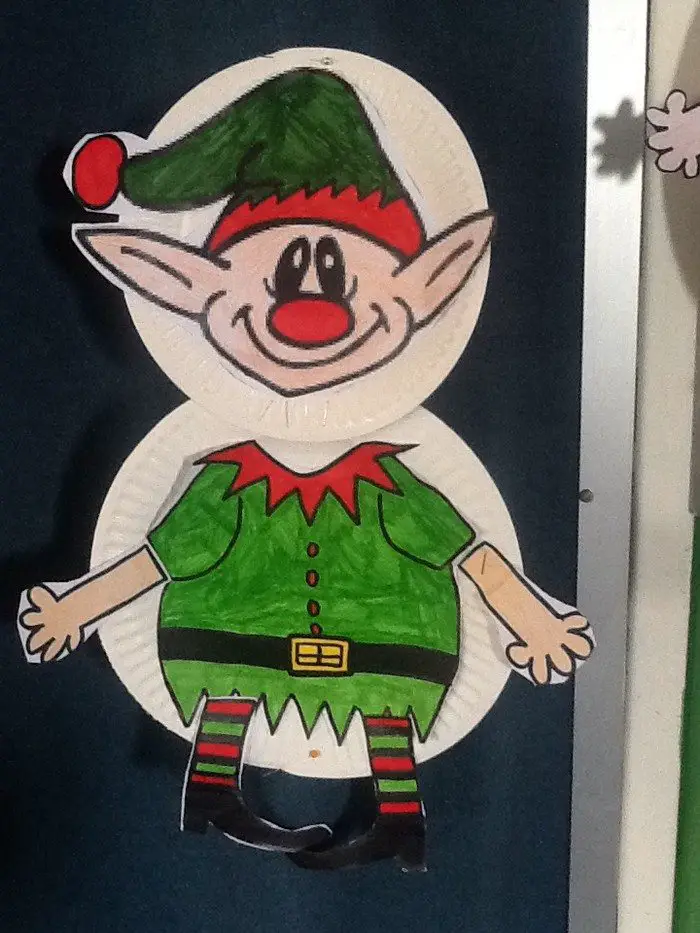
For your next arts and crafts activity, the kids can create cute Christmas icons using extra paper plates you might have from your previous party. They can create a paper plate santa, paper plate elf and a paper plate reindeer!

You can display it on the wall in their rooms or even add as an ornament to your Christmas tree!
So how about this for the weekend’s family activity?
Get all the extra materials you have from your craft supplies which you think can be used for this project and see how crafty your kids can be!
Contents [show]
Basic Paper Plate Christmas Crafts
Materials:
- 3 Paper Plates
- Cotton Balls
- Scrapbook Paper or Construction Paper
- Black Sharpie Marker
- Crayons – brown, peach, dark pink
- 4 Brown Pipe Cleaners
- 2 large Pom-Poms or Cotton Balls
- 1 large Glittery Red Pom-Pom
- 1 medium Glittery Red Pom-Pom
- 4″ long Ribbon
- 1 large Jingle Bell
- 8 small Glittery Pom-Poms
- White Craft Glue
- Tape
Tools:
- Scissors
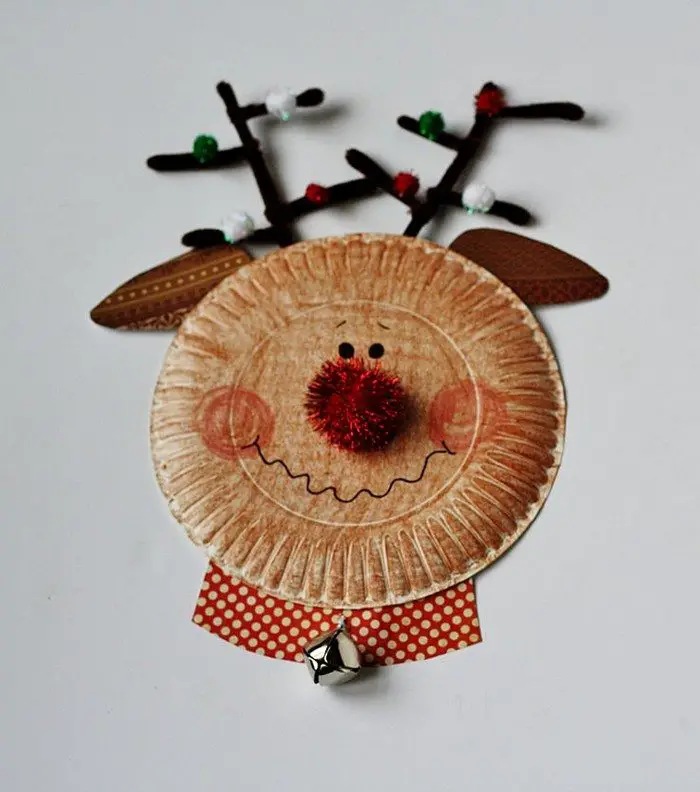
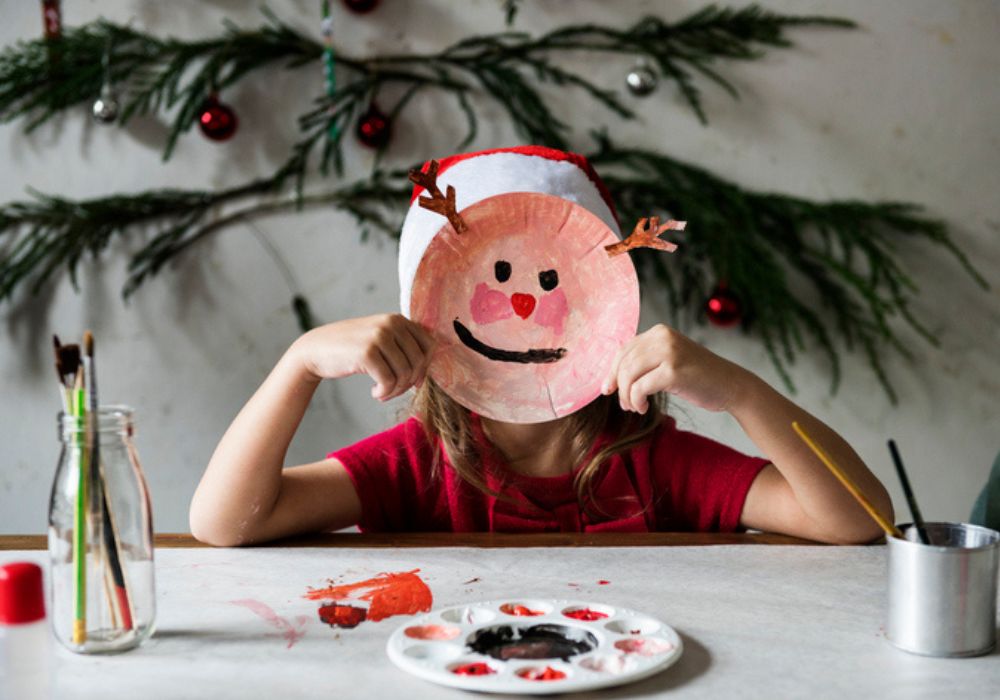
Craft 1: Paper Plate Rudolph
- Prepare the Plate: Take one paper plate. Color it brown using the brown crayon to create Rudolph’s face.
- Make the Antlers: Cut two pipe cleaners in half to create four pieces. Twist two pieces together for each antler. Tape or glue the antlers to the top back of the plate.
- Add Eyes and Nose: Use the black Sharpie to draw two large eyes. Attach the large glittery red pom-pom in the center of the plate for Rudolph’s nose.
- Decorate with Glitter: Glue small glittery pom-poms around the edges of the plate for added sparkle.
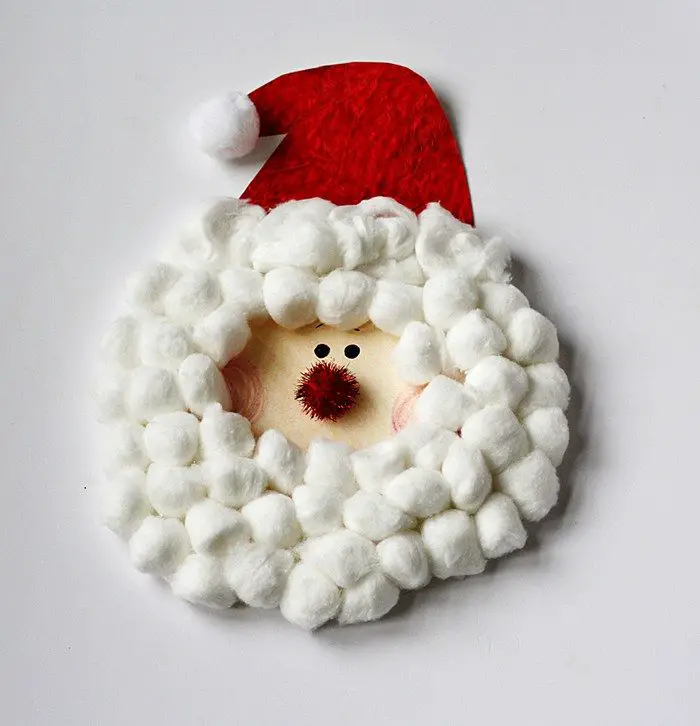
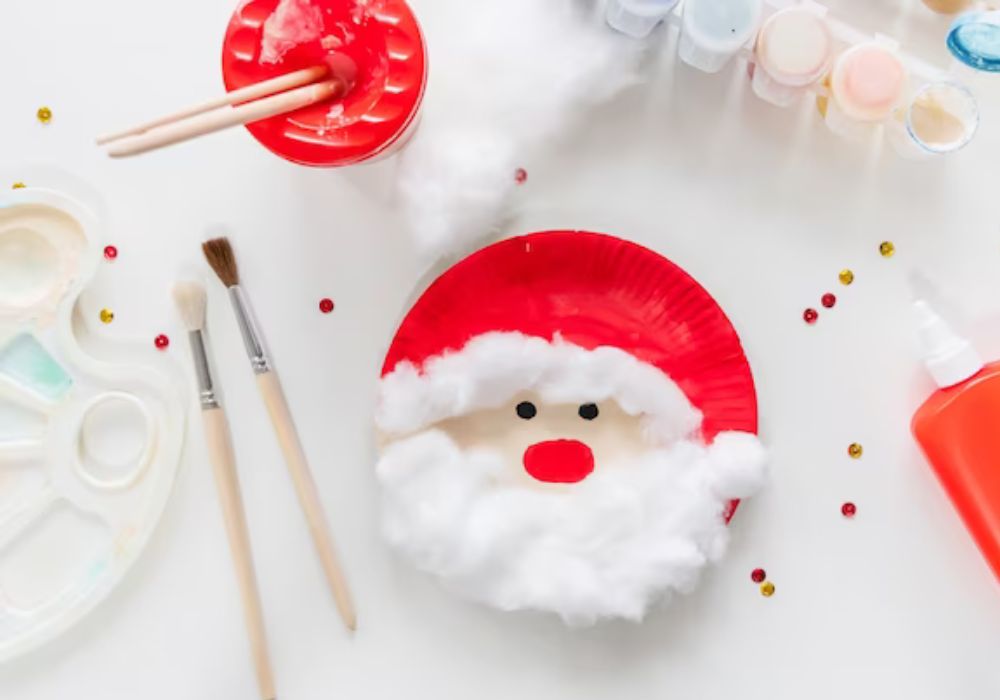
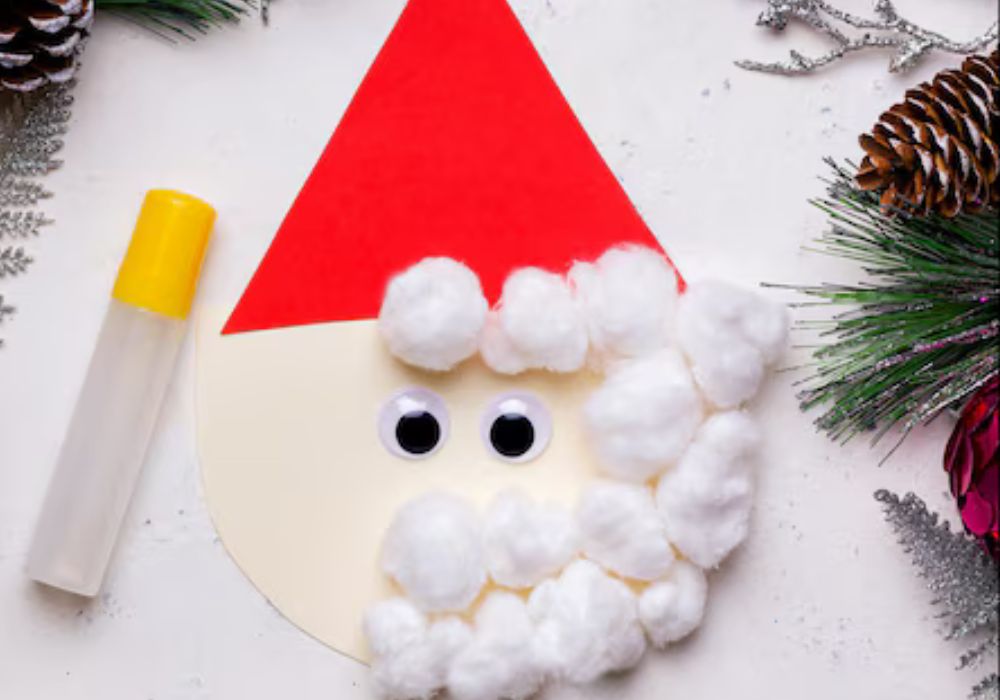
Craft 2: Paper Plate Santa
- Prepare Santa’s Face: Take another paper plate and color a peach circle in the center to make Santa’s face. Leave the edges white.
- Add the Beard: Glue cotton balls around the bottom half of the plate to create Santa’s beard.
- Make the Hat: Cut a triangle from red scrapbook or construction paper for Santa’s hat. Glue it to the top of the plate. Attach a large cotton ball or pom-pom at the tip of the hat.
- Details: Draw Santa’s eyes with the black Sharpie. Use the dark pink crayon to add rosy cheeks.
Craft 3: Christmas Bell Ornament
- Create the Bell: Cut the third paper plate into a bell shape. Color it with a mix of glittery and festive shades.
- Attach Ribbon and Bell: Tape or glue the 4-inch ribbon to the top of the bell shape. Tie the large jingle bell to the bottom of the ribbon.
- Decorate the Bell: Use small glittery pom-poms to create a pattern around the bell.
Click on any image to start lightbox display. Use your Esc key to close the lightbox. ![]()


How to Craft a 3D Christmas Tree with Paper Plates
Creating a 3D Christmas tree using simple items like paper plates is a delightful and easy craft that can add festivity to your home. Here’s how you can make your own charming decorations:
Materials Needed:
- Paper plates
- Green paint or markers
- Scissors
- Glue or tape
- Decorative items such as stickers, glitter, or pom-poms
Step-by-Step Instructions:
- Prepare Your Plates: Begin with clean, uncoated paper plates. You’ll need at least two plates for each tree you want to craft.
- Cut the Plates: Fold one paper plate in half and cut along the fold. These two halves will form the sides of your 3D tree. Repeat this with another plate.
- Shape the Tree: Take one semicircle and fold it to form a cone. Secure the edges with tape or glue. This will be one side of your tree. Repeat this step with the remaining halves to complete two cones.
- Assemble the Tree: Overlap the two cones at their bases and secure them together using glue. Position them so that they form a standing tree shape at a 90-degree angle.
- Decorate: Now comes the fun part—decorating! Paint your tree green or use green markers for coloring. Add glitter, stickers, or attach small pom-poms to resemble ornaments.
- Display: Allow your tree to dry completely before displaying it. These can be placed on your dining table, mantel, or used as centerpieces.
Enjoy this engaging and festive activity that also serves as a beautiful homemade decoration!
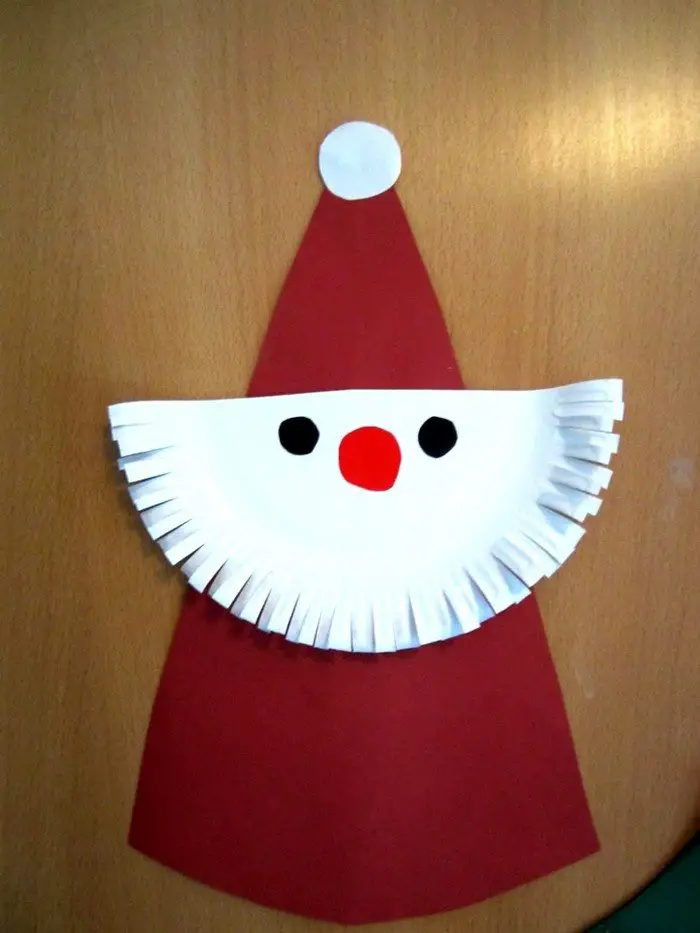
How to Make Festive Paper Plate Santa Hats
Creating paper plate Santa hats is a fun and easy craft that both kids and adults will enjoy. Here’s a step-by-step guide to making your own festive headwear for the holiday season:
Materials You’ll Need:
- Paper Plates: Opt for sturdy plates to hold up the shape.
- Red Paint or Markers: To give your hat its classic color.
- Cotton Balls or White Pom-Poms: For the fluffy trim.
- Glue: Preferably a strong, quick-drying adhesive.
- Scissors: Ensure they are sharp for clean cuts.
- String or Elastic: This will help secure the hat under your chin.
Instructions:
- Prepare the Paper Plate:
- Cut the paper plate in half. This will serve as your hat base.
- If you want a more compact hat, trim the edges slightly.
- Add Some Color:
- Use red paint or markers to cover the outer side of the half-circle.
- Let it dry completely to avoid smudges.
- Create the Fluffy Trim:
- Glue cotton balls or white pom-poms along the straight edge. This mimics the look of fur.
- For a neater appearance, overlap the cotton balls slightly.
- Form the Hat Shape:
- Curl the painted paper plate half-circle to form a cone shape.
- Secure the edges in place with glue or tape.
- Attach the String:
- Make a small hole on each side of the hat’s base.
- Thread and knot string or elastic through the holes, adjusting to the desired length.
- Add a Pom-Pom on Top:
- Finish off by gluing a cotton ball or pom-pom to the hat’s tip.
Once complete, your Santa hat is ready to wear. Add some string, and it’s perfect for anyone to join in the holiday fun!
How to Create a Grinch Paper Plate Craft for Christmas
Bring the whimsical world of Dr. Seuss into your holiday decor with a delightful Grinch paper plate craft. Perfect for kids and adults alike, this craft will add a touch of mischief to your seasonal decorations.
What You’ll Need:
- Paper plate: The base of your Grinch face.
- Green paint or marker: To capture the Grinch’s signature color.
- Red and white felt or construction paper: For making the Santa hat.
- Googly eyes: For that mischievous Grinch expression.
- Black marker: To draw facial features and define details.
- Scissors: For cutting out shapes.
- Glue or tape: To assemble all the pieces together.
Steps to Make Your Grinch Paper Plate:
- Paint the Base:
- Start by coloring the entire paper plate green. Allow it to dry completely, giving you the perfect Grinch face backdrop.
- Create the Santa Hat:
- Cut a triangle shape from red felt or construction paper for the hat. Add a white strip for the trim and a fluffy ball for the top using white felt or paper.
- Add the Eyes and Features:
- Place googly eyes slightly below the top of the plate.
- Use your black marker to draw the Grinch’s sly smile and nose. Consider adding eyebrows for extra expression.
- Assemble the Hat:
- Attach the red hat to the top of the plate with glue or tape, ensuring it sits at a jaunty angle as seen in classic Grinch imagery.
- Final Touches:
- Double-check the alignment of all pieces to maintain that iconic Grinch look. Allow any glue to dry completely before displaying.
This easy and fun craft will surely be a holiday hit, adding a playful twist to your festive celebrations. Enjoy making it with family or friends, and let the Grinch’s charm spread some cheeky cheer!
How to Create a Paper Plate Mrs. Claus Craft
Creating a charming Mrs. Claus craft is a delightful and festive activity perfect for the holiday season. With her iconic curly hair and warm smile, this craft is both fun and easy to make. Follow these simple steps:
Materials Needed:
- Paper plate
- Red and white construction paper
- Cotton balls or white yarn for her curly hair
- Googly eyes or a black marker
- Glue stick
- Scissors
- Pink and red crayons or markers for her rosy cheeks and lips
Instructions:
- Prepare the Base:
- Start with a plain paper plate. This will serve as Mrs. Claus’s face.
- Create Her Hair:
- Use cotton balls or white yarn to form curls, creating the characteristic curly hair. Glue these along the top and sides of the paper plate.
- Add Facial Features:
- Attach googly eyes or draw them with a black marker.
- Use a pink crayon or marker to give Mrs. Claus rosy cheeks.
- Draw a smiling mouth with a red marker or crayon.
- Make the Hat:
- Cut a triangle shape from red construction paper to serve as her hat.
- Attach the hat above the hair, allowing the curls to frame her face.
- Use a cotton ball at the top of the hat for a fluffy touch.
- Finish with Details:
- Add details like glasses by drawing or cutting small circles from construction paper.
- Optionally, create a collar with white construction paper to add dimension.
Embrace the festive spirit with this charming Mrs. Claus craft, perfect for decorating your home or giving as a heartfelt handmade gift!
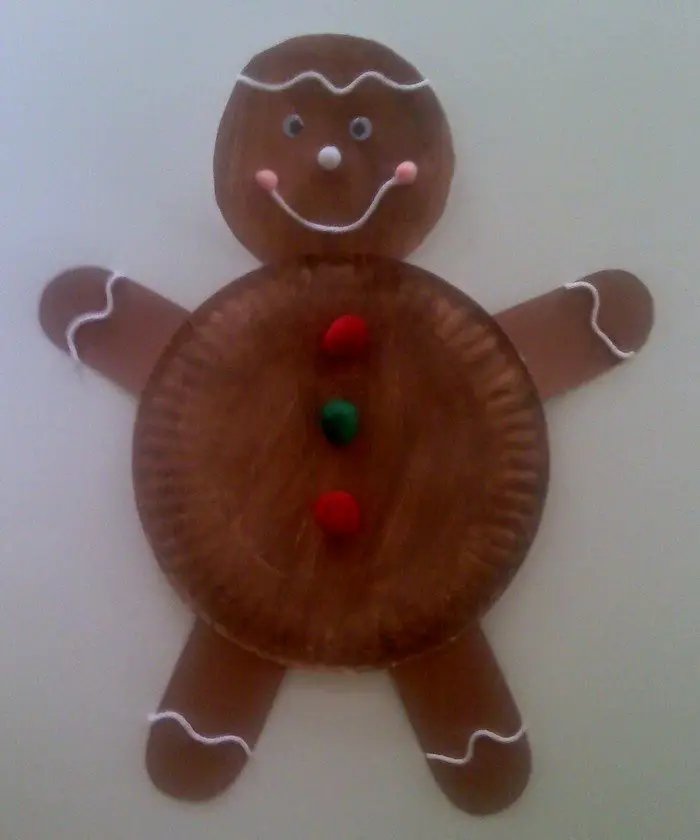
How to Create a Gingerbread Boy and Girl Using Paper Plates
Creating adorable gingerbread characters from paper plates is a festive and fun craft activity perfect for the holiday season. Here’s a step-by-step guide to making your own gingerbread boy and girl:
Materials Needed:
- Paper Plates: Two plain white or brown paper plates
- Acrylic Paint: Brown for the gingerbread body, plus assorted colors for decorations
- Googly Eyes: Available at craft stores, for expressive faces
- Pom-poms: Small red or pink ones for rosy cheeks
- Craft Glue: Strong enough to stick various materials
- Paintbrushes: A variety of sizes for detailed work
- Markers or Colored Pencils: For adding detailed designs and embellishments
- Optional: Glitter, buttons, or other decorative items
Instructions:
- Paint the Base:
- Start by painting each paper plate with brown acrylic paint to resemble gingerbread. Allow them to dry completely.
- Attach the Features:
- Glue on googly eyes to bring your gingerbread faces to life.
- Next, affix the red or pink pom-poms for their cheeks, right below the eyes.
- Design and Decorate:
- Use markers or colored pencils to draw a mouth, outlining a happy smile.
- Add other facial details like eyebrows or a nose if desired.
- Create clothing or patterns by painting or drawing on shirts, buttons, or bows. You can even attach small buttons for extra flair.
- Add Final Touches:
- If using glitter, carefully apply glue in the desired pattern and sprinkle the glitter over it to add some sparkle.
- Allow any additional decorations to dry thoroughly before moving or displaying your creations.
- Display:
- Once everything is secure and dry, your gingerbread boy and girl are ready to spread cheer. Hang them on the wall, use them as part of a festive centerpiece, or let them adorn your holiday workspace.
This delightful craft is an excellent way to bring holiday warmth into your home while engaging in a creative and relaxing activity.
Paper Christmas Craft Alternatives
Looking for more Christmas crafts for kids that involve paper? You’re in luck! Paper crafts are a simple and affordable way to spark creativity while celebrating the holiday. They’re perfect for children of all ages and provide a chance to make cherished decorations and keepsakes. The possibilities are endless, whether you’re using colorful construction paper, scrapbook paper, or even paper plates.
Here are some delightful paper plate Christmas craft ideas and a few other paper-based projects to fill your home with festive cheer.
Colorful Paper Chain Advent Calendar
Kick off the holiday excitement with a vibrant paper chain advent calendar. Start by cutting strips of construction or scrapbook paper in festive colors like red, green, and gold. Encourage kids to decorate each strip with glitter, stickers, or drawings. Create a loop with one strip and secure it with glue or tape. Add more loops, linking each one together to form a chain. You can even add tiny surprises or write holiday messages inside each link.
Simple Handprint Ornaments
Handprint ornaments are a sweet and personal touch for any Christmas tree. Have your child place their hand on a piece of paper or cardstock, trace it, and cut out the shape. Decorate the handprint with paints, glitter, or stickers to transform it into a festive design. Turn the fingers into a reindeer’s antlers, a snowman family, or a holiday wreath. Add a ribbon loop at the top, and it’s ready to hang.
DIY Paper Christmas Ornaments
Ornaments made from paper are a classic choice for Christmas crafting. With over 30 possible designs, kids can create stars, snowflakes, Christmas trees, or candy canes. Use patterned scrapbook paper or plain sheets that can be decorated with crayons, markers, or glitter. For 3D ornaments, fold and glue paper to give them volume. These lightweight decorations are perfect for adorning the tree or even as gifts for friends and family.
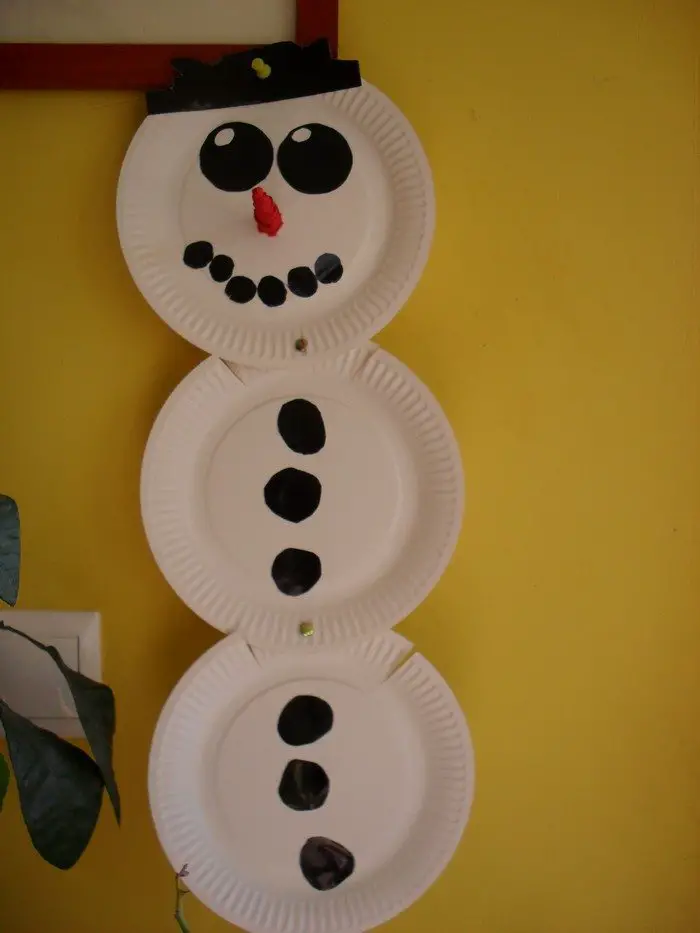
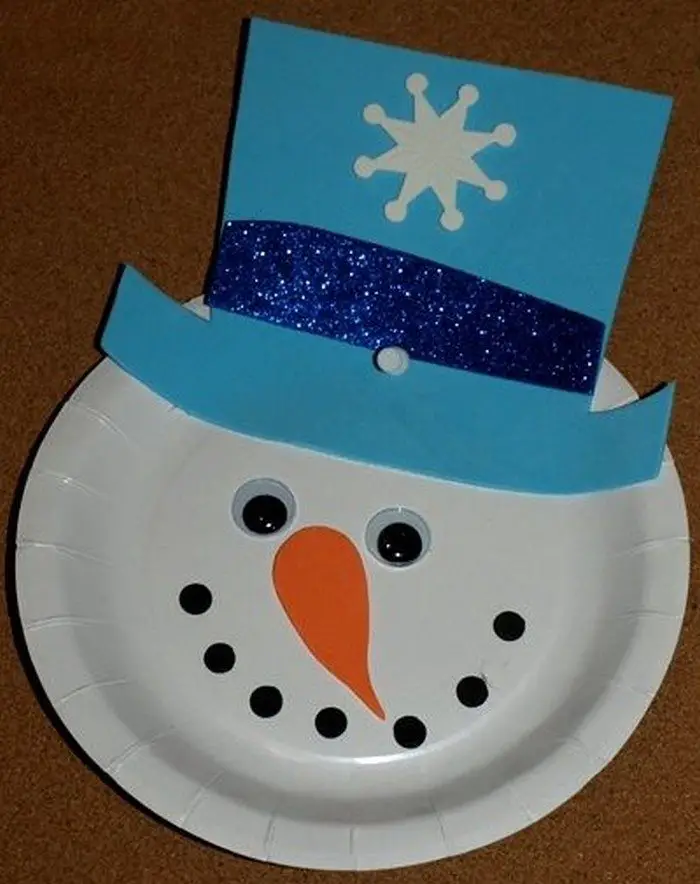
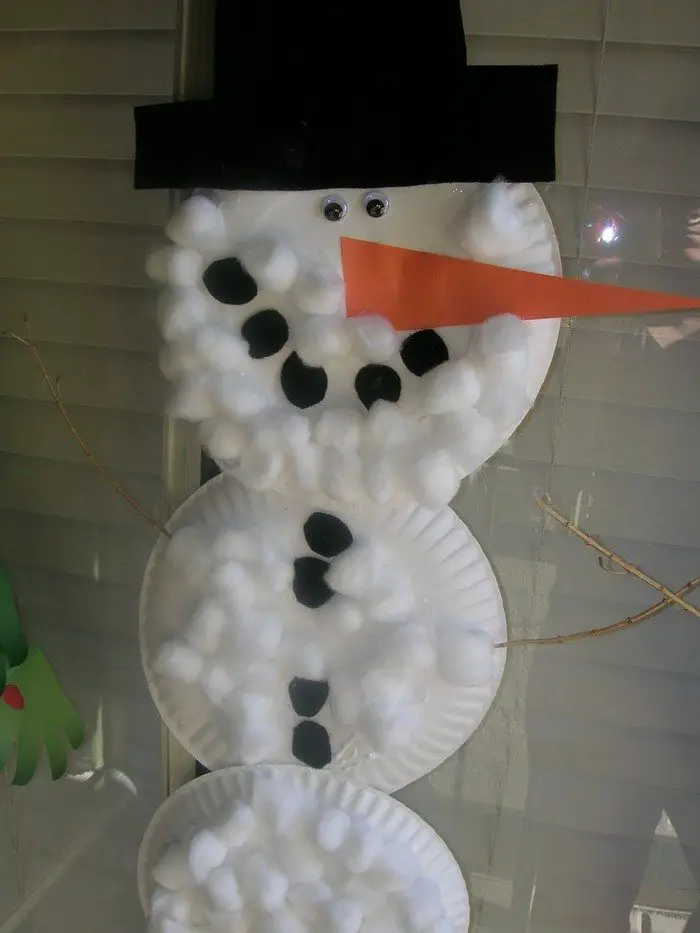
Easy Paper Snowman Wreath
A cheerful snowman wreath made from paper plates is a perfect addition to your front door. This paper plate Christmas craft involves layering paper plates or cardstock circles to form the snowman’s body and head. Add a construction paper top hat, a bright scarf, and a carrot nose cut from orange paper. Use buttons, pom-poms, or markers for additional details like eyes, a mouth, or buttons on the snowman’s body. Attach a ribbon or yarn to the top, and your snowy friend is ready to welcome guests.
Festive Poinsettia Paper Art
Bring the beauty of a classic Christmas flower to your home with poinsettia paper art. Using red and green construction paper, cut out petal and leaf shapes. Assemble and glue the petals into a layered flower pattern. Add a cluster of small yellow paper circles in the center to mimic the poinsettia’s vibrant core. These flowers can be used as table centerpieces, tree ornaments, or even gift toppers for a handmade touch.
Why Choose Paper Plate Christmas Crafts?
Paper plate Christmas crafts are ideal for young crafters because they’re inexpensive, versatile, and easy to work with. The round shape of a paper plate makes it a great base for many projects, such as wreaths, ornaments, or festive character faces. Plus, they’re sturdy enough to hold paint, glue, and embellishments, making them an excellent choice for more elaborate creations.
For example, kids can transform paper plates into adorable Rudolph faces by coloring the plates brown, attaching pipe cleaner antlers, and gluing on a red pom-pom nose. Similarly, they can make Santa by adding cotton balls for a fluffy beard and drawing his cheerful face with crayons. These crafts keep kids engaged and leave you with adorable decorations that add a handmade charm to your holiday decor.
These paper-based projects are both budget-friendly and eco-friendly, as you can often use recycled materials. They’re a wonderful way to involve children in the holiday preparations while encouraging their artistic side. Whether you make a paper chain advent calendar, handprint ornaments, or a paper plate Christmas craft, the joy of creating something with your hands is unmatched. Let your home come alive this season with handmade decorations that celebrate the spirit of togetherness and creativity. Happy crafting!
Conclusion
Paper plate Christmas crafts are a fantastic way to bring creativity and holiday cheer into your home. They are simple, affordable, and perfect for kids of all ages. These crafts allow children to explore their artistic side while creating festive decorations that can be cherished for years. Paper plates can be transformed into Rudolph faces, snowman wreaths, and even Santa Claus with just a few supplies and a little imagination. These projects are not just about crafting. They’re about making memories, sharing laughs, and adding a personal touch to your holiday decor.
We have more holiday projects for you to tackle. Check out our DIY Santa hat guide next!


