Last Updated on July 16, 2025 by Team Ideas24
Making DIY projects is so much fun and rewarding, especially when you can’t stop looking at your beautiful work after. There are times when the project is so perfect we want to put our signature on it.
If you are like me who loves making beautiful things out of wood (or leather for some), then you will love this wood branding iron project. A year ago I made a box for my shirt business which was perfect, except for the name on it. Since I didn’t want to spend any more on spray paint just for that small detail, I used markers. It was ugly. :(

Contents [show]
Crafting a Wood Branding Iron
Though “real” wood branding irons can be custom-ordered, some might not be up for spending quite a big amount of money for it – like me. This is why I got excited when I came across this DIY project.
Read on to see how to make a branding iron!
Materials
- Spray Adhesive
- Paper
- Brass Cabinet Knob
Tools
- Dremel Style Tool with small carving/engraving bits
- File/Sandpaper
- Locking Pliers
- Vise
- Computer and Printer
- Scissors, Utility Knife, X-acto Knife, etc
- Source of heat (campfire, stove burner, propane torch)
Steps
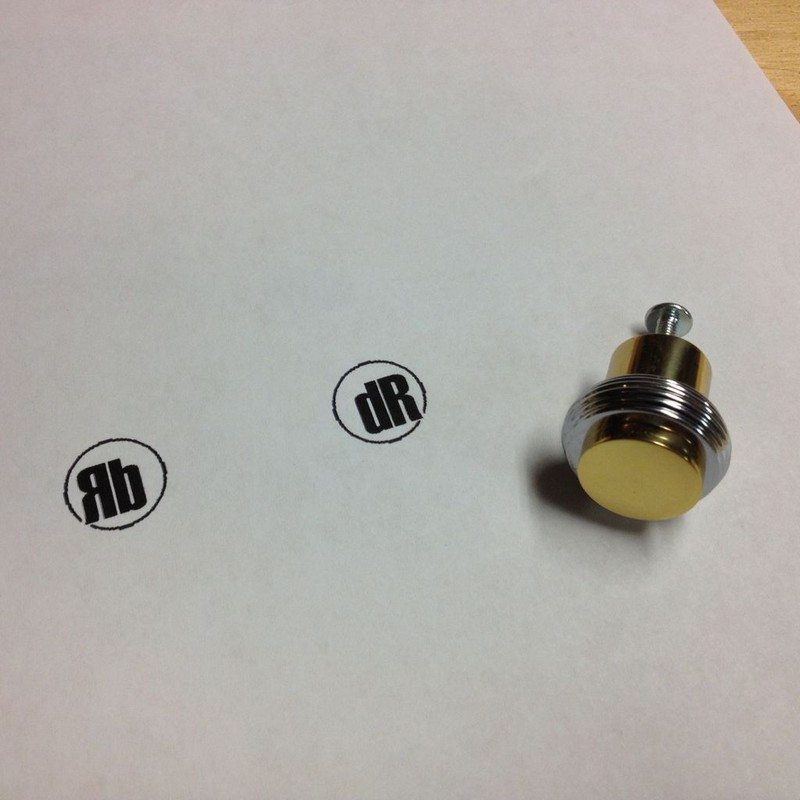
I wanted a fairly small brand with my initials. I laid it out on the computer using photo editing software. I made a mirror image of my design and printed it out.
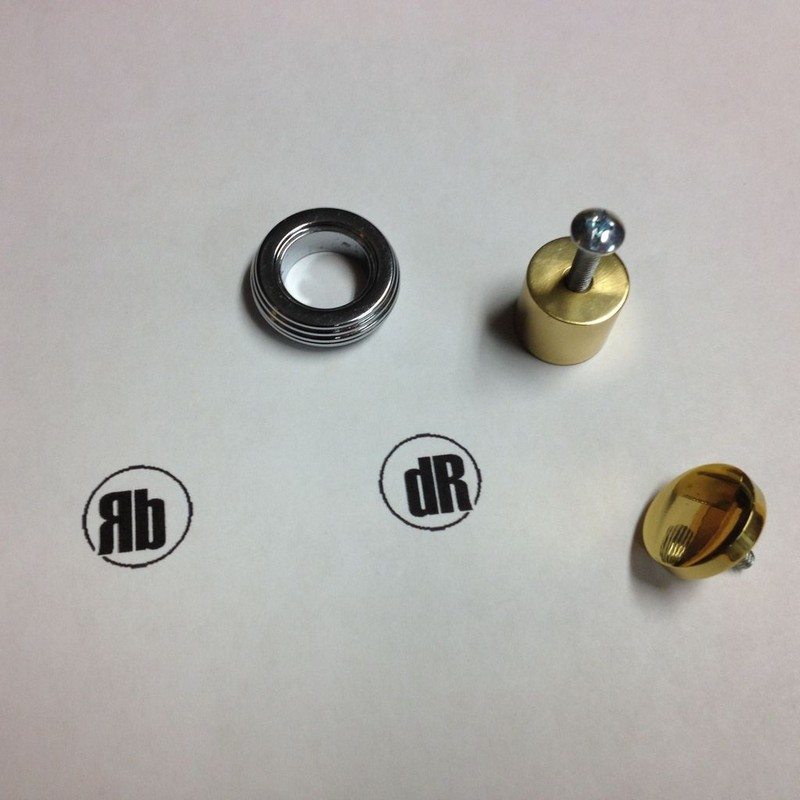
I found this little brass knob in the clearance bin at the hardware store. I wasn’t sure if it was solid brass or just brass plated, but I bought it because it was flat and round. It also had some threads cut into one end so I can eventually mount this on the end of a handle.
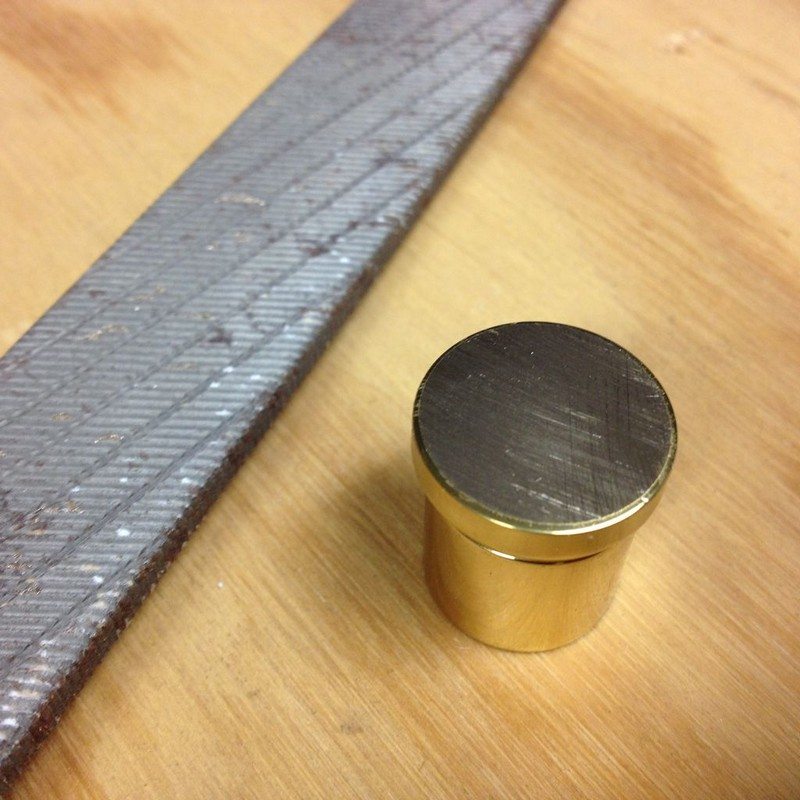
The flat end was slightly rounded, and to get an even brand mark, the brand needs to be perfectly flat. I used a flat file and flattened the top surface of the brass.
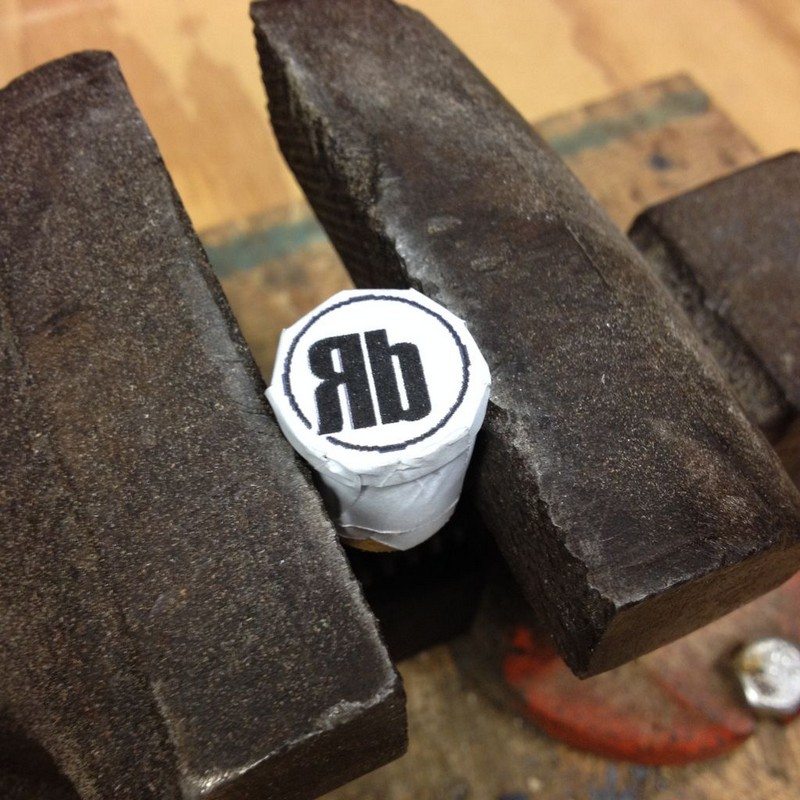
I flipped my paper template face down and placed the brass piece on top, marking it around the brass. I then used a spray adhesive and glued the brass to the template. I cut around the template, leaving a little extra length and just folded the excess around the brass.
I clamped the brass in a vise and used a Dremel with a flex shaft to engrave out all the white sections of the template.
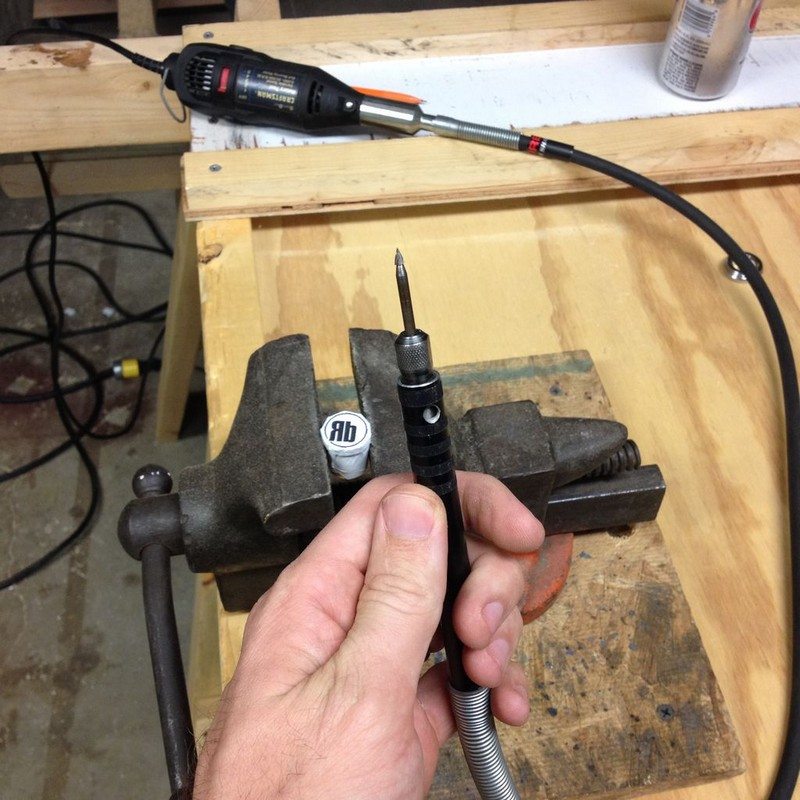
I carefully selected the pointed cutter and round cutter attachments for my Dremel tool to meticulously carve out the intricate design on my wooden branding iron.
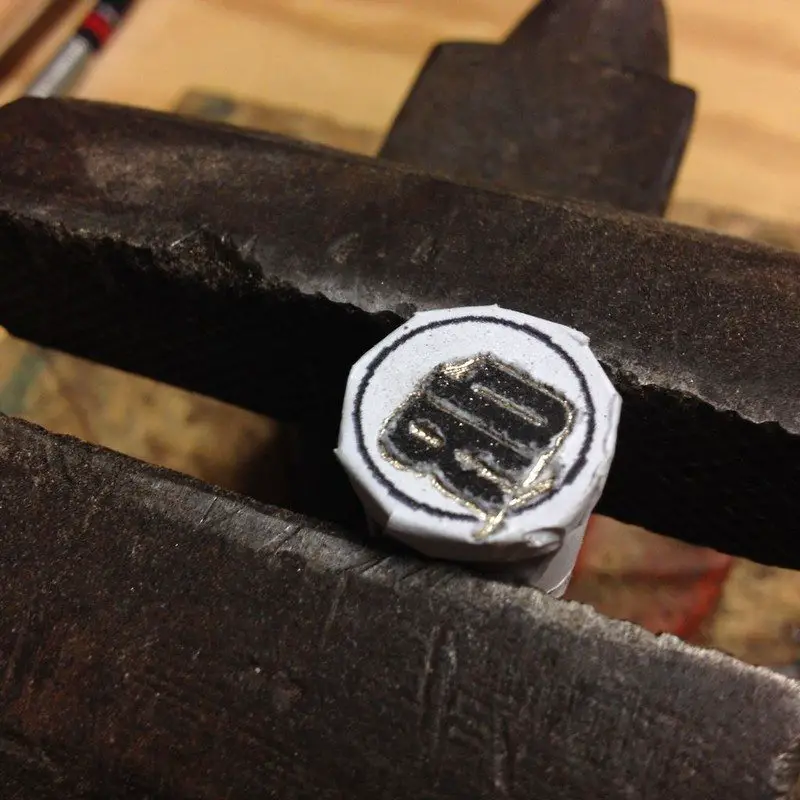
When using a Dremel tool to engrave your design onto a brass knob, it is crucial to proceed with caution and take your time. The process of carving intricate patterns or images onto metal requires precision and patience, as once material is removed, it is difficult – if not impossible – to add it back.
When it comes time to carve your design onto the brass knob, start slowly and steadily. Use a light touch and let the tool do the work, allowing the rotating tip to gradually remove small amounts of material. It is better to make several shallow passes than to try to engrave too deeply in one go.
This approach will help you maintain control and prevent any accidental slip-ups.
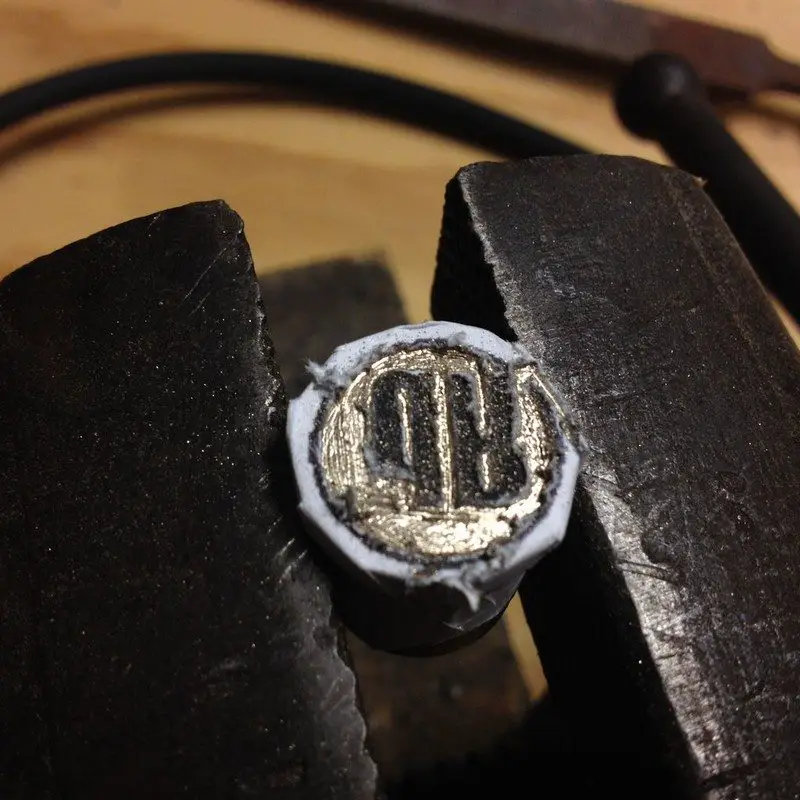
Before conducting the initial burn test, I made sure that the design had been engraved to the correct depth on the wood branding iron.
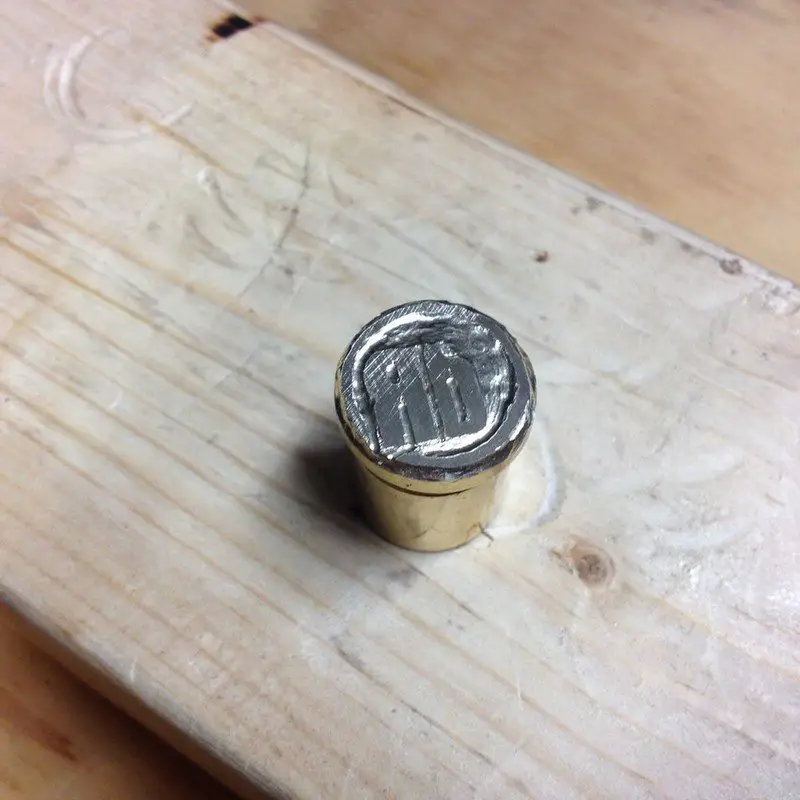
This step is essential to ensure that the branding process yields accurate and clear results. Engraving the design to the appropriate depth allows for optimal heat transfer during the burning process, resulting in crisp and well-defined impressions on the wooden surface.
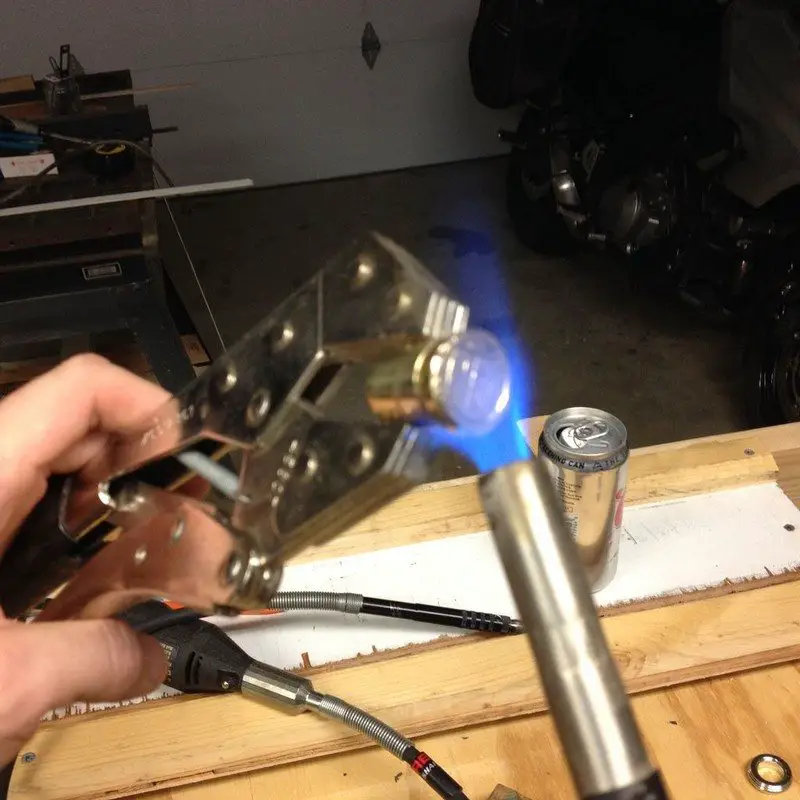
To test out the wood branding iron, I decided to secure it in a vise-grip for stability. I then ignited my propane torch to heat up the branding iron before applying it to a piece of scrap pine.
It is essential to practice heating the iron to the optimal temperature and ensuring even pressure when branding the wood to achieve a clean and distinct burn mark. This process requires precision and practice to perfect the technique.
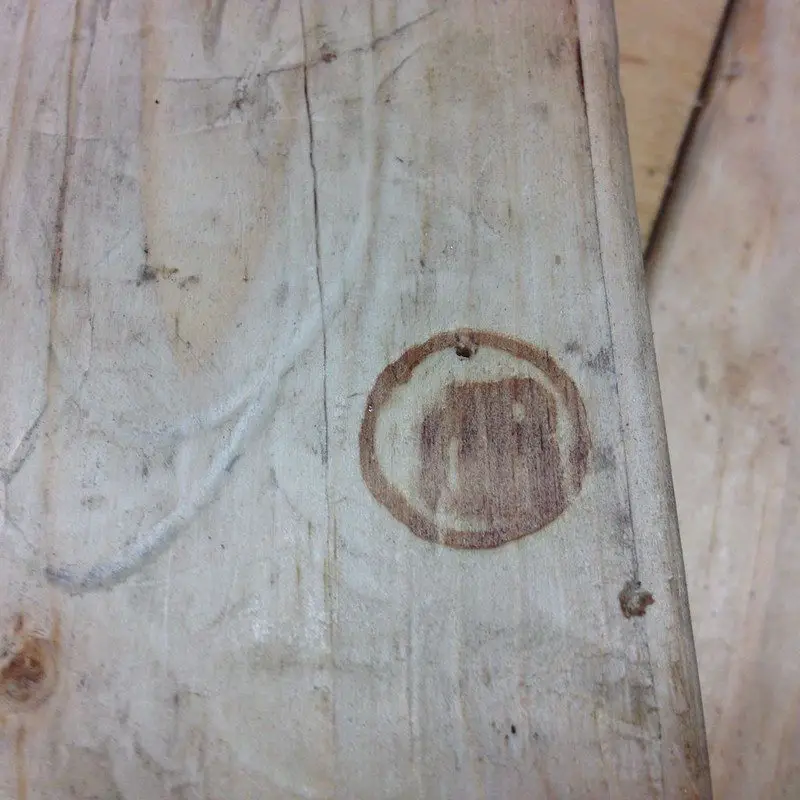
Here’s a breakdown of the first attempts:
- Not hot enough
- Uneven pressure
- Really uneven pressure & too hot/left on too long
- Slightly uneven
- Great burn – but the brand needs deeper cuts
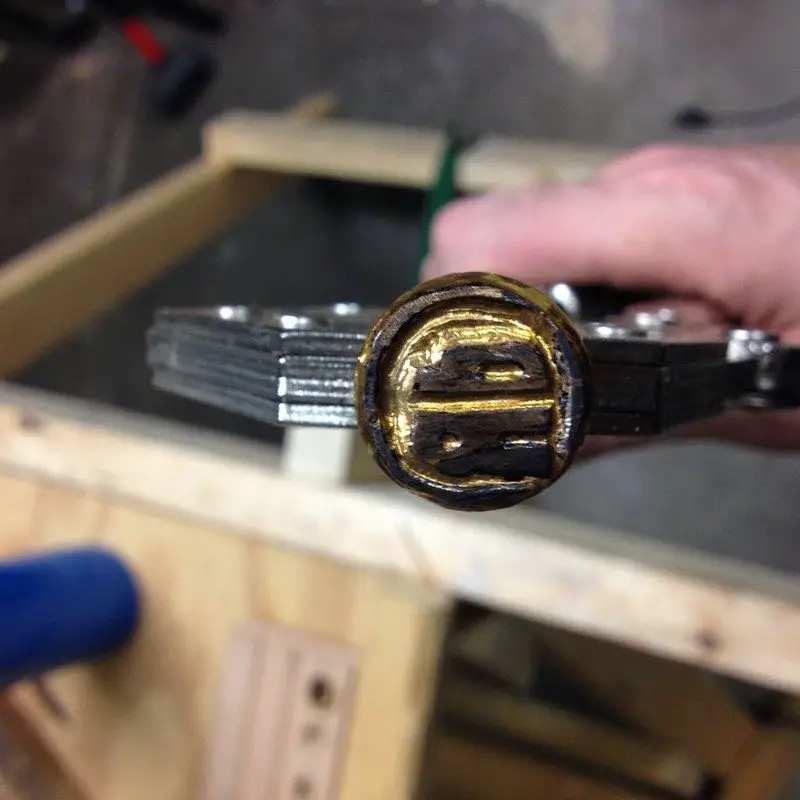
I let the brand cool down and clamped it back in the vise and made deeper cuts throughout. In the process, I also ended up making the letters narrower than I had originally wanted, but it still looks ok.
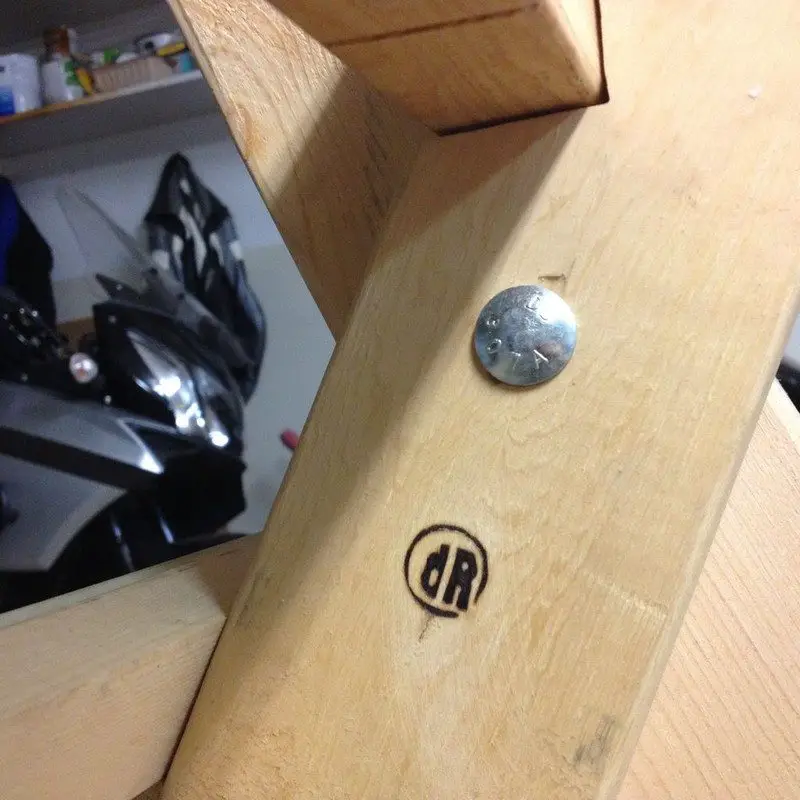
I tested the finished wood branding iron out on a scrap of oak flooring. The smoke from burning stains the surrounding wood on some of the darker burns. This staining can be removed by gently sanding it off with some sandpaper. Don’t sand too aggressively because you could end up sanding off your brand.
All said and done – design to final burn took me about 3 hours working at a leisurely pace. If someone would clean my garage so I could find my tools, these projects would probably take less time.
Now with just a relatively inexpensive door knob and a maximum of three hours, you can now beautifully “sign” your wood and leather projects! I can’t wait to have my DIY wood branding iron. How about you?
Materials Beyond Brass
When creating a DIY wood branding iron, explore materials other than brass for unique benefits and customization options.
Selecting the correct material for your wood branding iron is crucial for a clear mark on wood, leather, or other materials. Explore various materials if you want to make your own branding iron and their unique benefits.
- Steel
- Steel is a durable material used for wood branding irons because of its high heat capacity. It can withstand frequent use on wood and leather, but maintenance is necessary to avoid rust and corrosion.
- Aluminum
- Aluminum is a lightweight alternative to steel for branding irons, heating up quickly and evenly. It’s easier to handle but less durable, so better for occasional use. However, it degrades when exposed to constant heat, so consider other metals for regular use.
- Stainless Steel
- Stainless steel provides durability and corrosion resistance, ideal for long-lasting branding irons in any environment. Perfect for professionals seeking a lasting solution.
- Copper
- Copper heats up quickly and distributes heat evenly, making it ideal for branding intricate designs with precision despite wearing down faster than steel. Its excellent thermal conductivity ensures consistent results.
- Titanium
- Titanium branding irons are the top choice for durability and heat resistance. They are long-lasting, resistant to corrosion, and worth the investment for serious artisans.
By considering the unique properties of each material, you can select the best option for your DIY wood branding iron project. Whether you prioritize durability, heat conductivity, or weight, there’s a material that will meet your needs and enhance your creative endeavours.
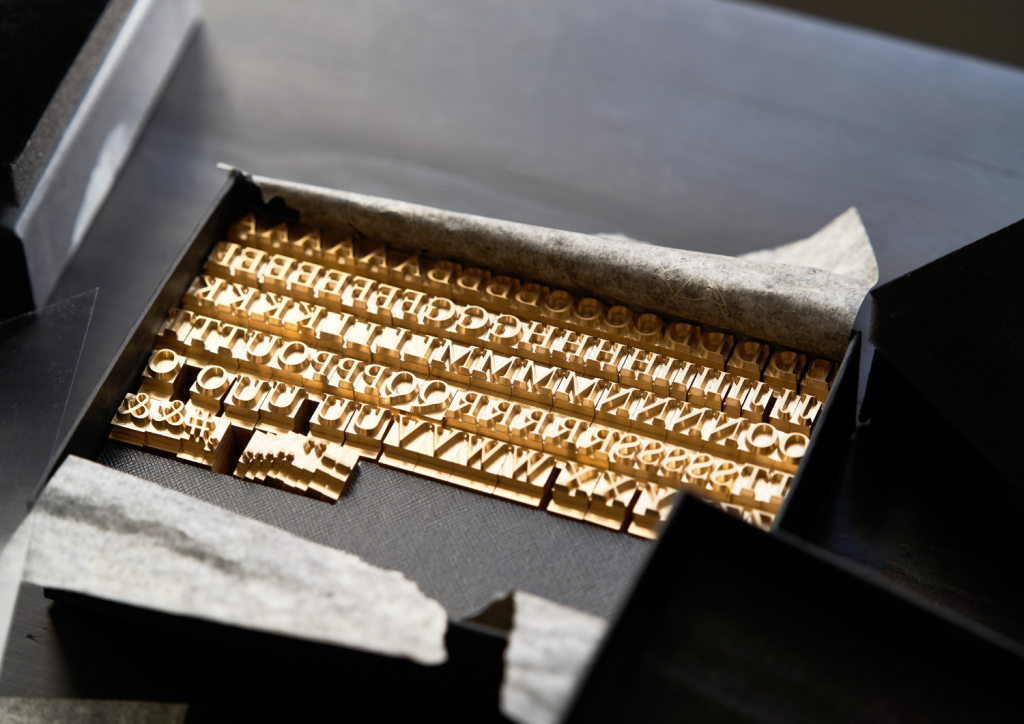
Creative Applications for Wood Branding Irons
Wood branding irons are not just for marking livestock or wood crafts anymore. Creative individuals have found new ways to use it to personalize ordinary objects, turning them into unique pieces of art. Its versatility allows for customization on a wide range of materials, sparking creativity in endless ways.
Here, we explore some of the its most imaginative applications , showcasing the tool’s adaptability and the creative potential it offers.
- Personalizing Culinary Creations
- It is a useful tool for chefs to personalize dishes with initials or designs on steaks, burgers, and bread, adding a unique touch and impressing dinner guests.
- Customizing Leather Goods
- Leather is commonly branded using a branding iron to personalize and add value to handmade goods like wallets, belts, and bags.
- Artisans use it to create unique designs or initials on leather products with precision.
- Decorating Wooden Furniture
- It isn’t just for small crafts; it can also be used to leave a lasting mark on wooden furniture.
- Whether it’s a signature on a handmade table or a decorative pattern on a wooden chair, a wood branding iron provides a way to customize furniture pieces uniquely.
- This technique can add character to home decor and signify ownership or artisanal quality.
- Marking Homemade Crafts
- Crafters use it to mark their creations like wooden frames or birdhouses, similar to a painter signing a canvas. This adds a professional touch and identifies the creator.
- Enhancing Packaging and Promotional Items
- It is a handy tool for small businesses to brand items like wood, cardboard, and paper with a logo, creating a unified customer experience and boosting brand recognition.
By exploring these creative applications, it’s clear that the potential uses for a branding iron are limited only by one’s imagination. Whether you’re a chef, artisan, furniture maker, crafter, or business owner, it offers a unique way to personalize and elevate your projects, products, and presentations.
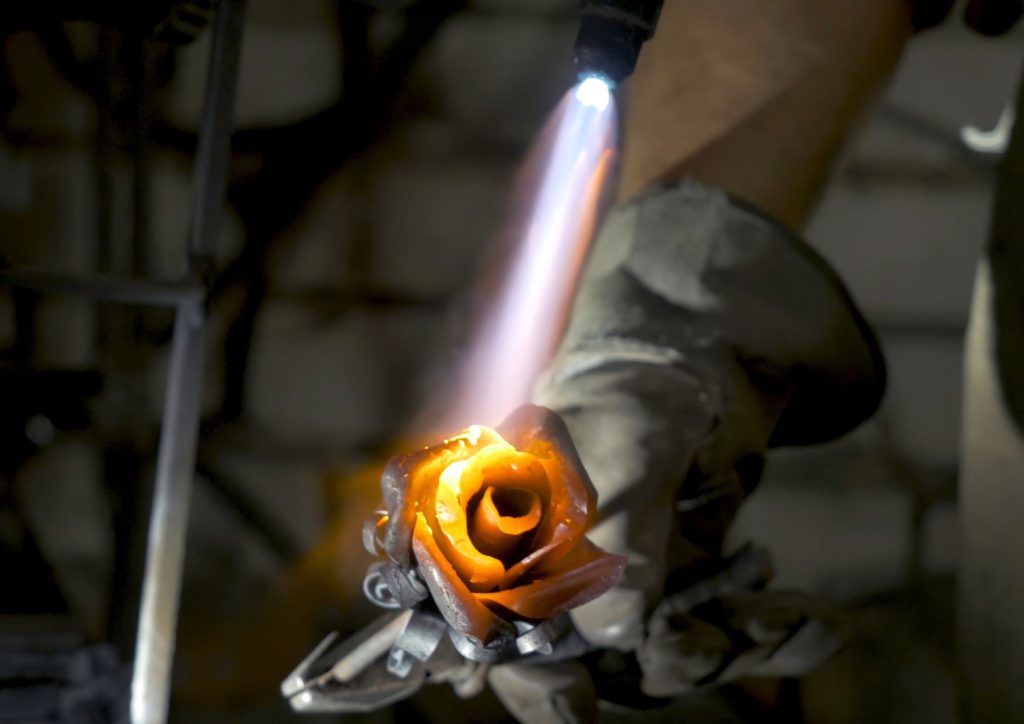
Essential Safety Tips for Using a Wood Branding Iron
Working with a wood branding iron can be a rewarding experience, but it’s essential to prioritize safety due to the high temperatures involved. Here’s how you can ensure a safe crafting session with your wood branding iron:
- Wear Appropriate Safety Gear
- Before you begin, equip yourself with the necessary protective gear. Heat-resistant gloves are vital to shield your hands from burns. Safety glasses or goggles can protect your eyes from sparks or flying debris during the branding process.
- Organize Your Workspace
- Create a safe working environment by organizing a clutter-free area. Ensure the workspace is well-ventilated, particularly if using a propane torch. This helps avoid inhalation of any harmful fumes. It’s wise to have a fire extinguisher or a bucket of sand within arm’s reach for emergencies.
- Handle the Iron with Caution
- When dealing with a heated wood branding iron, ensure careful handling. Use locking pliers or a robust handle to keep it secure and maintain a safe distance from the hot metal. Never leave it unattended while hot, and always allow it to cool completely before putting it away.
- Be Mindful of the Heat Source
- Exercise caution with your chosen heat source. If heating the iron over an open flame, such as a campfire or stove, ensure the area is clear of any flammable materials to prevent fires. Follow the manufacturer’s instructions meticulously if operating an electric branding iron.
- Practice on Scrap Materials
- To avoid mistakes and potential accidents, practice using the wood branding iron on spare materials before working on your main project. This practice run allows you to get comfortable with the pressure and heat required, reducing the risk of unexpected mishaps.
By adhering to these guidelines, you can enjoy the crafting process with a wood branding iron while maintaining safety and the quality of your work.
The Legal Side of Branding Iron Use for Logos and Designs
Using a wood branding iron to imprint your logos or designs can enhance the professionalism of your products and signify authenticity. However, navigating the legal landscape is essential to ensure compliance and avoid potential issues.
Copyright and Trademark Basics
Before applying any design, ascertain your legal rights to use it. Copyright laws protect original works of creators from unauthorized use, while trademarks safeguard logos, symbols, and phrases used in commerce to signify a particular source.
Unauthorized use of copyrighted or trademarked designs can lead to legal disputes and penalties.
Obtaining Permissions and Licenses
If the design you plan to use is owned by someone else, acquiring permission or the appropriate license is mandatory. This typically involves reaching out to the rights holder and possibly paying a licensing fee. Additionally, conditions might be set on how and where the design can be utilized.
Designing Original Works
To bypass potential legal pitfalls, consider crafting original designs. This not only avoids infringement issues but also helps build a unique brand identity. Once your design is complete, you can protect it by registering it as a trademark, ensuring your exclusive rights and preventing unauthorized use.
Responsible Use of Branding
Exercise care in how and where you apply your branding efforts. Misuse, such as branding items not intended for sale or misrepresenting product origins, can mislead consumers and breach trade description laws. Always ensure your branding truthfully reflects the product and its origin.
Record Keeping
Maintain comprehensive documentation of your design processes, any permissions or licenses obtained, and distribution details of branded products. These records are crucial for defending your rights in potential legal situations.
By grasping these legal considerations, you safeguard your creative projects, staying within legal parameters and protecting your brand’s integrity.
Precautions to Avoid Legal Issues with Branding
Branding is crucial for creating a unique identity for your business, but it comes with legal responsibilities. Here’s how to safeguard yourself against potential legal pitfalls when you make your own branding iron:
- Understand Intellectual Property Rights
- Understand intellectual property laws: Copyright protects original works, while trademarks safeguard symbols and logos. Misuse can have legal consequences.
- Obtaining Necessary Permissions
- Before using someone else’s work for your brand, make sure to get permission first. This may require reaching out to the copyright or trademark holder and possibly paying a fee. Be sure to carefully read any restrictions on how the design can be used.
- Design Your Own Graphics
- To avoid conflicts, create original designs to strengthen your brand’s identity and protect them by registering as trademarks to prevent unauthorized use.
- Mindful Application of Your Brand
- Be strategic with branding to avoid consumer protection law violations. Ensure branding accurately represents the product and its origin.
- Keep Thorough Documentation
- Maintain a detailed record of your creative processes, licenses obtained, and distribution points of branded products. This documentation can be essential in defending your rights if legal challenges arise.
By following these guidelines, you can help ensure your wood branding iron stay above board and legally secure.
What Precautions Should Be Taken to Avoid Legal Issues With Branding?
Adding a branding design to your products or artwork elevates their professional look and authenticity. Yet, navigating the legal aspects is vital to avoid pitfalls—particularly when using logos, text, or symbols.
Grasping Copyrights and Trademarks
Understanding copyrights and trademarks is crucial. Copyrights protect creative works, while trademarks safeguard symbols identifying product sources. Unauthorized use can result in legal consequences.
Obtaining Necessary Permissions
If you want to use a design owned by someone else, you must get their permission first. This usually involves contacting the copyright or trademark holder and possibly paying a fee. Usage rights will be specified in the agreement.
Crafting Original Designs
To avoid legal issues, create unique branding designs to protect your brand’s identity. Register your design as a trademark for added protection against unauthorized use.
Responsible Application
When using your designs, be mindful of their application. Misapplication—such as branding non-commercial items or inaccurately representing a product’s origin—can mislead consumers and potentially breach trade description laws. Ensure that your branding truthfully reflects the product’s nature and provenance.
Keeping Track of Your Creations
Keep detailed records of your design development, permissions/licenses, and distribution for your branded items. These records are essential for protecting your rights in case of legal disputes.
By paying attention to these legal considerations, you ensure that your branding efforts are compliant, safeguarding both your creative output and your brand identity.

Why is it Important to Document Your Branding Design Process?
Documenting your branding design process is crucial for several compelling reasons:
- Protect Your Intellectual Property
- By keeping a detailed record of your design journey, you create a clear timeline and evidence of your creative efforts. This can be invaluable if you face challenges around intellectual property rights. For instance, if another brand claims your design infringes on their trademark, comprehensive documentation can support your defense.
- By keeping a detailed record of your design journey, you create a clear timeline and evidence of your creative efforts. This can be invaluable if you face challenges around intellectual property rights. For instance, if another brand claims your design infringes on their trademark, comprehensive documentation can support your defense.
- Facilitate Legal Compliance
- Ensuring that you have obtained and documented all necessary permissions and licenses helps you avoid potential legal hurdles later. This includes permissions for fonts, images, or other design elements you incorporate. Regularly updated records provide proof of compliance and help maintain transparency in your business operations.
- Ensuring that you have obtained and documented all necessary permissions and licenses helps you avoid potential legal hurdles later. This includes permissions for fonts, images, or other design elements you incorporate. Regularly updated records provide proof of compliance and help maintain transparency in your business operations.
- Streamline Distribution Management
- Knowing exactly where your branded products have been distributed is essential for consistent brand messaging and quality control. Detailed records make it easier to trace and address any distribution issues, ensuring your brand maintains a positive reputation.
- Knowing exactly where your branded products have been distributed is essential for consistent brand messaging and quality control. Detailed records make it easier to trace and address any distribution issues, ensuring your brand maintains a positive reputation.
- Enhance Design Consistency and Collaboration
- Documentation doesn’t just protect your rights; it serves as a valuable resource for ongoing and future projects. Having detailed records allows designers to maintain consistency across different branding elements, ensuring that your visual identity remains cohesive. It also facilitates collaboration by helping team members get up to speed quickly on existing designs.
- Documentation doesn’t just protect your rights; it serves as a valuable resource for ongoing and future projects. Having detailed records allows designers to maintain consistency across different branding elements, ensuring that your visual identity remains cohesive. It also facilitates collaboration by helping team members get up to speed quickly on existing designs.
- Support Strategic Decision-Making
- By keeping track of your design process and decisions, you can reflect on what strategies have worked well and where improvements could be made. This insightful reflection can drive more informed strategic decisions, enhancing the effectiveness of your branding efforts over time.
- By keeping track of your design process and decisions, you can reflect on what strategies have worked well and where improvements could be made. This insightful reflection can drive more informed strategic decisions, enhancing the effectiveness of your branding efforts over time.
Thorough documentation provides a robust foundation for protecting your creative assets, ensuring legal compliance, maintaining brand consistency, and supporting strategic growth.
Conclusion
Crafting a DIY wood branding iron opens the door to endless possibilities for personalizing and branding a wide range of projects. It’s a fulfilling endeavor that combines creativity with functionality, allowing artisans to leave their mark on their work in a literal sense.
With the right materials and a bit of patience, anyone can create a custom branding iron that brings a professional touch to their crafts. For more creative ways to express yourself, check out our paper embossing guide!
FAQ
- What Safety Tips Should Be Followed When Using a Branding Iron
- Before you begin, equip yourself with the necessary protective gear. Heat-resistant gloves are vital to shield your hands from burns. Also, when dealing with a heated branding iron, ensure careful handling. Use locking pliers or a robust handle to secure the branding iron and maintain a safe distance from the hot metal. Following these tips should help you avoid burning any part of your body while working on your DIY woodbranding iron.
- What are the legal considerations when using a branding iron for logos or designs
- Before using any wood branding iron design, ascertain your legal rights to it. Copyright laws protect creators’ original works from unauthorized use, while trademarks safeguard logos, symbols, and phrases used in commerce to signify a particular source. If the design you plan to use is owned by someone else, acquiring permission or the appropriate license is mandatory. This typically involves contacting the rights holder and possibly paying a licensing fee.
- Why is it important to document your branding design process?
- You create a clear timeline and evidence of your creative efforts by keeping a detailed record of your design journey. This can be invaluable if you face challenges around intellectual property rights. For instance, if another brand claims your design infringes on their trademark, comprehensive documentation can support your defense. Ensuring that you have obtained and documented all necessary permissions and licenses helps you avoid potential legal hurdles later.


