Last Updated on June 19, 2025 by Team Ideas24
Photographs play an important role in everyone’s life. They connect us to our past. They remind us of people, places, stories, and feelings. They can help us to know who we are, who we once were – and maybe even tell us who we can become. Photographs are a tangible link to the past, to time and moment now lost.

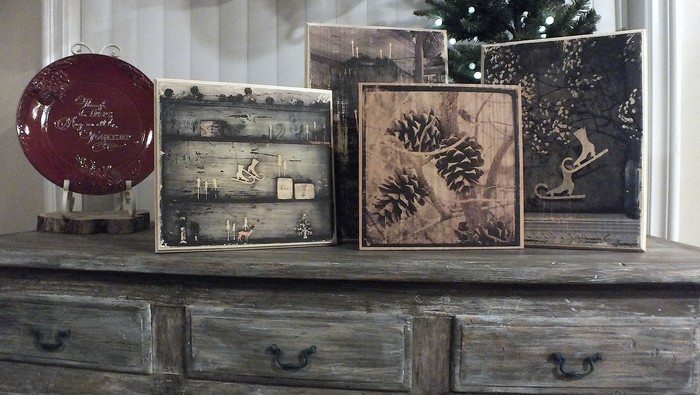
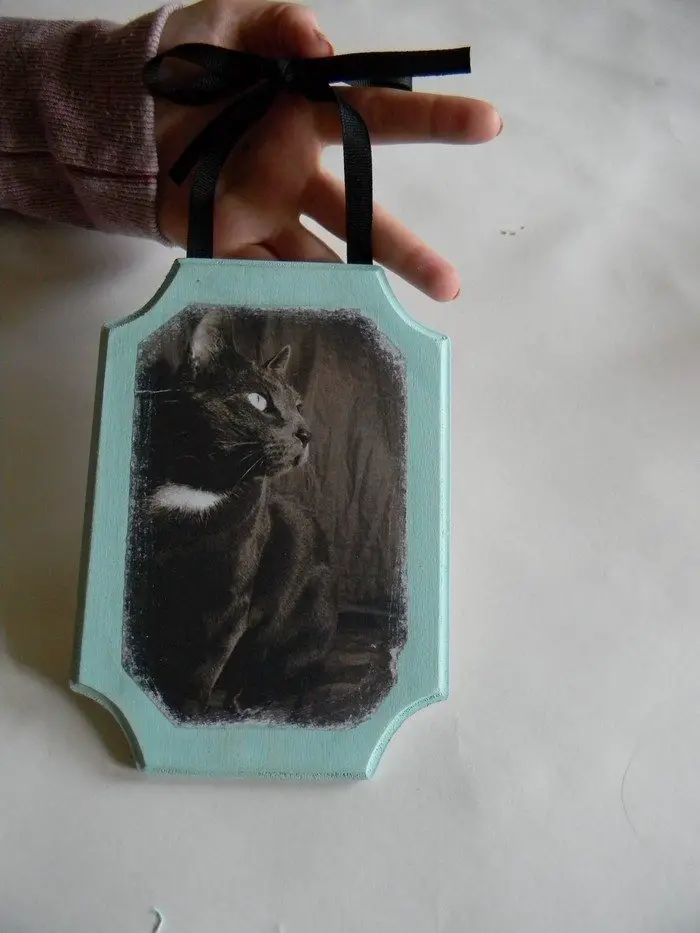
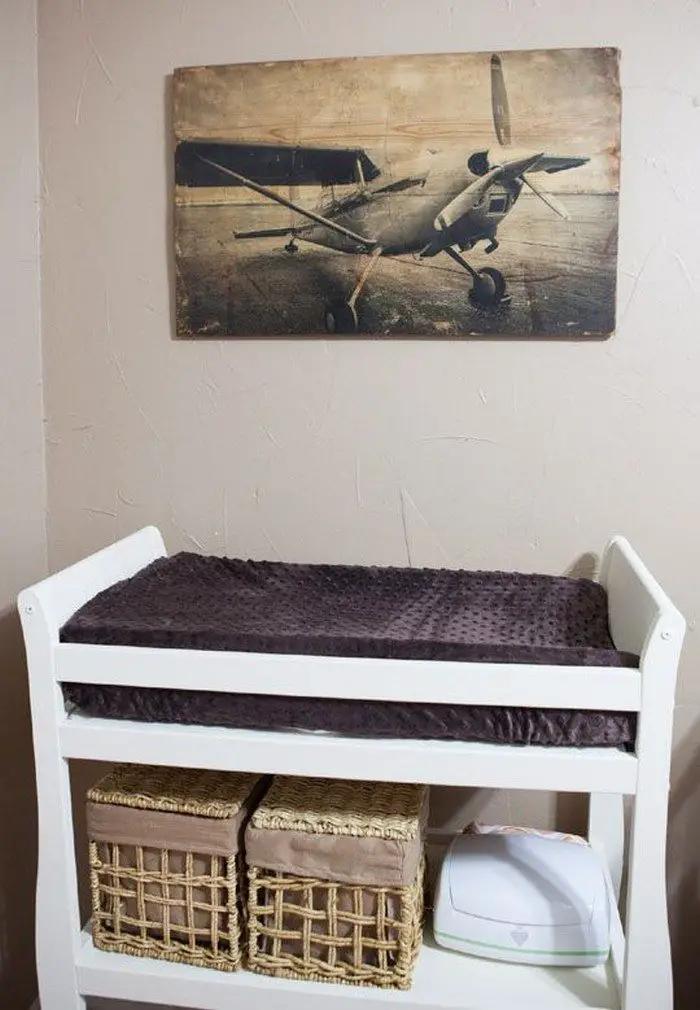
Have you thought about your next creative craft idea for your next craft night? Thinking of a new way to display memorable photos at home? How about transferring your photo to wood? Forget picture frames and use the timber you have at home instead and give that rustic touch to your living room. It’s perfect for making decorations, woodblock hang-ups, and wood coasters.
Transferring a photo to a piece of wood takes around 20 minutes. What we like more about this idea is that you can customize the look any way you want it — your imagination is the limit! You can paint the timber any color you like and even use special effects and patterns! And, of course, you can shape the wood to match the mood and content of your photo.
You can display your photos in a unique way by learning how to transfer photos to wood. Homemade photo projects are one of the easiest and most original ways to express yourself.
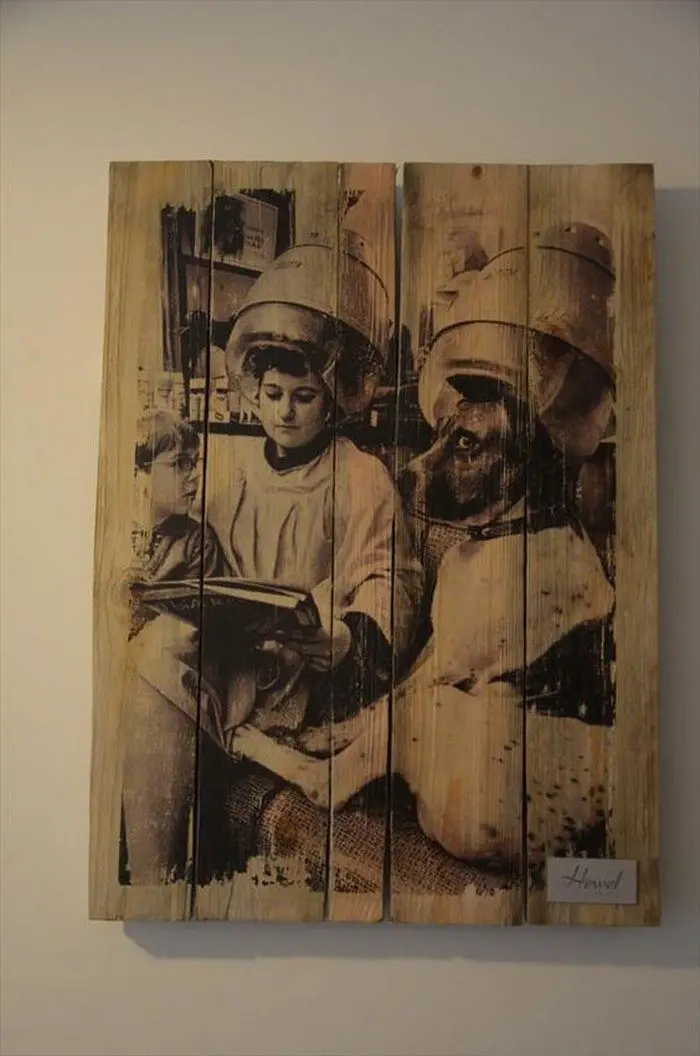
You can choose to incorporate a colored photo or print a black-and-white version. Text can be added to your design or you can choose to use only a photo. Depending on your preferences, you can print all the way to the wood’s edges or leave some space for breathing.
It’s entirely up to you how you create a unique and creative photo transfer on timber!
Contents [show]
What is a Mod podge?
Mod podge is a craft bond and sealant method we can use in a variety of ways. Even though using Mod Podge to transfer prints to wood takes a long period, it yields more detailed results.
Using this technique, you’ll be pleasantly surprised by the crispness and color of the photos. However, this method does require more than 24 hours due to the drying time required for Mod Podge.
Crafting DIY Pictures on Wood
Materials:
- Photo Print on Regular Paper
- Block of Wood
- Mod Podge
- Gel Medium
- Bowl of Water
- Rug/Cloth
Tools:
- Paintbrush
Step-by-Step Instructions
- Measure your photo against the block of wood and trim any excess paper. Make sure the image fits flat with no overhang. Mirror the print if it contains text because the transfer flips the image.
- Wipe the wood with a slightly damp cloth to clear dust. A clean surface lets the gel medium grab the ink evenly. Allow the timber to dry for a few minutes.
- Load a paintbrush with gel medium and spread a smooth, generous coat across the entire face of the wood. Keep the layer even to avoid ridges that can distort the picture.
- Place the photo face-down onto the wet gel medium. Starting at the center, press outward with your fingers or the cloth to push out air bubbles. The print must lie flat for a crisp transfer.
- Set the piece aside and let it dry undisturbed for at least eight hours. Overnight drying gives the best bond between ink and wood fibers.
- Fill a bowl with lukewarm water. Dip the cloth, wring out excess, and gently dab the paper until it darkens. Use light circular rubbing to roll away paper fibers. Work slowly so you don’t lift the ink layer.
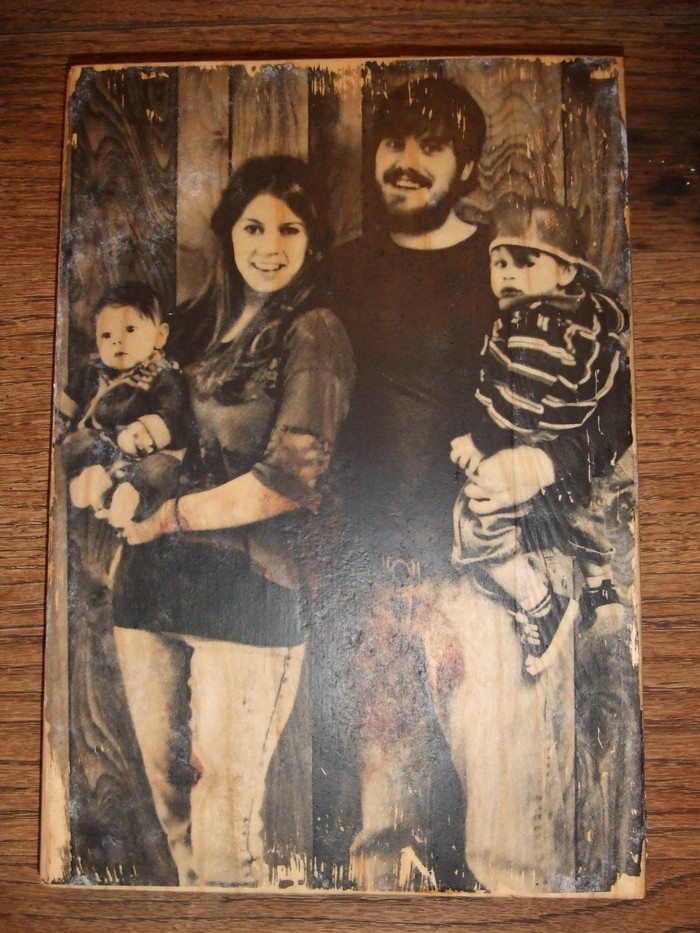
- Repeat dampening and rubbing until every trace of paper is gone and the image looks clear. Let the wood dry completely once more.
- Brush a thin coat of Mod Podge over the picture and exposed wood. This seals the print, adds a subtle sheen, and protects it from moisture. Let the finish cure, then display your new wood photo art with pride.
Choosing the Best Wood Species for Photo Transfers
Wood grain affects ink absorption and image clarity. Choosing the best species creates vibrant, long lasting DIY pictures on wood that hold attention.
Pine vs. Cedar
Pine works well for beginners because it sands quickly and has a creamy tone that brightens mid-tones. Its soft growth rings drink gel medium evenly, so blotches rarely form. Cedar adds warmth through natural reddish hues that complement sepia prints.
The aromatic oils resist warping in humid rooms, helping the image stay flat over time. Seal cedar promptly, though, because those same oils can migrate and dull blacks. Match rustic subjects with cedar and brighter family portraits with pine for the strongest visual punch.
Hardwoods: Maple, Oak, Birch
Dense fibers in maple and birch keep ink on the surface instead of soaking deep, yielding razor-sharp edges. Oak’s open pores give a subtle, textured backdrop, perfect for landscapes that need organic depth.
Hardwoods demand extra sanding to remove factory planer marks. Start with 120-grit and finish at 220-grit for a velvety touch. Avoid aggressive sanding near sharp corners because that rounds edges and shortens the print area. Apply a thin conditioner coat before gel medium to prevent uneven blotting on thirsty spots.
Softwoods for Rustic Effects
Softwoods like spruce and fir show pronounced year rings that create a charming weathered look once the paper lifts. The contrast between earlywood and latewood gives portraits a vintage feel without digital filters.
Always test a small scrap first. Some softwoods ooze sap when warmed by heat guns used to speed drying. Sticky spots repel sealant and can leave glossy pimples. Chill the boards overnight, wipe sap with mineral spirits, then proceed. Embrace knots if they fit your story; they frame focal points like natural vignettes.
Sourcing Sustainable Timber
Reclaimed barn boards save money and add history. Check for hidden nails with a magnet before trimming or you’ll nick your blades. Kiln-dried lumber from certified forests keeps moisture below fourteen percent, reducing late cracks that tear transferred ink.
Local sawmills often sell off-cuts perfect for coaster-size projects. Ask for straight grain and minimal twist. Choosing sustainable sources not only reduces waste but gives your artwork a compelling backstory you can share when gifting or selling.
Preparing High-Resolution Images for Crisp Results
Sharp prints begin with thoughtful file prep. Follow these steps and your second mention of DIY pictures on wood will look professional, not pixelated.
Understanding DPI and Print Size
Digital resolution determines how many dots end up inside every inch of timber. Target 300 DPI for pieces smaller than A4, and 240 DPI for larger wall art. Upscale cautiously; stretching beyond twenty percent often blurs fine lines.
Use editing software to check physical dimensions before hitting print. Remember ink spreads slightly inside lignin fibers, so a tad more resolution than paper printing safeguards detail.
Color Profiles and Ink Saturation
Set the document to sRGB if you use consumer inkjets because they render consistent blues and greens in that space. Boost mid-tone contrast by five percent to compensate for wood’s natural warmth.
Avoid heavy blacks that can appear muddy after Mod Podge cures. Test strips help calibrate saturation. Let each strip dry fully, then hold it over the chosen board under the light where the finished piece will live.
Mirror and Crop Techniques
Mirror the layer when text or directional elements matter. That simple step prevents words appearing backward after the face-down transfer. Crop with a rule-of-thirds overlay so important subjects sit away from edges that might lift during burnishing.
Leave at least a quarter inch bleed if you plan to sand borders for a distressed finish. Save the final file in high-quality JPEG or flattened PNG to avoid printer hiccups linked to layered PSDs.
Testing Prints Before Transfer
Print a low-ink draft on plain paper and press it against scrap lumber. Evaluate how shadows blend with grain. If faces look too dark, raise exposure slightly rather than lowering contrast. Once happy, switch to your final sheet.
Always use regular printer paper, not photo gloss, because thinner fibers release easier when soaked. Log settings in a notebook: printer model, paper type, DPI, and any tweaks. This record speeds future sessions and builds consistency across multiple boards.
Sealing and Finishing Techniques for Long-Lasting Prints
Protection keeps colors bright and fibers sealed. This final stage turns good work into heirloom-quality DIY pictures on wood that last for years.
Choosing the Right Sealant Formula
Matte Mod Podge gives a soft, non-glare surface ideal for cabins or boho décor. Gloss acrylic varnish deepens blacks and adds gallery sheen that suits modern loft walls. Water-based polyurethane balances toughness and clarity, making it perfect for coasters exposed to condensation.
Always read cure times. Rushing the second coat traps moisture and causes clouding. Stir sealants gently; shaking introduces bubbles that dry as tiny craters over important details.
Applying Even Coats Without Streaks
Work in a dust-free space. Load the brush lightly and move with consistent, overlapping strokes along the grain. Lay the board flat to prevent drips pooling at one edge. If streaks appear, switch to a high-density foam applicator for the next layer.
Lightly sand with 400-grit between coats once fully dry. Wipe residue with a lint-free cloth. Two or three thin coats outperform one thick coat because thin layers flex with seasonal humidity changes, avoiding cracks.
Adding Protective Wax or Varnish
Furniture paste wax over a cured poly layer adds a velvety handfeel and blocks fingerprints on dark areas. Apply with a soft cloth, let haze, then buff until slick. Outdoor pieces need marine varnish fortified with UV blockers. Brush edges and back first, then the face, so any runs fall on unseen surfaces.
For a farmhouse vibe, finish with food-safe beeswax blend, especially on photo-transfer cutting boards that display snacks. Reapply wax yearly for items in bright kitchens.
Maintenance Tips for Display Pieces
Keep framed boards out of direct sunlight to slow ultraviolet fade. Dust surfaces weekly using a microfiber cloth; avoid cleaners containing ammonia because they can dull sealants. In humid climates place small silica packs behind hanging pieces to absorb moisture sneaking through drywall.
If you spot lifting corners, inject a drop of clear craft glue, press with wax paper, and clamp gently for an hour. Regular care ensures your final mention of DIY pictures on wood stays rich and clear long after printing.
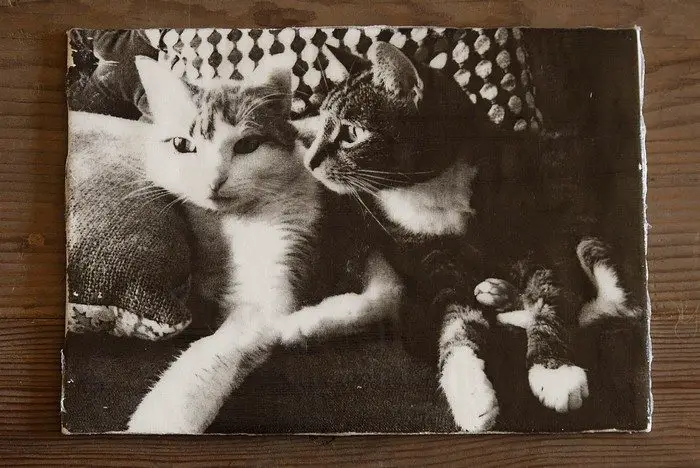
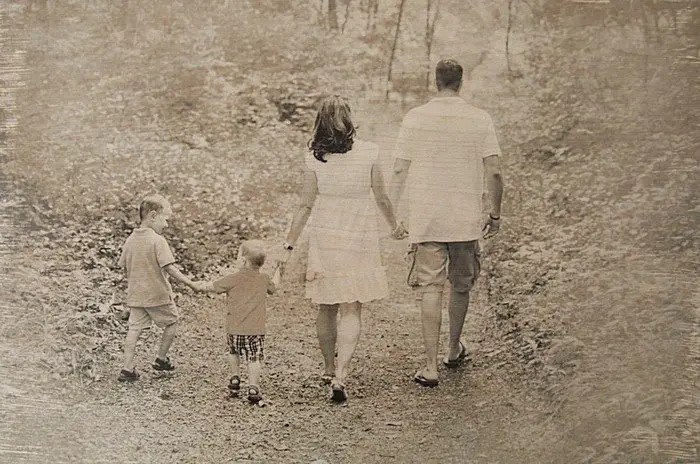
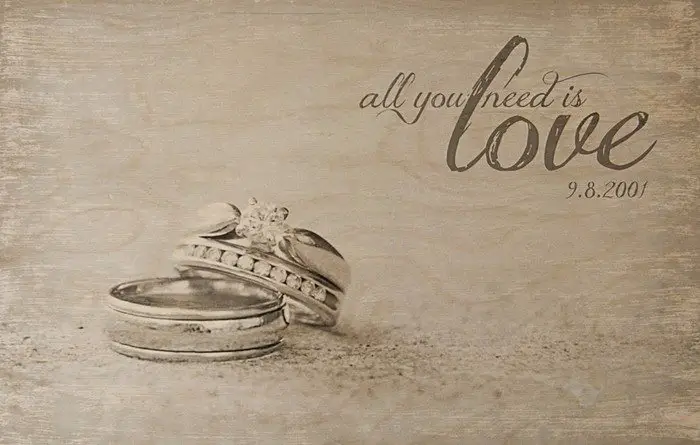
DIY Pictures on Wood Gallery
Click on any image to start the lightbox display. Use your Esc key to close the lightbox.![]()


Creative Display Ideas: Blocks, Coasters, and Wall Art
Displaying your finished transfers turns casual crafts into memorable décor. The ideas below show how DIY pictures on wood can enrich any room.
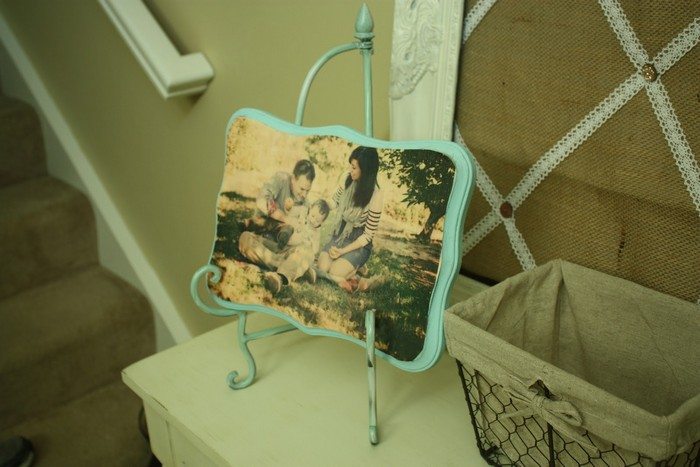
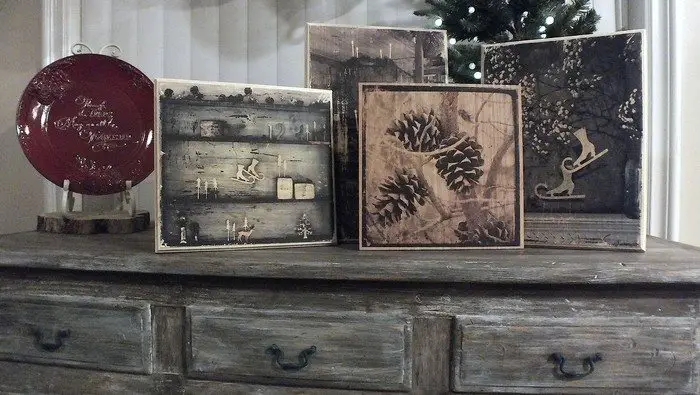
Chunky Photo Blocks for Shelves and Desks
Thick off-cut blocks create instant standing frames, no hardware needed. Sand edges smooth, add a clear wax, and the grain frames the image with natural contrast. Stack two or three heights for a tiered vignette that draws the eye.
Attach felt pads underneath to prevent scratches on glass or metal surfaces. Rotate a fresh block each season to keep stories alive and encourage guests to pick them up. DIY pictures on wood look sculptural in this format, making small spaces feel curated, not cluttered.
Everyday Coasters That Protect and Impress
Coasters balance form and function, showcasing art while guarding tabletops. Cut uniform squares from maple or birch for durability, then bevel edges for a finished look. Seal with food-safe polyurethane so condensation beads instead of seeping into fibers.
Arrange four designs that share a color theme, or mix travel shots for conversation starters at dinner parties. Tie a set with twine and a kraft tag for an easy handmade gift. People love practical keepsakes, and DIY pictures on wood coasters satisfy that need beautifully.
Gallery-Style Wall Grids
Create a modern gallery by mounting nine small squares in a tight grid. Use painter’s tape to mark equal spacing before driving saw-tooth hangers. Keep images in black and white if your room already has bold color.
For renters, hang panels with repositionable strips so walls stay intact. The pattern feels cohesive even when photos vary in subject because the uniform lumber anchors them visually. Visitors will lean closer, discovering details that printed paper alone could not capture. This layout repeats DIY pictures on wood yet avoids monotony through symmetry.
Floating Ledge Installations
A reclaimed timber ledge lets you swap art fast. Route a shallow groove along the top so thin boards sit upright without frames. Stagger heights for an organic skyline effect. Combine family portraits with typography prints to break rhythm and guide conversation.
Lighting matters here. Place the shelf opposite a window or add an LED strip beneath for subtle upward glow that highlights texture. When you crave change, slide pieces out and introduce fresh DIY pictures on wood without picking up a drill.
Seasonal Centerpieces and Gifts
Small rounds cut from fallen branches shine as rustic ornaments. Drill a tiny hole, thread jute, and hang them on holiday garlands. For spring weddings, lean photo slices against table numbers to personalize each reception desk. Larger slabs become welcome signs when you transfer a surname and a floral graphic.
Coat both sides with outdoor spar varnish if the display lives on a porch. Personalized décor feels heartfelt, and guests often ask how you made it. Each request spreads the idea of DIY pictures on wood to a new audience.
Conclusion
Building photo blocks, coaster sets, wall grids, ledges, and seasonal décor proves that wood transfers fit any style or occasion. Grain patterns add warmth you cannot get with metal or plastic frames. Simple finishes keep colors bright and surfaces protected for years. Your creativity decides whether the piece feels rustic or refined. Start experimenting today and turn ordinary planks into artwork celebrating your favorite memories.
If you liked this project, you might also like to view How to make Photo clipboards


