Last Updated on December 4, 2024 by Team Ideas24

Snow, ice and Christmas often go together, although why it should is a bit strange. There is no snow or ice in the Christmas story told in the Bible.
While Christmas was taken over from pagan winter solstice festivals in Europe, it was the Victorians who gave us our ‘traditional’ Christmas in Europe and the USA.
At the start of the Victorian era, Britain was caught in a mini ice age. During this time, in London, winter fairs were held on the frozen River Thames! Since then, we’ve associated snow and ice with the Christmas holidays.
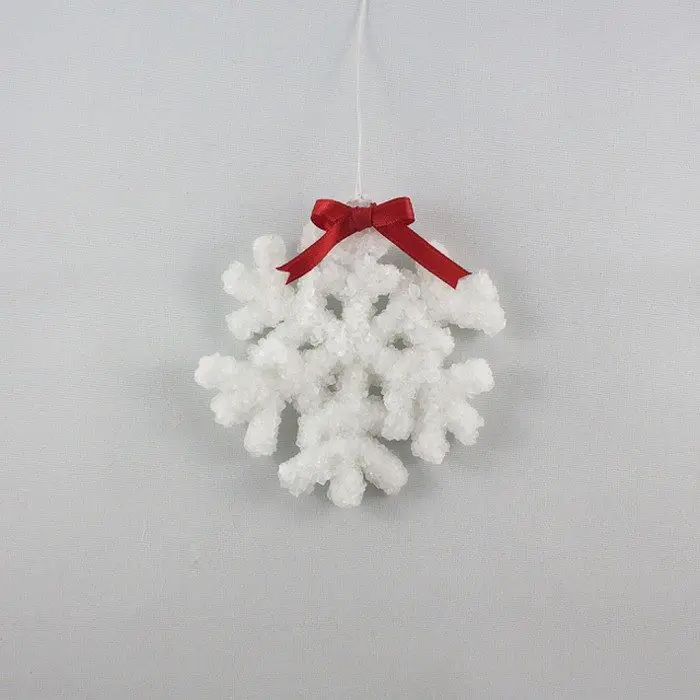
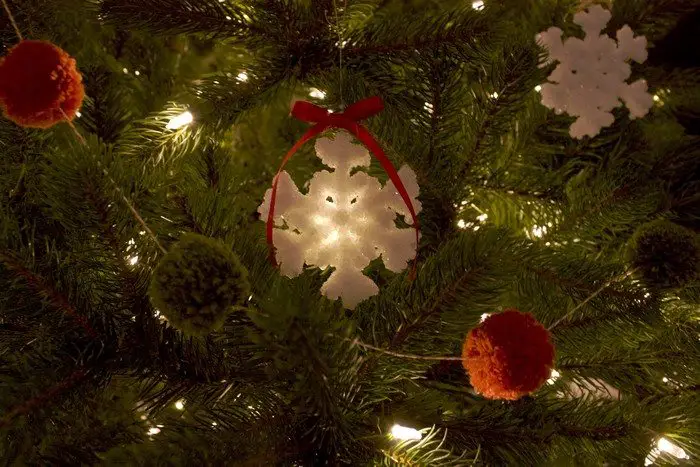
Want some real-looking snowflakes on your Christmas tree? That’s easy with this fantastic DIY decor idea!
Seems like a true snowflake isn’t it? This DIY ornament is made from pipecleaners and Borax. It’s a fascinating project you can do, even with the big kids! Just don’t forget to let them know what a Borax is and that it shouldn’t be consumed or inhaled. Other than that, this DIY decor idea should be safe for you and the family. :)

You can also create other shapes aside from snowflakes, like hearts or letters which will also make pretty decorations!
Aside from the Christmas tree, where do you think these cute little borax snowflakes can be displayed?
Get more ideas from our album and learn how to make them by heading over to the tutorial by Feathering My Nest below!
Contents [show]
Creating Borax Snowflakes
Materials:
- Pipe Cleaners
- String
- Boiling water
- Borax (3 tbsp for every cup of water)
- Container to hold enough water to completely cover the snowflake
- Ribbon
- Paper towel
- Skewers
- Spoon
Tools:
- Scissors
Steps:
Prepare the Snowflake Shape:
- Cut the pipe cleaners into sections to form a snowflake.
- Twist three equal-length pieces together at their centers to form a six-pointed star.
- Add smaller sections to the ends of each arm for extra detail, twisting them securely.
Attach the String:
- Tie a piece of string to one arm of the snowflake.
- Leave enough string to tie the other end to a skewer. This will suspend the snowflake in the solution.
Mix the Borax Solution:
- Heat water until it reaches boiling point.
- Pour the boiling water into the container. Use enough water to completely submerge the snowflake.
- Add borax to the water (3 tablespoons per cup) and stir with the spoon until the borax dissolves. Some residue may remain, which is fine.
Suspend the Snowflake:
- Tie the loose end of the string to the skewer.
- Lower the snowflake into the borax solution, ensuring it doesn’t touch the sides or bottom of the container.
- Rest the skewer across the top of the container to hold the snowflake in place.
Allow Crystals to Form:
- Leave the container in a safe, undisturbed spot overnight.
- Crystals will begin forming as the solution cools and the borax adheres to the pipe cleaner snowflake.
Remove and Dry:
- Carefully lift the snowflake out of the solution using the skewer.
- Place it on a paper towel to dry completely.
Add the Finishing Touch:
- Attach a ribbon to one of the snowflake’s arms for hanging.
- Your borax snowflake is now ready to be displayed!
Click on any image to start lightbox display. Use your Esc key to close the lightbox. ![]()


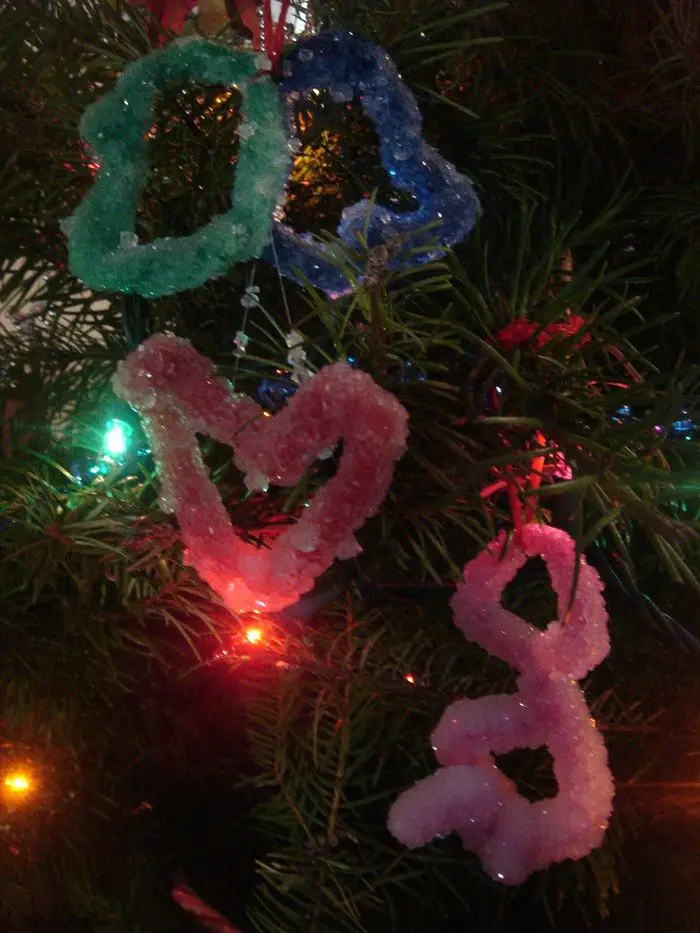


Tips for Creating Perfect Crystal Borax Snowflakes
Making borax crystal snowflakes is a delightful DIY project that yields magical, glittering results. A few insider tips can make the process smoother and ensure your creations turn out stunning.
Choose the Right Borax Product:
Start by picking up the correct borax from the laundry aisle of your local grocery store. Make sure it’s pure borax powder, not a borax-based soap or cleaning product. These alternatives contain additives that can interfere with crystal formation, so choosing the right product is key.
Prioritize Safety with Boiling Water:
Boiling water is essential to dissolve the borax and create the solution needed for crystal growth. Since borax is not food-safe and boiling water poses a burn risk, ensure adult supervision if children are involved. Use heat-resistant containers and handle them with care. Stir cautiously to avoid splashing the hot solution.
Alternative Crystal Growth Options:
If borax is unavailable, you can still grow crystals using common kitchen staples like sugar or salt. Dissolve either in boiling water until no more can dissolve, creating a saturated solution. Salt crystals tend to be chunkier, while sugar crystals are finer. Keep in mind that these alternatives might take longer to form, so patience is essential.
Perfecting Your Snowflakes:
To get the best results, ensure the solution stays undisturbed while the crystals grow. Avoid touching or moving the container once the snowflake is submerged. If you’re making multiple snowflakes, give each one enough space so the crystals don’t overlap or stick to each other.
Have Fun and Experiment:
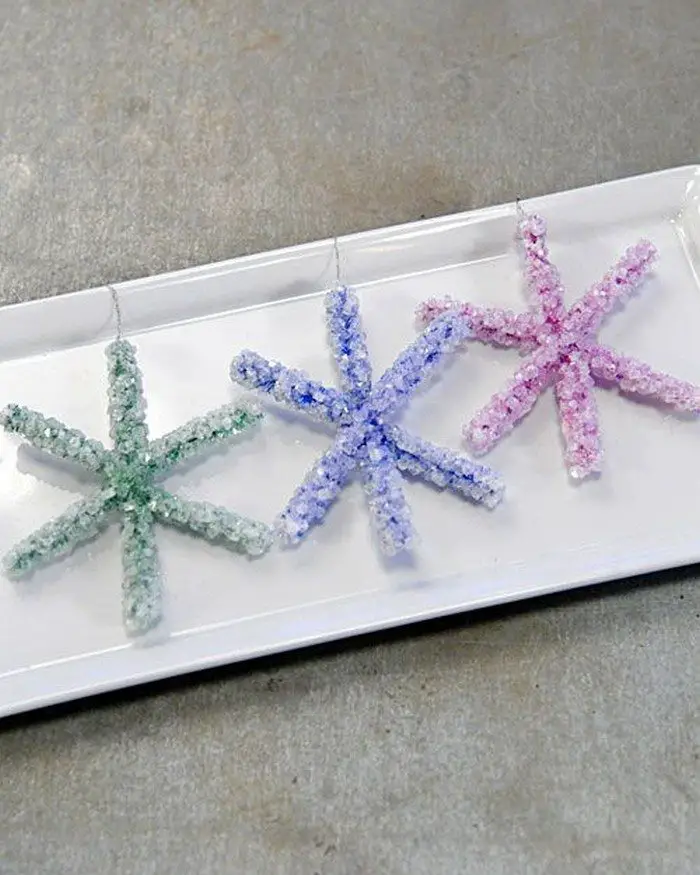
Try using colored pipe cleaners or adding a few drops of food coloring to the solution for custom designs. You can also vary the size and shape of your snowflakes to create a unique collection.
You will achieve beautiful, sparkling borax snowflakes that make perfect decorations or gifts with these tips. Enjoy watching science and creativity come together in this magical project!
How to Store Borax Crystal Snowflakes Safely
Borax crystal snowflakes are delicate treasures that can last for years with proper care. To preserve their brilliance and protect them from moisture, which can dull their sparkle or cause a white powdery layer to form, follow these storage tips:
Wrap Each Snowflake Carefully
Gently handle each borax crystal snowflake to avoid breaking the fragile crystals. Wrap them individually in soft tissue paper or a paper towel. This step creates a protective barrier to prevent scratches and minimize the risk of damage during storage.
Use Zipper-Top Bags
Place each wrapped snowflake into a zipper-top plastic bag. Choose bags that are the right size to avoid crushing the snowflake. The airtight seal of these bags offers an extra layer of protection, keeping moisture out and the crystals pristine.
Add Desiccants for Moisture Control
Include a small silica gel packet inside each bag to absorb any residual moisture. These packets are often found in shoe boxes or electronic packaging, but you can also purchase silica gel beads from craft stores or online. If silica gel is unavailable, dried rice can be used as a substitute for controlling humidity.
Seal and Store Properly
Ensure each bag is sealed tightly to maintain an airtight environment. Store the bags in a cool, dry place, such as a drawer or a storage box, away from direct sunlight or areas with high humidity, like basements or attics. Avoid exposing the crystals to extreme temperature fluctuations, as this can weaken their structure.
Extra Tip for Long-Term Display
If you want to display your borax crystal snowflakes for extended periods, avoid hanging them in areas with high humidity, such as near windows or bathrooms. Consider placing them in shadow box frames or under glass domes to showcase their beauty while keeping them protected.
By following these careful storage methods, your borax crystal snowflakes will remain as dazzling as the day they were made, ready to bring holiday charm to your home year after year.
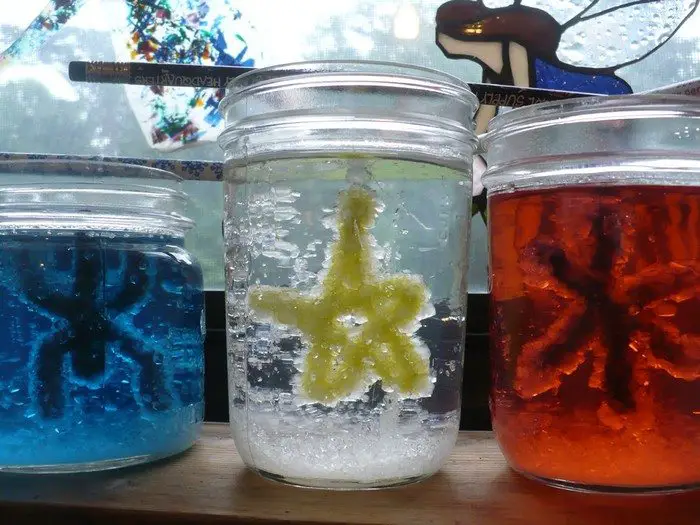
Hanging a Borax Snowflake in a Jar With a Pipe Cleaner
Creating a borax crystal snowflake involves carefully suspending your pipe cleaner snowflake in a jar filled with a borax solution. This step is crucial for ensuring the crystals form evenly and beautifully. Follow these simple instructions to position your snowflake correctly in the jar.
1. Attach a String to the Snowflake
Tie a piece of string securely to one arm of your pipe cleaner snowflake. The string should be long enough to allow the snowflake to hang freely in the jar without touching the bottom or sides. A snug knot will ensure the snowflake remains steady during the crystal formation process.
2. Prepare the Skewer or Pencil
Tie the loose end of the string to a skewer or pencil. The skewer will rest across the top of the jar, suspending the snowflake in the borax solution. Adjust the length of the string so the snowflake hangs in the center of the jar, fully submerged but not touching the container’s surface.
3. Fill the Jar with Borax Solution
Prepare a saturated borax solution by dissolving 3 tablespoons of borax for every cup of boiling water. Pour the solution into the jar, ensuring there is enough to completely cover the pipe cleaner snowflake. Stir the mixture until the borax is mostly dissolved.
4. Position the Snowflake in the Jar
Carefully lower the pipe cleaner snowflake into the jar, using the skewer to keep it suspended. Ensure it hangs straight and doesn’t lean against the sides. This positioning allows the borax crystals to form evenly across all parts of the snowflake.
5. Leave It Undisturbed
Place the jar in a safe, undisturbed location where it won’t be bumped or moved. Allow the snowflake to sit in the solution overnight. As the water cools, borax crystals will form on the pipe cleaner, creating your stunning borax crystal snowflake.
Alternatives to Borax
While borax is a popular choice for creating crystal snowflakes, there are other materials that can be used to achieve similar results. These alternatives may take longer to form crystals, but they provide a safe and creative way to experiment with crystal growth.
Sugar Crystals
Sugar is a common household ingredient that can be used to grow crystals. Dissolve sugar in boiling water until it reaches a saturated state, meaning no more sugar can dissolve. Submerge your pipe cleaner snowflake in the solution, and allow it to sit undisturbed for several days. Sugar crystals tend to form smaller and more delicate patterns, giving your snowflake a unique look.
Salt Crystals
Table salt or Epsom salt can also be used as an alternative to borax. Create a saturated solution by dissolving salt in hot water and stir until the water cannot dissolve any more. Hang your snowflake in the solution and leave it in a warm location. Salt crystals are chunkier and can produce a frosty, icy effect on your snowflake.
Alum Crystals
Alum, a type of chemical commonly used in pickling, is another excellent alternative for crystal formation. You can find alum powder in grocery stores or online. Dissolve it in hot water, following the same process as with borax, and let your snowflake sit in the solution overnight. Alum crystals grow faster and often result in a smooth, glass-like finish.
Baking Soda Crystals
For a safer option that’s ideal for younger children, baking soda can be used. Create a saturated solution with hot water and baking soda, then place the snowflake in the solution. Although the crystals may take longer to form, they create a fine, powdery appearance that resembles snow.

DIY Experimentation with Other Salts
Other types of salts, such as rock salt or sea salt, can also be used for crystal-growing experiments. These salts can produce interesting textures and patterns, making them a fun alternative to try if borax isn’t available.
Each of these alternatives offers a unique aesthetic for your crystal snowflake project. While they may not form as quickly or as uniformly as borax, they allow for safe and creative exploration of crystal science. Choose the option that best fits your needs and enjoy the process!
Conclusion
Creating borax snowflakes is a simple and enjoyable way to combine creativity with science. With the right materials and careful steps, you can craft stunning decorations that sparkle with intricate crystal patterns. Enjoy displaying your handmade snowflakes year after year as a reminder of this fun and rewarding project.
FAQ: Borax Snowflake
- How long does it take to grow a borax crystal snowflake?
- Growing a borax crystal snowflake is an engaging and educational activity that typically requires some patience. The crystallization process unfolds overnight, allowing ample time for the crystals to form and create beautiful patterns.
- What are the key concepts involved in the borax crystal snowflake project?
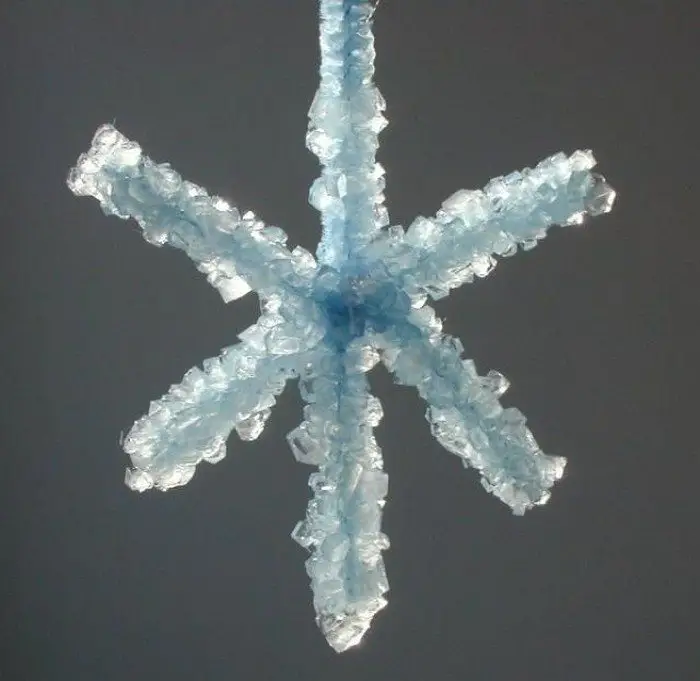
- Crystallization involves the formation of solid crystals from a homogeneous solution. In this project, borax (sodium borate) is used to form crystal structures around a snowflake-shaped frame, typically made from pipe cleaners. When a super-saturated borax solution cools, the borax molecules start to settle out of the liquid, creating intricate crystal patterns that cling to the surface of the frame.
- What is the experience level required for the borax crystal snowflake project?
- The borax crystal snowflake project is perfect for those just starting out, making it ideal for beginners. With easy-to-follow steps and minimal prior knowledge required, this activity is user-friendly for all ages. Whether you’re new to crafting or just looking for a simple yet rewarding project, this is a great choice to dive into.
- What are the final steps after the crystallization process is complete?
- Once the snowflake is crystallized, you can hang it as a decoration or display it in a window to catch the light.
- What should be done if the borax doesn’t fully dissolve?
- It’s normal for some borax to settle at the bottom of the jar if it doesn’t completely dissolve.
- What is the role of each material in the process?
- Pipe cleaners form the snowflake structure; string and pencil suspend the snowflake in the solution; borax and water create the crystallizing medium; the jar holds the solution, and food coloring can add a tint to your snowflake.
We have more DIY Christmas decorations. Check out our DIY Santa hat guide!


