We were planning my niece’s 7th birthday and my sister-in-law was looking for cute birthday souvenirs she could hand out to guests. She wanted something personalized and being an avid DIYer, she wanted to make them by hand.
Her first option was Dreamcatchers but given the 2-day timeframe, she couldn’t possibly finish everything on time.
One morning, my niece came to her with a cute macramé keychain. She asked her mom if it was something she could do because she really like it. She said she wanted to give them out to her friends.
Contents
Learn to Create a DIY Macramé Keychain
My sister-in-law immediately sat down in front of her laptop and searched the Internet for a tutorial. We all went to work, the project turning into a family affair.
She did make a statement with macramé keychains! The guests were absolutely head over heels for them. If you’re hunting for the cutest and most practical gift, you need to give this a whirl. It’s a total crowd-pleaser! Not to mention, it’s the perfect activity to do with your little ones.
Simple Steps for Making Macramé Keychain
Macramé keychains are trendy little accessories that are perfect for adding a touch of boho flair to keys, purses, or backpacks, and they’re super easy to make. With just a few supplies and a little bit of patience, you can whip up a whole bunch of these cute keychains in a breeze.
Start by gathering all the materials, then by following these seven simple steps to create your macramé keychain. Don’t worry if you’re a beginner – this project is easy enough for anyone to tackle!
Materials
- Keyring
- Macramé cords
- Embellishments (optional)
Tools
- Scissors
- Pin
Instructions
Measure and Cut the Macramé Cords
To begin the macramé keychain project, start by cutting two pieces of macramé cord. Make sure that each piece measures approximately 1 yard in length.
This specific measurement is ideal as it will give you enough cord to work with throughout the entire project. By having an ample amount of cord, you can comfortably create intricate knots and patterns that will make your keychain visually appealing.
Form a Loop with the Cords
Next, take both cords and fold them in half, creating a neat loop at the folded end. This loop will serve as the attachment point for your keyring. Carefully insert the folded end of the cords through the keyring, ensuring that the loop is securely attached to the ring.
This step is crucial as it forms the foundation of your macramé keychain, allowing it to be easily attached to keys, purses, or backpacks. Take a moment to check that the loop is firmly secured to the keyring before moving on to the next step.
A securely attached loop will ensure the longevity and durability of your finished keychain.
Tie an Initial Knot
Now, gather the four loose ends of the cords and bring them together. Tie them tightly in a knot, ensuring that you leave a small loop at the top. This knot serves as the solid foundation for your macramé keychain.
It not only secures the cords in place but also provides a starting point for the intricate knotting patterns that will follow. Make sure the knot is tight and secure to prevent any unravelling during the creation process.
This foundation knot sets the stage for the rest of your macramé keychain and acts as a sturdy anchor for the subsequent knots and designs.
Create Pairs of Cords
Now, it’s time to organize the cords to create four pairs. Take a moment to arrange the cords so that you have four sets of adjacent cords.
Each pair should consist of two cords that are located next to each other. This organization is essential as it establishes the structure for the knotting process that will follow. By having clear pairs of cords, you can easily distinguish and work with them while creating intricate macramé patterns.
Take a brief moment to ensure that the cords are neatly arranged in their pairs before proceeding to the next step.
Tie Square Knots
To begin the knotting process, start with the first pair of cords on the left. Take the left cord and loop it over the right cord, creating a cross shape. Then, bring the left cord under the right cord, passing it through the opening at the top. Pull both cords tightly to secure the knot.
This specific type of knot is known as a square knot, and it forms the basis of the macramé pattern. Repeat this knotting process with each pair of cords, ensuring that you maintain the same technique throughout.
Take the left cord of each pair, loop it over the right cord, bring it under, and pull it through the opening at the top. Tighten the cords firmly to create a secure and visually pleasing knot.
Continue moving from one pair of cords to the next, tying square knots consistently. This repetition of knotting ensures the uniformity and symmetry of your macramé keychain. As you progress, take a moment to adjust the tightness of each knot, making sure they are snug and even.
Remember, the key to creating a beautifully crafted macramé keychain is to maintain consistency in the knotting technique and ensure the knots are tight and secure.
Determine the Desired Length
While you continue the knotting process, it’s important to periodically check the length of your macramé keychain. This step ensures that the keychain is reaching your desired size and length. When you’re satisfied with its dimensions, it’s time to secure the design.
To do so, tie a knot at the end of the cords. This final knot serves as a finishing touch, ensuring that your keychain remains intact. Make sure to tighten the knot securely, preventing any unravelling or loosening over time. With the knot securely tied, take your scissors and trim any excess cord. Carefully remove any dangling ends, creating a neat and polished finish.
By trimming away the excess cord, you give your macramé keychain a clean and professional appearance. This attention to detail enhances the overall aesthetic and ensures that your keychain is ready to be showcased or gifted.
Now that you’ve mastered the art of making macramé keychains, you can create more delightful accessories to add a boho flair to your keys, purses, or backpacks. Enjoy the process of crafting unique keychains and let your creativity shine through!
Note: There are many different types of knots and techniques that can be used to make macramé keychains. This is just one example of a simple and beginner-friendly design. You can experiment with different colours and patterns to create unique and personalized keychains!
Tips for a Stylish Macramé Keychain
Looking to take your macramé keychain game to the next level? Here are some hot tips to help you elevate your keychain-making skills and create stunning, one-of-a-kind accessories.
Choose the Right Cord
The type of cord you use can greatly affect the look and feel of your keychain. The nylon cord is strong and durable, while the cotton cord has a softer texture. Choose a cord that fits your personal preference and the design you have in mind.
Use Pins to Hold Your Cords
This can help keep your cords organized and prevent them from getting tangled as you work.
Keep Your Knots Tight
Tight knots will give your keychain a clean and polished look. Take your time and adjust each knot as needed to ensure that it is secure and even.
Experiment With Different Knots
There are many different types of knots that can be used in macrame, including square knots, half hitch knots, and spiral knots. Try experimenting with different knots and combinations to create unique and interesting designs.
Here are three basic knots that you can use for making macramé keychains:
Square Knot
This is one of the most commonly used knots in macramé and can be used to create a variety of patterns and textures in your keychain. Here’s how to make a square knot:
- Take the two middle cords and cross the left cord over the right cord.
- Bring the left cord under the right cord and up through the loop formed on the right side.
- Pull both cords tight to create a knot.
- Repeat these steps with the same cords, tying a second knot in the opposite direction.
- Repeat this process with the next set of cords, alternating between cords until you have reached the desired length.
Half Hitch Knot
This knot is great for creating diagonal or chevron patterns in your keychain. Here’s how to make a half-hitch knot:
- Take the left cord and bring it over the right cord, forming a loop.
- Bring the left cord under the right cord and up through the loop, creating a knot.
- Repeat this process with the same cord, tying a second knot in the same direction.
- Repeat this process with the next set of cords, alternating between cords until you have reached the desired length.
Spiral Knot
This knot creates a twisted or spiral effect in your keychain. Here’s how to make a spiral knot:
- Take one cord and hold it taut, then twist the other cord around it several times.
- Bring the twisted cord around the taut cord and through the loop that has been formed.
- Pull both cords tight to create a knot.
- Repeat this process with the same cords, tying a second knot in the same direction.
- Repeat this process with the next set of cords, alternating between cords until you have reached the desired length.
Finish Your Keychain With a Knot or a Bead
Once you have reached the desired length for your keychain, finish it with a knot or a decorative bead. This will help give your keychain a finished look and prevent the cords from unravelling.
Conclusion
Macramé keychains offer a wonderful way to showcase your creativity while adding a trendy boho touch to your everyday essentials. By following these simple steps, you can effortlessly make your own unique keychains that are sure to turn heads. Embrace the art of macramé and enjoy the process of creating beautiful accessories that reflect your personal style.
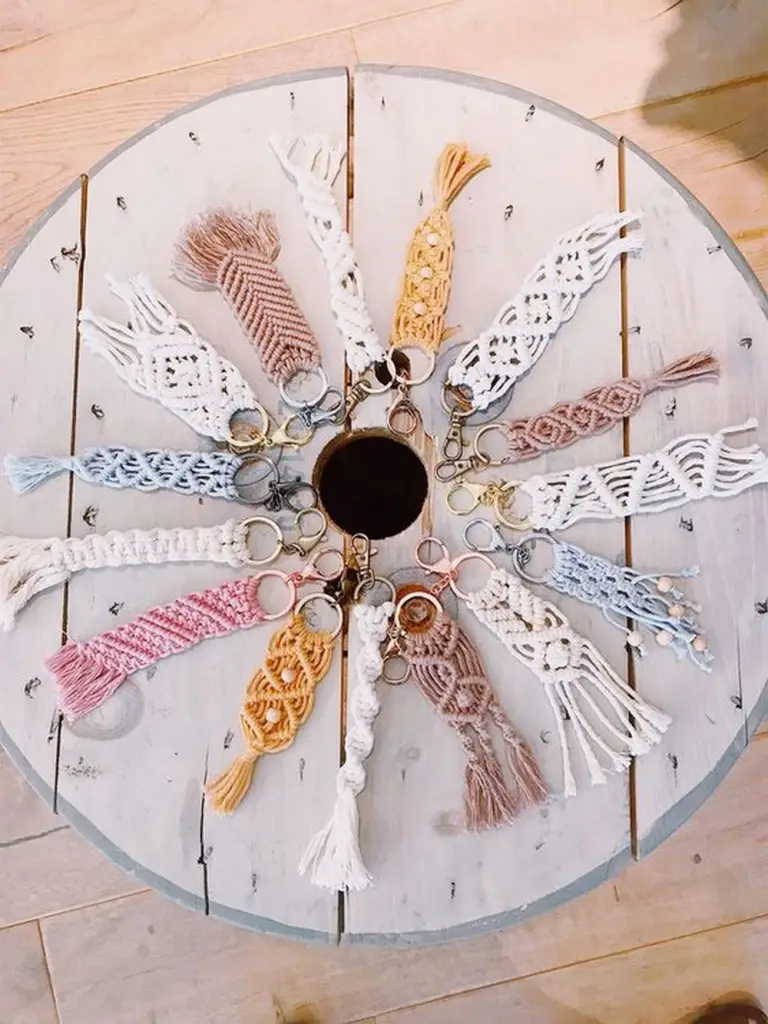
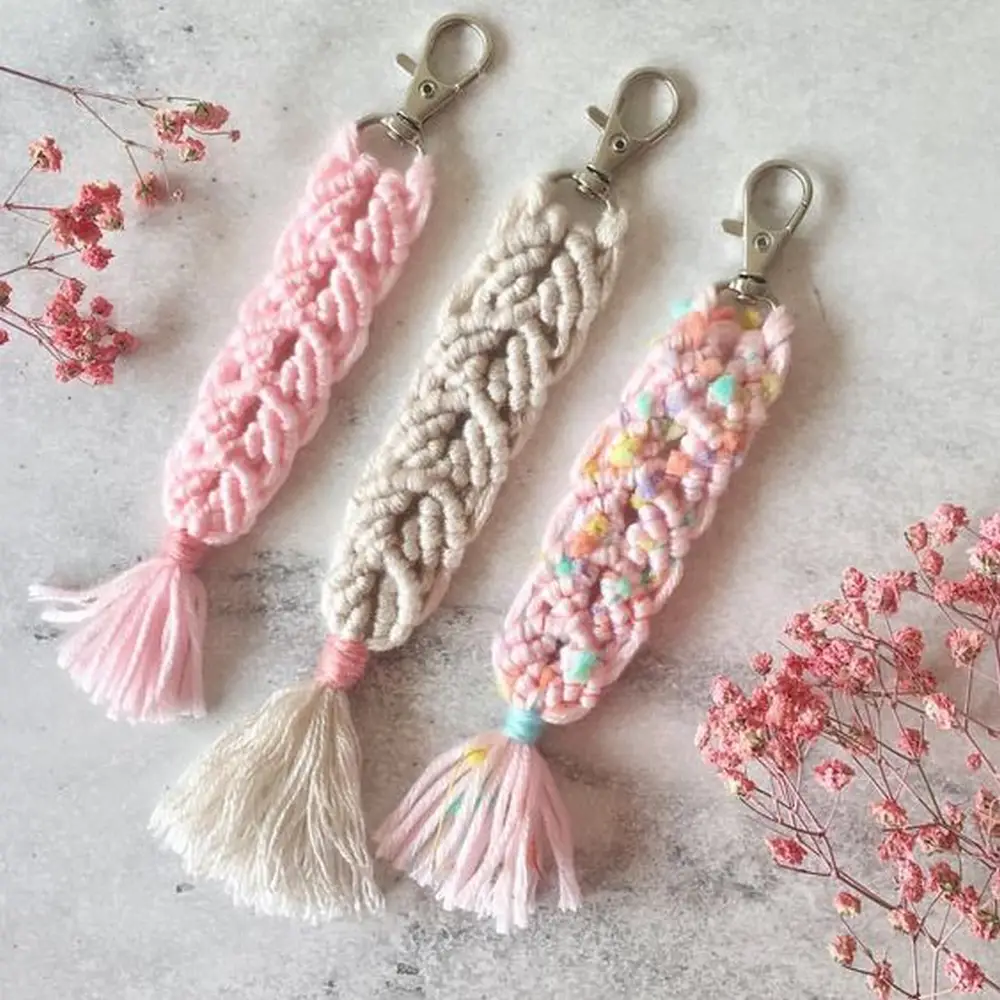
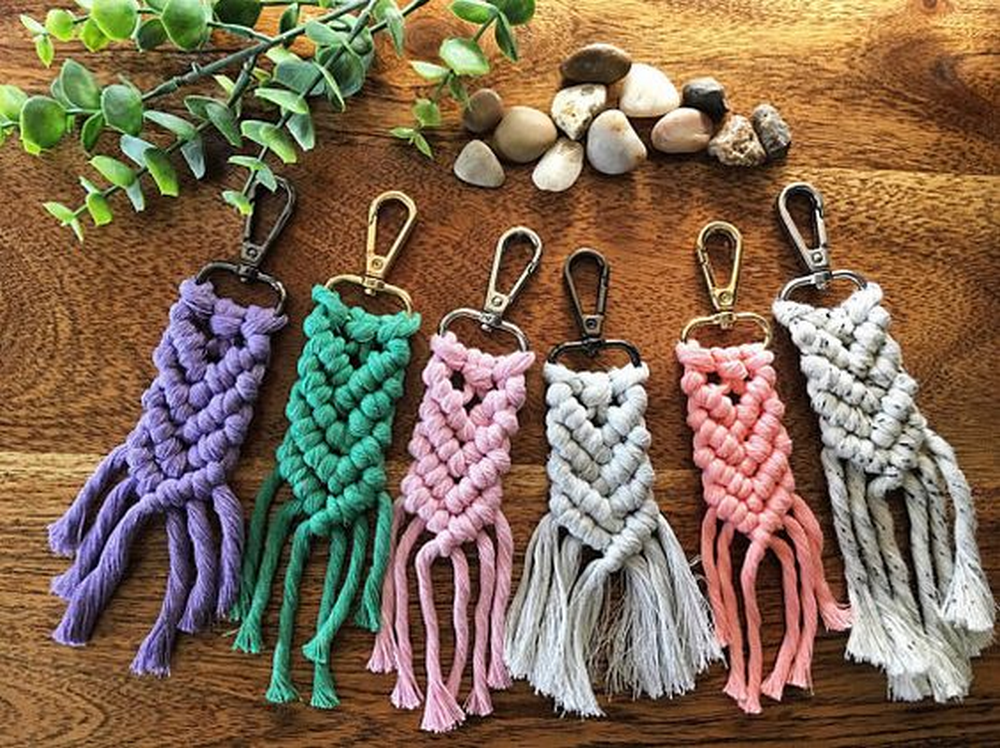
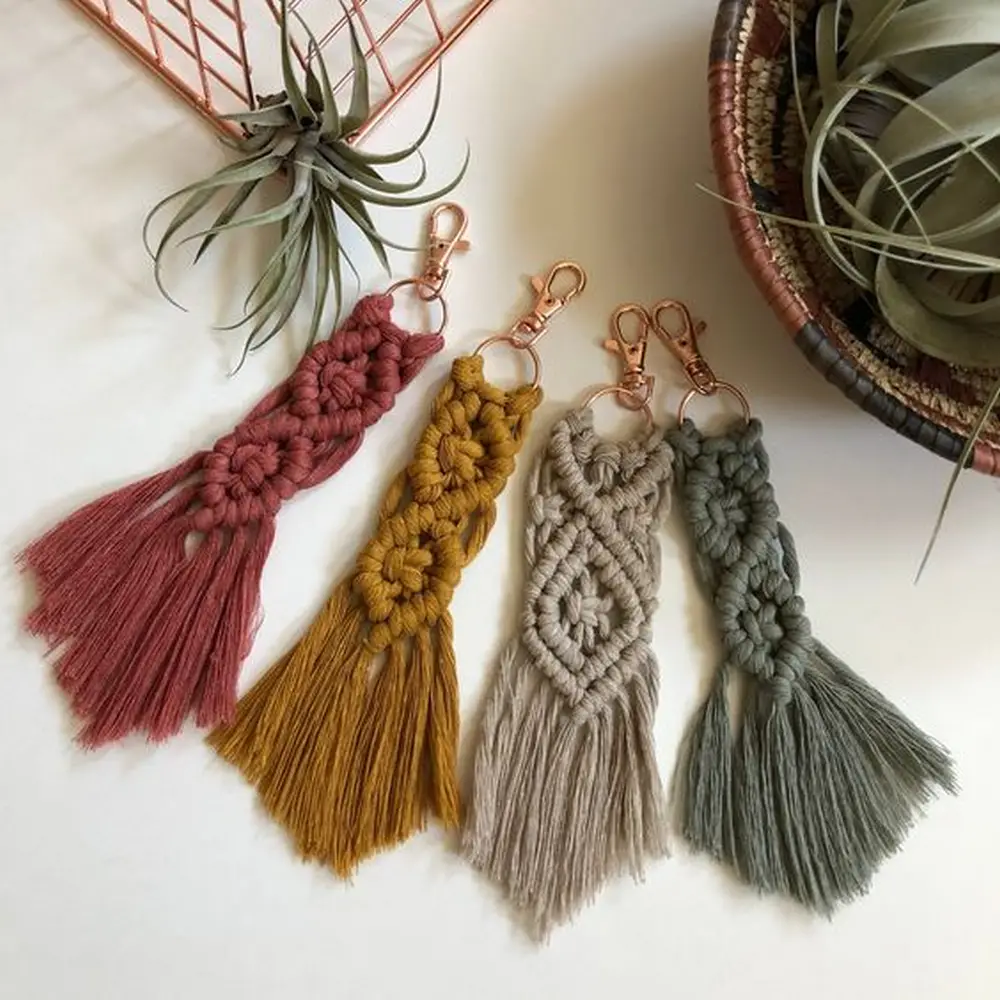
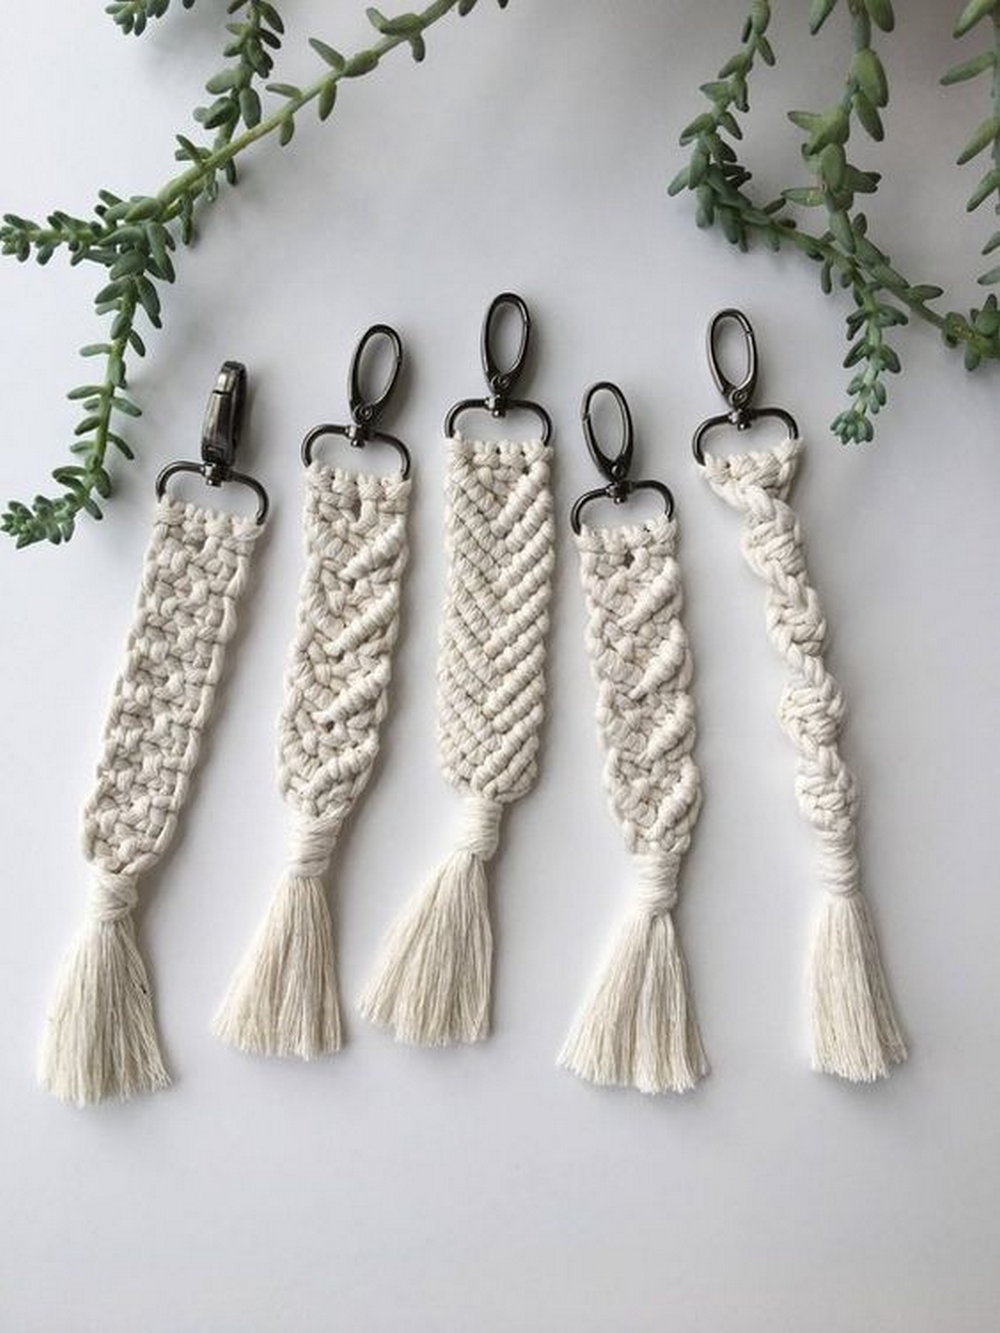
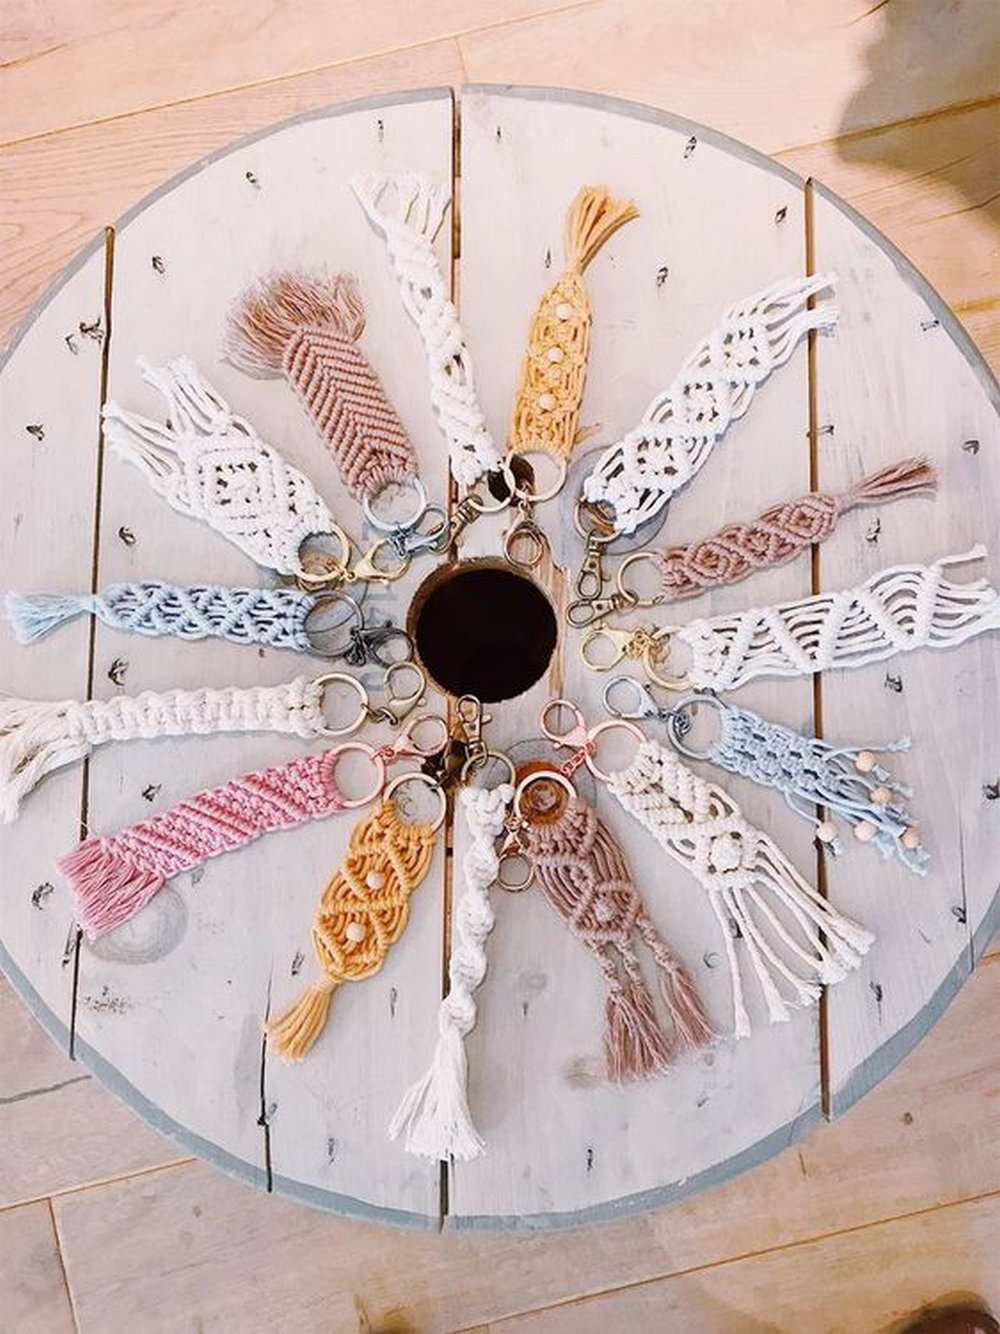
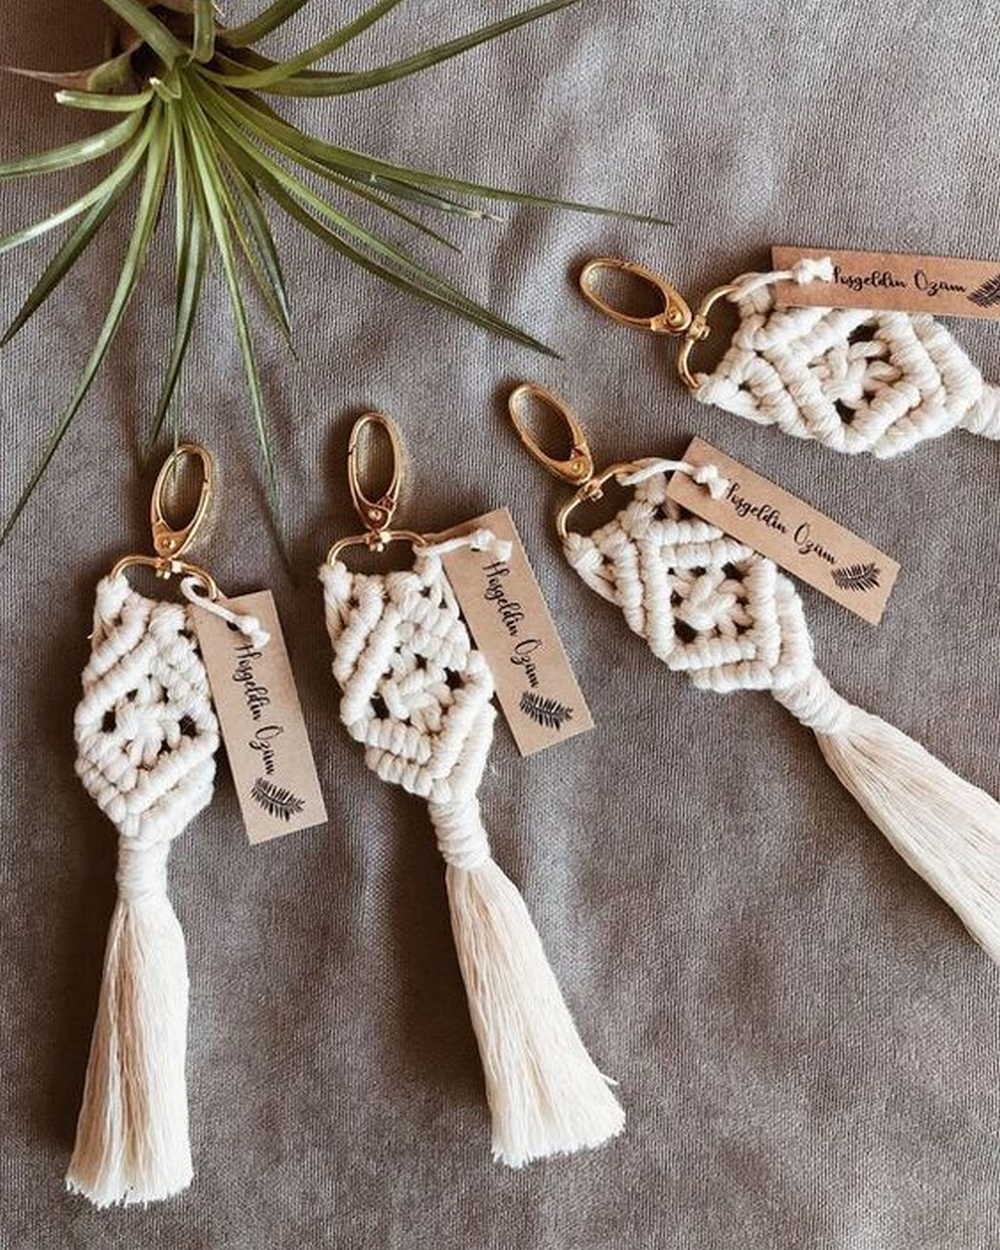
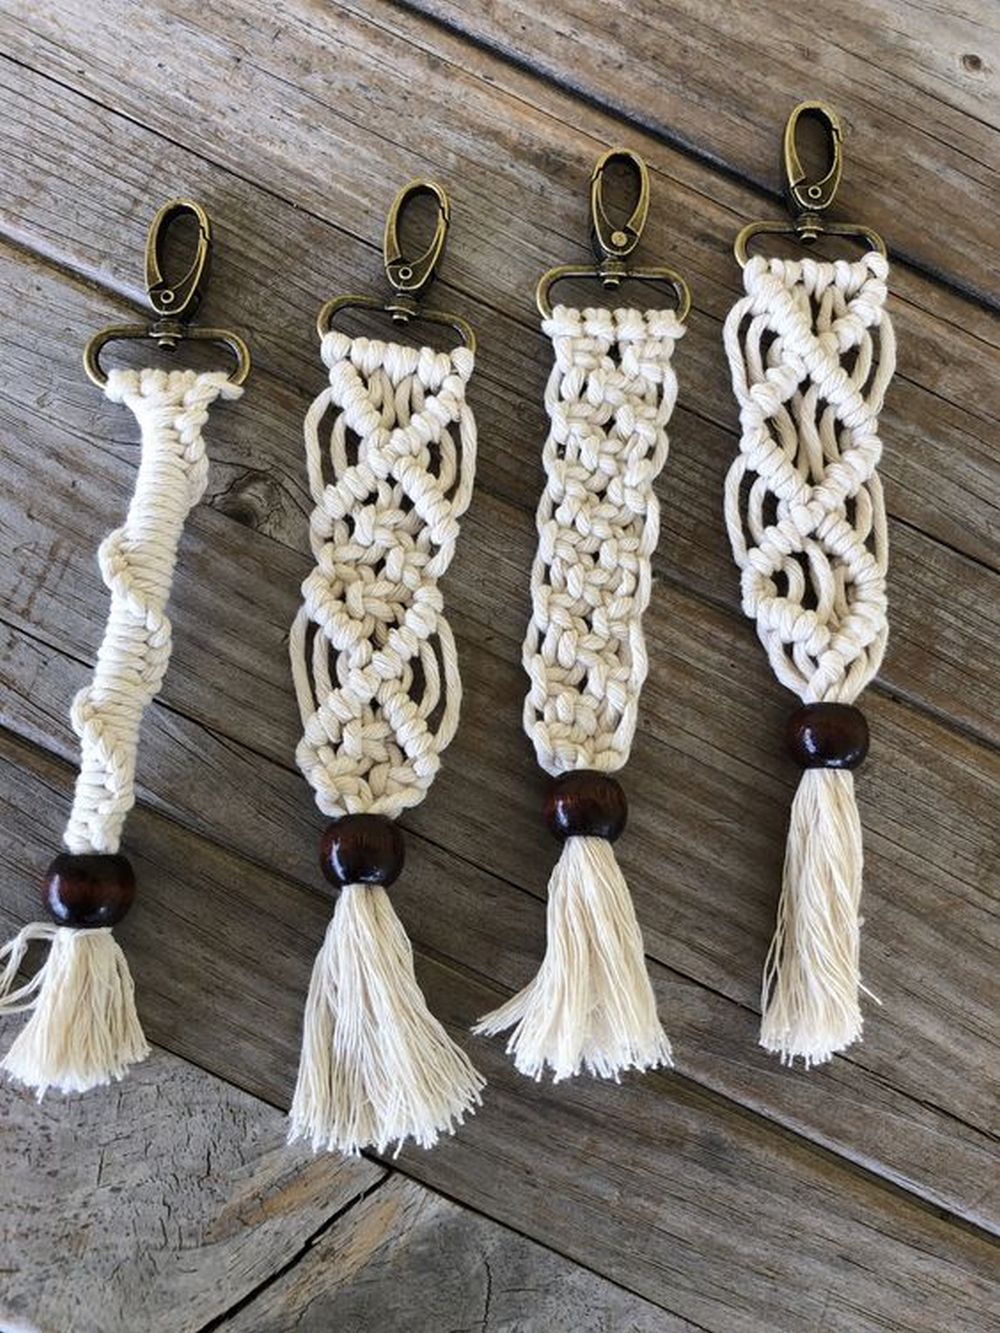
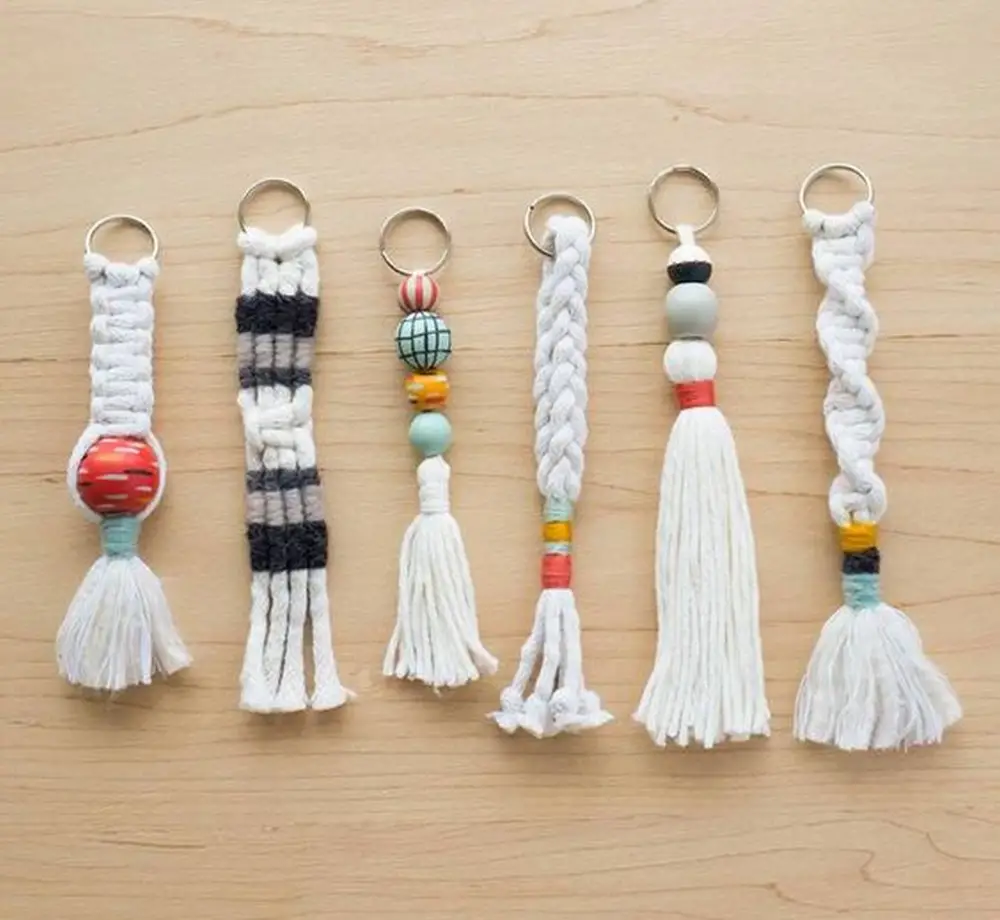
Here are some cute macramé keychain design ideas…
Click on any image to start the lightbox display. Use your Esc key to close the lightbox.

Watch the video below to learn how to make an adorable macramé keychain.


