Mirrors don’t have to be boring.
These words are from my 13-year-old daughter when I pointed to a plain-framed mirror in one of the stores. We were re-decorating her room over the summer and she knew what she wanted.

She put up new wallpapers, changed her bed’s position, and repainted her closet. Since she has plain wallpapers now, she wanted a colorful wall because her old one is blending in with the wallpaper.
Good thing there are too many DIY projects on the internet. This specific rainbow-colored pencil mirror caught her attention and we did it right away after buying the materials. The finished product stands out, just exactly how she wanted it.

If you’re looking for some creative and colorful inspiration, then you’ll love these rainbow pencil mirrors! These beautiful creations are sure to add a splash of color to any room, and they’re so easy to make!
Contents
- 1 Beautiful rainbow colored pencil mirror design ideas
- 2 How to make a rainbow colored pencil mirror
- 2.1 1. Measure and trace your mirror
- 2.2 2. Cut the plywood
- 2.3 3. Combine the two circles
- 2.4 4. Prepare the coloured pencils
- 2.5 5. Attach the coloured pencils to the larger wood
- 2.6 6. Add wood filler
- 2.7 7. Stain the coloured pencils
- 2.8 8. Create a French cleat
- 2.9 9. Seal them with clear gloss enamel spray
- 2.10 10. Mount the mirror on the base
- 2.11 11. Hang your mirror
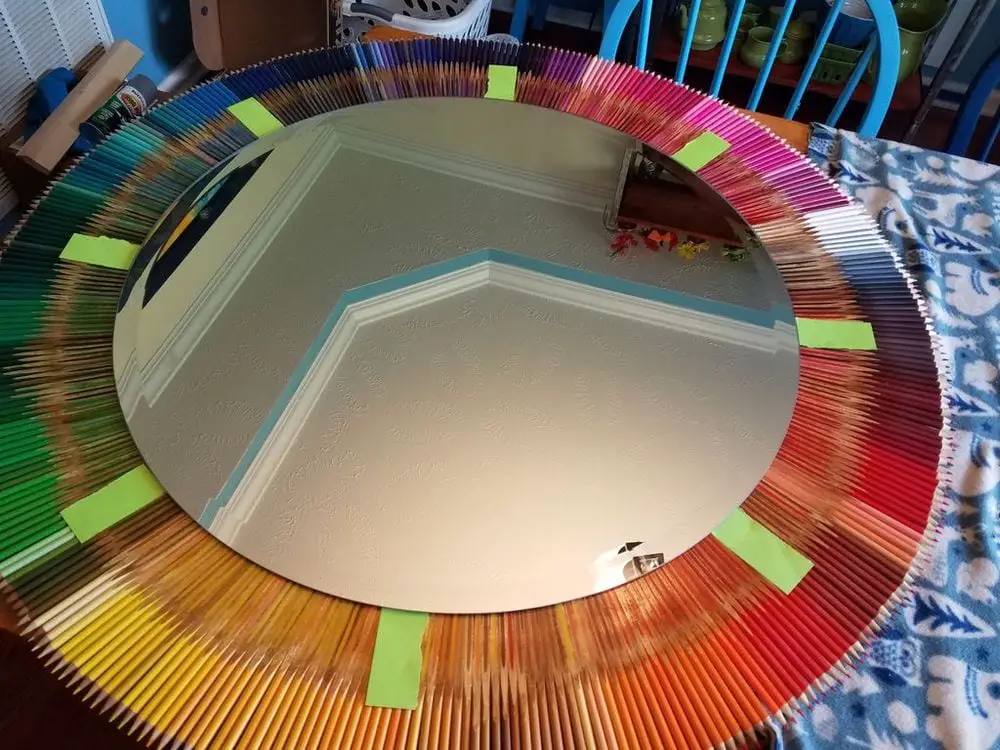
Beautiful rainbow colored pencil mirror design ideas
Click on any image to start the lightbox display. Use your Esc key to close the lightbox.

To make a rainbow colored pencil mirror, you’ll need:
Materials:
- 28″ mirror
- Around 450 round colored pencils
- 3/16″ thick plywood
- 1 x 6 x 19 ” piece of pine (cut for a french cleat)
- Gorilla glue construction adhesive
- Wood glue
- Wood filler
- Wood stain
- Clear gloss enamel spray
- 10 pcs 1″ wood screws
- 2 pcs 3″ wood screws
- Isopropyl rubbing alcohol
- Sticky notes/tape
- Plastic cups
- Scrap wood
Tools:
- Jigsaw
- Table saw
- Band saw
- Side grinder
- Orbital Sander
- Clamps
- Square
- Tape measure
- Small hand planer
- Putty knife
- Caulk gun
- Pencil planing jig
- Hand drill
- Countersinking drill bit
- Safety glasses
- Shop vacuum
- Air compressor
- Spreading spatula for construction adhesive
- Something heavy to hold plywood together
- Sandpaper (80, 120, 220, 320 grit)
- Flap Disk for side grinder
How to make a rainbow colored pencil mirror
These mirrors make a great gift for kids or adults, and they’re sure to brighten up any space. Here’s how to do it:
1. Measure and trace your mirror
Determine the measurement you prefer your mirror will be. Trace two circle sizes. The first size will be exactly the same size of your mirror, second will be larger than your mirror, exactly or approximately a few centimetres larger than your coloured pencils.
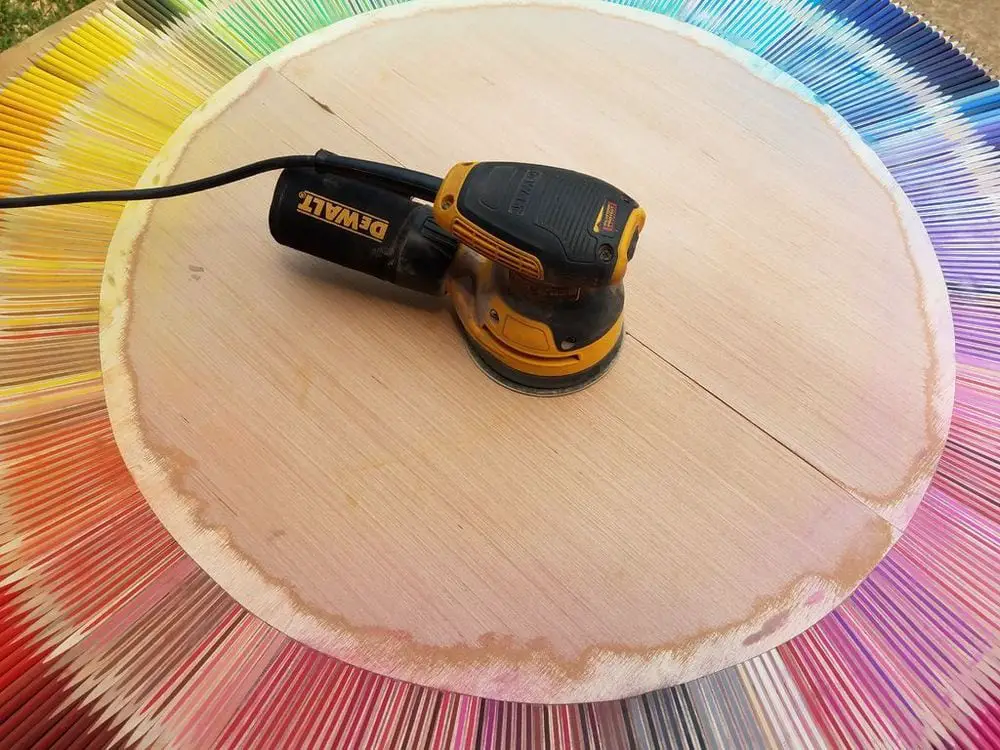
2. Cut the plywood
Place your plywood in a stable area. You can use your clamps to make sure it won’t move around. Using your jigsaw and your traced circles, cut the plywood. Smoothen the edges using sandpaper.
3. Combine the two circles
After sanding both circles, you may now combine them by using wood glue. To ensure the smaller circle will be in the centre, you can use a tape measure. Place something on top, to make sure they are compressed. Once glued together, let it dry for a day.
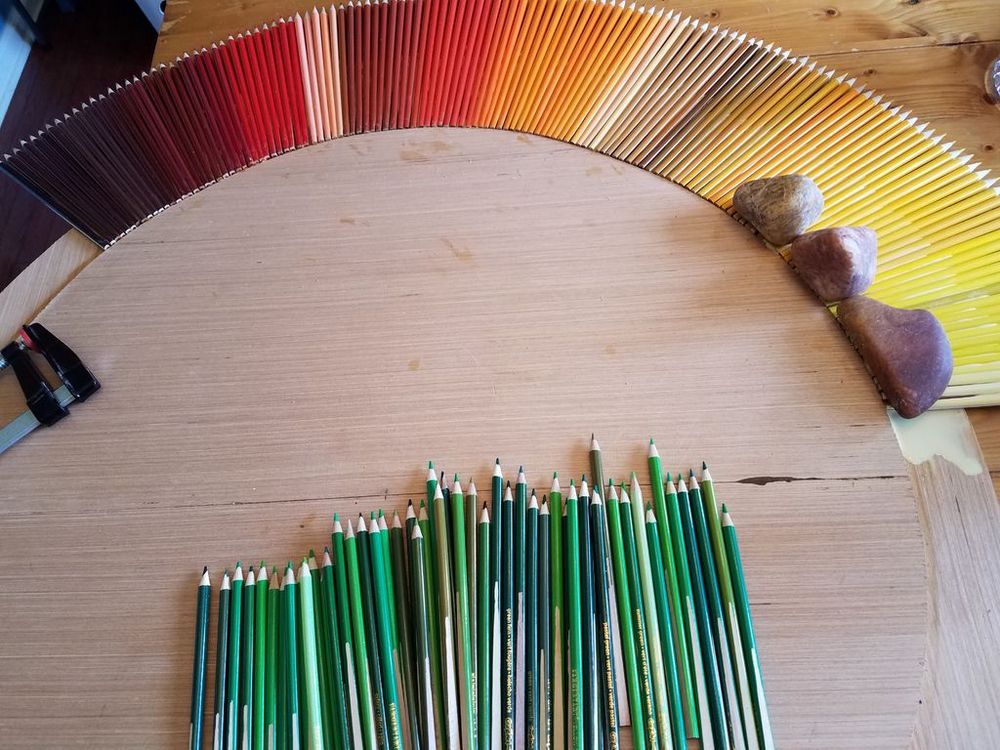
4. Prepare the coloured pencils
Create a template coloured pencil. You will be using this as a pattern for the rest of your coloured pencils. First, scrape off a small portion of your coloured pencil. You can use a knife or cutter blade. This also applies on both sides of the coloured pencils, but on the bottom part only.
To make this easier, you can create a jig, using some of your scrap woods. You’ll just need three pieces of wood. Two of them will be glued to one base, but with a space in between, where your coloured pencil will fit. Then, you can start scraping using your hand planer. This also applies on both sides of the coloured pencils, but on the bottom part only.
After scraping them all, you can further smoothen them with sandpaper. Wipe them to remove dust and you’re now ready to arrange them by colour.
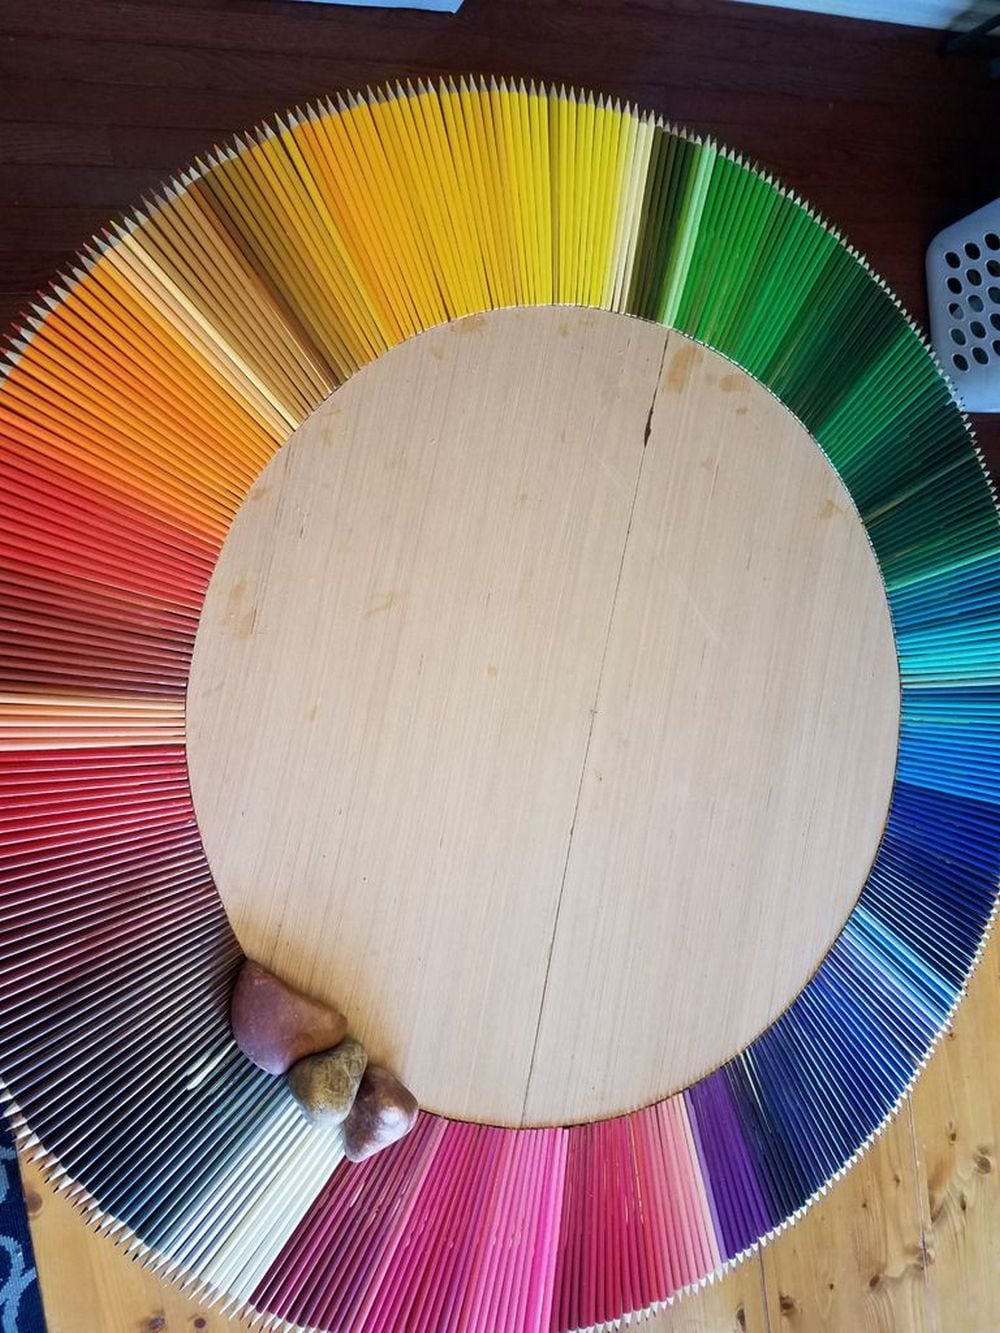
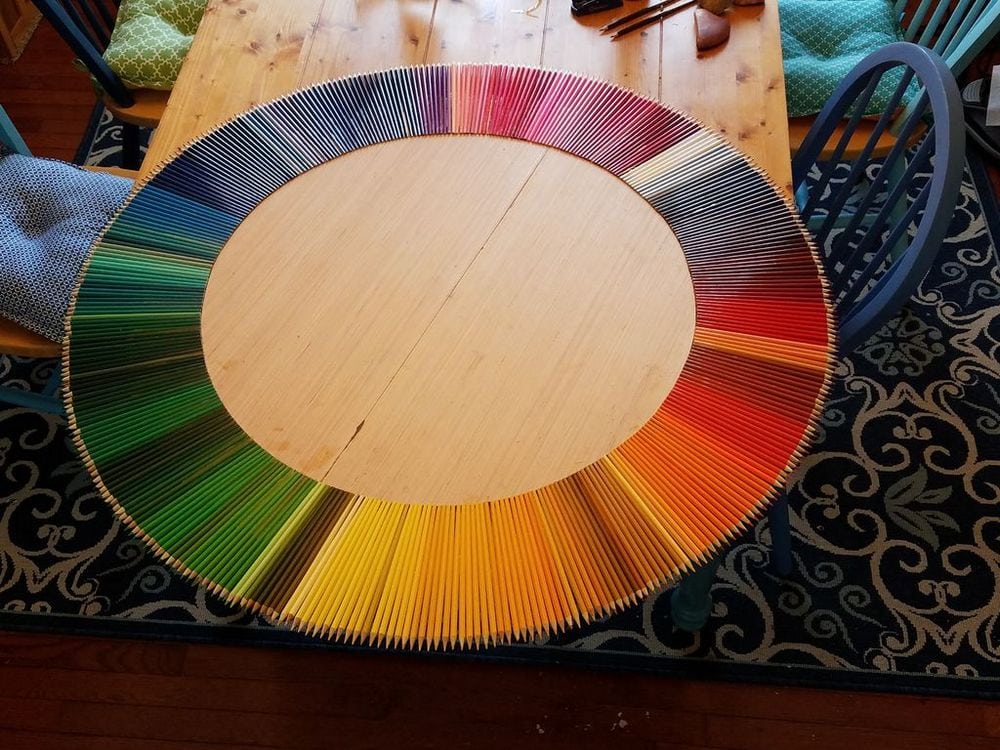
5. Attach the coloured pencils to the larger wood
Once you have arranged all your coloured pencils, you’re now ready to glue them all. Simply apply glue to the large circle where you will put your coloured pencils. Place your coloured pencils one by one on the glued part of the large circle. Make a round-coloured design around your smaller circle where your mirror will be placed. Continue gluing until the circle is surrounded by these coloured pencils. Once done, let it dry for a day.
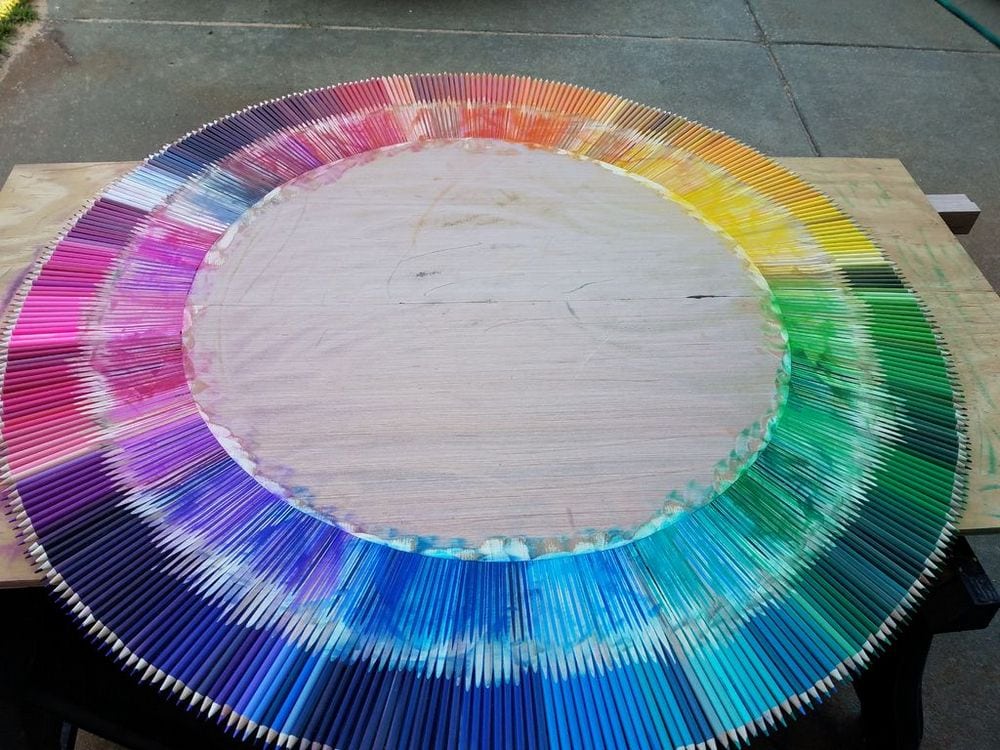
6. Add wood filler
To add further design, use your side grinder to add more details to your coloured pencils. Just be careful, since these grinders may cut off your coloured pencils.
To fill up any gaps in between your coloured pencils, simply apply a mixture of wood filler. Simply mix the wood filler with sawdust and water. Apply them evenly to the spaces and gaps. After all the spaces are covered, let the wood filler dry for a day.
7. Stain the coloured pencils
Before staining, make sure all coloured pencils and wood fillers have been sanded to smoothen them up. Wipe all smeared colours and dust with a damp cloth.
Once all coloured pencils are clean, you may now stain them using your paintbrush and stain colour. We recommend a golden oak stain colour. This will leave a flawless finishing touch to your coloured pencils. Let it dry for a day.
8. Create a French cleat
To create a french cleat, use 24” plywood. The width should be approximately 5”. Once the plywood has been ripped, position the table saw at a 45-degree angle and trace its width at three inches. Once positioned and traced, you’re now ready to cut it with your table saw.
Find wall studs using a stud finder. Using a pencil, mark where the studs will be placed. You can also use wall anchors to secure the shelf if you can’t find any studs or want to hang it in an area without studs.
Mark and predrill pilot holes on the larger piece of plywood cleat with the angled edge facing up. You should use a level to ensure your cleat is level. Use wood screws to attach the long cleat to the wall studs.
Mark and pre-drill pilot holes on the back of the item you want to hang with its angled edge facing downward. Check your cleat’s level with a level again. Use wood glue and screws to attach the smaller cleat to the back of the item.
Once done, you can line it up. Connect the short cleat to the long cleat. A proper alignment of the cleats must be ensured.
9. Seal them with clear gloss enamel spray
After creating a french cleat and before hanging your mirror, you would like to seal your coloured pencils first. This will help preserve your creations. The clear gloss enamel spray
Prevents the moisture to ruin your wood.
Use a clear gloss enamel sprayto seal your coloured pencils and the small circle. Apply two coats. Allow thirty minutes intervals for each coating. You can repeat this process until satisfied with the look. Once done, let it dry overnight. The next day, you’ll also need to also seal the other side. Simply turn it over and spray the base, cleat and braces. Then let it dry again for a day.
10. Mount the mirror on the base
Align your mirror to the centre of the plywood. Make some markings. Then remove the mirror.
Squish glue onto the clean plywood with a caulking gun and glue construction adhesive.
The construction adhesive should be spread evenly over the plywood using a plastic spreading spatula.
As soon as the plywood is sufficiently covered, place the mirror gently onto the adhesive
Gently slide the mirror around to ensure proper adhesion by applying pressure.
Once glued, wait for one whole day to let it completely dry.
11. Hang your mirror
Once you are sure that the adhesive is fully dry, you’re now ready to hang your new mirror.
First, use your long screws to attach the french cleat to the wall studs on the lower side. Complete the cleat by sliding the mirror onto the other board until it fits snugly.
Now clean your mirror and hang it! Enjoy your new rainbow-coloured mirror! 😎
Here’s a quick video tutorial…
Thanks to khoiland for this great project.
If you’re looking for a present, here’s a great idea for you. Your mom, mother-in-law, sisters, and girlfriends will surely love these DIY suncatchers and Luxurious DIY Wood Slice Mirror…


